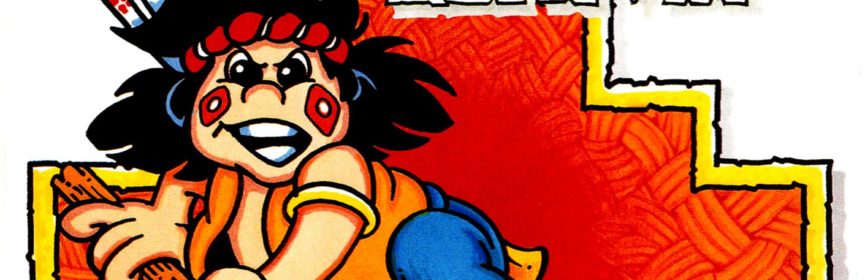
Take on the NES Library

An 8-bit Extravaganza!

Finished

OCT
12
2018
0

#98 – Defender of the Crown

One must obtain the crown before he can defend it.

The detailed title screen sure looks like a PC conversion.

To Beat: Defeat the Normans to reach the ending
Played: 8/15/18 – 8/19/18
Difficulty: 5/10
My Difficulty: 5/10
My Video: Defender of the Crown Longplay

The beauty of this NES completion project is that I get to experience new games and am able to build an appreciation of them I would not have had naturally. Defender of the Crown at first glance lulled me in as something interesting. I mean, it’s a Konami/Ultra game and they make great games, so it ought to be good. Then I booted it up and saw that it was a strategy game with a goal of map conquest. I turned a complete 180 from my original impression in my head. I put the game on my deferred list. Fast forward to now and things are much different. I have now beaten Gemfire, a game that I originally didn’t want to play but ended up liking quite a bit. Defender of the Crown is also more action based than I first realized which is another way the game appeals to my tastes. I started up the game with feelings of intrigue and excitement, rather than an attitude of indifference. Would I have a good experience after all?

Defender of the Crown is a game for the Commodore Amiga that released in 1986. It was developed by Cinemaware as their first release. It was best known for setting the graphics standard in video games at the time of its release. Later the game was ported to various home computers while taking a hit in the graphics and audio compared to the Amiga version. The NES port of the game was released in July 1989 in the US and in PAL regions in July 1991. Ultra Games published the US version and Palcom published the PAL version. Beam Software appears to be the developer but the evidence I have found isn’t conclusive. It’s possible Konami developed it themselves.

Defender of the Crown is a strategy title that includes some action elements. The game takes place in England in the year 1149, mired in a civil war. The king has died and someone has to take the throne. To the north are the Saxons displayed in blue, and to the south are the Normans in orange. You play the role of one of the Saxon lords. Your task is to take over all three Norman castles, thereby ending the war so that you can be crowned king. The other Saxons are your allies, but they too want the crown and may come after you as well. You will beat the game if you turn the entire map to blue.

Hey, it’s Robin Hood!

There are many different modes to this game so the controls change frequently to follow suit. Most of the time you will control a cursor on the map screen. Use the D-pad to move the arrow and press A to make selections. The map shows all the separate regions of England. There are colored shields with symbols on them that denote which lord owns that territory. Your army is displayed as a man on horseback within the region you currently occupy. At the start of the game you are randomly assigned one of the three Saxon castles. This map fills up most of the screen, but there is a white banner in the upper left corner that acts as your menu. Press A while on the banner to bring up the menu. A dagger appears as the menu cursor.

Before starting a game, you get to choose one of four knights as your main character. They are Wilfred of Ivanhoe, Wolfric the Wild, Cedric of Rotherwood, and Geoffrey Longsword. Use the D-pad or the Select button to switch between profiles, then press A on the one you want. Each knight has ratings in Leadership, Jousting, and Swordplay ranging from Weak to Average to Good to Strong. The manual says Wilfred of Ivanhoe is the best knight to start off with, and this is the one I chose to play.

After choosing your knight, and before each turn, you see your status screen. You get to see your character portrait, as well as the portrait of the fair maiden should you rescue her. At the top is the current date, both month and year. Below that is your monthly income and your current gold. Next are the Leadership, Jousting, and Swordplay ratings. At the bottom the current forces of your army are shown. You see the number of soldiers, knights, and catapults in your army. You also see how many soldiers are staying behind to defend your home castle. You always get the first turn every month. You will see the map activity of the other lord’s turns afterward. While you can see the location of your army, you cannot explicitly see where the enemy armies are positioned on the map.

Study the map, then conquer it.

The main menu in the corner of the map screen contains your main commands. Tournament lets you spend five gold to hold a jousting tournament. Conquest is one of your primary commands. It contains sub commands that allow you to move your army and forces around the map. Go Raiding lets you do a raid for gold against one of the castles. Buy Army lets you spend gold to buy more troops. Use the Read Map option to check the stats on any of the provinces. You can also choose to Pass your turn.

With the Conquest command, you can control your army. The sub commands are Read Map, Move Army, Transfer, and Done. Read Map under the Conquest command is the same option as on the main menu. Move Army lets you move your army between territories, but before you can do that, you first select the Transfer command to move troops between your castle and your army. You begin the game at your home castle with 20 soldiers and none are in your army, and you can’t move your army with no one in it! On the transfer screen, you see Soldiers, Knights, and Catapults in the middle. On the left side is the count of each in your home garrison, and the right side is the count of each in your army. Use the D-pad to move the dagger cursor and press A to select a unit type. You can use either Left or Right to move troops between the army and garrison, and then press A again to de-select the cursor. Choose Done when finished moving troops. This action doesn’t cost a turn.

Now that you have troops in your army, you can use Move Army to move them to a new territory. You can move the army to any adjacent territory you already own without losing your turn. You can also move freely through other Saxon territories and you decide if you want to just pass through or attack them. If you move to either an empty or hostile territory, this will end your turn. It’s a good idea to use Read Map to examine other territories. Pull up a territory to see the name of it, who owns it if applicable, the number of vassals, and the monthly income generated from owning the territory. Moving to an empty territory claims it for yourself, and in addition, the number of vassals in that territory are added to your army. Adding vassals only happens when taking previously unclaimed territories and not when taking a territory from someone else. If you move to a territory owned by someone else, and there’s no army or castle there, you claim it. Otherwise you will do battle with the occupant. More on that later. All claimed territories generate income that you earn in gold at the start of every turn.

Try to hit the center of the shield to knock him off.

You can compete in jousting tournaments either by paying five gold from the menu or participating for free in a tournament arranged by someone else. You can either compete for Fame or for Land. If you have no land to gamble, or if the game doesn’t let you choose, you automatically compete for fame. When jousting for land, you get to pick an enemy territory that you want to claim. Then that ruler will choose one of your territories and the winner of the joust gets both. When jousting for fame, select the name of the lord you want to compete against. The tournament can last for three rounds as long as you keep winning, and you can only compete against a lord once per tournament. One key point here is that jousting for fame will increase your Leadership stat if you are successful. In fact, Leadership is the only rating that can either rise or fall depending on actions you make throughout the game.

The joust consists of two phases: The joust and the morning star battle. The joust portion is the face-off on horseback that you would normally think of. Two riders on horseback take opposing sides. The action takes places from a first-person perspective with the opponent approaching from the other side of the low fence. Use the D-pad to adjust the position of your spear. Movement is erratic and stiff, but what you want to do is try and put the tip of the spear as close to the center of the opponent’s shield as you can. Then you see an animation with the results. One man can be knocked off his horse, or neither. If no one falls you try again up to three times. If you are unsuccessful by the third attempt, you automatically get knocked down. The worst possible outcome is if you accidentally spear and kill the opponent’s house. This is considered most dishonorable, and if you do that you lose most of your stuff. The results of this joust play into the morning star battle.

Morning star your opponent into submission.

The other half of the match is the morning star battle. You are the blue knight on the left and the opponent is the red knight. There are health bars at the bottom for each participant. Winning the joust gives you a larger health bar. Use Left or Right on the D-pad to move your fighter. Press the A button to swing your morning star. This does a high strike. You can do a low strike by holding Down when pressing A. You have a shield that defaults to defending low. Hold B to raise your shield and block high. The idea is to hit where he is not blocking by striking when his morning star is pointed the farthest away from you. The winner of this fight wins the round.

Swordfights occur when you go on a raid, or if another ruler approaches you to save the damsel in distress. This takes place from a side view. You approach the castle and must take out three guards outside. Then you go inside to battle with the captain of the guard. Use the D-pad to inch either Left or Right. Press A to strike with your sword, or you can parry by holding Up and pressing A. You can also escape by moving all the way to the left but that reduces your leadership rating. The best strategy is to hit him with as much space between the two of you as possible, then back up a bit and strike again. It’s possible to get through without damage though I haven’t done it. The outside guards have small health bars, but the captain inside has a long health bar plus the advantage of stairs on his side of the room. If you initiate a raid and win, you steal half the gold from the enemy castle.

Raiding a castle for gold isn’t supposed to be easy.

As the main purpose of this game is map conquest, you need to build up a powerful army by spending cash and buying troops. Use the Buy Army command. All troops purchased here are assigned to your home castle, so to use them in your army you need to be able to move the army home and then transfer them over. There are four types you can buy. Soldiers cost one gold each and are the bread and butter of your army. Knights cost eight gold each. Naturally with the price difference you will have far fewer knights than soldiers. Knights are powerful fighters on the battlefield but are not that useful for defending your home turf. Catapults cost fifteen gold each. You must have at least one catapult if you intend on attacking an opposing castle. You can also buy castles here for twenty gold. This option lets you build a castle on a territory you occupy and provides you ten soldiers to go along with it. A castle on a territory gives you an option to defend yourself and makes things more difficult for enemies to claim it.

Battles take place out on the open field between opposing armies. There’s no action here, rather the battles play out automatically via what amounts to invisible dice rolls behind the scenes. The battle screen displays one soldier per every 25 commanded and one knight per every 10 commanded on each side. The actual numbers are displayed at the bottom. There is a menu at the bottom where you can change your tactics. Use the D-pad to position the cursor and A to make your selection. The command may take some time to take effect depending on your leadership level. The idea to battles is that there are different tactics you can try based on the situation. Hold Your Ground is suitable when you have the size advantage and are a strong leader. Ferocious Attack is a risky move that could help if you are outnumbered. Bombard takes advantage of your catapults. The Outflank tactic can be effective if you are a weak leader with the larger army. You can also Retreat, which saves your men but affects your leadership rating. Battles can play out very fast so you need to make quick decisions for best results during battle.

Punch a hole in the enemy’s defenses.

If you have a catapult, you can perform a catapult siege against your enemy. Simply attack an enemy castle with a catapult in your army. This mode is all about timing. You get six times to attack the enemy castle before engaging them in battle, no matter how many catapults you have. Each time you get to choose your ammo from either a boulder, disease, or Greek fire. Then you get a view of the castle from behind your catapult. Press and hold A to pull the catapult back and let go to fire away. The castle has a low wall in the front. What you want to do is hit the top of the wall with a boulder first to break a hole in the castle. You can expand the hole with multiple boulders by hitting the top of the wall each time. Then you can use either the Greek fire or disease shots to fire into the hole in the wall you made. The fire shot defeats 10% of the home army, while the disease can kill enemy soldiers over time, particularly if you score a hit with it early in the siege. After all attacks are made, then you go automatically into a normal battle.

Should an enemy attack one of your castles, you then play yet another mini-game to defend it. This is a crossbow battle played from a first-person perspective from inside your castle. Enemy soldiers will pop up at predefined points on the wall and fire at you. You move the crossbow at the bottom of the screen with the D-pad. It moves freely left and right, while it will sit at only three vertical levels that you can shift between by pressing Up or Down. Press A to fire arrows. The number of hits you can take and the number of enemy soldiers you have to dispatch depend on how many soldiers are in each army. The higher your leadership rating, the faster you can slide the crossbow around the screen. The enemy’s leadership rating determines how quickly enemy soldiers fire. If you lose your home castle, you lose all your territory and the game is over. This goes the same for enemy castles, so if you successfully take the enemy’s home castle you get all of their territories.

Outnumber your opponent for best results.

Finally, in a pinch, you can call on Robin Hood to help you. On your turn, point the cursor to Sherwood Forest in the center of the map and press A to talk to Robin Hood. He will help you out up to three times during the game. He can help you raid a castle, siege a castle, or help you out in battle. To use him, you must perform one of those three actions right after asking him for help, otherwise you forfeit his assistance. For the normal battles, Robin Hood will swoop in and knock out a chunk of the opposing army.

This was my first time playing Defender of the Crown. I’m glad I got to play it since it was something I had ignored for a long time. A cart copy only costs around $5, but even with that price it’s not one I see as often as I would expect.

The 5/10 difficulty rating I gave Defender of the Crown is misleading. If you haven’t played this game before, you will get destroyed quickly and often. Any time I encountered an enemy on the map, I suffered for it heavily. The fights I did win left me so crippled that I didn’t last much beyond that, and the ones I lost were over almost as fast as I could issue any command. I fared a little better with gold raiding and the joust, however, you can’t win a game with those skills alone. I couldn’t maintain territories long enough to have enough gold to afford even a modest army. The castle defense sections were also tough to get the hang of. Several attempts ended swiftly. I combed through the manual several times for help, and against my normal policy, I also read parts of an FAQ I found online. The FAQ really helped to clarify the tips in the manual and steered my focus, rather than tell me outright the best way to win the game. I was now able to put together a successful strategy for beating the game. My first win was a little drawn out, but I played a few more rounds and started to win pretty easily. My experience with Defender of the Crown went just like AD&D: Heroes of the Lance. The game starts off challenging, but soon gets much easier when you learn to make sense of what to do.

Defending your home turf is the most important ability.

Here was my strategy for beating the game. If you want to figure it out yourself, now is the time to look away. The first thing you need to do is learn the map. Take some time to use the Read Map feature and check out the territories to see which ones are valuable. There is one near the middle of the map that is really good and one of the starting positions will allow you to claim it right away. Instead of building up my army early on, I spent my gold on castles to lock down the best territories. To properly defend the castles, you really need a quick crossbow. This leads to the most important piece of advice. The key ingredient for success is maintaining a high leadership rating. As you could tell from reading here, many positive outcomes all throughout the game are born from having high leadership. If no one started up a tournament after sticking castles on two or three territories, I made sure to hold one to joust for fame and build up my leadership. The sooner you get to Strong leadership, the better. Then you’re in the driver’s seat. Make sure you keep ten soldiers in each castle, especially the ones that border enemies. You can use your army to help distribute soldiers all over your territories, all on one turn. Having a bunch of castles and getting good at defending them with the crossbow is what you want to focus on. You can opt to play the long game here and start rolling out castles on more territories, slowly dominating the map that way. My way was a little faster. Once I had a territory in reach of an enemy’s home castle, I then splurged on a single catapult and the biggest army I could get, splitting my money about evenly between soldiers and knights. Sometimes I went on a gold raid against a home castle for a nice cash infusion. You can also borrow soldiers from castles that aren’t at risk from enemies to add to your army. Do the best you can at a catapult siege, but even if it doesn’t go the best, I vastly outnumbered my opponent anyway and just did Hold Your Ground until victory. Taking a home castle can give you other territories all in one shot. It should be easy to win from here.

I guess you could say I had a love/hate relationship with Defender of the Crown. I was never interested in this game. When it appeared on my list, I was excited to try it. I liked it at first, even though I got hammered. Then I started to dislike the game from all the losing. Once I figured it out, then I had a lot of fun with the game. The graphics are pretty decent. They are a far cry from the original Amiga version, but are more than passable. I don’t remember the music very well, which I suppose means it’s forgettable. I found the controls to be slow and stiff, especially in the jousting and sword fighting. I realize that this is not exactly selling the game to you. What I enjoy about the game is the variety. There are several ways to play this game and you only have to work hard at one or two of them. There are different characters with his own strengths, plus some random starting positions that give you some replayability. It’s a quick game too, which is unusual for a map conquest game. I think it’s the ideal pick-up-and-play game of this style and I can see myself playing it through again, which I would have never said just a few months ago.

#98 – Defender of the Crown

 
OCT
02
2018
0

#97 – Chip ‘n Dale: Rescue Rangers

If you ever wanted to throw a friend, here’s a great way to do it!

Ch-Ch-Ch-Chip and Dale!

To Beat: Reach the ending
Played: 8/12/18
Difficulty: 4/10
My Difficulty: 3/10
My Video: Chip ‘n Dale: Rescue Rangers Longplay

We are almost at 100 NES games into this project, yet somehow this will be the fourth Disney Afternoon NES game on the list already. Sure, I handpicked DuckTales to round out my first ten games, but then TaleSpin followed quickly after. DuckTales 2 was beaten just a few months ago. I did not watch much of those cartoons in the Disney Afternoon lineup, but I sure played a ton of Chip ‘n Dale: Rescue Rangers over the years. Time to play it again and document it all!

Chip ‘n Dale: Rescue Rangers was an animated series from Walt Disney Television Animation. It was created by Tad Stones and Alan Zaslove. The series technically started with a preview episode that aired in August 1988. The full series began on the Disney Channel in March 1989 with a 13-episode run in its first season, which included that preview episode. Season 2 ran 47 episodes from September 1989 through May 1990. The first five episodes of the season were initially created as a standalone movie named Rescue Rangers: To the Rescue. The third and final season was an abbreviated five episode run from September 1990 through November 1990. Reruns were aired as part of the Disney Afternoon from 1990 through 1993.

Chip ‘n Dale: Rescue Rangers is one of the few releases to launch near simultaneously in both Japan and the US. Both the Famicom version, named Chip to Dale no Daisakusen, and the NES version were released June 1990. The PAL version would wait until December 1991. There was also a port to the Playchoice-10 arcade machine. Capcom both developed and published this game. Chip ‘n Dale: Rescue Rangers was included as part of the Disney Afternoon Collection compilation released in 2017.

Small cutscenes progress the story.

Chip ‘n Dale: Rescue Rangers is a side-scrolling platformer. The Rescue Rangers work together to find their neighbor Mandy’s missing kitten. Chip and Dale go hot on the trail and fend off a bunch of mysterious robotic enemies. It turns out to be a distraction as their enemy Fat Cat captures Gadget, one of the Rescue Rangers. Now the remaining Rescue Rangers have to work their way through several levels to find and defeat Fat Cat. Simply reach the ending of this story to beat this game.

At the start of the game you decide if you want to play single player or two-player mode. In single player you then get to pick if you want to control either Chip or Dale. Both play the same so just pick the one you like more. In two-player mode, player 1 is Chip and player 2 is Dale. Two-player mode is simultaneous play which I have found is a big draw to this game.

The controls are normal platformer controls. You move around with the D-pad and press A to jump. You can control your fall with the D-pad for good old precision movement. Hold Down to duck low, and if you press A then you will jump down through ledges. The B button is used to pick up and throw objects. Normally you will throw crates but there are other things you can grab. Push into the crate from the side and press B to pick it up. You can move around like normal when holding a crate. Press B to throw the crate sideways the length of the screen. You can hold Up and press B to throw a crate straight above your head, like you have super strength. If you duck while holding a crate you will hide inside of it. You’ll see your character’s eyes peeking out. While hiding like this, enemies can walk right into the crate and take damage, acting like a shield of sorts. If you throw the crate while hiding you will throw it low across the ground. In the two-player mode, you can throw crates at each other, stunning your partner briefly. You can also pick the other player up, carry him through the level, and throw him around. Press Start to pause the game, and press Select to also pause the game and bring up a status screen.

Always carry a crate along.

A little information is on-screen during play, and the rest of it is shown on the status screen. The top of the screen shows your health meter in the corner. You get three hearts of health and damage from an enemy causes you to lose a heart. In this game there is no way to extend the maximum health meter. There is also a C or a D displayed above the health depending on if you are playing as Chip or Dale. The status screen from pressing Select shows your character portrait along with the number of lives, flowers, and stars you have collected.

There are powerups and collectibles you can find. Flowers are the most common item you will see all the time out in the open. Meanwhile, stars are usually found hidden behind a crate. Once you collect either 100 flowers or 20 stars, a 1up star will float into play from the side of the screen. You can occasionally find 1up stars hidden in crates. You can tell the difference as 1up stars flash colors and normal stars do not. Health-restoring acorns can also be found in crates. Normal acorns restore one heart and blinking acorns restore all health. While not a powerup, I want to also mention the metal crates. You can’t throw these, but you can pick them up, drop them, and stack them to build makeshift stairs.

Large treasure boxes may hold special items. You can find full-health acorns inside them sometimes. You can find a powerup with the letter P on it that helps you carry heavy items. There are some things like large apples that you can pick up but they slow your movement and you can’t jump as high. When carrying an apple you can see Chip or Dale visibly sweat because it’s so heavy. With the P powerup you can carry big items the same as normal ones. Boxes may contain a hunk of cheese that lures fellow Rescue Ranger Monterey Jack. He will go after the cheese while knocking a hole in the wall that opens up the next screen. The best powerup is Zipper, another Rescue Ranger. He provides temporary invincibility and knocks out all your enemies for you while it lasts.

Choose your own adventure!

You jump right into the action after the initial story sequence in a new game. The end of this level is when Gadget gets captured. After a message from one of the characters, you get to choose the next level you want to play from the map. Each area is identified by a letter of the alphabet, and you can fly your plane to the one to want. Of course, you have to beat a level before you can pass it on the map to the next one.

At the end of each level before the map screen, you get to play a bonus game. This is a single-screen platforming segment with a few crates that have items inside. You want to find stars and 1up stars here if you can, but the bonus game is over so quickly that you have to be intentional on where you want to look. In two-player mode this is especially devious as you can stun the other player with thrown crates, losing precious bonus time in the process.

The levels themselves are mostly straightforward platforming. There are locations where everything is large in contrast to your small size. You can run around library books or jump over steaming pots in the kitchen. Some stages have interactive elements. For instance, you can turn off streams of water in the way by jumping on top of and turning the tap. You can also hit switches with crates to turn things on and off. The path of the level may take you in any direction, but you always stay on track and the screen doesn’t scroll to let you backtrack.

Turn the tap to shut off the upper valve also.

Most stages end in a boss battle. Instead of the bosses dropping throwable items, you get a single red ball used to attack. This ball acts like the crates but it is permanent. Throw it into each boss five times to defeat it. The ball always rebounds off the wall and flies backwards before dropping to the ground after its next collision with one of the sides. This is so you can’t lose the ball behind some of the larger bosses in the game.

You start the game with three lives. You can play when the status screen shows zero lives remaining, so you always have one more life than it appears. The same thing happens with continues. You can continue up to three times from the start of the stage where you died. Before your last continue, the Game Over screen will display “Continue 0.” I think it’s nice to have what feels like an extra continue just in case you need it!

Chip ‘n Dale: Rescue Rangers was a game I’ve owned since I was a kid and I have played through the game countless times. We did not own this new, but it sold well enough that there were a lot of second-hand copies floating around. I don’t recall how I got my first copy but I have had a few other copies I bought within game lots on eBay. As a popular, yet common game, it always sells for around $10-$15.

This huge boss is probably some kid’s toy robot.

I have played a lot of this game, but I hadn’t played it recently. I liked the idea of trying to beat the game without dying, but this time I just wanted to beat the game well enough to move on to the next one on my list. I died four or five times in my run and I didn’t get too far in before I died the first time. It’s not a great outcome, but I’m satisfied with it. I made sure to play all the stages. Poor Area E gets ignored by just about everyone since there’s really no reason to play it due to its location on the map. I wanted to give it part of the spotlight during my playthrough because it’s a good level like the others.

Chip ‘n Dale: Rescue Rangers is a great NES game suitable for any collection. It has colorful and detailed graphics, peppy music, responsive controls, and fun levels. The enemies and traps are interesting with some creative behavior and interactivity, and the boss battles are well made. The levels are in some unusual but clever settings and they really suit the game well. My only gripes are that the game feels a bit too short and the game difficulty is mostly easy. A few of the levels can be skipped over entirely making for an even quicker game if that’s what you want. These are minor complaints. This is an excellent game made even better by supporting two players. Games like this tend to make me crave more of it, but lucky for me there’s an NES sequel coming up someday. I haven’t yet played Chip ‘n Dale: Rescue Rangers 2, nor do I know much about it at all, so I am very much looking forward to playing it!

#97 – Chip ‘n Dale: Rescue Rangers

 
SEP
25
2018
0

#96 – WWF Wrestlemania

Whatcha gonna do brother when Hulkamania runs wild on you?

Shiny colors!

To Beat: Win the Tournament
Played: 8/6/18 – 8/8/18
Difficulty: 6/10
My Difficulty: 6/10
My Video: WWF WrestleMania Longplay

I was a teenage boy and for a season I was really into professional wrestling. I happened to get interested in WCW during the time when it overtook WWF in popularity, and then I unceremoniously got out of it sometime before WWF acquired it. The NES wrestling games vastly favored the WWF license over WCW with four NES titles to one. I am familiar with many of the WWF stars from this period as they eventually crossed over into WCW. Hulk Hogan on the cover of NES WWF WrestleMania, for instance, was a huge part of the nWo and his entry into that group was very shocking for me as a young fan. Playing this NES game rekindled a lot of nostalgia for that period in my life. Of course what matters now, nostalgia aside, is if the game is any good.

The current WWE began in 1952 as Capitol Wrestling Corporation and was created by Jess McMahon and Toots Mondt. It was part of the broader National Wrestling Alliance, or NWA. The owners at that time, Mondt and Jess’s son Vincent, withdrew from NWA in 1963 over a dispute and created the WWWF, which eventually rejoined in NWA in 1971 and was renamed to the World Wrestling Federation, or WWF, in 1979. Vincent McMahon Jr. created Titan Sports in 1980 and bought Capitol from his father in 1982. Vince Jr. helped usher in the WWF Golden Age in the 1980s. WWF acquired its main competitor, WCW, in 2001. In 2002, WWF was renamed to World Wrestling Entertainment, or WWE, after a dispute with the World Wildlife Fund. WWE is currently the biggest professional wrestling promotion in the world.

WWF WrestleMania is the first of four WWF licensed NES games. The other three games are WWF WrestleMania Challenge, WWF WrestleMania: Steel Cage Challenge, and WWF King of the Ring. WWF WrestleMania was developed by Rare and published by Acclaim Entertainment. It was released in January 1989 on the NES in North America only.

Awww yeah, wrasslin’!

WWF Wrestlemania is a straightforward professional wrestling game. There are six characters to choose from: “The Million Dollar Man” Ted DiBiase, Bam Bam Bigelow, The Honky Tonk Man, “Macho Man” Randy Savage, Andre the Giant, and Hulk Hogan. Matches take place between two wrestlers in the ring until one of them wins by pinfall. The game supports up to six players though only two may play at one time. One or two players can play a standard match, or one to six players may compete in a Tournament format. To beat the game, you have to win the Tournament mode in single player.

At the start of the game you will choose the number of players and the corresponding mode. A name entry screen appears for each player after the mode is chosen. Use the D-pad to move the cursor and press A to make selections. Names are up to six characters long. For multiple players, odd numbered players use the first controller and even numbered players use the second controller. After name entry, choose from one of the six wrestlers. Press Up or Down to choose. You will see his profile picture and some short stats. Press A on the one you want. After all selections are made, you will see the Pre-Bout screen with the participants of the next match. Now the fun begins!

Fights take place on a single screen with the stats on top and the match on the bottom. On each side of the top of the screen are the character portraits and the vertical energy bars for each player. In the center is the match timer and the bell that rings at the end of the match.

Bam bam on Bam Bam.

The controls are a little more complex than they first appear. You walk around the ring with the D-pad and you can walk in all directions. You can press either A or B to do some basic strikes against your opponent. From here it gets more complicated as some wrestlers can’t perform certain moves. I won’t go into all these details, but the manual has a couple of charts detailing all this and I suggest you look that up before trying this game. One more thing all wrestlers have in common is running mode. Press and hold either Left or Right, and then hold A to engage running mode. You can let go of the D-pad, and then let go of the A button to stay locked into running mode without touching any of the buttons. You will rebound back and forth between the ropes until you press a button to get out of the mode or your opponent gets in the way.

The remaining moves can only be performed by some wrestlers. While in running mode, you can press A or B to do a running attack. You can do a different move by pressing either A or B while holding Up or Down. One of these, usually with the B button, is how you pin your opponent when they are laid out on the mat. If you have your back to the opponent and press A and B at the same time, you will do a strong back move. If you are facing your opponent and press A and B together, you can do a bodyslam. However, you need to have more energy than your opponent to pull off the bodyslam, otherwise you will default to the back move. Finally, some wrestlers can do a move off the turnbuckle. To climb up on the turnbuckle, you need to engage running mode while all the way at the bottom of the screen. Just as your approach the corner, press B. If your timing is good, you will climb onto the turnbuckle and then dive off all in one move. Even though there are turnbuckles at the top of the screen, you can’t climb on those. Weird, I know.

To win a match, first you need to drain all of the energy from your opponent. When he’s down, you need to pin him. Stand next to him and press either Up or Down combined with either A or B depending on your wrestler to pin. A three-count will start, and if your opponent is still down at three, the bell rings and you win the match. Often, just getting the energy bar emptied is not quite enough to keep him pinned down. Sometimes he will get up right away and other times he will stay down for quite some time. You can get a feel for when he will stay down longer than usual with some experience. On the flip side, your opponent is also trying to drain your energy and pin you too. You will rise automatically if you are knocked down with energy remaining, but if you don’t, mash the Up button on the D-pad to get up as quickly as you can.

High octane pinning action!

There are a few additional mechanics and things to look out for in the game. Energy meters slowly grow over time. You have to keep up the offensive or your opponent can get back into the game. There is an additional way to earn back some energy in the form of a powerup. That’s right, this game has a powerup called the energizer. Each wrestler has his own energizer listed in the game manual. Energizers appear from the top left of the screen, go across the top of the ring, and then exit on the right side. You want to collect your energizer if you are near it, and likewise you want to keep your opponent away from his. There is also an anger mechanic. If someone gets hit a bunch, his skin will change color from pink to red. Moves do more damage while in this angered state.

The timer is of some importance as well. There is no timer in a standard match, either single player or two-player. In fact, a two-player match with one person is a great environment for practicing moves and timing, all without worrying about the timer. The timer runs in tournament mode only. It counts up to three minutes, and if there isn’t a winner to that point, the match is considered a draw. You will get an instant rematch, and these will continue until there is a clear winner.

To win single-player Tournament mode, you pick a wrestler and then you have to win against all other wrestlers in order. You can tie via the timer as many times as necessary, but lose once and you’re out. A multi-player tournament functions more like an actual tournament. The computer controls the remaining wrestlers and everyone plays each other once for a total of fifteen matches. Whoever wins the most matches wins the tournament, and the tiebreaker is whoever has the quickest average match time over matches won.

Ooooh, that’s gonna leave a mark.

This was my first time playing WWF Wrestlemania. This game was originally on my deferred list, but I can’t remember why I put it there other than my general disinterest in sports games. This is one of the most common NES games out there. Right now, I have four extra copies I haven’t bothered to sell yet. It only costs a few dollars if you want a cart.

I did not have the easiest time beating this game. I decided to go with “Macho Man” Randy Savage (RIP) as he was one of my favorite wrestlers growing up. Taking the wrestlers in order means The Million Dollar Man is the first wrestler, and he really is a pushover for the most part. For a while I couldn’t beat anybody else. I found trying to beat anyone else in a fist fight is useless. Those guys can rifle off back moves quickly before I could barely get out one. Running attacks are more useful especially if you can knock the guy down with them. You can go right into another running attack and knock him down as soon as he gets up. This strategy doesn’t work on the heavier wrestlers. My path to victory was abusing turnbuckle moves. The problem then is getting the opponent into the corner with you to get in range for the move. I try to get the opponent to run after me into the corner so I can climb the turnbuckle. Knocking him down gives me enough room to back up and run again. I tried to time it so that I was climbing up when he got up. That way he will chase me into the corner, trying to take advantage of having my back to him. I can get into a loop, but it doesn’t always last. Your timing has to be really good too so that you don’t miss the turnbuckle climb. I think the presence of the timer, combined with energy regeneration, encourages repeating powerful moves over and over to win. It might be a cheap way to win but it worked for me. I can win most of the time with this strategy, but even then, winning all five matches was a little harder than it seemed.

Take this opinion with a grain of salt because I haven’t played any other wrestling games on NES, but I don’t think WWF Wrestlemania is all that good. Rare usually makes fun games but not this time. The level of presentation and polish from a Rare game is still there. There are some nice graphical effects on display. The character portraits look pretty good on the NES. Everything up to the gameplay is solid, and then the annoyances begin. I had a tough time lining up properly with the other wrestler, and when I did I would get beat down before I could get enough hits in. Movement around the ring is cumbersome and slow. It’s easy to get trapped in the corner and hard to get back out. The act of pinning a wrestler is a lot harder to perform than it should be. The timer gets in the way of a more thoughtful match, resulting in exploiting moves just to win in time. These control and balancing issues add up to a more frustrating experience than a fun one. I hope later games are better than this one.

#96 – WWF Wrestlemania

 
SEP
18
2018
0

#95 – Bomberman

You’ll get to blow up a lot of bricks and things over all these stages!

It’s Bomberman, not Bomber Man.

To Beat: Reach the ending
What I Did: Beat the game without dying
Played: 7/30/18 – 8/1/18
Difficulty: 2/10
My Difficulty: 2/10
My Video: Bomberman Longplay

The Bomberman franchise is one with a long history and a loyal fanbase. I think Bomberman really grew in popularity on the Super Nintendo with the Super Bomberman games. The simple nature of the game, combined with the SNES Multitap, made it a perfect party game for multiple people. He would have his solo adventures, and those games have their fans too, but the multiplayer is what most people remember and what they would prefer to play. I’m more a fan of the solo outings, and that’s what I got here with the NES version. Bomberman comes from a humble beginning, as this early title is a bare-bones adventure.

Bomberman got his start on home computers in Japan and Europe in 1983. The game was remade for the Famicom, releasing in December 1985. It was developed and published by Hudson Soft. The NES version would wait until January 1989. Since then, there have been dozens of Bomberman games spanning various consoles and computers. There wouldn’t be another Bomberman game after the Famicom/NES release until 1990, but then there were multiple games released every year all the way through 2010. There was another long hiatus until Super Bomberman R came out on the Nintendo Switch in 2017.

Bomberman is a top-down action game with kind of a sad story. Bomberman is named appropriately as he makes bombs all day in an underground compound and he doesn’t like his situation at all. He hears a rumor that if a robot like himself leaves the compound for the surface then he will become human. He leaps at the opportunity but other robots pursue him. Luckily, he has unlimited bombs of his own making which will help him. You beat the game by clearing all 50 stages.

Make way for Bomberman!

The game has simple controls. Bomberman can walk in four directions with the D-pad. The A button places a bomb which is locked to one of the tiles on the playfield. Eventually it blows up leaving a brief trail of fire on the playfield. Later in the game, Bomberman can detonate his own bombs with the B button. The Start button pauses the game. That’s all there is to it.

Bomberman is a really simple game too. Each stage is two screens wide and free scrolls left or right to follow the action. The playfield consists of indestructible columns spaced evenly apart. Sprinkled among the level are bricks that can be destroyed with a bomb blast. Usually you are blocked from parts of the stage and you have to bomb your way through. The goal of the game is to defeat all enemies in each stage, then locate the exit door and leave. You have to drop bombs in spots where the enemies will walk into the blast and get themselves killed, or you can trap them with your bombs near an explosion. All enemies plus Bomberman are killed by a single bomb blast, so there is a strategy element as you also need to keep yourself out of harm’s way. A chime will play when all enemies have been defeated. The exit door is hidden behind one of the destructible walls. It’s completely random so sometimes you’ll find it without trying and other times it’s one of the last bricks in the whole level.

There is a little information on the top of the screen during game play. The level timer begins at 200. Now usually you would lose a life when time expires, but here a bunch of strong enemies are introduced when the timer hits zero. In the early game, that’s just as bad as death. In the middle is your score. You earn points through defeated enemies and you can score more points per kill if you defeat multiple enemies with a single explosion. On the right side, labeled Left, is the number of remaining lives. You start with three lives and you earn one after beating each stage. That’s very generous!

Setting up chain reactions is both fun and dangerous.

The primary mechanic in Bomberman is the bomb blast. When a bomb is placed it stays dormant briefly before exploding. The blast extends outward in the four cardinal directions. It won’t travel through the solid columns or the destructible bricks, but it will rip right through enemies and Bomberman himself. If an explosion hits another bomb, that bomb also explodes immediately. Naturally, you can set up multiple bombs and set off a huge chain reaction. It’s all very intuitive and satisfying to rain fire on large portions of the stage. The catch of course is that you should be thoughtful in your placement so that you don’t get yourself caught up in the blast, whether you get greedy with bomb chaining or trap yourself in an unescapable spot.

Bomberman can find powerups. Each level has exactly one powerup hidden somewhere within a breakable block, just like the exit door. Collecting the powerup causes the music to change, which is an interesting and unusual way of reminding you that you don’t need to hunt for the powerup anymore. Here are the powerups you can find. The bomb powerup lets you lay one extra bomb on screen at a time. The smiling flame powerup extends the bomb blast one tile in each direction. At the start of the game, Bomberman can only lay one bomb at a time with a tiny blast radius. By collecting multiple bomb and flame powerups throughout the game, your bombing ability grows fast. The speed skates let Bomberman walk faster. The wall walk powerup lets you walk through the breakable walls, and the bomb walk powerup lets you walk through your own bombs. The detonator powerup is a heart with a small bomb on it. This lets you blow up the oldest bomb with the B button, and also causes bombs to stay dormant until you blow them up yourself. The flame proof powerup looks like a little person engulfed in flames. This keeps you from being hurt by your bomb blasts. The mystery powerup looks like a question mark and gives you temporary invincibility from enemies and bombs. All powerups except for the mystery powerup last until you die, while the bombs, flames, and speed skates are permanent upgrades.

It does make sense that you could also blow up both the powerups and the exit door. You might not want to do that. Blasting either one spawns several enemies which are typically more challenging ones than the initial enemies in that stage. Not only that, but if you blow up the powerup you lose it, putting you at a double disadvantage. The lesson here is that you want to be careful with explosives.

Blow up enemies in the bonus level without concern.

There are bonus stages sprinkled between some levels. The standard unbreakable columns are still there but there are no bricks to deal with. Each bonus level features only one enemy type but there are a lot of them and they keep coming. Bomberman is completely invincible from both enemies and explosions here, so this is a great place to go wild and set up huge chain reactions. This is simply a point-scoring affair, but it’s a fun break while it lasts. The bonus levels occur after every five levels for most of the game. For some reason they put the bonus areas after levels 39, 44, and 49 instead of multiples of five like it started out. I get that they didn’t want the game to end on a bonus stage, but I think they could have just adjusted only the final bonus level instead. I’m all about the minutia here on the site, so I just had to let you know about this.

Bomberman also features some special, hidden items. These are nothing to get excited about and are just for points, but they might appear in a playthrough when you don’t expect them. There are six of them. Each stage has one and there is a specific method to get it to appear in the stage. I’ll spare you the details on this one. Most players will not come across them at all because the requirements are kind of ridiculous. I didn’t in my playthrough, though I believe I found one in a past playthrough.

Lastly, there is a password system. Lose all your lives to get the password. These are 20-character passwords consisting of the letters A through P only. Passwords save the stage you are on, the number of bombs you can deploy, the blast radius, and even your score. Nice!

Strong powerups like this give you great versatility.

Though I have played Bomberman before, I haven’t played it all that much. I am pretty sure I played the SNES Bomberman games before playing this one, and it feels primitive in comparison. At least I had the basic idea down for how the game works. I beat the game for the first time a few years ago as part of the NintendoAge contests. Bomberman is a common game but it’s one of the more expensive commons, selling for over $15 for a loose cart today.

I think Bomberman is a really easy game. I was able to beat the entire game on one life on my second try. While the difficulty of the levels increases as you play, I believe the first level is the hardest one. You have little explosive range so you have to get a little too close to the enemies and they are tough to reach with bombs. You start off with a flame powerup in Stage 1 which helps out greatly. In Stage 2 you can get an additional bomb, and in Stage 3 you can get the detonator, putting the game into easy mode. With the detonator and cautious play, you probably shouldn’t die anymore the rest of the way. The flame proof powerup comes late in the game and pairing it with the detonator is ultra-powerful. Then you can drop bombs and immediately detonate them at your feet, essentially surrounding yourself with a fire shield for as long as you keep pressing the buttons. Even without the best powerups, you can still password creep through the game the long way.

Bomberman is a basic, but fun game. The core gameplay is solid, laying the groundwork for future titles. Aside from that hook, the game was primitive by the time it released on the NES in 1989. From a 1985 perspective, I can see why this was well regarded. It’s a fun game with a bunch of levels, randomly generated obstacles, and some neat powerups that make you feel very powerful by the end of it all. The music is catchy enough in its simplicity. The graphics do well enough to carry the idea of the game, but don’t offer anything further. I’m glad to have played it, but I don’t plan to go back to it.

#95 – Bomberman

 
SEP
12
2018
0

#94 – Volleyball

Nintendo’s Black Box Volleyball is the only game of its kind on the console.

Good on the players to practice before getting started.

To Beat: Win a single match
To Complete: Win a match against Russia
What I Did: Won a match against Korea
Played: 7/15/18 – 7/17/18
Difficulty: 7/10
My Difficulty: 7/10
My Video: Volleyball Longplay

If you have been following my project closely, you probably will disagree with my initial tagline. After all, I have already played an NES volleyball game already in Kings of the Beach. The only other games are Super Spike V’Ball and the unlicensed Venice Beach Volleyball. The main difference between these games and the original Volleyball is that the other games are beach volleyball and this one is standard volleyball. That means this game is a full six-on-six match while the others are strictly two-on-two. I can see why two-on-two volleyball makes sense on the NES. A four-player sport is perfectly suited as a Four Score title, and fewer characters on screen reduces the amount of flicker and graphical issues. It’s interesting to me that the first volleyball game on the NES is the only one to tackle a standard game, and it does a noble job of it. It’s also quite a bit more challenging than I bargained for.

Volleyball first launched on the Famicom Disk System, releasing in July 1986 in Japan. The NES version arrived in March 1987, and the PAL version followed in November 1987. It was developed by both Nintendo’s R&D1 division and Pax Softnica. Interestingly, this game is credited on the title screen to Tomoshige Hashishita (written T. Hashishita), which is unusual for early Nintendo games. I don’t know if that means he was the main developer, designer, or perhaps the sole creator of this game.

As mentioned in the introduction, Volleyball is the only NES game that covers a standard game of volleyball. Two teams of six players each play in a normal game. You can play in either the men’s or women’s league. In a two-player game, each player chooses his or her own team, while in single player, you will play as the USA team. There are eight teams in all to pick from. There are no additional gameplay modes in Volleyball, so winning a single match is good enough for completion.

Nice touch to animate teams lining up.

The game is structured in the same way as other volleyball games on the system with the same mode of play. One team earns possession of the ball and one player serves the ball from the back line into the opponent’s court. Each side may hit the ball three times before they are required to return the ball to the other court. A team earns the serve if the ball falls within the opponent’s court or the opponent fails to return the ball after three hits into the team’s court. If the serving team wins the serve again, they also score a point. Each match consists of up to five sets. In each set, the score is reset to 0-0 and the first team to 15 points, while also winning by two, wins the set. The first team to win three sets wins the match.

A good place to start with this game is the training mode. This is selectable from the title screen and you go straight into playing without choosing teams. This is for single player practice only. There are two differences between training and the standard game. First, the speed of the ball is decreased, and second, the active player’s uniform changes to red. This will help you see which character you are allowed to control at any given moment. Certain game situations force you to control only a subset of the team at one time, so training mode gives you an immediate visual of who you control so you can get the hang of it.

The scoring display is at the top of the screen during gameplay. The viewpoint scrolls from left to right to follow the action and the scoreboard is in the center making it visible at all times. The three-letter team abbreviation is displayed vertically on the appropriate side. Next to that is a column of five rectangles. This represents each set and the team that wins each set has their light turned on. The current set will blink on both sides of the scoreboard. In the center is the score for the current set. Below that are a series of lights that show which team is the serving team.

Good timing on your serves is always helpful.

The first thing you will need to do in single player is serve the ball. The server waits behind the back line for the referee to blow the whistle. Press A to toss the ball in the air and then press A with good timing to hit the ball to the other side. If you hit the ball early, you will do a high serve, and if you wait until the ball is low to the ground, you will perform a low serve. Be careful not to let the ball hit the ground or you lose the serve. You can also aim the serve by holding a direction on the D-pad while you hit the ball.

The D-pad controls the team members while the ball is in the air. There is a line close to the net on each side called the spike line, and there are three team members on either side of the line. You control the set of three players behind the line if the ball is hit toward the back, and you control the three players by the net if it is hit near the net. The ball casts a shadow on the court and you use this to anticipate where the ball might land according to its flight path. The ball often gets hit high above the playfield to where you can’t see it, and the shadow is usually all you can go by. Get into position and press either A or B to receive the ball. The B button is a low hit that is not often used. The third hit automatically sends the ball to the other side of the court.

You can also aim the ball a little bit while receiving. Simply hold the D-pad in the desired direction of the hit as you smack the ball. Holding down the button also locks the player in position and he or she cannot move unless you release the button. If you press toward the opponent’s court, you will hit the ball there even if you aren’t on the third hit. Another wrinkle is that if the center player receives the ball and you direct the ball either up or down, control is locked to only the player on that side in the same row.

Spiking is an essential skill here.

You can spike the ball on the third hit. The first hit is the bump, second is the set, and third can be the spike. Get the player into the position where the ball is expected to land, then press B to jump. Hold the button and you will spike the ball at the top of your jump. You can also aim the spike with the D-pad. You can cross spike with Up or Down, or do a feint by holding back toward your court. The spike is a difficult move to pull off with the arc of the ball and anticipating the shot without seeing the ball the whole way.

On defense, you can block the spike in much the same way. Simply press and hold the B button to jump by the net. If you press the D-pad toward the net, you will do a double block with two defenders. Optionally, while the ball is in the opponent’s court, you can press A to bring the front row of defenders together in a tight row automatically. One big difference here is that you cannot direct the ball on a block directly with the D-pad like you would in other situations. The direction of the ball coming off the block is determined by the angle of the block. For instance, if you block the ball using the right side of your body, the ball will shoot off to that side.

There’s a few more tidbits about the game. The seven teams you compete against are Russia (USSR), China, Cuba, Japan, Brazil, Korea, and Tunisia. These teams are in order of difficulty from hardest to easiest as determined by head to head ranking in the 1981 and 1985 World Cup tournaments. At the start you can select from either the men’s or women’s teams which determines the speed of the ball during play. In addition to player sprite changes, the ball moves faster in men’s mode than women’s mode. Lastly, teams switch sides after each set. If the match is tied two games to two, teams will switch sides in the middle of the set once one team scores eight points.

I love getting the other team to whiff on a hit like this.

This was my first time playing and beating Volleyball. Despite being a pick up and play style game, this is not one I spent much time with in testing carts. I do recall this was my 400th licensed NES cart I bought for my collection. That wasn’t planned or anything, just how it worked out. I have had a few copies of this game pass through my hands. The game primarily is found in the original 5-screw form factor, but there were some copies made after the conversion to 3-screw carts. I have a couple of 3-screw variants of Volleyball that are a bit more valuable than the 5-screw cart. The game sells for around $10 for a loose cart.

I had heard that Volleyball is a difficult game that you might not expect, and I agree with that assessment. I really wanted to beat the hardest team, Russia, but first I started on the opposite end with Tunisia. I ended up winning my first match in four sets, giving me a false sense of security for the harder difficulties. The Tunisia team makes a lot of miscues that you can benefit from. I played a few matches with Russia and got destroyed every time. My best single set over all attempts was a 15-4 loss. I played the middle difficulty Japan team a few times and also got my butt handed to me. I did figure out an exploit on serving against Japan. When on the left court, I could hit a low serve to the bottom right corner and the defender would whiff on it most of the time. That could only help me win two sets and I didn’t play well enough to win the entire match. I settled with beating the second-weakest team, Korea, but it was a close game. I won in five sets 15-10, 15-12, 5-15, 13-15, 15-8. That match was the one I recorded for my longplay. I had thought about stepping up a team at a time just to see the toughest team I could beat. I didn’t have a chance to win against a tougher team before leaving on vacation, and I wanted to move on to something else once I got back home. As much as I wanted to stick it to the Russians, this would have to be good enough.

The ball can easily go above the screen.

I had some issues with the game that made it difficult to play. I found the controls got in the way of keeping the ball in play. One example is if a ball is hit near the spike line. Either the front row or back row will be active at once, and sometimes I anticipate that the ball will land in a spot where the inactive group should get it. There is a little bit of time to recognize which group of players is moving, but I found it wasn’t enough for me to recover from a misjudgment. Another control issue occurs when setting the ball with one of the middle players. Setting off to one side leaves only the player on the same side active for the spike. I guess I just messed up the controls in the heat of the moment, but I left myself in situations too many times where I hit the ball to a non-moving player. Defense in Volleyball is really challenging and I just could not figure it out consistently. The ball moves so fast enough on opposing spikes that you really need to block. A successful block requires both good jump timing and good positioning. If the opponent hits the ball off the edge of one of your blockers, it flies off the court and there’s nothing you can do about it. I also either spiked or blocked the ball into the net a lot. It’s so cramped by the net that I can’t tell the outcome until the referee sorts it out. I didn’t play long enough to tell if either bad timing or bad luck caused issues with maintaining possession of the ball. It was a struggle at times to string points together but I managed the best that I could.

Black Box Volleyball is a noble, early effort on the NES, but I didn’t really have a lot of fun with it. The graphics are extremely basic, but that’s to be expected for an early game. Simple sprites help keep the action fast while avoiding graphical flickering. The music is not that bad. There are some shared sounds and songs from other early games Nintendo put out, but they are good enough. The action is very fast. Normally I find that a good thing, but I think that works against the game in this case. Too often the ball gets hit high in the air and you are left to guess when and where it will land, with not much time to react. Good luck defending enemy spikes or smacking the ball through their defenses. The speedy pace, difficult teams, and some control issues further mar the experience. It’s not an awful game, but there are better NES volleyball games.

#94 – Volleyball

 
SEP
07
2018
0

#93 – Indiana Jones and the Temple of Doom

More like the Temple of Pain, Suffering, and Doom.

The top title text is usually cut off on old TVs

To Beat: Reach the ending
Played: 7/5/18 – 7/12/18
Difficulty: 9/10
My Difficulty: 9/10
My Video: Indiana Jones and the Temple of Doom Longplay

I’m here to talk about Indiana Jones and the Temple of Doom on NES, but what I really want to talk about is La-Mulana. I’ve long thought the game La-Mulana is secretly the best Indiana Jones game, or at least the best interpretation of that concept. In La-Mulana, you play as the archaeologist Lemeza as you seek to follow your father’s footsteps in exploring and discovering the secrets of the ruins of La-Mulana. It’s a Metroidvania game with a huge emphasis on solving complex, intricate puzzles spelled out through cryptic textual monuments. You really need a pencil and notebook as you gather clues and piece them together throughout the journey, while also collecting various artifacts, battling huge bosses, and avoiding constant death traps. This is not a game for everyone, but I fell hard for it and it is one of my favorite games, both the original freeware version styled like an MSX game, and the newer remake available on Steam and elsewhere. Actual Indiana Jones games seem to take a safer stance in terms of gameplay. There are several Indiana Jones games on the NES that are standard platformers. Indiana Jones and the Temple of Doom, on the other hand, is less of a platformer and a lot closer to my La-Mulana-like ideal than I originally thought.

Indiana Jones is a well-loved film franchise. There have been four major films to date: Raiders of the Lost Ark in 1981, Temple of Doom in 1984, The Last Crusade in 1989, and Kingdom of the Crystal Skull in 2008. A fifth movie is slated for production beginning in early 2019 with a tentative release date in 2021. A TV series, The Young Indiana Jones Chronicles, ran from 1992-1993, and that series was followed by four made-for-TV movies between 1994 and 1996. There have been plenty of books, comics, video games, toys, and attractions revolving around Indiana Jones.

There are two video games based on Temple of Doom. The first was a 1985 arcade game that was later ported to various home computers. The NES game, Indiana Jones and the Temple of Doom, was released in 1988. It was developed by Atari Games and published by Tengen. In December 1988, Temple of Doom was licensed by Mindscape, so that’s the version I played for the project. Both the unlicensed Tengen version and the licensed Mindscape version are identical games. This version was also ported to a few home computers.

Whip it, whip it good!

I have seen all of the Indiana Jones movies, but it’s been a few years and I don’t remember much of anything about Temple of Doom. From what I’ve read, the story and gameplay both follow the movie. You play as Indiana Jones who, along with his companions Willie and Short Round, reach the village of Mayapore. The Sankara Stones have been stolen and the children of the village have been captured by evil people from the Pankot Palace, led by the high priest Mola Ram and his Thuggee guards. The children have been forced to mine for the missing Sankara Stones, so Indy sweeps in to save the children and recover the stones. The game consists of twelve levels, or waves, that you need to beat to complete the game.

Indiana Jones and the Temple of Doom is an action game from what I’ll call a near top-down perspective. You use the D-pad to move in all directions. Indy is armed with his trusty whip that you wield with the A button. You can whip in all eight directions by holding the direction and pressing A. The B button is for jumping. A for jumping was a standard convention by now, but nope, it’s B. If you just press B, you will jump downward. If you want to jump in a different direction, hold the D-pad in that direction and then press B. The Start button pauses the game and brings up a status screen. Use the Select button to switch weapons. You hold Select and press either Up, Down, Left, or Right to switch between the four weapons in the game.

You will spend a lot of time in this game saving children. They appear within holes along the cave walls. Simple walk or jump up to them to save them. You will earn some points and they often will leave weapons behind that you collect. Usually, they drop either a gun or a sword. These are limited use weapons that have secondary functions. In the first room of Wave 1, you can use the sword right away. There are small tunnels boarded off by wooden planks. If you slash them with the sword, they will reveal TNT to collect. These are your base weapons in the game that you switch between with Select. Left is for the gun, Right for the sword, Up for TNT, and Down to go back to your whip.

I’m coming to save you! (For equipment and points)

There is limited information on-screen during play. There is a countdown timer at the top of the screen that counts down from 99. The timer speed varies depending on the level. If it goes down to 0, Mola Ram appears, which causes you to lose a life and you have to start the wave over. Below the timer is an icon for the current weapon equipped if it’s something other than the whip. When you switch weapons, you briefly see the ammo count next to Indy. The Status screen when pausing the game gives you a lot more information. You are shown your current score and lives remaining. Below that are all your weapons and ammo accumulated. You also see any special items you’ve collected. Next are the number of children remaining in the wave and how many map pieces are remaining in the game.

There are other items to collect from the children. Some children have map pieces that you hold onto until a later event in the game. An arrow may be left behind. You can pick this up for points, but it’s main purpose is to point the way toward a warp room. Small jewels restore your level timer. Hats are extra lives, and they play a familiar tune when you earn a new life. The key opens the locked door to the next wave.

Most waves in the game follow a similar pattern. Each wave has two rooms. One is a cave room, and the other is a mine cart room. You can switch freely between the two rooms within a wave. The cave rooms have open doors that lead to the mine cart room, and the mine cart tracks may end in tunnels that lead back to the cave room. Each room has a locked door leading to the next wave. To open the locked door, you first obtain the key from the opposite room. The key in the cave room opens the locked door in the mine cart room, and vice versa. Each room has its own key so it is up to you how you want to approach clearing each wave.

Come along for a ride.

The movement mechanics allow for some complex scenarios that the game takes full advantage of. The rooms start getting really large within just a few waves. They also loop around in all directions, which makes them seem even bigger than they really are. Sticking to the main paths will not get you very far, especially in the mine cart rooms. You are going to have to leap from ledge to ledge to explore every nook and cranny of the rooms. Jump while holding Up to jump on the same ledge you are standing on. Otherwise, you fall through all solid objects until you reach a walkable area. The mine cart rooms have a bunch of disconnected conveyor belts so you need to jump to get around those for sure. You also must contend with lava rivers all over these rooms too. Falling onto a lava tile is instant death, so you have to be smart and not just jump all willy-nilly through the rooms.

The mine carts add some additional movement options within those rooms. First, you must jump onto the mine cart to climb in. Then you get to ride around! Carts move from left to right and you can slow them down by pressing Left and speed them up by holding Right. Press Up to lean the cart to the left and Down to lean the cart to the right. Sometimes lava or something is obstructing part of the path and you can lean one way to get through. Be careful as other mine carts appear periodically and they can get in your way, causing you to crash and die if you collide. Tracks sometimes merge which also facilitates collisions. Getting the mine carts to appear in the first place can also be a hassle. Usually you need to scroll the screen horizontally to get one to appear from the left side. In later waves, enemies are in the carts and you need to whip them or defeat them some other way before entering.

The enemies in this game as a huge nuisance. They don’t typically kill you, rather they stun you. This pushes you somewhat and often forces you to fall to the ledge below. Those falls can drop you to your death or leave you vulnerable in other ways. The most common enemy is the Thuggee guard. You can kill them with other weapons or stun them with the whip. You can knock them into the lava for an easy kill. Once a guard is whipped, he becomes an attacker and will kill you outright with a hit. There are bats, rats, snakes, and spiders that move erratically and stun you. Retractable spikes and lava pools kill you. Some guards drop boulders in the mine cart rooms that kill you if they drop on you, but the rocks also provide the benefit of temporarily stopping the movement of conveyor belts.

Whipping guards into lava seems excessive.

Indy has his set of weapons to help out. Furthermore, all of them have secondary uses for moving around the levels. The whip is your primary weapon for stunning guards and killing minor enemies. You will find hooks on the walls that you can latch onto with your whip to swing over gaps. The gun does not actually fire bullets, but instead does instant damage to the first object within its line of sight. There are skulls on the wall that you can shoot with the gun to reveal hooks for swinging with your whip. Swords kill guards and enemies, while they are also used to open up blocked caves containing TNT. The TNT can be thrown in eight directions and leaves a blast that kills enemies. This explosion removes spikes and certain lava tiles that obstruct walkable paths. I found myself switching weapons all the time for each need as it appears.

Another use of the TNT is to reveal hidden rooms. In waves 1, 4, and 6, some children will hold arrows that point in the direction of a hidden room. When you think you’ve found the spot, bomb it to hopefully reveal the door. This takes you to a warp room, which is its own unique stage. Pass through any door in the warp room to advance to a future wave. Doors farther out in the warp room advance you further along in the game. As a bonus, you earn all the map pieces in a wave where you don’t rescue any children, including the waves you skip via warp. Waves without a warp room also have hidden doors revealing either a large cache of normal items or a special item.

The first eight waves all follow the two-room structure and get difficult fast. Wave 9, however, is where the game takes a turn into a devious direction. This wave contains only one room called the Chamber of Kali. Your goal is to reach the Statue of Kali and the three Sankara Stones at the top of the room. You have to forge a path across the lava river to get there. There are several locations where lava monsters appear randomly out of the lava. Hitting a monster with either the gun or TNT turns the monster to permanent stone and you can walk across. The idea is to find the area with the most lava monster activity so that eventually you will clear a path across. You are at the mercy of randomness as you wait for the monsters to line up properly. Once you get to the other side, retrieve the stones and then locate the exit door to Wave 10.

Building your own lava bridge is excruciating.

This is where the map pieces you have been collecting come into play. Before starting Wave 10, you are presented with a crude map of one of the rooms in the wave. There are 25 pieces of the map in all so you may see a partial map excluding sections at random representing map pieces you did not collect. The map shows skulls, doors, children, and an X indicating the exit door for the wave. This is the only time you see the map, so commit what you need to memory or make notes before proceeding.

Wave 10 consists of six large rooms with several doors connected to other rooms. Your task is to use the map to determine which room contains the exit and where the exit is positioned within the room. The exit door itself is hidden and must be revealed by TNT. Each room has four possible locations for the exit door, so there are 24 possible exits. When you find the exit door, you will not be allowed to exit the wave unless you are holding the three Sankara Stones. Unfortunately, if you die in Wave 10, you drop all the stones you are holding. Each room has three large skulls in it and these are where the stones are placed should you drop them. It would really behoove you to get all three stones back in your possession before moving to a different room. God help you if you drop stones in two or even three different rooms at once. All the while, you have to deal with lava pits, lava monsters, conveyor belts, swarming enemies, and all that good stuff. Without a doubt, this is one of the nastiest challenges I’ve experienced in this project to date.

If somehow you survive Wave 10, there are still two more waves to finish. These are more straightforward challenges, but you still need to hold all three stones to exit the wave and you must collect them from skulls if you die in the wave. These scenes are meant to follow the movie as you destroy the rope bridge and keep Mola Ram from escaping. The good thing is that you have unlimited continues throughout your entire journey. The bad thing is that once you get past Wave 9, you go back to Wave 9 when you continue. Still, it’s better than starting from scratch.

This just gets ridiculous.

This was my first time playing Indiana Jones and the Temple of Doom. I do remember that this game seemed awfully challenging when I tested out my carts, and I have heard that this is one of the most difficult games on the NES. This is an inexpensive game, but it’s not one I see a whole lot, either in licensed or unlicensed form. I think I owned the Tengen unlicensed version before I owned the licensed Mindscape version. Both versions cart only are worth around $8-$10.

I had what I consider an unusual path to completing this game. I struggled the first couple of times I tried. Wave 1 is really small, but after that, the rooms seem to increase in size drastically up through either Wave 5 or 6. There are several doors connecting each room together and I couldn’t keep track of where I was. I had a couple attempts where I gave up around the middle of the game, but it felt like I was on the brink of getting the hang of this game. One morning I got up early and tried again, and I finally reached Wave 9 without warping before I had to stop. I was able to leave the NES on all day and chipped away at attempting the end of the game, and then before bed I was able to beat the game. I didn’t expect to finish it, so I wasn’t recording, and I wasn’t exactly thrilled with the prospect of playing through the entire game again. So it goes. I was able to block out a few hours during the evening on another night to set up the recording and play through the whole game again. Sadly, this game is a little buggy. It crashed on me somewhere around Wave 7. I was able to jump straight to Wave 9 with the continue code but all my item counts were screwed up. I started over and then it crashed on me again in Wave 10. This time I was able to continue from Wave 9 with everything normal. I ended up going to bed and came back early in the morning before work to finish the game on video. I was running low on time but I managed to beat the game again with all the proper documentation.

There are a couple of optional special items that make this journey a lot easier. These are called out in the manual directly. There is a hidden door in Wave 7 that hides the special key, and another hidden door in Wave 8 that hides a secret idol. Both these items have their locations randomized at the start of their respective waves. The special key unlocks any locked door in the game but you can only use it once. There is a locked door in Wave 9 that can only be opened with the special key. It takes you to an island partway across the lava river in that wave, saving you a lot of time. The secret idol is much more useful. If you have it, the secret idol will appear within Wave 10 on top of the hidden door to Wave 11. It takes much of the guesswork out of where the exit is hidden. The secret idol item is permanent too. In my opinion, the secret idol might as well be mandatory to finish the game. The map, even a full map, is far too sparse and lacks enough detail to be useful. With enough plays, I suppose you could learn how to connect the map data to the location you need to search, but believe me, I’d rather not. If I have to find something hidden, I’d rather bomb around the two rooms of Wave 8 than the six rooms of Wave 10, especially since I can keep continuing on Wave 8 for as long as I need to.

Identifying the hidden exit is a huge relief.

Lastly, I want to discuss the difficulty rating. A fellow who goes by Electric Frankfurter helped compile a list of the Top 30 most difficult NES games. My two 10/10’s so far, Ikari Warriors and Q*bert, are both featured on the list, and so is Indiana Jones and the Temple of Doom. Make no mistake, this game is hard, ridiculously hard, with what is asked of you to complete the final stretch of the game along with unlimited enemies that are all over you all the time. It falls short of 10/10 for me because of the infinite continues. I have many of the 10/10 games already in mind, and I’m really going to have to take a deep look at the ones that have infinite continues to see if they are truly deserving of the hardest of the hard. The fact is that if you can reach Wave 9 with a good number of items (and hopefully the secret idol), you can just keep hammering away with the exact same item loadout until you beat it. Total play time is another factor I consider. I beat the game twice within a week and I don’t think I spent any more than 10 hours total. That’s not quite 10/10 for me either. I don’t do fractional scores, but I would say the game is more challenging than most of its peers in the 9/10 area.

I am more impressed with the idea of this game than how it actually turned out. There are some clever concepts here with collecting pieces of a map, locating secret items, and using multiple weapons that double as tools. Randomization adds some replay value to the mix. The rest of the game is kind of a mess. The rooms are huge, complex, and tough to successfully navigate under constant enemy threat. Whip swinging has poor hit detection, both on hooking with the whip and landing on the other side of the swing. The jump mechanics are confusing and many jumps to below ledges don’t make physical sense. Locating hidden doors are all trial and error that require limited resources to reveal. The controls for switching weapons don’t always trigger correctly, which always happens when I am in a rush. The graphics are okay and the music is poor, aside from the Indiana Jones theme. There is bad programming that can occasionally lead to crashes. The game is playable, but for the most part it is more frustrating than fun. If you are looking for a new challenge, this game certainly has it. Now if you’ll excuse me, I think I need to go play some La-Mulana.

#93 – Indiana Jones and the Temple of Doom

 
AUG
31
2018
0

#92 – Whomp ‘Em

The name is a terrible pun, but the game is fun.

I wonder how much thought was put into the name.

To Beat: Reach the ending
Played: 7/1/18 – 7/5/18
Difficulty: 5/10
My Difficulty: 5/10
My Video: Whomp ‘Em Longplay

I know this is cliché, but first impressions aren’t always what they seem. I played Whomp ‘Em many years ago on an emulator on one of my first computers. I wish I could remember what led me to play this game in particular, but whatever it was, I got a solid recommendation. I had a great time working through the game, that is, all the way up to the very end. The final boss completely wrecked me, and after a few failed attempts, I quickly decided that seeing the ending was not worth the effort required to learn how to beat the boss. I let it lay there until now. When Whomp ‘Em came up, the first thing I remembered was that final boss and my past struggles. My second impression was more favorable than the first impression. Read on to see how it all shook out.

Whomp ‘Em has an interesting origin, which begins with the game Saiyuki World on Famicom. Saiyuki World is a port of the game Wonder Boy in Monster Land. The Wonder Boy series is perhaps one of the most confusing series of games to try and deconstruct, and I’m not touching that here. Anyway, a sequel, Saiyuki World 2: Tenjokai no Majin, was released on Famicom in December 1990. This was brought to the NES as Whomp ‘Em, with the main character changed to a Native American. Whomp ‘Em was released in March 1991 in North America. The game was published and developed by Jaleco in both regions.

Whomp ‘Em is a side-scrolling platformer. There is virtually no story to this game, which really is a breath of fresh air if you ask me. You play the role of Soaring Eagle, a young Native American who is seeking out totems for his magical pouch. That’s it. There are eight levels and you beat the game if you complete them all.

Good start for a kabob.

This game has simple controls. You use the D-pad to walk around. Press the A button to jump. Soaring Eagle wields a spear. You can attack above you by holding Up while you jump, and similarly attack below by holding Down while jumping. Press B to attack forward with your spear. He thrusts the spear ahead of him a short distance. You can duck by holding Down, and you can raise your staff by holding Up. Ducking lets you attack low against the ground, but holding your spear above your head seems to serve no purpose in the game, other than a visual cue that you are holding Up. The Select button pauses the game this time, while Start lets you switch between your totems after you collect them.

You are thrust into the action right away when you start a new game. This is a special introductory stage to get you accustomed with the game. You work your way to the right and come to a screen where you must go upward to proceed. Later in the level you encounter another vertical subsection where you go back down. Most if not all levels in the game travel in different directions like this. When you complete the level, you are presented with a map screen. This contains the next six levels in the game. You can play these stages in any order you want. The eighth and final stage is available once the other stages have been beaten.

The top left corner of the screen is your on-screen display. At the top is the current totem you have selected. To the right of that there may be some magic potions. These act as your extra lives. If you run out of health, the potion kicks in automatically if you have one, restoring some of your health back. Below the totem is your health meter in the form of hearts. You begin the game with a maximum of four hearts but can earn up to twelve throughout your adventure.

Vertical sections are a good place for downstabbing.

There are quite a few items you can collect in the game. You can get these from defeated enemies or from touching certain locations in the levels to make items appear. The most common pickup is the gourd. When you pause the game, you get a display saying “More” along with a number. This is how many gourds you need to collect to increase your maximum health meter. You’ll want to defeat a lot of enemies to get these. The small heart restores a heart and the large heart refills your health to the max. There is a flint spearhead that boosts your attack power temporarily. You will see this hover in the bottom corner when you collect it and it goes away after four spear strikes. Similarly, the headdress gives you a temporary boost in defense. The deerskin shirt makes Soaring Eagle invincible for a few seconds. Certain enemies in each level drop a spear which gives you a longer reach to your default weapon for the rest of the stage. Finally, you can find those magic potions. You can hold up to three at one time. One bad thing about the potions is that some bosses can steal them from you. That’s awfully unfortunate and something to be aware of.

Whomp ‘Em has a little bit of Mega Man to its structure. Not only can you play stages in the order you want, but you also earn a new weapon by defeating the boss at the end of each stage. Press Start to cycle through the totems you have collected. Most of these are more like tools than weapons. Beating the Sacred Woods gives you the Spear Whirlwind. You spin the spear in front of you to break certain blocks. The Fire Wand is your reward for completing the Fire Test. This makes flames come out of the tip of your spear that is useful for melting ice blocks. You get the Cloud by completing the Ice Ritual, which summons a cloud that you can jump on and ride with the D-pad. Beating the Water Test gives you the Ice Crystal, which can freeze enemies. You obtain the Web from the Magic Forest. This lets you capture an enemy in a web and you can then throw the trapped enemy. You earn the Dart from beating the Secret Cliff. This is a weak projectile attack that shoots darts, which can then stick into the wall and be used as makeshift platforms. The manual states that using the totems and their abilities cost you health, but all of these weapons can be used as much as you want without penalty.

Fire is sometimes used to melt ice.

There’s one final level remaining after all six selectable stages are beaten. This is your typical “use all of your abilities” stage and it is quite a bit harder than the rest of the game. One neat tidbit about the last level is that all the enemies are miniature versions of the bosses you fought in the previous six stages. You also get one last totem for this final stage as well. This attack fires a large dragon head forward. It is the most powerful weapon in the game, however this totem does cost you a full heart of health each time you use it.

Whomp ‘Em is somewhat forgiving when it comes to failure. Since you get healed with magic potions when you exhaust your health, you get to keep going as if nothing happened. Losing all your potions and health means Game Over. Then you get sent back to either the level select screen or the start of the final level if you died there. Repeating the full level can be a bit frustrating, but you do get unlimited continues.

I finally got to beat Whomp ‘Em for the first time. This is a game that used to be much more affordable. I am certain it has been featured many times as a hidden gem which would account for the price hike. I was able to grab a couple copies of this game locally for around $8-$10 each a few years ago, in combination with either buy two get one free, or buy three get one free, back when my local stores didn’t realize the value of this game. Loose carts sell for around $35 these days so those were great value buys for me.

Poke bosses, get totems.

I had sat down to record Jordan vs. Bird and then had enough time to start looking at Whomp ‘Em. Not even two hours later I beat the game for the first time. It was mostly a leisurely romp through the bulk of the game, aside from a couple bosses that took more than one attempt. The final level wasn’t all that bad, though it included one random section of anti-gravity with some strange movement controls. I finally got to face that final boss again, and I can see why I gave up before. He has an attack that damages you anywhere on screen and it is not obvious at first that this is happening. The trick to the fight, unfortunately, is to cheese the boss. I entered the fight with as much health as possible and all three potions, and then used the dragon attack to whittle his health down, in effect trading one heart of my health for one of his. It was a bit of a letdown that strategy was thrown out the window, but what can you do when the boss is unfairly designed? I am relieved that I figured it out this time, anyway. I beat the whole game again a few days later and captured it on video. This was a no-continue run with only using a few potions, mostly on the final boss battle.

Whomp ‘Em is a fun game that bears some flaws. I like the graphics in this game. Everything is nicely detailed and the enemies and bosses were animated well. The music is hit or miss. Most songs are good but there are a few that get on my nerves. I spent a lot of time in the final level and that song could have been a little less painful. The gameplay is exactly what you want out of a platformer. The controls are tight and being able to attack in all directions keeps the action going. I found the special weapons almost entirely useless until the final level where they are forced upon you. I am disappointed that the final boss went from too hard to too easy after employing a now-obvious strategy. My second impression of Whomp ‘Em took a much different turn than my first. Most of the ride through the game is great fun and I’m glad I got to play through it here.

#92 – Whomp ‘Em

 
AUG
29
2018
0

#91 – Jordan vs. Bird: One on One

I’ve already played two-on-two basketball, now it’s time for one-on-one!

They look a little too kind on the rebound here.

To Beat: Win a single match
To Complete: Win all game modes
What I Did: Completed the game
Played: 6/23/18, 7/1/18
Difficulty: 3/10
My Difficulty: 3/10
My Video: Jordan vs. Bird: One on One Longplay

I like watching sports but I don’t follow them too closely. The one exception is the Chicago Cubs. I became a baseball fan and Cubs fan somewhere between the 1994 baseball strike and the 1998 home run chase, and I’ll for sure be a dedicated fan for the rest of my life. Being tuned into the Cubs back then led me into recognizing what the Chicago Bulls were doing at that same time. Now the Chicago Bulls dynasty in the 90s would have been hard to miss anyway, and I’d like to believe I was aware of how special that run was, but I may have been too naïve to truly appreciate it. However, there’s no denying how special Michael Jordan is as an all-time great basketball player. I don’t have a similar connection with fellow hall of famer Larry Bird as I missed seeing him play in his prime. Those two were among the biggest names in basketball of the time, so I can see why they made a game featuring the two of them.

Jordan vs. Bird: One on One originally released for the PC and Commodore 64 in 1988 and was developed and published by Electronic Arts. This game is a sequel of sorts to the 1983 computer game One on One: Dr. J vs. Larry Bird. The NES version of Jordan vs. Bird released in August 1989. The port was developed by Rare and published by Milton Bradley. This was a US release only. In 1992, the game was ported to both Game Boy and Sega Genesis.

Jordan vs. Bird, for the most part, is a simple basketball game. You get to choose either Michael Jordan or Larry Bird and square off against the other. There are several options for customizing your game and you can play against the computer in single player or play against a friend in simultaneous two-player mode. In addition to a standard basketball game, you can play a couple of mini games. You can play as Michael Jordan in a slam dunk contest or as Larry Bird in a three-point shooting contest. To beat the game, you simply need to win a single game. If you want to do more, you could also aim to win both the slam dunk and three-point shooting contests.

Power past Bird and go for the dunk.

In this game, the controls on offense and defense are similar so I will cover them here together. You move around in all directions by using the D-pad. On offense, you will always face toward the basket, whereas on defense you will face either up toward the basket or down toward the screen, depending on where the ball handler is in relation to you. If you hold the B button down while moving, you will turn your body in that direction and move. On offense, you can lock yourself into facing away from the basket by holding B, pressing Down, and letting go of B. The A button shoots the ball. Press and hold A to jump, then let go of A to release the ball. Jordan can dunk by shooting with A as you move near the basket. You can also press A on defense to jump if the opponent is shooting. Press B while on defense to attempt a steal. You can hold the B button down and continuously try stealing so long as you are standing still. If the offensive player has not yet moved once he has gotten possession of the ball, you can press Select to take a timeout and pause the game. Pressing Start exits the game and takes you back to the Options screen.

The Options Screen is the main menu of this game. For a one-on-one game, you can select from a full game, a game to either 15 or 11 points, and a warm up for practicing. For the slam dunk contest, you can select from the main contest, warm up, or a follow the leader game to help you learn the dunks. For the three-point contest, you can select either the main event or a warm up.

Starting a one-on-one match brings up another options screen. First, select who you want to be. Press B to toggle Larry Bird’s setting and press A to toggle Michael Jordan’s setting. For each player, you can cycle through first player, second player, or computer player. The Play to 11 option lets you choose from either an 11-point game or 15-point game, provided you chose that option from the main menu. You can set the computer’s skill level anywhere from one to four. Winner’s outs determines who gets the ball after scoring. The default of no gives the ball to the defensive side. Fouls can be toggled on or off. Finally, for a full game, you can select the length of the four periods. Selections are two, five, eight, and twelve minutes.

You can play tough defense.

Now you can start shooting some hoops! The basket is in the middle with details written on the scoreboards on either side. The left side shows Bird’s score, followed by the period number, and the 24-second shot clock. The right side shows Jordan’s score, followed by the time remaining in the period, and a repeat of the shot clock. The view pans side to side as you move toward the edges of the screen, leaving part of one scoreboard off screen if you move all the way to the opposite side.

There are only a few differences between the two types of one-on-one modes. We already know the full game is a timed game with four periods, while the other mode is a race to either 11 or 15 points with no time limit. The only other difference is in the scoring. The full game follows standard basketball scoring, with two points for a field goal and three points from beyond the three-point line. In the 11 or 15 game, field goals are worth one point and three-pointers are worth two points.

Both modes display a results screen at the end of each period. This is the same screen that appears when you take a time-out with Select during the game. For each player and period, you get stats like total points scored, shot attempts and percentages, steals, and blocks. You also get some nifty profile pictures of our two stars.

In the Slam Dunk Contest, you can show off Jordan’s dunking ability. You can play this mode with one to four players. In a single player game, the first player is computer controlled and you play second player. For multiplayer, only controller one is used and shared by all the players. At the start, you get a screen where you can choose from one of ten dunks to perform. Move the cursor and select the one you want. Here’s a tip. The dunks on the left side of the list are initiated from the left side of the basket. Same thing for the dunks in the center column and right side of the list. Now you control Jordan alone on the court. Approach the basket from the appropriate direction and hold A to start the dunk. If you hold A the entire time, you will make the basket but not score very high with the judges. A panel of five judges replaces the right scoreboard and your dunk is scored from zero to ten from each judge. The slam dunk contest is secretly a timing game. You want to release the A button as far away from the basket as you can while still successfully dunking. Let go too early and you miss the dunk, but let go too late and you lose points. This mode just takes repetition to learn. Each player gets three dunks and the highest cumulative score wins.

Everyone wants to dunk like Mike.

The other two slam dunk modes are just for practice. Warm up plays just like the normal contest, only you play solo. In Follow the Leader mode, first the computer player selects a dunk at random and shows you how it works. Then, you get a chance to perform the same dunk. This is a useful mode to see what the dunks look like and how to perform them, but it is annoying that you don’t get to pick the dunk you want to follow in this mode.

The three-point contest puts you in Larry Bird’s shoes as you try and score as many shots as you can. In this format, you get 60 seconds to shoot up to 25 basketballs. There are five racks of five basketballs each positioned around the three-point line. You first shoot all five balls in the rack to make the next one appear, and then you walk over to it and start shooting. The judges’ scoring is used to show how many basketballs remain in each rack. The left scoreboard shows the total score and the time remaining. The shooting controls are different in this mode for some reason. You press A to grab a basketball and start your jump, then press B to release and shoot the ball. You get one point for each basket made, while the last basketball in each rack is worth two points. You can play this mode with multiple players or single player against the computer over three rounds. A quirk about this mode is that once you grab a basketball from the rack, the one you previously shot disappears even if it is in midair on the way to the basket. Just make sure you know the outcome of your last shot before you start the next one.

This was my first time playing through Jordan vs. Bird. I know I’ll say this for just about all sports games, but I enjoy watching sports more than playing video games about sports. This is a cheap, affordable game, although it’s one I’ve only owned once out of the many games I’ve had in my house.

Shoot as quickly and accurately as possible.

This turned out to be a game that I figured out on the first day of trying. Unfortunately, I wasn’t recording my trial run and it took me a week before I was able to get some free time and play again. Normally in a basketball game I will look to shoot as many threes as possible, but this time I figured out an exploit right away that goes a little differently. I started off with the main game as Jordan, two-minute periods, and computer level 1, which is said in the manual to be the hardest setting. On offense, I immediately go around Bird and dunk for an easy two points every time. On defense, Bird will start sliding in one direction. If you follow him to the back corner, you can get him trapped there. I hold the B button to steal and make small positional adjustments until I steal the ball, then take it to the basket and dunk. In the worst-case scenario, he will make the three-pointer from the back corner with 3 seconds left on the shot clock. If he misses it, you can hold him back until the ball lands and then recover the rebound easily. I won my game with no trouble. I also played to 11 using Larry Bird. The defensive technique remains the same. On offense, I moved toward the top-right corner and shot the three for two points. Another easy win. Between modes, I switched the computer player level from one to four and I didn’t see any noticeable difference in difficulty.

I found the two mini games harder than the main game. Neither one is particularly easy to win, however attempts are short so eventually one will come through in your favor. In the slam dunk contest, the computer player often seems to score around 35-40 points out of 50 per dunk, while I am usually good for 25-30 points. In my longplay video, after several failed attempts, I won with an above average round for me and a below average round for the computer. On my initial, unrecorded playthrough, I saw the computer outright miss dunks, so it does happen and that can lead to an easy win. The three-point shooting contest goes much the same way. The only advantage you have against the computer is in your shooting speed. The computer player does not finish the final rack, while if you play as fast as possible, you should be able to shoot every single ball. With some of these games, you just have to take every edge you can get!

Jordan vs. Bird is another mediocre basketball game. I don’t mean that in a bad way. On a technical level, it plays well. There isn’t any noticeable flickering or slowdown and the gameplay is clear. The graphics are music are fine but don’t stand out in a meaningful way. It’s the slam dunk contest and three-point contest that make this game stand out. While not enough to base an entire game on, they fit pretty well within the confines of a simple one-on-one basketball game. I would rather play Jordan vs. Bird again than I would want to play Roundball again, but I am also happy enough keeping them both on the shelf. I’m starting to wonder now if there is a truly good basketball game on the NES. It seems that Jordan vs. Bird was ported over because the NES could support one-on-one basketball better than with full teams on either side, which could easily devolve into a flickery, unplayable mess. I suppose we will find out after I play more basketball games.

#91 – Jordan vs. Bird: One on One

#91 – Jordan vs. Bird: One on One (Game to 11)

#91 – Jordan vs. Bird: One on One (Slam Dunk Contest)

#91 – Jordan vs. Bird: One on One (Three-Point Contest)

 
AUG
23
2018
0

#90 – Bonk’s Adventure

Bonk here, bonk there, bonk everywhere.

What a happy caveman!

To Beat: Reach the ending
Played: 6/12/18 – 6/13/18
Difficulty: 4/10
My Difficulty: 4/10
My Video: Bonk’s Adventure Longplay

The 1990s in video games were all about the mascot platformer. The success of Super Mario Bros. was a very early frontrunner to this trend, and although mascots wouldn’t really hit their stride until well into the 90s, there are some early examples of games trying to piggyback off the success of Mario. The Sega Master System tried keeping step with Alex Kidd. Sega eventually switched over to Sonic, a formidable rival. You could say Master Higgins of Adventure Island is also a mascot with a platformer. The SNES and Genesis generation brought a lot of one-off type games with mascot platformers like Bubsy, Aero the Acrobat, Sparkster, and Ristar to name a few. The Nintendo 64 and PlayStation era stepped it up even further with big names like Crash Bandicoot, Rayman, Banjo-Kazooie, and Spyro the Dragon. Within the days of Mario vs. Sonic and the Console Wars was Bonk, a humble caveman starring in his own adventure on the Turbografx-16. There wasn’t a whole lot of console crossover in the early days, but for some reason, Bonk’s Adventure did receive a very late NES port.

Bonk’s Adventure was released first on the PC Engine in Japan in December 1989, named PC Genjin. The PC Engine became the Turbografx-16 in the US, and Bonk’s Adventure was brought over in 1990. The game was developed by Red Company and Atlus. A Famicom port called FC Genjin released in July 1993 and the NES version launched in January 1994. Hudson Soft published the NES version, however the developer is not clear. Red is mentioned on the title screen, but development has also been attributed to A.I. Company Ltd. There were three Bonk games on the PC Engine/Turbografx-16 and two on the Super Famicom, as well as some Game Boy ports and spinoffs and mobile games in Japan.

Bonk’s Adventure is a side-scrolling action platformer. You play the role of the caveman Bonk who must save the Moon Princess from King Drool. Just another cliché video game story. Bonk’s journey through Dinosaur Land will take him through many locales over the seven worlds in the game. You beat the game once you clear all the levels and beat all the bosses.

You gotta use your head.

You move Bonk around with the D-pad. Use the A button to jump. Bonk has a very strong head and he can use it to hurt enemies simply by jumping into them from underneath. Bonk will grab onto walls from the side with his teeth. In this state, you can climb the wall by jumping repeatedly. The B button is used to attack in two different ways. Press B while standing to headbutt. You can hit enemies from the side this way. While in the air, you can press B to do a flip. This turns Bonk over so that you can fall onto enemies with your head and hurt them that way. If you press B again while still in midair, he will orient himself upright again. You can do a bunch of midair spins in the air by pressing the B button repeatedly while in the air. This causes Bonk to fall much slower and you can use the increased airtime to make long horizontal jumps.

There isn’t much on-screen information to go by while playing Bonk’s Adventure. The top left corner shows three hearts. This is your health meter. Enemies can knock off your health in quarter-heart increments, but typically you lose health by half or full hearts. You can read a little more information by pausing the game. The pause display shows the current round and stage number, the number of smiley faces you’ve collected, and how many lives you have remaining.

There are several powerups to aid you in your adventure. A recurring enemy in this game is the Bani-Bana flower. They are stationary enemies that you can knock with a headbutt either from the side or above to reveal their contents. There are a few variations of the Bani-Bana flower. There are white ones that don’t give power ups, but instead launch Bonk skyward if he jumps on top of them. There is also an enemy that masquerades as a flower that leaps away when you wake it up. Since you are often left vulnerable while attempting to reveal the flower’s item, this means you will usually get hurt by this enemy if you aren’t careful.

Get powered up and crash through the bad guys.

There are many different pickups you get from the flowers. Fruit that is shaped like a carrot restores a quarter-heart of health, while red hearts give you one full heart and a big heart gives you three hearts back. The rare big white heart adds a heart to your maximum health. You begin the game with three hearts and can earn up to six. Smiling faces are collectibles that are redeemed at the end of each round. There are both small meat and big meat that power up Bonk when you eat them. You can also find little Bonk figures worth an extra life.

The small meat powerups give Bonk a head of steam, changing his form to the Grand Bonk. This is only a temporary transformation that is quite useful. As the Grand Bonk, if you do a midair spin and land on the ground with your head, it shakes the screen and damages all enemies. If you take a hit, you will go back to normal, and the effect eventually wears off anyway. If you collect the big meat, or collect the small meat again while Grand Bonk, you become invincible for a short time. You can really plow through enemies and clear a lot of ground in this state. When the invincibility wears off, you remain Grand Bonk until that wears off or you lose it.

You may see a small flower within a level. Grab it to ascend to a bonus area. There are three different bonus areas that have different rules. In the Jump the Canyons game, simply work your way to the right as far as you can while collecting the carrot-shaped fruits. Falling off or reaching the end completes the bonus game. You can earn smileys or even a 1up by collecting as many fruits as you can. You play the Flip Through the Air game by jumping off a tall ledge and flipping with B as many times as you can. The number of flips are counted up when you land on your feet at the bottom and you can earn smileys or a 1up. You earn nothing if you land on your head. The third game, Beat the Clock to Reach the Top, is the easiest one. Cling to the wall and press A to jump as fast as you can to reach the top. You earn more rewards for every second remaining on the timer.

There are bonus games you can sink your teeth into.

Most of the worlds follow a similar pattern. Many levels begin with a signpost with the round and stage numbers written on it. Levels proceed in one direction and there’s another post with an arrow on it meaning you’ve reach the end of the stage. The final stage within a round ends in an elevator that looks like a skull. Stand in front of it and press Up to take the elevator to the boss. These bosses are all large enemies that need to be bonked many times to defeat. After the bosses are defeated, evidently you knock them back to their senses. They each speak a few words of text after you finish the fight. Then you get health restored depending on how many smileys you picked up within the round.

One nice thing about Bonk’s Adventure is you don’t get set back at all if you lose a life. When you run out of health, you roll around and keel over. You can hang out in the death state for a long time while the game continues around you. Press Start to wake up with a new life and three hearts of health right where you left off. If you run out of lives, you can continue from the start of the round. This is a pretty severe penalty if you happen to lose your lives on the end of round boss. Fortunately, it seems like you can continue as often as you want.

This was my first time playing through Bonk’s Adventure. On the NES, this game is well known as one of the most expensive NES games. It’s the most expensive game I’ve played so far for this project. Here in 2018, loose carts sell for an average of $500 and complete in box copies average $800-$900. Bonk’s Adventure has consistently been in or near the Top 5 most expensive NES carts. I scored my copy in mint condition for $150 in 2014. The value of the cart was around $400 then so it was a killer deal. I just happened to find the listing for it on eBay at the right time within a lot of other NES games. That $150 bought me Bonk’s Adventure and 10 other common games.

The bosses are usually huge like this.

I had an easy time with Bonk’s Adventure. There was a learning curve to the momentum in-air. For the first couple of rounds I often missed my target while attacking from above. Powerups and health pickups were plentiful enough to help mitigate most damage taken from missed attacks. I was also bad at the bonus games at first, aside from the wall climbing one that is virtually impossible to lose. I thought the second round boss was the hardest one. It jumps around a lot and I couldn’t hit it when it jumped up into me, which sadly happened a lot. Those were the main issues I had with playing the game and I didn’t have any significant troubles otherwise. My first time through the game required one continue, but the second game through for my longplay video was a no-continue run. I didn’t check on the pause screen, but I think I ended up with about a dozen lives in reserve by the end.

Bonk’s Adventure is a quality game that is fun to play. The graphics and animation are very well done. The boss fights are really fun, though I feel they take way too many hits to defeat. The gameplay is tight and there are plenty of ways to attack enemies within the simple controls. The game can get a little repetitive, but at the same time there are a few stages where you swim or climb and it’s nice to have something different. I am not a big fan of the music. The soundtrack feels a little moodier and depressing than I would expect out of a game like this. The song during the end credits is something that would have given me nightmares as a kid playing games alone at night. It’s not objectively bad music, it’s just not for me. This is a good NES game all around. I would recommend playing the game, even if it falls short of the Turbografx-16 version like I suspect it does. But there is no reason at all to own this game unless you are a collector, grew up with it and still have your childhood copy, or got lucky and found it for cheap.

#90 – Bonk’s Adventure

 
AUG
20
2018
0

#89 – Wacky Races

Before you ask, this is not a racing game.

All the other racers drive through the title screen!

To Beat: Reach the ending
Played: 6/9/18
Difficulty: 2/10
My Difficulty: 2/10
My Video: Wacky Races Longplay

I am always amazed at the old series or properties that somehow make their way to the NES. The Adventures of Gilligan’s Island didn’t really make much sense to turn into an NES game, even though the show maintained popularity for years in syndication. Puss ‘N Boots is another game starring a character with a historical past. These are just ones I’ve personally covered so far, but there are plenty more. Both Tom and Jerry and Rocky and Bullwinkle got NES games. Bugs Bunny had two NES games. Hanna-Barbera got in on the action too with two Flintstones games, a Jetsons game, and this Wacky Races game, all on NES. I’m sure there are more I’m forgetting as well. I think you can make a good argument that Wacky Races might be the most obscure cartoon property to get an NES game. It sure seems to have flown under the radar from a gameplay perspective.

Wacky Races is an animated series produced by Hanna-Barbera Productions. The show aired for only a few months in 1968-1969, with 17 total episodes made. The cartoon is about 11 racers competing in various road races against each other. The main villain, Dick Dastardly, and his canine henchman Muttley, drive a powerful vehicle that might win most or all of the races outright. However, being a villain, he often gets ahead of the pack to set traps that usually backfire in some way. Dick Dastardly never wins a race. There were a couple of spinoffs of the original show: The Perils of Penelope Pitstop and Dastardly and Muttley in Their Flying Machines. The show was rebooted in a new animated series beginning in 2017. There were also a few video games based off the franchise.

There were actually two separate Wacky Races games created in 1991. One was made for various home computers in 1991 and 1992 and is a completely different game from the one I played. Wacky Races appeared on the Famicom in December 1991, called Chiki Chiki Machine Mou Race. It was both developed and published by Atlus. The NES version was released in May 1992. This is the first game either developed or published by Atlus I have played so far for the site.

Definitely not a racing game.

You might think a show about racing would have a video game about racing, but instead Wacky Races is a platformer. You take control of Muttley. There are three courses of either three or four levels each, and these courses all have their own plot line. Something has happened to Dick Dastardly and Muttley needs to go and rescue him. You can play the three courses in any order you like, though the stages within the courses all must be played in order. There is a map that shows Muttley’s progress through the course shown after each level. You beat the game once you have completed all three courses.

Wacky Races is a simple platformer with equally simple controls. You use the D-pad to move, mostly walking left and right. Press the A button to jump. You can control the height of your jump a little depending on how long you hold down the button. You can hold Down to duck, and you will jump down through ledges by holding Down and pressing A. The B button attacks. The standard attack is a Muttley bite from close range. The Start button pauses the game, while the Select button is used to trigger items from the item window.

The bottom of the screen contains all the pertinent info you need. On the left are the number of diamonds and lives. You earn an extra life when you collect one hundred diamonds. The middle of the screen shows the item window. The right side shows your health points represented by hearts, and a clock for the stage timer.

Dogs love bones, so collect them to power up.

Wacky Races has a Gradius-like powerup system. The item window is comprised of four icons. There are only three types of collectables in this game: diamonds, extra lives, and bones. When you pick up a bone, a cursor points to the first item in the item window. You can press Select to take that item now or wait until you pick up another bone to move the cursor one space to the right. The cursor will loop back around if you keep finding more bones.

The first two items in the list are weapons. You can only use one at a time but you can switch by collecting bones and nabbing the other one from the window. The first weapon is a bomb. Muttley produces a bomb above his head and throws it. It travels sideways for a while before arcing toward the ground. It blows up on contact with the ground or an enemy. You can hit enemies with it or throw it in front of them a little so that they are hurt by walking into the blast. The other weapon is called the Sonic Bark. Muttley barks and fires an icon in the form of the word “BOW.” This travels through everything and goes about the length of the screen before vanishing. There is a bit of a delay between when you push B and he hurls the bark.

The other two items are support items. The wings give you feather fall ability. While Muttley is falling, you can mash the A button to descend slowly. Muttley slinks down and wags his tail in the air while doing this. The idea is the same as the raccoon tail in Super Mario Bros. 3. The last item in the window is the heart. This item both extends your health meter and restores your health. You begin the game with three health points and can go up to six. Even with a complete health bar, you can still collect the heart from the item window and refill your health any time.

Here’s the obligatory water level.

The stages in the game are also quite simple as they all move from left to right. Stages are broken up into different sections by an arrow sign. Just walk to the edge of the screen to proceed to the next section. If you die, you go back to the beginning of the section. I found that the levels went on a lot longer than I thought they would. Many levels have three or four sections to them that take a little walking to reach the end. The levels themselves are generic platforming for the most part. There is a swimming level and an ice level plus there’s a stage where you bounce on clouds. There are a few more gimmicks like that along the way.

Each level ends with a boss battle. These are all other contestants in the Wacky Races and they all fight you within their vehicles. I think they did a good job making the boss sprites look like the vehicles from the show. The boss arenas are locked down to a single screen. There is a bone provided so you will be able to get a weapon if you start from nothing. The bosses have various movement patterns and may throw projectiles of their own. After taking several hits, it will look like you have defeated the boss, only for it to come back with a second, more aggressive movement pattern. All bosses follow this format. Just keep attacking and you’ll achieve victory!

You begin the game with three lives. If you lose all your lives, you can continue. The manual doesn’t say but it appears you can continue as many times as you like. Even better is that a continue also puts you back at the start of a section. The penalty for failure is this game is minor.

In this game, car chases dog.

This was my first time playing through Wacky Races. It’s a very uncommon game, and that comes with an uncommon price tag. The current selling price is around $200 for just the loose cart. It was one of the last ten games I bought for my licensed set. I had a chance to buy a copy earlier though. There is a local flea market that opens once a month. A seller had a copy there for at least a couple of years for $82. Around then the game had raised in price from around $60 to $120, so eventually the flea market copy was a good deal. Of course, by the time I was ready to go buy it, it had sold just a month or two prior. I had to wait a couple more months before I bought my copy on NintendoAge. I bought it along with Bubble Bobble Part 2 and I ended up getting it for around the price I missed. The only bad thing is that there’s an ink stamp on the front of the cart that I could not get cleaned. Maybe that’s a little reminder of what happens when you wait on something you shouldn’t.

The sad thing is that $200 doesn’t get you much with Wacky Races in terms of gameplay. This is a good enough game, but it is also really easy. I beat the game on my first try with over twenty lives remaining and used no continues. I counted seven deaths on my playthrough. That may not sound great but it’s low enough for a lengthy game like this that I’ve never played before. My deaths mainly consisted of either falling in holes or dying at the bosses. The boss battles in my mind are the hardest part of the game since they are big sprites and they take a bunch of hits to go down. I didn’t find the game challenging, not even considering the infinite continues you can use. It’s a light, simple game with a hefty price tag.

Wacky Races is a solid NES game in most regards. The graphics, music, and controls are all spot on. There are a few cutscenes that are nicely detailed and there’s even a little humor to go along with it. The powerup system works well and you don’t have to wait long to switch weapons if you want. On a technical level, everything runs great. The levels suffer from just being too ordinary. You simply move left and right. There’s a good variety in the graphics from stage to stage, but the level design does not stand out in a meaningful way. Most enemies don’t pose much of a threat. The platforming is basic too, with only a few spots that are mildly tricky. The boss battles get repetitive, though I do appreciate that they change patterns midway through each fight. This game is only worth buying if you are a collector. In that case, you might as well play through it and beat it quickly like I did.

#89 – Wacky Races