Take on the NES Library

An 8-bit Extravaganza!

ltd

AUG
23
2018
0

#90 – Bonk’s Adventure

Bonk here, bonk there, bonk everywhere.

What a happy caveman!

To Beat: Reach the ending
Played: 6/12/18 – 6/13/18
Difficulty: 4/10
My Difficulty: 4/10
My Video: Bonk’s Adventure Longplay

The 1990s in video games were all about the mascot platformer. The success of Super Mario Bros. was a very early frontrunner to this trend, and although mascots wouldn’t really hit their stride until well into the 90s, there are some early examples of games trying to piggyback off the success of Mario. The Sega Master System tried keeping step with Alex Kidd. Sega eventually switched over to Sonic, a formidable rival. You could say Master Higgins of Adventure Island is also a mascot with a platformer. The SNES and Genesis generation brought a lot of one-off type games with mascot platformers like Bubsy, Aero the Acrobat, Sparkster, and Ristar to name a few. The Nintendo 64 and PlayStation era stepped it up even further with big names like Crash Bandicoot, Rayman, Banjo-Kazooie, and Spyro the Dragon. Within the days of Mario vs. Sonic and the Console Wars was Bonk, a humble caveman starring in his own adventure on the Turbografx-16. There wasn’t a whole lot of console crossover in the early days, but for some reason, Bonk’s Adventure did receive a very late NES port.

Bonk’s Adventure was released first on the PC Engine in Japan in December 1989, named PC Genjin. The PC Engine became the Turbografx-16 in the US, and Bonk’s Adventure was brought over in 1990. The game was developed by Red Company and Atlus. A Famicom port called FC Genjin released in July 1993 and the NES version launched in January 1994. Hudson Soft published the NES version, however the developer is not clear. Red is mentioned on the title screen, but development has also been attributed to A.I. Company Ltd. There were three Bonk games on the PC Engine/Turbografx-16 and two on the Super Famicom, as well as some Game Boy ports and spinoffs and mobile games in Japan.

Bonk’s Adventure is a side-scrolling action platformer. You play the role of the caveman Bonk who must save the Moon Princess from King Drool. Just another cliché video game story. Bonk’s journey through Dinosaur Land will take him through many locales over the seven worlds in the game. You beat the game once you clear all the levels and beat all the bosses.

You gotta use your head.

You move Bonk around with the D-pad. Use the A button to jump. Bonk has a very strong head and he can use it to hurt enemies simply by jumping into them from underneath. Bonk will grab onto walls from the side with his teeth. In this state, you can climb the wall by jumping repeatedly. The B button is used to attack in two different ways. Press B while standing to headbutt. You can hit enemies from the side this way. While in the air, you can press B to do a flip. This turns Bonk over so that you can fall onto enemies with your head and hurt them that way. If you press B again while still in midair, he will orient himself upright again. You can do a bunch of midair spins in the air by pressing the B button repeatedly while in the air. This causes Bonk to fall much slower and you can use the increased airtime to make long horizontal jumps.

There isn’t much on-screen information to go by while playing Bonk’s Adventure. The top left corner shows three hearts. This is your health meter. Enemies can knock off your health in quarter-heart increments, but typically you lose health by half or full hearts. You can read a little more information by pausing the game. The pause display shows the current round and stage number, the number of smiley faces you’ve collected, and how many lives you have remaining.

There are several powerups to aid you in your adventure. A recurring enemy in this game is the Bani-Bana flower. They are stationary enemies that you can knock with a headbutt either from the side or above to reveal their contents. There are a few variations of the Bani-Bana flower. There are white ones that don’t give power ups, but instead launch Bonk skyward if he jumps on top of them. There is also an enemy that masquerades as a flower that leaps away when you wake it up. Since you are often left vulnerable while attempting to reveal the flower’s item, this means you will usually get hurt by this enemy if you aren’t careful.

Get powered up and crash through the bad guys.

There are many different pickups you get from the flowers. Fruit that is shaped like a carrot restores a quarter-heart of health, while red hearts give you one full heart and a big heart gives you three hearts back. The rare big white heart adds a heart to your maximum health. You begin the game with three hearts and can earn up to six. Smiling faces are collectibles that are redeemed at the end of each round. There are both small meat and big meat that power up Bonk when you eat them. You can also find little Bonk figures worth an extra life.

The small meat powerups give Bonk a head of steam, changing his form to the Grand Bonk. This is only a temporary transformation that is quite useful. As the Grand Bonk, if you do a midair spin and land on the ground with your head, it shakes the screen and damages all enemies. If you take a hit, you will go back to normal, and the effect eventually wears off anyway. If you collect the big meat, or collect the small meat again while Grand Bonk, you become invincible for a short time. You can really plow through enemies and clear a lot of ground in this state. When the invincibility wears off, you remain Grand Bonk until that wears off or you lose it.

You may see a small flower within a level. Grab it to ascend to a bonus area. There are three different bonus areas that have different rules. In the Jump the Canyons game, simply work your way to the right as far as you can while collecting the carrot-shaped fruits. Falling off or reaching the end completes the bonus game. You can earn smileys or even a 1up by collecting as many fruits as you can. You play the Flip Through the Air game by jumping off a tall ledge and flipping with B as many times as you can. The number of flips are counted up when you land on your feet at the bottom and you can earn smileys or a 1up. You earn nothing if you land on your head. The third game, Beat the Clock to Reach the Top, is the easiest one. Cling to the wall and press A to jump as fast as you can to reach the top. You earn more rewards for every second remaining on the timer.

There are bonus games you can sink your teeth into.

Most of the worlds follow a similar pattern. Many levels begin with a signpost with the round and stage numbers written on it. Levels proceed in one direction and there’s another post with an arrow on it meaning you’ve reach the end of the stage. The final stage within a round ends in an elevator that looks like a skull. Stand in front of it and press Up to take the elevator to the boss. These bosses are all large enemies that need to be bonked many times to defeat. After the bosses are defeated, evidently you knock them back to their senses. They each speak a few words of text after you finish the fight. Then you get health restored depending on how many smileys you picked up within the round.

One nice thing about Bonk’s Adventure is you don’t get set back at all if you lose a life. When you run out of health, you roll around and keel over. You can hang out in the death state for a long time while the game continues around you. Press Start to wake up with a new life and three hearts of health right where you left off. If you run out of lives, you can continue from the start of the round. This is a pretty severe penalty if you happen to lose your lives on the end of round boss. Fortunately, it seems like you can continue as often as you want.

This was my first time playing through Bonk’s Adventure. On the NES, this game is well known as one of the most expensive NES games. It’s the most expensive game I’ve played so far for this project. Here in 2018, loose carts sell for an average of $500 and complete in box copies average $800-$900. Bonk’s Adventure has consistently been in or near the Top 5 most expensive NES carts. I scored my copy in mint condition for $150 in 2014. The value of the cart was around $400 then so it was a killer deal. I just happened to find the listing for it on eBay at the right time within a lot of other NES games. That $150 bought me Bonk’s Adventure and 10 other common games.

The bosses are usually huge like this.

I had an easy time with Bonk’s Adventure. There was a learning curve to the momentum in-air. For the first couple of rounds I often missed my target while attacking from above. Powerups and health pickups were plentiful enough to help mitigate most damage taken from missed attacks. I was also bad at the bonus games at first, aside from the wall climbing one that is virtually impossible to lose. I thought the second round boss was the hardest one. It jumps around a lot and I couldn’t hit it when it jumped up into me, which sadly happened a lot. Those were the main issues I had with playing the game and I didn’t have any significant troubles otherwise. My first time through the game required one continue, but the second game through for my longplay video was a no-continue run. I didn’t check on the pause screen, but I think I ended up with about a dozen lives in reserve by the end.

Bonk’s Adventure is a quality game that is fun to play. The graphics and animation are very well done. The boss fights are really fun, though I feel they take way too many hits to defeat. The gameplay is tight and there are plenty of ways to attack enemies within the simple controls. The game can get a little repetitive, but at the same time there are a few stages where you swim or climb and it’s nice to have something different. I am not a big fan of the music. The soundtrack feels a little moodier and depressing than I would expect out of a game like this. The song during the end credits is something that would have given me nightmares as a kid playing games alone at night. It’s not objectively bad music, it’s just not for me. This is a good NES game all around. I would recommend playing the game, even if it falls short of the Turbografx-16 version like I suspect it does. But there is no reason at all to own this game unless you are a collector, grew up with it and still have your childhood copy, or got lucky and found it for cheap.

#90 – Bonk’s Adventure

 
JUL
17
2018
3

#83 – The Black Bass

Bag and behold the biggest black bass believable!

The music is much better than I expected.

To Beat: Reach #1 ranking
To Complete: Reach #1 ranking and finish the season
My Goal: Be #1 on the final day of the season
What I Did: Met the goal
Played: 4/27/18 – 5/8/18
Difficulty: 5/10
My Difficulty: 5/10
My Video: The Black Bass Final Tournament

I am not interested in fishing. At least as an adult. I fished a few times when I was a kid just because you’ll try lots of different things at that age. Dealing with the hooks, live bait, and the caught fish was all handled for me when I was young. Thinking of doing that now almost sends shivers up my spine. Just let me stay inside with my video games, please! Despite my attitude about it, fishing is still a very popular outdoor activity. If you consider it a sport, it may well be the most popular sport in the world. It’s no surprise then that there is an NES fishing game. If I have to go fishing, I’d much rather do it this way!

The Black Bass first released on the Famicom in October 1988. It was published by Hot-B and developed by Another Ltd. This is the same developer who made Championship Bowling. The NES release came to North America in September 1989. This game is actually a sequel and is known in Japan as The Black Bass 2. Japan’s original The Black Bass game first appeared on the MSX computer in 1986, followed by the Famicom release in 1987. The title screen of the NES version calls the game The Black Bass USA, which is how this game is sometimes referred to in Japan. There have been many games in The Black Bass series since these games, including the NES sequel The Blue Marlin.

The Black Bass is a fishing game with no story. Your task is to enjoy fishing for Black Bass in several tournaments. There is a ranking system that scores you on how well you performed during the tournament. If you do well enough, you can go to different lakes in later tournaments that have bigger fish to catch. The ultimate goal here is to achieve #1 ranking out of a pool of 200 contestants.

You better do what the man says.

There are twelve tournaments you will play in The Black Bass. The tournament season begins in June and ends in September, despite the manual claiming it ends at the end of October. Each month has three tournaments, always on the 5th, 15th, and 25th of each month. There is a clock system in the game denoting the start and end times of the tournament. Each one begins at 6:00am, but the ending time varies depending on the calendar date of the tournament. Early season and late season tournaments have shorter durations than the ones in the middle of the season.

After the title screen, you have some selections to make. First, you enter your name in. This is six characters long consisting of just A-Z. The cursor points to the first character and you have to scroll through the list of characters with Up and Down for each and every character. Press Left or Right to position the cursor to the next character and input that one from scratch. Press A to lock in your name choice. Now you have three more options. You can begin a new game as a new player. This puts you at Lake Amaya on June 5th for the first tournament. The other two options require a password. You can either continue a game mid-season, or just see your stats. Passwords are 16 characters long consisting of A-Z and 1-5, also with the long entry method. This system is tedious, for sure. Also, be careful of zero, O, and Q which look a lot alike. If you choose stats, you see a screen with your information and then you go right back to selecting another option. You have to put the entire password back in if you want to continue a game with the same password after checking stats, so it’s really not worth it.

Once you start a new game, first you see a screen from I guess the tournament director. This shows the lake you are on, the date, and duration of the tournament. The next screen has even more information. Again, you see the lake, date, and timeframe of the tournament. You also see your ranking, which begins at 200th place. Next is the weather conditions. I have seen Clear, Cloudy, Light Rain, and Heavy Rain. You also see the temperature outside and the depth of the lake. Next up is the map screen. This is an overhead view of the entire lake. A small blinking boat shows your current location. You can use the D-pad to move the boat around and choose where you want to start finishing. This screen also shows the current time. Press A to choose your location, and finally it is time to start fishing!

You can boat to whatever spot you want instantly.

The fishing mode starts with your character at the bottom of the screen. There is a white cursor that you can move with Left or Right. This is the direction of your cast. When you decide on the direction, press A to begin casting. This starts a power meter at the bottom of the screen that grows and shrinks. When it lines up with the power you want, press A again to cast out your line. The screen will scroll vertically a long way to keep up with your lure, but it does not scroll sideways. If you cast off the sides of the screen, you lose your lure and have to cast again with a different one. It’s best to shoot it straight up the center most of the time. You can also press and hold B while in the air to try and hit the brakes on your cast and stop it short.

Once your lure is in the water, you have a different set of controls to move it around. Press Left or Right to move the lure sideways. You can press Up to move the lure toward the surface of the water. Press and hold A to reel in your line. If you hold down both A and B at the same time, it will pull the line in all the way back to the boat automatically. This is useful if fish just aren’t coming or you get your line caught on something. The bottom of the screen shows how deep the lure is in the water, and this is also expressed by the same red bar used for casting. The idea of fishing is to move the lure around in such a way to make it attractive to fish, as if the lure is struggling. Sometimes a shadowy fish will appear from off screen and approach your lure. The fish can either bite or leave, and if he bites you try and catch it. If you’re like me, you probably won’t even hook a fish the first time, so we will come back to this later. You are done for now once you reel in your line all the way.

The menu screen should appear next, containing a bunch of different options. You can select the lure you want from a list on the Select Lure screen. Each one is named along with the number you have. Press Up or Down to select the lure, and press Left or Right to change the color between Red, Blue, and Silver. The quantity depends on color and lure type, and you don’t have every option at the start of the game. Choose the one you want and press A to select it. Some lures float on top of the water, and others sink. Each one has its own feel for how you move it around in the water, so feel free to experiment with different ones to find those you like.

By the end of the game, you can use any lure you want.

The next two screens are informational. Select Data For This Point to see the map of the lake. There is a message on the side of the screen that either says “Here is nice bass point” or “This point has little bass” depending on where you moved your boat. You want to fish only at those nice bass points, so you go to this screen to see if you are in a good spot for fishing. Press A to advance to the next screen. This shows the current time, current weather conditions, and the end time of today’s tournament. Press A again to go back to the menu screen. The Your Results So Far Today screen gives you exactly what it says. It shows three at a time the ten biggest fish you caught today, including the kind of fish, its weight, and which lure you used to catch it. The final screen displays the number of bass caught today and the average weight, plus the number of bass caught total and the average weight over all tournaments. Go back to the menu with A.

The final three options are Move, Casting, and End. Move brings you back to the map screen to reposition your boat to a new fishing spot. You go from that screen right back to fishing. Casting sends you back to fishing at your current location. End is used when you are completely done fishing for the day. Only use this option if you are sure you are satisfied with today’s catch or you don’t have enough time remaining to catch any more fish.

Now we are on to the good stuff. You’ve casted your line and attracted a nice fish that bit your lure. Now its time to try and reel it in. The bottom of the screen now shows a picture of a fish. This indicates the strength of the fish, and over time as you fight the picture changes to a more pathetic looking fish. This goes all the way down to an image of fish bones once you get the fish very tired. You also see the depth of the fish in both numeric form and red meter form. Press the A button to reel in your line. You can use the D-pad to try and pull the fish in a certain direction. The B button is for thumbing the line. This essentially acts as a brake by holding your thumb down against the line to keep it from moving. It helps if the fish is trying to swim away. If you decide not to try catching the fish, you can try pressing Select to let it go. This doesn’t always work and you only get one try to free the fish.

If it’s not a black bass, it’s not worth your time.

There are several scenarios where the fish can get away. While you are fighting the fish, you also have to manage the strength of your fishing line. There is a shrill ringing sound you hear whenever the line is close to breaking. You need the sound on while playing The Black Bass to tell since there’s no on-screen indicator. You can cool the line down by letting go of the buttons, but this also allows the fish to recover his strength too. You have to find your technique to manage both of those things so that you can successfully catch your fish. If you reel in too hard for too long, the line will break and you lose both your fish and your lure. This can also happen if the fish gets too far away from the boat or if it travels off the sides of the screen. At random, the bass can also leap out of the water. This can cause the fish to come off the line, either by taking the lure with it or letting it all go completely. Often enough the fish will stay attached and you can continue the fight. What happens seems to be completely random, so it’s not your fault if the fish gets away this way.

To catch the fish, you need to pull it down to the bottom center of the screen. You can do this by wearing out the fish completely so that it is easier to draw in, or sometimes you can catch a fish quickly by hooking it close to the boat. Once you get it all the way in you will see the fish go into a basket. Now you get a celebratory screen of your catch! The most important factor is the weight of the fish you just caught. You get to see the weight tick up from zero pounds and it’s exciting to see how high it goes whenever you reel in a big one. You see the time of day the fish was caught and how long it took you to bring it in. You also see the type and color of bait used. Then you go back to the menu screen.

The tournaments go on for quite some time, but eventually they all end. As soon as your reach the end time, fishing ends abruptly, even if you are in the middle of a fight. You can also choose to quit prematurely with the End option from the menu. This brings you to one more menu. Choosing Ceremony shows your end results from the day, including your new ranking. You also get your password for the next tournament. If you rank well enough, you advance to the next class and get a nice little ceremony to celebrate your accomplishment. If you don’t think you did well, you can choose to Go Back Home from the menu, sending you to the title screen. You can also view your results from today and your overall results from the season.

It’s big indeed!

The ranking is determined on how many bass caught, the biggest one you caught today, and the average weight. Other fish caught such as trout or pike do not factor into the ranking at all. The rank you can get also depends on which tournament class you participated. The starting class is Class C which is for participants ranked 101 through 200. Class B is for places 51 through 100, and Class A is for 1st place through 50th place. The top five in each class advance up to the next class, while the bottom five go down a class. It seems counterintuitive, but it is not a huge loss to go back down a class. Twelve tournaments are a lot, and you can rise up from 200th to 1st place in three tournaments if you are really good. Rankings are also based on the current tournament and are not driven on cumulative results over the entire season. When you advance to Class B, you compete at Japan Lake. At Class A, you alternate between Lake More and San Lake. The lakes at higher classes contain larger fish, so not only is the ranking standard higher, but the difficulty of landing heavier fish also increases.

The ending condition for The Black Bass is up for debate. The game does not end officially until all twelve tournaments are completed. Since the goal of the game is to get the top ranking, that is what I chose as the minimum for considering the game beaten. I don’t think it’s fair to say you beat the game by participating in all tournaments dead last. On the other hand, some say you need to both get 1st place and finish the season, since you don’t get a real ending if you don’t complete the season. My personal standard is to do both things, but I took it a step further and insisted on finishing the final tournament in 1st place.

This was my first time playing The Black Bass. I had no intention of playing this game until the very end of the project, since a long game of all fishing seemed very unappealing at the time of compiling my game list. I picked the game up in an eBay lot for a few bucks. The game falls in the middle of the pack in collectability as a semi-common game costing around $5-$10.

Now I have him right where I want him.

The Black Bass is a long game and I made it longer by not figuring things out right away. My first day of fishing was just figuring out how the game works on a basic level. I finished right where I started in 200th place. The next day I bumped up to 143rd place, but the following day I stepped back to 156th place. At this point I thought there was no way I would improve from here, so I started over. I failed to understand that rankings are only for the day of the tournament, and past days do not factor into it at all. The manual didn’t really explain it clearly, but I suppose I shouldn’t expect it to. The other thing I did was put in a special code listed in the manual to help out. If you input the name “HBMAX” the meters change. Cast out your line and the display where it normally shows the depth of the lure now displays a number of the desirability of the lure to fish. Now you can see if how you are moving the lure around is helping you out or not. You want to get the value at or above 6.0. Once you are fighting a fish, this number switches over to the tension of the line. Once it hits 10 you get the chiming sounds, at I think at 12 is when the line breaks. I think it’s useful to try it out once or twice to ensure your technique is solid.

I started completely over from here. My other sessions allowed me to find all the good bass spots and I was able to advance to Class B on my first try. The next day at Japan Lake did not go well and I got bumped back to Class C, but then I went on a winning streak. I won Class C, Class B, and both Class A tournaments, one at each lake, all in a row. That put me halfway through the season in first place. I wanted to speed my way through the other tournaments just because it was taking at least an hour to do each tournament. My goal was to see how few bass I could catch and yet do well enough to stay at Class A. I had a couple of failures, but I managed to finish most of the remaining tournaments in half the time it should have taken. I wanted to finish the last two tournaments both in 1st place to show off the final tournament in my gameplay video. In the penultimate tournament I thought I did well but ended up 6th. It took me three tries to get first place at the last tournament, mostly because it is the shortest tournament and therefore more restrictive in time to catch enough big fish. I think it was worth it to end up in first place at the end of the season. My biggest catch in my video was a 16-pounder, and my biggest overall was 18.1 pounds. I know there are 20+ pound bass in the game but I wasn’t fortunate enough to bag one.

Some of the bass spots have many obstacles.

Here are several tips if you want to play this game yourself. Each lake has five locations good for catching bass. You can check the Data for this Point screen to see if you are in one of those spots, but there’s a better way to check. All poor fishing spots are in empty, dark blue water. If you are fishing anywhere else, then it’s a good spot. I found the type and color of the lure really didn’t matter much. It may have some effect on either the visibility or desirability, but not much. The pencil bait is the most responsive bait to control so I used that one the most. I switched over to the plastic worm for the middle of the day because it seemed more helpful in getting fish to show up. You have to be able to tell roughly the size of the fish you want as it is approaching your lure so that you can back out quickly if it’s not one you want. My luring technique was a quick move left, a quick move right, a quick move up, and repeat. A good technique is to try and hook fish near your boat so that you don’t have to reel them in as far. You can also try landing a fish in front of a rock or something solid to give the fish a harder time to get away. To catch bigger fish, you need to wear them out. My philosophy is to always keep the fish moving. Thumb the line with B when they are moving away from you, and then start reeling once they stop moving. Ideally, you want the fish to be at least one notch below full strength before your line starts to fatigue with the warning chime. Then it’s a matter of managing your line while keeping the fish from straying too far away. It may take some time, and they can always jump and get away anyway, but eventually it will wear out all the way and then you can finish the job. Finally, try and release any fish if it’s either not a bass or too small. It might not always work, but it never hurts to try. It’s always successful to let a fish off during Class A tournaments.

The Black Bass was more fun than I expected. I would say the graphics are average, but the music is good and a lot better than I would have guessed. There’s a good variety in both lakes and prime fishing spots. The mechanics are sound and have some nuance, which makes it difficult to start playing but becomes more engaging later on. The biggest negative is that the gameplay can become very sluggish. Some lures are very slow to move and it takes a long button press for the lure to respond to your movements. This gets worse when a fish enters the screen. There doesn’t appear to be a lot going on and yet there is some significant slowdown. Your lure can get stuck in some environments and it is especially frustrating when a huge bass bites and you can’t move it at all. Password entry is tedious. The season is long, and the gameplay gets repetitive. I still don’t like fishing, however, even with the issues this is a fun fishing game.

The developer Another Ltd created the only NES bowling game, Championship Bowling, and here they made one of two fishing games on the console. I don’t know if working on one-off NES games like this was something that was planned or not. Championship Bowling is a solid bowling game, and The Black Bass is an equally solid fishing game.

#83 – The Black Bass (1st place)

#83 – The Black Bass

by :
comment : 3
 
DEC
18
2017
0

#60 – Advanced Dungeons & Dragons: Heroes of the Lance

It’s known as one of the worst NES games, and that mostly holds up.

Love that over half of the title screen is text.

To Beat: Reach the ending
Played: 9/29/17 – 10/2/17
Difficulty: 5/10
My Difficulty: 5/10
Video: AD&D Heroes of the Lance Longplay

Clearly, I am a huge gaming nerd, especially when it comes to Nintendo and the NES. Mostly I go it alone and play single-player games, but occasionally I will play multiplayer games. Tabletop gaming has become quite popular, and I do like to get together with friends to play sometimes. I don’t take it much farther than that, and so I have never been interested in Dungeons and Dragons. Maybe it’s the idea of a long campaign with a group of people that doesn’t appeal to me and my single-player ways. The NES has four games bearing the Dungeons and Dragons name and I had no interest in them. I had originally planned to skip them in this project altogether. However, plans change, so here we are with the first game in the set. AD&D: Heroes of the Lance is generally regarded as a bad game, and having played it for myself I can see why.

Dungeons and Dragons, abbreviated D&D, is a tabletop RPG that takes place in a fantasy setting. Players choose characters and team up to battle monsters and solve puzzles in scenarios devised and managed by a Dungeon Master. The game was originally published in 1974 by Tactical Studies Rules, Inc., or TSR, but is now published by Wizards of the Coast as of 1997. D&D split early on with the lighter game keeping the name, while a more rules-heavy experience was called Advanced Dungeons and Dragons, or AD&D. The NES games fall under the AD&D banner. These two games merged back together when the 3rd Edition of D&D released in the year 2000, and this structure remains today.

Naturally, there were many video games created or spun off from D&D. It’s mindboggling how many different series and games there are under so many different names that I can’t even begin to make sense of it myself let alone try to explain it. There are different series of games that might have familiar names to you, such as the Gold Box series, Baldur’s Gate, and Neverwinter Nights. Some follow the strict D&D ruleset, while others only utilize the setting. Several games are not RPGs at all. The NES received four different AD&D games, and in order of release they are Heroes of the Lance, DragonStrike, Pool of Radiance, and Hillsfar.

This intro screen has more color than anything else in the game.

AD&D: Heroes of the Lance was released on many home computers beginning in January 1988. The NES port of the game was released in January 1991, and the Famicom version came next in March 1991. It was developed by U.S. Gold Ltd. and Strategic Systems, Inc. Natsume is also credited as a developer, but as far as I can tell they are only linked to the game’s soundtrack. The NES game was published by FCI, while Pony Canyon published the Famicom game. The sequel, Dragons of Flame, was released on the Famicom in February 1992 but did not make it to the NES.

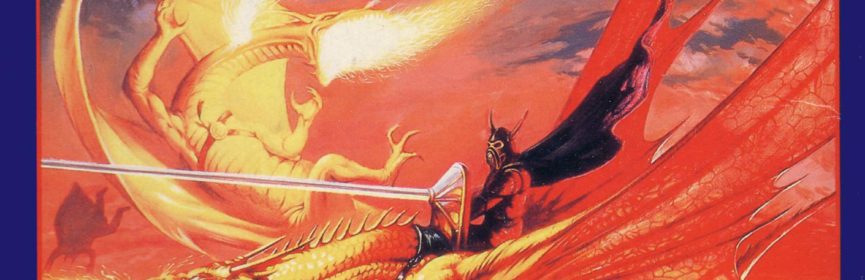
The story is based on the Dragonlance novels written by Margaret Weis and Tracy Hickman. In the land of Krynn, people have abandoned their traditions and faith, causing the Queen of Darkness, Takhisis, to awaken evil and take power in the land. The ruins of Xak Tsaroth hold the keys to restoring the traditions and regaining balance of power, and these keys are the Disks of Mishakal. Of course, Takhisis knows of the Disks and has sent the dragon Khisanth to protect them. You play the role of the party known as the Companions of the Lance, who must venture into Xak Tsaroth to fight the dragon, recover the disks, and restore the land of Krynn. After entering the ruins of Xak Tsaroth, the warrior Goldmoon of the Companions entrusted her blue crystal staff to a statue of the goddess Mishakal, who then blessed the staff and offered her power to aid in recovering the disks. You got all that, right?

Heroes of the Lance is one of the D&D games that is not a strict RPG. Instead, it is a side-scrolling dungeon crawler. You control the entire party of eight Companions of the Lance through the maze of Xak Tsaroth. All the action takes place in the side scrolling view. You enter other rooms to different parts of the maze, and the goal is to find the entrance to the next level of the dungeon. There are only three levels in the game, culminating in the final battle with Khisanth. Along the way you will fight enemies, jump over pits, cast spells, and collect items. You can rearrange your party of eight characters in any order you choose, and each member has their own stats, abilities, and weapons that aid in completing the adventure.

Perhaps this first screen is what many players have seen the most.

The eight characters in the party are Goldmoon, Sturm, Raistlin, Caramon, Tanis, Tasslehoff, Riverwind, and Flint. Goldmoon has the blue crystal staff which is used to cast clerical spells. Sturm is a powerful knight who wields a magical Long Sword. Raistlin is a physically weak mage with powerful magical abilities using the Staff of Magius. Caramon is another powerful warrior armed with both a sword and throwing spear. Tanis is a half-elf armed with a sword and a bow. Tasslehoff is of a race called kender, and he is armed with a hoopak which can be used as a sling for long range attacks and as a staff for close range combat. Riverwind is another strong fighter armed with a sword and a bow. Finally, Flint is a dwarf who wields both a battle axe and throwing axes.

The controls are complex and they change somewhat depending on the situation. You walk left and right using the D-pad. If you walk in the same direction for a while you will start running, or you can run by holding Up combined with either Left or Right. While running you can jump with A. You can also duck while standing still by holding A and pressing Down. That isn’t intuitive, but it occasionally helps. There is a compass on the bottom left of the screen, and one of the directions lights up if you are standing by a door. You can proceed through the door by holding either Up or Down depending on which side the door is on. You must hold the button for a full second to go through the door. You can use the B button combined with a direction for the lead character to use ranged weapons. If enemies are too close then you can’t use ranged weapons, and you also have to equip them before you can use them in the first place. The Select button both brings up and exits the main menu.

Combat introduces some different controls. If an enemy is near enough, the word Combat will display on the bottom. You can’t use ranged weapons anymore when this indicator in on. You can still move, duck, jump, run, and enter the menu the same as above. To attack the enemy with the lead character, hold down the B button to swing your weapon. You need to be right next to the enemy to land any hits. You can keep the B button held to do continuous attacks. You can also attack high by holding the D-pad diagonally Up and toward the enemy, and attack low diagonally with Down. Some enemies can only be hit high or low. You will see a little circle whenever you land an attack, but you will miss about as often as you hit.

Well actually this is the screen you will see the most often.

You will spend a lot of time in the game menu. While in the menu, press A to choose an option, press B to cancel and go back, and press Select to leave the menu. The Hero Select option lets you view each character’s stats, health, and items. You also use Hero Select to move party members around. Press A to choose a party member, and press A again when a different party member is highlighted to swap the two characters. Magic User Spells lets you use Raistlin’s spells, and Clerical Staff Spells lets you use Goldmoon’s spells. More on spells in a bit. The Use command lets you use some items like potions and equip some items like bows. For example, to equip Caramon’s throwing spear, go to the Use command, select Caramon, and then select the spear. It will then appear next to the Using field on both the Use or Hero Select screen when successfully equipped. The Score option shows you how many of each enemy you have killed as well as your experience points and score. Yes, Heroes of the Lance has a scoring system. The Give, Drop, and Take commands all move items around. Use the Give command to trade items between party members just like how you switch characters around. Drop puts an item on the ground, and Take is used to pick items up. You can find items on the ground or even in the background during play. Stand near one and use the Take command to give it to whichever party member you want. You can save the game at almost any time using the Save command, or load a save file anytime with the Load command. There are three save slots that either display as Old if it has save data or New if it is empty.

To cast spells with Raistlin or Goldmoon, you have to do two things. First, you must equip each character with their staff with the Use command. Second, you have to put the spellcaster in the front row. On the screen, the top four characters are in the front row and the others are in the back row. Party alignment is also important because any of the front row characters can take damage during combat, although the lead character is most likely to take the hit. Use either of the spell commands in the menu to display the spells and select one to cast it. While exploring, if the spellcaster is the lead character, you can simply cast the last spell used with the B button as a long range attack. In combat range, you must use the menu to cast spells.

Trapping enemies and running past them is an effective strategy.

Raistlin is the only character that can use the Magic User Spells option. This option displays the spell list and the charge meter showing how much power is left in the staff. Each spell uses up a different amount of charge, and when this meter is empty you can no longer cast spells. The same goes for Goldmoon and her Clerical Staff Spells. Raistlin’s magic spells are primarily combat oriented. Charm, Sleep, and Web are all used to temporarily stop enemies. Magic Missile and Burning Hands are attack spells. Detect Magic highlights magical items in the field with sparkles, and Detect Invisible reveals invisible objects. The Final Strike spell uses up all the energy in the staff to defeat all monsters on screen, though Raistlin loses his life in the process. To use this spell, you have to put Raistlin in the lead and also be outside of close combat range.

Goldmoon can use all Clerical spells with her Blue Crystal Staff. She has two healing spells, Cure Light Wounds and Cure Critical Wounds. Protection from Evil weakens enemies near the party, while Prayer builds the party up temporarily. Find Traps shows any traps on screen, such as falling rocks. She has two combat spells. Hold Person can disable an enemy like the Charm or Sleep spells, and Spiritual Hammer is an attack spell. Goldmoon can revive defeated party members with the Raise Dead spell. If a character is killed in combat, their body remains on the ground. You can stand near it and use Raise Dead to revive the character with a few hit points. However, if you change screens before reviving the character or cause the lead party member to fall in a pit, they are gone for good. In this case, their character portrait shows a tombstone instead of being grayed out. The last spell is Deflect Dragon Breath, which causes the lead character to glow and avoid all damage from the acid spewed by dragon hatchlings. If Goldmoon is defeated, a few other characters can pick up her staff and perform a subset of Clerical spells.

There are quite a few items found in the dungeon. There are five colors of potions that do different effects, such as healing, party member protection, or holding enemies. A ring or a gem ring can be equipped with the Use command which makes the wearer harder to hit in combat. Raistlin can use a Scroll or a Wand to perform a long range attack without using power from his staff. The remaining items have no effect except for adding points to your score while you carry them. Such items are gems, coins, gold bars, chalices, and shields.

This waterfall is awfully pretty.

This was my first time playing through AD&D: Heroes of the Lance. At the beginning of my project, I put this game and many others near the end of the list which I call my snub list. Now I am bringing those games back into the fold occasionally as I see fit, and it had been awhile since I pulled one of my snubbed games into the forefront. I’m reasonably sure I bought this game at my local game store at the time when they were slow to keep up with price increases. I could bundle games and get every fourth game free, so I took advantage of that frequently. The price of this game hasn’t really moved though. I think it was an $8 game at that store and that’s in line with its current value. I have the manual for it that I got separately, although with a missing cover.

I gave the game a test drive just to check the battery, and in those few minutes I couldn’t get off the first screen. At a glance, it is an intimidating game to say the least. There are so many menu options and character statistics. Who are all these characters and what do they bring to the table? Spell casting doesn’t work right away. The first screen features a pit that I bet most players fall in right away trying to figure out what to do. I sure did. I see I can go through a door to the north and another to the south, but my character won’t go that way because I’m just pressing Up or Down instead of holding the direction button. The game has a bad reputation for all these reasons. The manual is an absolute must, and I’m guessing most people that have tried the game played without reading the manual, further souring their first impressions. I read through the manual several times, and I needed it by my side as I played before the game started to unfold.

One of my biggest gripes with Heroes of the Lance is the level layout. The compass is there to help orient you, but from room to room it can twist in various directions. Say you are in a room that runs north and south. The next room may also run north and south, so you know you are in a different room that runs parallel. Other times, the next room runs west to east, so you then start spreading out more. To make it more confusing, if this north to south hallway has an east door and a west door opposite each other, sometimes both doors lead to the same room and other times they lead to separate rooms. Both doors leading to the same room can make sense if you picture it as two perpendicular hallways that intersect, and you are simply reorienting your view by turning 90 degrees. It’s just that this is not evident at first. Most of the hallways looks the same anyway with the same drab gray colors. All this combined is the perfect recipe for getting lost. I am good at mental mapmaking, but it only took a few screens into the game before I needed to begin drawing. Even then, I ran into problems. The layout seems nonsensical at times. Sometimes the map has loops in it, and other times it appears that you are going in a direction that overlaps with something else in the level. It’s hard enough to map the dungeon without having to consider verticality. It’s ugly, unthoughtful design.

Basic platforming is also frustrating.

The good news is that there are clear, one-way transitions between the three levels of the dungeon. Go the correct way and you may see a short cutscene of your character falling to the level below. This is not a pit that kills you and you are going the right way when this happens. If you successfully map your way to that spot, then you effectively have that level solved. It’s not always easy getting there. There is one section in Level 2 that I am convinced is impossible to map out. It’s a door maze with several hallways, all with multiple doors. I started finding new items after going through many hallways, so I know I was hitting unique screens still. Fortunately, this section is not on the critical path and can (and should) be skipped completely.

Once I reached Level 3, I was running low on magic so I elected to start over. It was quick getting back there and I was in a much better state than my first try. The final level was the easiest area to map and I did so completely. It was straightforward to beat the game at that point. It took me about four hours to beat the game the first time. I knew I could beat the game much quicker than that, so I recorded a longplay. I admit, I really enjoyed blowing through the game again once I figured it all out. The second play lasted 20 minutes. The ending of the game teases you with the sequel, AD&D Dragons of Flame, which was never released on NES. Dragons of Flame did make it to Famicom, though I won’t be playing it.

Another aspect of this game’s reputation is that it is a difficult game, but I found that really wasn’t the case. The game seems so difficult at first for all the reasons mentioned here, and that’s true, it is difficult to start. You have a lot of learn and you will probably play poorly trying to get your bearings. This makes saving anywhere such a godsend. Take advantage of it by saving frequently and reloading if things don’t go well. Don’t go too long without saving so that if you need to reload you have a better chance of remembering where you are. Mapping the game on paper goes a long way as well, even if the map itself is crude like mine. Once you find the entrance to the next level and can get there from the start, you can do what I did and restart the game if things go south. The game is short with only the three levels and it isn’t a huge setback to start over with the knowledge gained. Sadly, Heroes of the Lance will permit you into situations where the game is unwinnable and you have to start over, but this is not much of a burden as it would appear. I would say the game begins like it has well above average difficulty and then becomes a low difficulty game at the end, depending on your aptitude for mapping. Suddenly a 5/10 rating seems about right!

Make sure to protect yourself when fighting the dragon hatchlings.

I know this review has gone on long enough, but I’m going to share my tips and strategy for beating Heroes of the Lance. I’m spoiling quite a lot here. I’ll begin with perhaps my biggest revelation about this game. Most of the content in this game means nothing. Other than health, the statistics do not tell you anything. The game can be beaten with only three characters and fewer than half the spells. You need to know how to kill enemies and jump a little. That’s all. Here’s how you do it. Set Caramon as your lead character and put Raistlin and Goldmoon in the third and fourth spots in the front row. Go to the Use command to equip both Raistlin’s staff and Goldmoon’s staff so you can cast spells. Most of the enemies in this game are affected by the Web spell. When these enemies are stuck in a web, you can kill them if you want or run right past them. Web didn’t work on short enemies or the dragon hatchlings, so you have to fight them. Use only downward attacks on the short enemies. You might be able to jump past them if you want to try that. The hatchlings are the biggest nuisance here. For them, use the Deflect Dragon Breath spell so you don’t get hurt by their acid and keep reapplying it when the spell wears off for as long as you battle them. They constantly back away from you in close range, so you have to step forward and take a stab or two. Just repeat that until you either kill them or move them far enough out of the way to get where you are going. In general, monitor your health and heal with the Cure Light Wounds spell as often as needed to keep your HP topped off. Save often, as much as you feel comfortable. The Prayer spell might come in handy for a few tricky screens, but it isn’t essential. At the final battle with the dragon Khisanth, first get close enough to engage him in battle. Set Goldmoon as the lead character and press both the B button and Right to throw the staff into the dragon killing him instantly. It is that simple, and it is not even a spoiler since the manual tells you to do this. Grab the disks, wait a few seconds, and enjoy the ending.

In conclusion, yes, AD&D: Heroes of the Lance is a bad game. Poor controls, sluggish movement, drab graphics, a confusing dungeon, and frivolous, unnecessary elements make for an unpleasant experience. I haven’t mentioned the music at all, which is easily the best part of this game. The composer Seiji Toda and arranger and programmer Iku Mizutani did an excellent job with the music and they both deserve far more credit than they have received. The music aside, I would not recommend this game. If you like map making, you might get a little enjoyment here, and it’s not the worst game to play solely by walkthrough if you want to go that route. As for me, I’m really pleased I conquered the game on my own. It feels like a big accomplishment, and that is such a good feeling that makes it all worth it.

#60 – Advanced Dungeons and Dragons: Heroes of the Lance