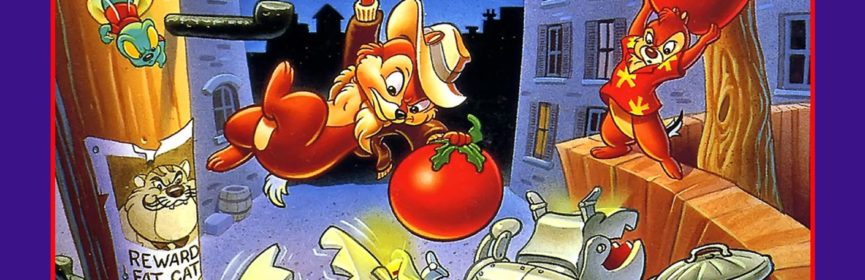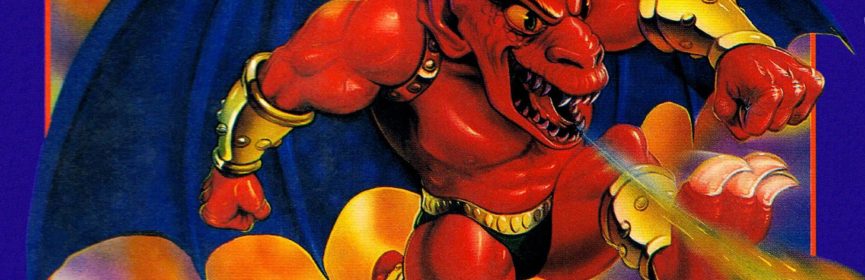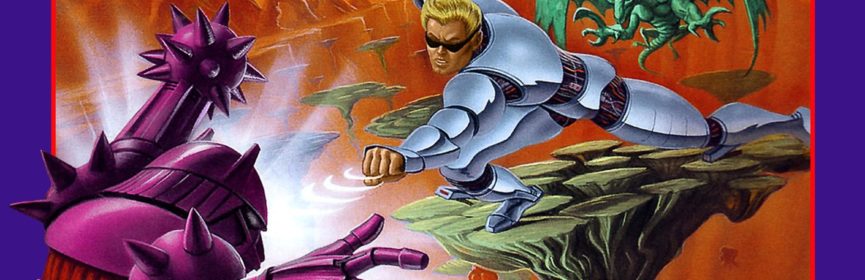
#168 – Street Fighter 2010: The Final Fight
Neither Street Fighter nor Final Fight.

The real 2010 wasn’t this exciting.
To Beat: Reach the ending
Played: 10/15/20 – 10/18/20
Difficulty: 7/10
My Difficulty: 7/10
My Video: Street Fighter 2010: The Final Fight Longplay
Knowing what we know now about video games of the past, if you were to see the name Street Fighter 2010: The Final Fight without knowing anything about it, you might get pretty excited. Street Fighter II and Final Fight are both among the greatest arcade games of their generation, so even under NES limitations, you would be right to expect something great. Plus, it’s made by Capcom, the same developer for all three! Well, we didn’t get some glorious NES adaptation of Street Fighter or Final Fight. What we did get is a futuristic, sci-fi action platformer that ends up one of the more interesting NES titles, for better or worse.
Street Fighter 2010: The Final Fight was both developed and published by Capcom. It first appeared on the Famicom in August 1990 under the slightly different name 2010 Street Fighter. The game released on the NES just a month later in September 1990. Of note, this game released after both Street Fighter and Final Fight in arcades, but before Street Fighter II, when the series exploded. This game also released on 3DS Virtual Console in all regions in 2014 and also on Wii U Virtual Console in Japan and PAL regions in 2014, with an early 2015 release in North America.
In this game, you play the role of Ken, the greatest Street Fighter in the world. Defeating all the best fighters in the world doesn’t leave Ken satisfied, so he pursues university studies in the field of Cybotics. Along the way he befriends Troy, and the two of them invent something called cyboplasm. In proper doses, this makes men very strong, even helping them stay alive long beyond their normal life span. At the same time, others in society have perfected travel to distant worlds, though Ken has no interest in all that. Except now he has to, for one day back at the lab, his cyboplasm was stolen and Troy was murdered. Ken will avenge the death of his partner, having to defeat many super creatures along the way that have taken too much cyboplasm, which causes them to lose their minds. This journey takes you across five planets with multiple levels each. Clear all the levels to see the ending and beat this game.

This first fight is pretty tough just starting out.
This is a side-scrolling platformer game with rather complex movement and controls. Ken can perform standard platformer movements. Use the D-pad to walk around, jump with A, and attack with B. Ken can cling to walls by moving into them while holding A, then he can press Up or Down to climb the walls. Press away from the wall and jump to jump away. He can jump down through certain floors by holding Down and pressing A. When falling through a floor, if you hold Up you can grab onto the underside of the floor. Continue to hold Up to pull yourself back up onto the ledge, or you may let go of the D-pad and just hang there. Later you may press A to jump down from the hanging position. Ken can perform all sorts of punches and kicks with the B button that throw out some sort of energy for a short distance. Press B rapidly to do a flurry of quick punches, either facing left or right, or while holding Up. If you hold either Left or Right, you can mash the B button to perform some longer distance attacks. These always come in a combo, some of them curve downward or upward slightly. Eventually they turn into kicks that attack at an upward diagonal before cycling back around to the punches again. If you hold Down and mash B, you’ll perform the diagonal kick attacks first, then start throwing punches in the same cycle as above. You definitely want to play around with it to get the feel for how it works and how the attacks move. One more thing. If you do a neutral jump straight up, then hold the opposite direction you’re facing, you’ll backflip. When you are upside down in the backflip, you can attack to fire straight down, which is the only way to do so.
Each planet has multiple stages that are framed as one-on-one combat matches. You’ll get a screen that say “Target vs. Ken” with an image of the enemy you need to take out in this stage. The levels themselves can take many different forms. There are single screen levels, scrolling levels, and autoscrolling levels. Some areas are simply boss fights, some involve infinitely spawning enemies, and others are stages with a boss fight at the end. Sometimes the target is just one enemy you need to defeat, and sometimes you have to defeat multiple target enemies to proceed. The goal of each stage is to open up a portal to the next one. Defeating the target produces some glowing energy that you touch to collect. This fills up the Open bar at the bottom of the screen, and when it is completely filled up, the portal to the next level appears. There is a normal stage timer during regular play that sets itself to 10 seconds whenever the portal is open, so you must move quickly to find the portal and enter in time to proceed.

Anticipate spending a lot of time climbing this.
There are items you can collect to help you power up. Many stages have rocks that you can destroy, some of them hide powerups. The most common one looks like a circle with a C in the middle. This increases your power level half a segment. Each segment of the power bar makes your attacks go a longer distance, but I’m not sure if attacks are more powerful or not. I never got to full power at any time, but apparently your stronger shots look like spinning disks at full power. There are some rare powerups that only appear in certain stages. One is an orb that attaches to your back and deals damage to enemies that touch it. Another gives you some sort of slash kick. When you perform a backflip, your feet do damage to enemies on contact. There are also some items that enemies drop. Glowing orbs restore half a bar of health, and large glowing orbs restore two bars of health. You can also get 1ups but they are uncommon.
Structurally, each planet has some sort of theme. Planet 1 is mostly cityscapes, Planet 2 is jungle-like with lots of vines, Planet 3 is the desert planet, Planet 4 is the water planet, and Planet 5 is pretty much a space station. Not all levels in each planet strictly follow the theme, but for the most part they make sense. In between each planet are cutscenes that advance the story, showing where Ken is off to next, that sort of thing.
This is a pretty challenging game for a variety of reasons. Most enemies and traps take one bar of damage out of the starting five. Your health carries over from stage to stage, so you’ll often lose lives just from having low health to start a new area. Health pickups from enemies seem to happen every four kills, which doesn’t help any in pure one-on-one fights. When you die, you lose your entire power bar. This is the main reason why I never was able to see what full power was like. There are no mid-stage checkpoints in the game, and that includes the gauntlet in the final level. The only aspects in your favor are that you get a health refill at the start of each planet, sub areas stay cleared when you move through the portals, and you get infinite continues.

A … sanderfall?
This was my first time clearing this game, though I have played it before. This was a rental way back in the day, and it is the only time I remember playing it up to now. I seem to remember the final stage, though I’m probably getting my memories crossed up as that would be quite a feat for me as a rental. I saw the AVGN review of the game a few years back, that’s probably the most of what I remember about this game. I would consider this game a tad obscure, but it is relatively common from a collector perspective. This was a $5-$10 game for quite a long time, and I see now it has crept up to around $15 for a loose cart.
This is the type of game that I can sit and grind out a victory in a few hours, depending on length and difficulty. Street Fighter 2010 took me close to four hours to beat, over two nights. The first night I worked on it for a couple of hours and got to the final planet before turning it off for the night. I beat the game the next stream. It took me about an hour to reach the final stage, then a full hour just to finish off the game. That last area is no joke. You have to clear three past bosses, one of those a double fight, and then the final boss, all on one life. This is the only level where the timer is a major issue as well. Thankfully I managed it. As of this writing, it has been over 9 months since I beat the game for this blog. I ended up replaying the game last week just to refresh myself, and I beat the game in about an hour and a half this time. I’m honestly surprised I didn’t lose much skill on this. It’s pretty hard to go back and beat old games that I haven’t touched in some time. Maybe now I’ll be serious about getting caught up on these writings!
Street Fighter 2010 is a difficult, complex action game that’s not for everyone, but it is a technical showpiece for the console for sure. The graphics in this game are really good looking. There’s lots of detail in the backgrounds and enemy sprites, and good animations too. There’s plenty of variety here as well. Some levels scroll fluidly in all directions, and there is some split scrolling in some of the boss fights that can be tricky to pull off well on the console. One autoscroller level drifts in an unorthodox pattern, similar to the airships in Super Mario Bros. 3. The music is top notch, certainly with some of Capcom’s best composers hard at work. The controls, while they let you accomplish a lot of moves, can get in the way of the action sometimes. Clinging to walls, hanging off ledges, and swinging around pillars takes a fine touch, while those same obstacles can get in the way of you trying to avoid enemy attacks. This is a game that is just as much about mastery of the player character as mastery of the levels and boss designs. This game is often overlooked as far as Capcom games go, and I think in part that is because it is not as accessible as other games of this style. And let’s be honest, naming it Street Fighter 2010: The Final Fight was not the best choice. This game is derided just off the name, but there’s a quality experience here if you can wrap your head around it.

#168 – Street Fighter 2010: The Final Fight