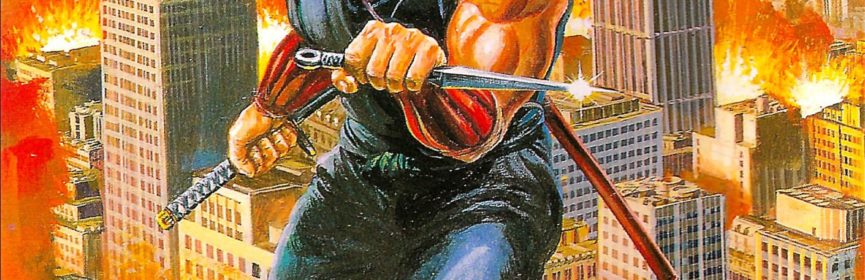
Take on the NES Library

An 8-bit Extravaganza!

Finished

NOV
22
2017
0

#58 – Snow Brothers

This game is SNOW much fun!

These brothers slim down a bit during gameplay.

To Beat: Reach the ending
To Complete: Beat the game without continuing
What I Did: Completed the game
Played: 9/11/17 – 9/19/17
Difficulty: 4/10
My Difficulty: 3/10
Video: Snow Brothers 1CC Longplay

There are several genres of games that I have had a fondness for from an early age. I cut my teeth on Super Mario Bros. and have always enjoyed platformers of that kind. The SNES affirmed my interest in RPGs, and although for the most part that didn’t carry over beyond that, those RPGs are still among my favorite games. The Adventures of Lolo games, as well as Tetris, paved the way for getting interested in many different types of puzzlers. As an adult, my tastes haven’t changed much, but they did get more refined. I discovered that I really enjoy games like Bubble Bobble, a single-screen arcade style platformer with a focus on clearing out all enemies to proceed to the next room. It’s a specific type of experience, but there are several titles that fit the bill. One of my favorite games in this style is Snow Brothers.

Snow Brothers was originally released in arcades in 1990, developed by Toaplan. It was later ported to the Game Boy, NES, Famicom, and the Mega Drive in Japan only. Each version has slight differences and enhancements. The NES and Famicom versions add story cutscenes at the start of the game. The Game Boy port is single player only, but ten levels were added. The Mega Drive version includes an expanded story and twenty additional levels from the original arcade game. The NES version of Snow Brothers was released in November 1991. It was published by Capcom and appears to be developed by Sol. I could not find much information on the web on Sol, but they are also credited with developing both NES Flintstones titles. Toaplan’s final game was Otenki Paradise in 1994, which was localized in the US as Snow Bros. 2: With New Elves. A third game under this name was created by a company called Syrtex Games in 2002 called Snow Brothers 3: Magical Adventure. It was never officially released and could potentially be a hack of the original arcade game.

Always saving the princesses in these games, sheesh.

The story of Snow Brothers is a basic one. King Scorch cursed brothers Nick and Tom by turning them into snowmen, and he also captured the princesses Teri and Tina because of course he does. It’s up to the brothers do to their thing and defeat the king to save their land. You can play Snow Brothers in single player with the blue-clad Nick, or play simultaneous two-player with the other player using Tom dressed in red. To beat the game and save the day, you must clear all 50 floors.

Snow Brothers is a single-screen arcade platformer. Just like Bubble Bobble, the object of the game is to defeat all enemies on screen so you can proceed up to the next floor. Use the D-pad to move Nick and Tom both left and right. The A button jumps, and the B button throws a handful of snow forward. The idea here is to throw enough snow on an enemy to encase it in a giant snowball. Then, you push the snowball and it rolls to the bottom of the screen and defeats the enemy inside. If the pushed snowball collides with other enemies on the ledges below, they also get defeated and will leave an item behind for you to collect.

The gameplay is both simple and straightforward, but there is some nuance to the mechanics that gives you some surprising versatility. You can jump up through floors allowing you to climb higher more easily. A pushed snowball disappears once it hits a wall on the ground level, and it rebounds off any other wall above. Sometimes you can get a snowball trapped within a ledge off the ground level and it will bounce back and forth a bit before vanishing on its own. You can have the snowball hit you and carry you along with it. While riding, you can either jump out early on your own or let the snowball run its course. Once you finish your ride, you will gain some brief invincibility. You can throw a bit of snow on an enemy to start the process of forming a snowball, briefly stunning the enemy in the process. As partially covered enemies sit there untouched, they slowly melt the snow until they can break out and freely move around again. You can defeat an enemy by running it over with a snowball even if it is partially covered, which is an effective strategy. If two full snowballs collide, they rebound off each other and both start descending which can knock out enemies on both sides of the stage if done right. Some levels have slopes and snowballs can roll up these hills with no problems. You can use a stationary snowball as a platform to reach higher ledges, and you can even lift a snowball by jumping into it from below. All these techniques give you plenty of ways to approach any challenge.

This early level has a great setup for teaching the player how to clear many baddies at once.

Bowling over enemies with a snowball will reveal some kind of item once the defeated enemy is removed from play. These stay on screen temporarily, but usually long enough for you to reach them across the stage if you go at them right away. Most of the time you get some sort of money or food item that gives you points, like candy or a slice of cake. What you really want are powerups. The manual for Snow Brothers calls them hot sauce, but they are clearly potions in jars as far as I’m concerned. The red potion gives you speed skates allowing you to move much faster. The blue potion lets you throw larger handfuls of snow so you can cover enemies with fewer shots. The yellow potion increases your throw distance, letting you heave snow over halfway across the screen. All three powerups stack together too, but you lose all of them if you die. Losing a fully powered character is quite a setback, but that’s just the nature of the game.

There are a couple of rare item drops that you should make sure to grab right away if you see one. The first of these is a green potion. Grab it to inflate Nick or Tom like a balloon. You can then fly freely across the level and simply run into enemies to defeat them. You should have plenty of time with this power to clear all enemies on screen. The second rare powerup is a white smiley face. This item changes the color of the background and temporarily replaces the normal enemies with these blue face enemies. Turning the blue enemy into a snowball displays a letter in the word “SNOW” and pushing it lets you acquire the letter. You will see a space at the top of the screen above your score showing which letters you have. Spell out SNOW for an extra life! You can also destroy the special enemies with a snowball for a large 30,000-point bonus.

There are several different enemies in the game. Most of them have some way of climbing around the level. Some enemies will attack you if you come near, a couple breath fire at you, some fly around, and so on. All normal enemies can be covered in snow and must be defeated. One neat thing you can try to do is clear all the enemies by pushing only one snowball. You can do this with a single snowball, or with more than one as long as you set up a chain reaction first. Defeating all the enemies at once causes some paper money to rain down to the bottom of the level. These disappear very quickly, but are worth either 10,000 or 20,000 points each. If you are playing for high score, you want as many of these as possible.

It doesn’t matter how cold it is, we’re making it rain!

There are two enemies that you cannot cover in snow. There is a sumo enemy appearing in the middle levels that doesn’t need to be killed. He sits at the top of the screen and is tough to reach. If you can pelt him with a little snow, he will go away and leave some paper money behind for big points. The enemy that can show up in any level is Pumpkin Head. This is a “hurry up” enemy that appears when you are spending too much time in a stage. He floats around slowly, but freely, and you can’t hurt him at all. After a little while, he will begin spawning invincible ghosts that home in on you. These spell certain death for Nick and Tom. The idea is to clear levels quickly enough so that you don’t have to deal with Pumpkin Head. The only two ways to get rid of him are to defeat all remaining enemies or let him or one of his ghosts kill you.

Every tenth level is a boss stage, so in this 50-stage game there are five bosses. These are your typical large enemies that take many hits to defeat. All of them generate smaller enemies which you turn into snowballs and send flying into the boss to do damage. You can also throw snow at them directly. I don’t know if that does damage or not, but you can earn a small amount of points for each direct hit. After each boss fight is a slot machine mini-game. There are three reels that each give you a bonus depending on where they stop. The reels contain a big X which gives you nothing, each of the four letters in the word “SNOW,” and a figure of Nick that gives you an extra life. Each letter you collect also nets you 10,000 points, and each extra life adds 50,000 points. It is possible to time the slots for specific outcomes, but it’s tricky to do so and I couldn’t quite get the hang of it. Each reel needs time to slow down to a stop so you need to anticipate your mark early. It is also difficult to make out specific letters while the slots are going, but extra lives stand out more and that’s really what you want anyway.

You begin the game with only two extra lives. These can go by quickly when you are just starting out. The good news is that you get many continues. The manual states you get four continues, but you actually get nine. Upon losing your last life, the life counter at the top will blink and instead display the number of continues remaining. You resume play with three new lives exactly where you left off. In a two-player game the continues are shared, so lives are more precious here than in single-player.

I’ll take the red speedup potion any day!

I have a little history with Snow Brothers, and actually I give the game some credit for getting me back into game collecting. I first played the NES game as a rental at a babysitter’s house, so I probably played it soon after release. I enjoyed playing it, but that was the extent of my experience for many years. I’m sure I’ve mentioned this before, but in 2013 we bought a house and I could display all my NES games properly for the first time. As I was getting everything set up at home, I got the urge to expand my collection. I owned around 250 NES games then, so there were plenty of fun individual games left to start looking for. My memories started to stir and the first game that came to mind was Snow Brothers. Unfortunately, this was also the exact moment I realized this collecting journey was not going to be cheap. You see, Snow Brothers is among the most expensive NES carts.

The cost of some individual games like Snow Brothers caused me to divert my attention toward buying games in bulk. I focused heavily on games that fell in the $15-$30 price range. I could make consistent progress through the deep middle ground in the NES set and often found these titles bundled with cheaper games to fill that part of the collection at the same time. That strategy paid off immensely because many of the $20 carts I bought soon became $50 titles or higher. I would eventually need a plan to buy all these high-end titles at the end.

I had nearly doubled my NES loose cart collection in what seemed like such a short time. I was doing a good job at tracking my total and noticed I was sitting on 499 total games. Lacking many of the most expensive carts, this was the perfect time to take a bulk-buying break and acquire something special for Game #500. The choice was easy; this was the time I would finally purchase Snow Brothers. My wife gave her blessing, and so I started searching. I am very price conscious and all I found were high-priced copies and sellers that wouldn’t budge. It seemed like a long time, but it only took a couple of weeks to find my mark. A new eBay listing for Snow Brothers showed up at $130 with best offer, and I worked the price down to $117.50 shipped. That was essentially market price at the time and I was glad to pay it. I probably shouldn’t admit this, but this was also the time I first purchased a screwdriver bit to open and clean cartridges. Better late than never! Snow Brothers was either the first or second cartridge I opened to clean those pins nice and shiny. I played through the game three or four times in my first week of ownership and then mostly left it on the shelf until now.

Snow Brothers features some pretty fun boss battles.

I have owned Snow Brothers for three years now, and I had no trouble beating the game again. The entire game takes around 30 minutes to beat. I needed only two continues and so I punched in an easy victory. Because I enjoy this game so much, I set out to beat the game using no continues simply as a fun challenge. This took a bit more effort but I didn’t find it all that difficult. I needed around five attempts and the failed ones all ended within the last 15 levels or so. The only reason it took me so long to finish the game between my first and last attempts was because it took me a week to make time for my next NES session.

To my surprise, Snow Brothers has an extended ending sequence if you clear the game on a single credit. I haven’t seen this distinction called out anywhere specifically, and I only found out about it once I beat the game this way on my own. I always shoot for the best ending on games like this, but I didn’t even know it applied to Snow Brothers until I saw it for myself. I’m sure I will find more secrets like this as I continue my deep dive into the library.

Snow Brothers is one of my favorite NES games, and it’s a shame is so expensive. Games of this nature can get repetitive, but Snow Brothers lasts just long enough to avoid mid-game burnout. The boss fights are fun and a nice change of pace, and the difficulty curve is even and fair. The graphics are clean and the music is good, although some of the tracks are repeated within the different groups of ten floors. The two-player mode is a blast to go through with a friend. It’s a great game for high score challenges too. I don’t like that it’s so expensive to buy, but it does make sense. The game is a true uncommon title that probably had a low print run, it was a later run NES game, and the game is fun. It fits the profile of an expensive game, as I like to say. Definitely check this one out even if you have to emulate it.

#58 – Snow Brothers

 
NOV
06
2017
2

#57 – M.C. Kids

This fun, golden platformer isn’t kidding around!

This screen doubles as a little playground to move around in.

To Beat: Reach the ending
To Complete: Beat all stages and collect all puzzle cards
What I Did: Completed the game
Played: 8/27/17 – 8/29/17
Difficulty: 6/10
My Difficulty: 6/10
Video: M.C. Kids 100% Longplay

McDonald’s is one of the most iconic and ubiquitous brands in the world. Ronald McDonald is a household name, and just about everyone recognizes the golden arches. It’s no surprise that there are licensed video games based on their cast of characters. What may be surprising is that the NES game is quite good. M.C. Kids channels the spirit of Super Mario Bros. 3 with some clever twists that makes it a great NES platformer.

McDonald’s is an American fast food restaurant that was first founded in 1940 by Richard and Maurice McDonald as a barbecue restaurant. In 1948, they changed over to a hamburger stand and subsequently expanded to other locations. Ray Kroc purchased the chain from the McDonald brothers in 1955 and established McDonald’s Corporation. Today, McDonald’s has vastly expanded worldwide approaching 40,000 total restaurants in over 100 countries.

The character Ronald McDonald may have been created by Willard Scott. The former NBC Today Show’s weatherman was the original Ronald McDonald in three television ads in 1963, and he claims to have created the clown character himself. McDonald’s expanded their advertising by introducing McDonaldland in 1970-1971. Many new characters came and went over the years to accompany Ronald. McDonaldland was officially phased out of advertising in 2003.

Something tells me the kids weren’t part of McDonaldland.

A few video games were created using the McDonaldland characters. The Famicom exclusive Donald Land was released in Japan in 1988, and was both developed and published by Data East. The NES game M.C. Kids was released in North America in January 1992. It was both published and developed by Virgin Games. The European version was renamed McDonaldland and was published by Ocean Software in 1993. In a strange twist, the Game Boy port of this game was released as McDonaldland in Europe and rebranded as Spot: The Cool Adventure for North America. A Sega Genesis follow up named Global Gladiators was also released in 1992. Another Genesis game, McDonald’s Treasure Land Adventure, was released worldwide in 1993 by the developer Treasure.

M.C. Kids (pronounced “Em-Cee” Kids) is a side-scrolling action platformer. The Hamburgler has stolen Ronald’s magic bag, and Ronald asks the kids Mick and Mack to help him track it down. To do this, the kids must locate some of Ronald’s puzzle cards from the levels in the world. When you collect enough puzzle cards, the path to the next world is open. This cycle repeats until you track down the Hamburgler and recover the magic bag.

On the title screen, you take control of Mick. This is a great place to get a basic feel for movement and jumping in a safe environment. There is a signpost pointing to the left labeled 1up, and another pointing to the right labeled 2up. Walk off the appropriate side of the screen to activate either one-player or two-player mode. Above the signposts are moon blocks. Bumping your head into the block changes you between Mick and Mack. They control the same, so simply pick the one you prefer. For two-player mode, the second player gets the other character. Two-player mode is alternating play.

This map style reminds me of some other game…

After the introductory story, you are taken to the world map. Use the D-pad to walk on the predefined paths between stages. Press A to enter a stage or house. Each stage is noted with a flashing M with a signpost next to it indicating the level number. At the top of the screen, you see the name of the world you’re in, as well as the level name if you are standing on a stage tile. You also see how many puzzle cards you need for this stage, the number of lives remaining, and how many arches you have collected. The puzzle is on the top right of the screen in a rectangle of six tiles. The cards not yet collected are displayed as M tiles. For each puzzle card you find in the levels, a tile is flipped over revealing part of the puzzle for this world.

The levels themselves are large side-scrolling levels where you control the kid directly. The controls are easy to understand but movement takes time to master. You move with the D-pad and use A to jump. You can duck by holding Down. You get a higher jump by jumping while ducking. You run automatically by walking on the ground in one direction for a while. Movement is momentum based and you maintain your speed well while jumping around. There are slopes that can either boost or reduce your speed accordingly. Running at full speed or close to it produces the highest jumps.

The B button is used to pick things up. The most common thing to grab are blocks that you hold above your head and use as weapons. Walk into a block and press B to lift it, or you can stand on a block, duck, and press B to grab them that way. You then throw the block with B. You can throw the block up or down, or press B without a vertical direction to throw the block forward. Thrown blocks will bounce once or twice before dropping off the screen, and sometimes you can hit more than one enemy with the same block.

Well, I need health, so this little bird has got to go!

At the top of the screen in a level you see a few indicators. The M stands for how many arches you have. These are floating M’s within the levels that you collect just by touching them. The L shows how many lives you have. Underneath that are hearts that represent your health. You begin each new life with three hearts. You lose single hearts when colliding with enemies, and you die when all hearts are depleted. There are no item drops or health pickups in M.C. Kids, but you can restore hearts in a couple of ways. Defeating ten enemies will restore one heart, and if you defeat two enemies with the same block you also recover a heart. You start with three hearts but can go up to four. Health also carries over between stages which is something to keep in mind.

The most important item in M.C. Kids is the puzzle card. They are solid blocks with an M on them and you collect the card by picking up the block. To keep the card permanently, you need to finish the level after grabbing it. You end a level by touching the goal line situated between two goal posts. There is a floating M across the line that will give you some arches if you touch it while breaking the string. When the level ends, you will high five your friend and see a message indicating which puzzle card you acquired, if any. Some cards in a world are for a puzzle in a different world, and some levels have two cards instead of one. The cards can be well hidden or stashed in hard to reach places, so it’s crucial to explore the levels thoroughly.

Most puzzle cards are a little harder to find.

There are several types of blocks in M.C. Kids. Blocks with a 1 on them are extra lives, and you will see many of them in the game. The reverser is a left-facing arrow block that sends you flying and flipping all the way back to the start of the level. Sometimes you will see a block outline moving around in a level. If you find a similarly shaped fill-in block and touch it to the outline, it will make the block solid and you can use it as a platform. A boat lets you float on water and you can climb in it and use the D-Pad to move the boat across water left and right. You can even grab this boat like a block and throw it into a different body of water. There are also porous blocks that float in the water and drift forward on their own. There are sand tiles that you can dig through like in Super Mario Bros. 2.

One of the neatest elements in M.C. Kids is the spinner block. It is a solid, fixed block that is located at the end of a long platform. You want to get a running start and run right over the spinner block. Do this and you will run around to the underside of the block, letting you walk on the ceiling with reversed gravity. You can reach high areas this way. One thing to note with reversed gravity is if you fall off the top of the screen, you lose a life just as if you fell down a pit.

There are also several different springboards and lifts found in stages. Small springboards let you jump high. These are usually found in the open but sometimes are hidden behind grabbable blocks. Super springboards require you to carry a block with you to spring very high. The travel lift is a platform that begins stationary and starts moving when you jump on it. The continuous lift winds around in a predefined pattern and you have to watch it for a while to see its path so you can reach it safely. The conveyor lift shows up near the end of the game. It travels along a guidewire and you move it yourself by standing in the center of it and walking either left or right. Walking left moves it forward and walking right moves it backward. This lift is particularly tricky to learn. The zipper is neither a springboard or lift, but it comes up often. Press B while standing in front of it to transition to either a new room or different location within the level.

This path for this lift winds around a lot.

As you play, you will accumulate arches. You will lose some whenever you collide with an enemy. If you manage to collect over 100, the arch counter rolls over and starts blinking. If you finish the level from here without dying, then you get to play a bonus game. This is a small level containing four blocks on upward rails. One of the four will light with an up arrow, and then shortly after the rest will display downward arrows. You want to jump quickly to the one with the up arrow to slide it upward a little bit before the down arrows activate and lower the block you are standing on. The idea is to lift at least one block high enough to reach a ledge at the top with a couple of zippers. Use the zipper to go to a 1up room with several 1up blocks suspended over a pit. Grab as many as you can! If you fall off the blocks in the bonus game, there’s a moon block on the floor you can use to switch characters if you want.

When you collect enough puzzle cards, you can go to the house in that world and speak with its owner. He or she will then provide you a path to the next world. If you are missing cards for a particular puzzle, you can drop by the house for a hint. Collecting all the cards for a world and visiting the house may provide some other benefits. There is nothing on the map to indicate if a completed level still holds a card, which makes it more difficult to track down missing cards. However, you don’t need every card to beat the game. You may also find secret cards. There is an optional secret world in the game that you can find that only opens if all secret cards are collected.

This was my first time playing through M.C. Kids, though I have owned the game for quite a while. I bought it during a brief collecting phase I had around 2009 or so. There was a deal on eBay where you could pick 10 games for either $20 or $30, and M.C. Kids was one of the games I chose. Those kinds of deals make me wonder if I had missed out on another game that would eventually become more expensive. M.C. Kids sells in the $10-$15 range these days, so it ended up being a good purchase.

This bonus level features multiple fake goal markers.

It took me a couple of days to beat M.C. Kids. The first night I streamed gameplay on Twitch, and I was doing decently until the end of the third world. I was really struggling to figure out a few different sections, and after 90 minutes or so I called it a night. The next night I pushed my way through to the end of the game in a near three-hour session. It wasn’t pretty but I got the job done. However, I wasn’t recording my attempt, and I also beat the game without visiting the special world at all. Once you get to the ending, there’s no way to go back. I also missed two puzzle cards that weren’t necessary to play all the levels and I looked online to find out where they were hiding. I had ideas on where both cards were located, but I don’t think I would have found them on my own unless I grinded out a few more hours of playing. With all that in mind, I beat the whole game again on my third attempt and captured video this time. I had to play the special world blind, but it went relatively well for the toughest stages in the game.

The deeper I get into this project, the harder time I have figuring out how to rate games on difficulty. If you can keep your NES running for a long time, then you could probably beat M.C. Kids. There are unlimited continues, and beyond that there are several places where you can grind out extra lives to not even need to continue. There is at least one level that has two extra lives right at the beginning, so by grabbing both and dying right away, you can slowly build up a stock at any time. I also found a cache of eight lives or so in a level in the first world, which is even better for grinding. Therefore, lives are not much of an issue in beating the game. The two things that make the game challenging are the momentum-based physics and locating some of the trickier-to-find puzzle cards. This seems like an average difficulty game to me, but I decided to tick up the rating to a 6 since I had trouble the first night I played.

M.C. Kids is a fun NES game that I recommend playing. The levels are often sprawling with many things to do, and the game introduces many different elements along the way that keep the experience fresh. The reverse gravity gimmick works well and it is used in clever ways. The graphics are very clean with some nice animation, and the music is equally great. I had this track stuck in my head for several days after playing. It’s no Mario 3, but it resembles it enough that it’s an easy game to recommend. The AVGN video on M.C. Kids has raised awareness of the game, but it’s been long enough since that review that the game has backed up a bit into mild obscurity. Now that I’m shining some light on the game, make sure you don’t skip this one.

#57 – M.C. Kids

 
OCT
23
2017
0

#56 – Mendel Palace

Shuffling panels has never been this much fun!

The baddies look far less menacing in the actual game.

To Beat: Reach the Ending
To Complete: Beat both the game and the Extra mode
What I Did: Completed the game
Played: 8/7/17 – 8/18/17
Difficulty: 7/10
My Difficulty: 7/10
Videos: Mendel Palace Longplay and Mendel Palace Extra Mode Longplay

There are a lot of weird video games out there, especially today when the barriers to development and distribution are much lower. The NES was around in a time when some gaming conventions were being defined, so developers had the liberty to make some weird games too. Ghoul School is one that comes to mind that I’ve already played. I classify Mendel Palace as a weird game, and in this case I mean it in a good way. Mendel Palace is a frenetic action game that is dripping with character.

Mendel Palace was released in North America in October 1990. The game was developed by Game Freak, who are best known as the developers behind Pokémon. This was the first game they developed. The NES version was published by Hudson Soft. This game debuted first on the Famicom under the name Quinty. There it was released in June 1989, over a year earlier. Quinty was published in Japan by Namco. Mendel Palace has not been re-released, nor are there any sequels.

Mendel Palace is a single-screen action game. You play the role of Bon-Bon. The princess Candy has become trapped in a dream that she cannot escape, and so you might fight all her dolls that have come to life and free Candy. It’s the typical save the princess trope. The object of the game is to defeat all the enemies in each stage. There are 100 total levels spanning several different worlds. If you clear all the stages, then you save Candy and win the game. You can go at it alone or play with a friend in the two-player mode.

It’s a block party!

The main gimmick to Mendel Palace is how you attack enemies. Each stage is in a top down perspective consisting of a 7×5 grid of large panels on the floor. You can walk around in the four cardinal directions using the D-pad. When you press the A or B button, you will shuffle the floor panel in front of you. It is a little tricky at first to determine which panel you will move. If you stand on the edge of the panel facing the middle of it, you will shuffle the one you are standing on. Otherwise, you will shuffle the next tile over in the direction you are facing. The idea is to shuffle tiles when enemies are standing on them, which causes the baddies to get pushed away a short distance. Enemies are defeated when they get shoved into the side of the screen or against a solid object. Sometimes enemies can push you into the wall as well, but if an enemy touches you then you can also die that way.

The other side effect with shuffling panels is that you can reveal other panels underneath. This is not merely a binary flip. Sometimes there are three or more different layers underneath each panel that continuously cycle as long as you keep shuffling. There are many kinds of tiles that can appear in Mendel Palace, including several different item tiles. The most common item tile is the star. You must stand exactly on the center of an item tile to collect it. Stars are accumulated through play and you can see how many you have in a counter at the bottom of the screen next to the amount of lives remaining. The final star tile in a level will blink and you get 10 stars if you grab that one. Collecting 100 stars awards you an extra life, and it also makes you walk faster.

There are two more item tiles that are not as abundant as the star tiles. The first of these is the roulette tile. This cycles between four different items and you get whichever one is face up when you collect it. You can get either a puny 10 point bonus or a generous 10,000 point bonus. You can get a 10 star item for more precious stars. The best award is the 1up! Aside from star collection, this is the only other way to gain lives. The other item panel is the time panel. This is labeled FIVE SEC when you see it in the game. Each level has an invisible timer that causes the enemies to become very aggressive when it runs out. Grabbing these panels extends that timer.

The smile on the sun panel is quite appropriate!

There are a few panels that can affect nearby panels. The most common of these is the cross panel. When you step on it, the tiles in all four cardinal directions will shuffle chain reaction style. If you can get an enemy caught up in the shuffle wave it almost always sends them all the way to the wall. There is a similar panel that does not show up often called the clock and time panel. This one looks like the cross panel but with only one direction lit up at a time. Like a clock, the lit direction changes rhythmically. Stepping on this panel causes a wave in only the direction it is pointing. The sun panel is the most powerful of these in that it shuffles all tiles on the screen radiating outward from the sun panel. Most of the time this wipes out all the enemies in one shot, so it can be very nice to find.

There are a couple of bonus panels that transform the game board in ways that can be helpful. The more common of these two is the moon panel. This one dims the lights in the level and replaces all walkable tiles with stars. There is a tradeoff with this one however. Solid panels remain solid but you cannot see them in the dark. If you are being pursued by enemies in a level with now invisible solid panels, it may not be worth the extra stars. The better bonus panel is called the special bonus panel. It has a swirl design on it and flashes colors. Run into this panel and you will be whisked off into a bonus screen filled with stars and no enemies. There will be an additional counter at the bottom of the screen indicating how many stars are available in the bonus area. Sometimes you need to shuffle panels to reveal stars, but most of them are visible from the start. There is a time limit indicated by faint color changes in the small tiles around the border of the level. If you collect all the stars before time runs out, then you get bonus stars. Play proceeds to the next level, so using the special bonus panel is an easy way to clear a stage for free.

Special bonus panels flip you right into star paradise.

Here are the remaining panels in Mendel Palace. The metal panels are solid panels that appear raised on the screen. You cannot pass through them, but you can shove enemies into the metal panels to defeat them. Some enemies can smash through the metal panels leaving behind a broken panel, which acts like the standard blank panel. The lock panel has screws in the corners indicating that this square can no longer be shuffled. The attack panel is an orange panel with the same swirl design as the special bonus panel. This launches you forward in the direction you enter the panel. It’s called the attack panel because you can defeat enemies if you collide with them after this panel pushes you. It spins for a little while so you can run back into the panel to do more damage. The final panel is the game is the enemy panel. It looks like a warp portal, and it acts like one too. New enemies will spawn from the enemy panel if there is room for them in the level, and then the panel transforms into a blank panel. Revealing these panels can keep the level going even if all other enemies have been defeated.

At the start of the game, you are shown a map screen with nine different houses. You can choose any of the houses except for the one in the center which is saved for last. Each house is based around a specific enemy type and consists of ten levels. The enemies themselves may have multiple variants, and the more difficult versions appear in the later levels of the house. The final level in each house is a boss fight that somehow incorporates the base enemy for that house. Let’s talk about each one!

This is the best choice for the new player.

The upper left area is the house of Moko-Moko, and this is the recommend level to begin the game. Moko-Moko is a rather plain enemy that doesn’t do anything other than walk around. The second form of Moko-Moko has light blue coloring, and he splits into two smaller enemies whenever you push him.

C’mon get hoppy!

The upper area is the house of Dragon. This enemy moves by making small jumps across the board. You can only push Dragon whenever he lands on the ground, so you have to time your shuffles to fight them. There are three different versions of Dragon. The normal one wears pink pants. The second version wears green pants and they don’t start hoping around until you approach them. The third version wears red and makes longer jumps.

Their drawings are so life-like!

The upper right area is the house of Vinci. These are often referred to as doodlers. They move slowly around the level and will occasionally stop on a panel to draw on them. This leaves them vulnerable to attack. If the finish their drawing, that panel becomes locked. The normal doodlers wear pink, and the green ones can also generate a ghost enemy upon completing a drawing. One interesting tactic is that is it possible to leave every tile in the level locked by either doodles or lock panels. If this happens, you win the level automatically and get a large point bonus to boot.

They can take your frustration to new heights.

The right area is the house of Toby. These enemies take a long jump straight up if you try and shuffle the panel beneath them, but they are vulnerable when they land. While waiting for one to land, you can easily get surrounded by other ones. The ones with red hair jump higher than the ones with brown hair.

Taking Follow the Leader too seriously.

The lower right area is the house of Mira. They attempt to imitate your movements. They take a step forward when you do, and they shuffle panels when you do. They will even move if you simply turn your body in another direction. If you stand still they don’t move at all and the music even stops. They can shove each other so you can get them to defeat themselves sometimes. The red versions move faster than the yellow ones.

Just keep swimming.

The lower area is the house of Wasser. They are swimmers and are often referred to as such. They will walk around the perimeter of the level and then swim straight across the stage when they line up with you. As they swim across, they shuffle the panels behind them with their feet. Wasser is a clever enemy type in my opinion. The regular version of Wasser is colored green and they swim in straight lines, while the harder blue version swims at angles and can also turn toward you mid-swim.

I like the flowing stage music here.

The lower left area is the house of Tako. These enemies are dancers and resemble ballerinas. Most enemies cannot move diagonally, but Tako can. They glide around the level homing in on you, but they take time to turn around if they pass you. Eventually they wear out and stop for a break before moving again. The normal Tako is orange, and the red ones move much faster and can break through metal panels.

These heavy enemies may take several pushes to defeat.

The left area is the house of Sumo. These are large, slow enemies that only get pushed a short distance, so the idea is to keep pushing them several times consecutively. After a Sumo is shoved, he will attempt a sumo stomp that shuffles a wave of panels away from him. The white Sumo is the regular type, and the purple one is heavier and takes more shuffles to move.

One final enemy type for good measure.

Once all eight houses are finished, Mendel Palace in the center opens. This stage features ten more levels that use all the enemy types so far. After that, there are ten final levels that feature one last enemy type.

Mendel Palace is a difficult game to take on all at once. The enemies swarm constantly and it takes either good technique or luck to get the breathing room to start defeating them. The difficulty is mitigated heavily by unlimited continues. After Game Over, the title screen displays the word Continue and all you have to do is press Start to resume play at the same level you lost. As long as you keep the NES powered on, you can brute force the entire game one level at a time. Holding the A button causes the Continue text to disappear, so if you want to start all over you have to press Start with A held down. It’s very kind of the developers that they made it simple to continue and you have to go out of your way to start completely over.

I have played some Mendel Palace before for the NintendoAge contest. I got a taste of each of the houses as I tried to figure out the best way to score the most points. The later part of the game was all new to me. Mendel Palace is not exactly common, but it is not hard to find online. I picked up my copy at a local store during a buy two, get one free promotion. I believe I bought Mendel Palace, TaleSpin, and Whomp ‘Em together for $16 total. That is a little more than what Mendel Palace is worth alone at the time of this writing, and I did particularly good on Whomp ‘Em given its current price.

I intended to play Mendel Palace for about an hour, but like most good intentions of mine that turned into me beating the game over about two hours. Some of the later levels are very challenging and it made me want to keep playing until I could surpass them. However, not only was I not recording my playthrough, but I also forgot to take a picture of the TV when I finished. It took me about a week before I got the time to play through the game with everything set up. I think I played the second time a little better but I still died plenty.

This level still gives me nightmares.

Mendel Palace has a secret Extra mode containing 100 new levels. Nothing in the manual or the game mentioned this mode. To play Extra mode, first make sure the NES is powered off. Then hold down Start and Select and turn on the NES. If successful, you will see the word Extra on top of the title as well as a different color on the title text. This mode has a few differences over the normal game. The biggest change is that there is no map or level selection. Instead you play all 100 rounds in the same order. There are stars but there is no counter displayed like in the normal mode. The number of extra lives caps out at five and even the lives display is different. You will get different enemies from level to level instead of grouped together. This mode is significantly harder than the normal game. It took me almost three hours to finish all the levels and I stayed up way too late to get it done. The ending you get is the same as the normal game, so this is purely an optional mode. I beat it anyway because I really like Mendel Palace and I’m not going to leave new levels on the table.

Mendel Palace is a very fun game and one that I give my full recommendation. There’s not another game quite like it, and all the different enemy types, stage layouts, and the action all bundle together nicely. The music is upbeat and catchy, and the graphics have a pastel and almost cell shaded look to them. There’s a lot of stuff going on at one time, from the multiple panel shuffling animations to the marble spray when an enemy bites the dust. Mendel Palace manages to run fast despite all the action on screen. There is a lot of sprite flicker, and that’s a negative you have to accept for a game like this on the limited NES hardware. A few stages and bosses are very frustrating in their difficulty too. Aside from those complaints, Mendel Palace is this weird game that’s a blast to play.

#56 – Mendel Palace

 
OCT
16
2017
0

#55 – Golgo 13: Top Secret Episode

Demonstrating that assassins for hire must be versatile to be effective.

The intro screens are even better than this title screen.

To Beat: Reach the ending
Played: 7/24/17 – 7/27/17
Difficulty: 8/10
My Difficulty: 8/10
Video: Golgo 13: Top Secret Episode Longplay

When I was a kid, I would read whatever gaming magazine or tip guide I could get my hands on. Golgo 13 was a game that would show up often and it always looked like a fascinating game, but maybe too advanced for my age. Later, when I got a copy to try, I didn’t really give it much of a chance. I wrote it off as not my style of game, and I don’t think I was ready for it anyway. Now I’m old enough to give it a fair shake. Golgo 13 is rough around the edges, but it turned out to be a fun game with significant variety.

Golgo 13 is a Japanese manga series written by Takao Saito. It centers around the assassin for hire Golgo 13, who is also known by his pseudonym Duke Togo. The manga began in October 1968 and it is still an ongoing series nearly 50 years later. The series has expanded into various other forms of media, such as a live-action movie, two animated movies, an animated TV series, and several video games.

Golgo 13: Top Secret Episode is an NES game released in North America in September 1988. It was published and developed by Vic Tokai. It is both the first NES game published by Vic Tokai as well as the first Vic Tokai game I have played for this project. The Famicom version of the game is the original version, released in March 1988. In Japan, it was named Golgo 13: Dai 1 Shou: Kamigami no Tasogare. There is also a sequel on the NES named The Mafat Conspiracy, which I will cover in the future.

You might as well just fire away.

Golgo 13: Top Secret Episode is an espionage action game. You play the role of Golgo 13 who is framed for the explosion of a helicopter containing a biological weapon named Cassandra-G. A vaccine and plans for Cassandra-G were taken from the wreckage and Golgo 13 is blamed for the whole thing. An international organization named FIXER believes that the DREK empire is ultimately responsible for the event. The FIXER group recruits Golgo 13 to investigate a lead on recovering the vaccine, eventually leading him to assassinate the leader of DREK.

This game takes on several play styles that appear as needed through the course of the game. The first of these is the horizontal side-scrolling mode where you directly control Golgo 13. Here you use the D-Pad to walk left and right. You may encounter people on the streets. Some pass by, some will talk to you, and others are enemy agents that will shoot at you. Contrary to most action platformers, you use the B button to jump and the A button to attack. At first you don’t have any weaponry, so A deploys a jump kick instead. After defeating an enemy, you will acquire bullets and you shoot them with A instead of kicking. You can kick by pressing A while jumping, or you can shoot with A by standing on the ground. You can also press Up to either enter doorways or progress to other areas you see in the background.

In all play modes, on the top left of the screen you will see two displays. The first is labelled L and this is your health meter. You begin with the maximum 200 health that dwindles away like a slow timer. You also lose health when you take damage from enemies. The second display is noted with the letter B and this indicates how many bullets you have. For every enemy you defeat, you automatically gain both health and bullets. How much you recover differs by enemy. You can hold as many as 400 bullets so you are encouraged to shoot everything.

This first-person mode shows up all the time in Golgo 13.

As you move around in most modes, sometimes a gun will rise from the bottom of the screen or an explosion will appear in front of you. This engages the play mode called pan and zoom. In this mode, the action switches to a first-person perspective and you control a crosshair. Use the D-Pad to move the crosshair in all eight directions and press A to shoot. The screen scrolling loops all the way around to the left and right, and also scrolls partway upward. At the bottom of the screen, you see an indicator showing one or more enemy types and how many of each enemy type there are. You must defeat them all to continue play in the prior mode. There is also a meter that shows which compass direction you are aiming. When there is only one enemy remaining, arrows are shown indicating the direction of the final enemy threat. Some enemies will appear for a brief time and fly off in the distance, and others stay on and keep attacking. Some enemies fire missiles at you that you can shoot before they hit you. They do a lot of damage so it is best to shoot them first if you can.

Another recurring feature in Golgo 13: Top Secret Episode are the cutscenes. You find these when you enter certain locations. They always begin with a close-up of Golgo 13 facing the screen. Press A and he will turn toward the background. If no one is there, play goes back to the previous screen. Otherwise a person will walk up and start talking to you. At the end of each text block you are prompted to press either A or B. The prompt for A means press A to advance to the next block of text. The prompt for B indicates the end of the cutscene, so pressing B will return you to the action.

Golgo 13 also gets to assume control of a helicopter, and this play mode is like a horizontal scrolling shooter. In these sections, you automatically scroll to the right with the goal of surviving until the end of the scene. You can move the helicopter in all eight directions with the D-pad. The helicopter moves faster going left or down and slower going right or up. Press A to shoot the gun. Like Golgo 13’s pistol, it only shoots a single shot straight ahead, but here you can rapid fire many shots quickly.

Golgo 13 is also a professional scuba diver, evidently.

Another play style appears in the underwater sections. Golgo 13 takes to the water with scuba gear and is armed only with a spear gun. Use the D-pad to swim in all eight directions and press A to fire spears. Golgo 13’s sprite changes significantly between swimming horizontally and swimming vertically. This is important when guiding him through narrow passages. It is also important in that Golgo 13 can only fire spears when swimming horizontally. You can fire either to the left or right. Here there are other enemies with scuba gear as well as aquatic creatures to fend off. Mines are a recurring nuisance that bob up and down underwater. They cannot be destroyed and they do heavy damage if you touch one. There are also plants that look harmless but actually damage you on contact.

Finally, perhaps the most involved play style of any in the entire game is the action maze. This play mode takes place from a first-person perspective and you explore a series of corridors. Most areas like this have multiple branching paths like an actual maze but some are more linear. You navigate the maze step by step. Every time you either take a step forward or switch direction, the screen goes blank very briefly before displaying the new location. This is a bit jarring when moving quickly through the maze, but under the restrictions of the NES it’s about the only way to do it quickly. Since every step is deliberate it helps you plot your course more accurately.

You will use the D-pad to move through the maze. Press Up to advance one step forward. Pressing either Left or Right will turn you in place. Pressing Down will let you face directly behind you also keeping you in place. Up is the only button that moves you to a different square in the maze. There is a compass along the bottom of the screen indicating which direction you are facing. This is invaluable to let you map your way accurately through the maze.

Enemies appear suddenly, but they are easy to dispatch.

The mazes have enemies. As you perform movements, sometimes an enemy soldier will be standing in front of you. Press A to bring up a crosshair. There are only three positions you can aim, either in the middle, to the left, or to the right. Use the D-pad to choose one of these locations and press A to shoot. You have to be quick to take out a soldier when you see one or you will take some damage. Many enemies will leave behind a grenade that you will pick up automatically. You can hold up to three of them and they are displayed at the bottom of the screen. They are not used for attacking like you might think. I will explain what the grenades do shortly.

Mazes can be complicated to navigate for several reasons. There are multiple doors that appear in the maze. Just walk into them to move to the room behind them. I had a hard time keeping my bearings after moving through doors while trying to go without a map. There are also ladders. Yes, the mazes can have multiple floors. Each level of the maze is in a different color to help distinguish them and you use the ladders to switch between floors. Sometimes when taking a step, a wall will appear right in front of you. If you have a grenade, you can throw it near the wall to break a hole through it allowing you to pass. The worst aspect is the trap door. Some squares of the maze will reveal a trap door and you fall to the floor below. Typically, the top floor holds what you are looking for within the maze, so falling always represents a step backward.

Contrary to the other modes, there are some pickups in the maze. You can find a life potion that fills your health and an ammo box that replenishes your ammo. You can find a key that lets you unlock a locked door. All doors look the same and a blinking key icon is displayed at the bottom of the screen if you are trying to go through a locked door without the key. There is a set of infrared goggles needed to go past the laser walls. This is yet another obstacle you will encounter within the maze. If you are equipped with the goggles, you can see the lasers beaming down. You can try to walk through the laser wall without the goggles if you wish, but you will suffer heavy damage by doing so. With the goggles and proper timing, you can pass through unscathed. I found the timing tricky to master and there is little room for error.

The lasers deploy randomly, so you need good reflexes and timing.

You can continue playing if you die in this game, and Golgo 13 has an interesting way of representing the continue system. Each life for Golgo 13 is represented as an episode of a TV series. On the title screen, there is a #1 written on the left at the start of the game. If you die, you get a screen saying “To Be Continued…” instead of the traditional Game Over screen. You go back to the title screen and now you see #2 meaning Episode 2. You can keep continuing all the way to #52, but if you die there you must start the entire game over.

Golgo 13: Top Secret Episode is a long game. Naturally, there are 13 acts in the adventure. Some of them go by quickly, and others, like the ones with mazes, last a long time. There are no passwords and no saving in the game, and you are left at the mercy of the continue system. Completing Golgo 13 is more than just an endurance test; it has some challenging moments that take learning and practice.

This was my first time playing Golgo 13. It’s a common cart and one I picked up early on during one of my waves of collecting. With cart in hand, I remembered my impressions of the games from those old magazines. When I finally got to try it out, I was less than impressed with the first few minutes of the game. I would not have sat down and tried to get into it had I not started this project.

What doesn’t Golgo 13 do?

Golgo 13 started to impress me the more I played it. The first scene has you walking on the streets of Berlin. I thought the first-person shooting segments were a neat diversion. Soon you play a helicopter portion, and I had no idea that Golgo 13 had shooter sections. Each mode is a little bit clunky in its own way, but the game does a noble job of including several variants of game play. It’s a surprisingly deep game for the NES in 1988.

The manual is invaluable for this game because it contains maps of the mazes. Only the basic layouts are included, but all you need is a few missing details you can fill in yourself and you have a complete map. I got stuck in a maze on my first time playing, and I come to find out that it’s meant to be a fake base that is not necessary at all. If I had read the manual first more clearly, I would have known that.

One night I ended up with a lot of free time and I was able to complete the entire game with some continues to spare. It took me around three and a half hours to beat Golgo 13 on that playthrough. I didn’t think I’d be able to beat the game that night so I didn’t have any of my recording equipment set up. I had to play through the entire game again the next night to get it captured. It took me half the time to beat the game a second time with many fewer deaths. I’m satisfied with that result from only playing the game for a few days total.

Suggestive content was toned down for the US release.

Golgo 13: Top Secret Episode had some content censored for the US version. The most significant change is that the Japanese version features brief nudity. In an early scene of the game, Golgo 13 meets with a female agent in a hotel room and at the end she sheds her clothes. In the US version, the scene cuts away to an outside view of the hotel where you can see the two characters get close and the lights go down. Golgo 13 then has his life refilled to the max, which clearly suggests what they were up to.

There are a few other things included in the NES game that the censors missed. Some of the enemies in the mazes briefly show bleeding when they are shot. In one act, Golgo 13 can find a pack of cigarettes on the ground and he helps himself to a life-refilling smoke. There is also a stray swastika that should have been removed. My guess is that since these events are deeper in the game, the censors didn’t play long enough to notice them.

There are many things happening in Golgo 13: Top Secret Episode that are worthwhile, but sadly the game suffers from a lack of polish. The hit detection is off in several places, such as when landing jump kicks or shooting targets in the first-person mode. The jumping is a little too slow and his jump arc doesn’t feel right. Enemies attack faster and with more complex patterns than you, causing frustration. You can shoot bullets right through enemies in the helicopter, which makes it appear you are not doing damage when you actually are. Now the graphics, music, and presentation are overall good, especially considering the age of this game, and there is a deep story with many different characters. Kudos to Vic Tokai for making a huge game with so many different play modes that all play well enough. For that, I can look past these issues and say that I enjoyed Golgo 13.

#55 – Golgo 13: Top Secret Episode

 
OCT
09
2017
0

#54 – Championship Bowling

The lone NES bowling title gave me more than I bargained for.

A cute penguin also runs across this screen!

To Beat: Score 250 or higher
To Complete: Bowl a Perfect Game of 300
What I Did: Completed the Game
Played: 7/12/17 – 7/17/17
Difficulty: 4/10
My Difficulty: 4/10
Video: Championship Bowling Perfect Game

Have you ever played a game expecting one thing and then got something significantly different? I have experienced that a little bit in this project so far. Take The Immortal as an example. I expected an adventure game with puzzles, but I wasn’t anticipating combat resembling Mike Tyson’s Punch-Out!! at all. Championship Bowling is clearly a simple bowling game, but as I sought the highest score it morphed into a puzzle game, requiring me to look for patterns and techniques to crack its code.

Championship Bowling was released on the NES in December 1989. It was published by Romstar and developed by Another Ltd. The Black Bass is the only other NES release developed by Another, though they did release a couple of adventure games on the Famicom in their brief history. This was the second game published by Romstar on the NES, just a couple of months after Twin Eagle. Championship Bowling was also released on Famicom in 1991, published there by Athena. It is the only bowling game on the NES.

Championship Bowling emulates a standard, regulation round of bowling. There are ten frames each consisting of ten pins arranged in a triangle, and the object of the game is to roll the bowling ball down the lane trying to knock down as many pins as possible. You get two throws per frame unless you get a strike by knocking them all down on the first throw. Strikes are the way to get the best scores, but you can do well by picking up the spare on the second throw. After the 10th frame is completed, the game is over. You can see your score, high scores, and choose to play another round if you wish.

At the title screen, you can choose the number of players and which bowling lane you want. Championship Bowling supports up to four players! You can also choose from five different lanes. Each one has a different color scheme in game as well as unique effects on the ball path such as speed and curve of the ball. You press Left or Right to change the number of players, and press Up or Down to choose the lane. Then press Start to advance to the character selection screen.

There’s a good selection of options.

On the next screen, each player makes further selections. You can choose from one of four bowlers and each one has some slight differences in gameplay. Use the D-Pad to highlight the desired bowler and press A. Then enter in your initials. Press Up or Down to cycle through letters and press A to choose each initial. Finally, choose which bowling ball you want. You can pick a 7 pound, 9 pound, 11 pound, 13 pound, or 15 pound ball. Again, each ball handles a bit differently and each one is a different color. One weird thing here is if you play multiplayer, Championship Bowling requires two controllers. Odd numbered players use controller 1 and even numbered players use controller 2. One controller is all you really need since play is alternating, so this is a strange choice. Once all players make their selections then it’s time to bowl!

At the start of each frame, your player stands at the bottom of the screen. Use Left or Right to set where you want your bowler to stand, then press A. Next, the Control meter on the left will show a ball automatically moving in a half-circle arc. This determines the kind of spin placed on the ball. You must press the A button with good timing to get the spin you want. After spin is chosen, then the power meter bar quickly moves up and down. This determines how hard you throw the ball, and like the Control meter this also requires good timing with the A button. After all that, the bowler will go ahead with those selections and throw the ball. If you bowl a strike, you get a little celebration and play moves on to the next player or next frame in single player. Otherwise, you get a second throw to try and clean up the remaining pins.

There is some other useful information on this screen. You can see the high score in the upper-left which defaults to 200. The lower left shows which player is bowling, the current frame, and the scoring for this frame. On the right side, you see a top down view of the lane which is useful for lining up shots. Above the pins is a display that lights up the number of each remaining pin after the first throw, just like something you would see on the display at a real bowling alley. Additionally, before you start your timing selections, you can press B to see the scorecard for your entire round thus far.

After everyone has finished bowling, you are taken to the high score screen. Initials and score are added for every player that scores well enough to place on the board. There are trophies displayed here with scores underneath them that suggest you should be aiming for those scores. When you are finished, you go back to the title screen. Championship Bowling is a simple, straightforward experience.

Here you line up your shot and time the meters.

I think this is my first time playing through Championship Bowling. I have cleaned and tested every cart in my collection, and it’s possible that I played a whole round when I tested this game. This was definitely my first time playing this game seriously. It’s a common cart and I don’t recall when I bought the game. I know I have picked up some in game lots over the years so that’s likely where my copy came from.

The manual has a topic about getting the perfect strike, and the idea proposed there is the same as actual bowling. You want to aim the ball between the front pin and either one of the pins in the second row. Not only that, but you also want to hook the ball between those two pins to get the best possible pin action and best chance to get a strike. In the game, you want to do the same thing. Position your bowler to the right of the pins and curve the ball to the left. (Do the opposite if the bowler is left handed.) With the right positioning, angle, and power, you can hit the sweet spot and get a strike most of the time. I say most of the time because the same shot doesn’t always work.

I mentioned the trophies on the high score screen. The lowest one reads 250 points, then 275, and lastly the perfect 300. Championship Bowling has three different ending screens for meeting each one of those thresholds. The way the scoring system works, you must score several strikes in a row to best increase your score. I was able to find the sweet spot that gives me a strike most of the time, and then I was able to pick up the spare on the frames where pins were remaining. It took many games to find this spot as well as home in on the timing to hit it every time. After playing for some time, I could play a round that let me have enough consecutive strikes to score well within the 250s. That was good enough to get one of the endings and consider the game beaten, but that wasn’t good enough for me.

This was the point where the game turned into this larger puzzle of how to narrow down my options and sequence the events to bowl a perfect 300, and I’m proud to report that I achieved it. I have bowled at least five perfect games with my strategy and it does seem to be consistent. So now I will reveal the ultimate strategy for the perfect game in Championship Bowling. This is the official spoiler alert. You can jump down to the closing paragraph now if you want this game to remain shrouded in mystery.

Strikes are very exciting!

There really are many variables at play here that can change everything, and I narrowed some of them down pretty quickly. I tried just about every position, angle, and speed. Before bowling even begins, I tried all the different lanes, all the different characters, and all the different balls. Right away I put a focus on powerful shots, and in turn I could eliminate three of the five lanes that slow the ball down considerably. Lane 1 is the right lane for this strategy. I also knew a strong hook was important, so I read the manual and it says the upper-right character has the best hook. It’s tough to tell, but I believe the characters do have minute differences and so I stuck with that character. This is the base that I started with.

My next discovery was the semi-consistent strike shot. There are lane markings shaped like triangles arranged in an upside-down ‘V’ pattern. You want to position your bowler to the left of the second lane marker from the right so that the right side of his head is just barely to the left of that lane marker. For the spin control, you want to stop the cursor on the far bottom-left. For the power, you want the bar all the way to the top, or one notch below full power also works. The best ball for this is the 13 pound ball. This exact shot with this ball is 100% effective for the first three frames, while any other sized ball has a small chance of failure.

The fourth frame is where this strategy falls apart. Using my shot technique here causes the ball to hook more sharply, leading to missed pins. To make matters worse, sometimes the game waits until the fifth, sixth, or seventh frame to start missing. Now somewhere around here I did figure out another shot variation that gives occasional strikes, and that’s good and important, but I still have the problem of not knowing when I can deploy this other weapon. This leads to my next discovery. The longer you play, the more randomized the game becomes. I got into the habit of hitting the reset button when I missed a strike to start over and eventually I realized that puts the game into a slightly different state than starting from power on. Once I resorted to shutting my NES off and turning it back on for each new game, I began to get consistent results! Now I could put everything together and get the perfect game I’ve been working toward!

Oooh, I wonder what my prize is!

Here is the complete strategy. Choose Lane 1 and the upper-right bowler. Choose whatever initials you want and select the 13 pound ball. There are only two shots you need to learn. The first shot is the same one I covered above. Position your bowler so that the right side of his head lines up with the left side of the second lane marking from the right. Angle the ball as far left as possible, and go for either full power or one notch below full. Let’s call this Shot A. The other shot I will call Shot B, and it is nearly identical to Shot A. You want the same lane positioning and the same power for both shots, however the angle for Shot B is at a 45-degree angle on the left. Use Shot A on frames 1, 2, 3, and 5, and use Shot B for all remaining frames. If you mess up Shot A a little bit, there’s a chance you can still get a strike. However, you need to be precise on each Shot B or you won’t get a strike. It took me a long time to figure this out because Shot A magically becomes effective again once you make a mistake, so I was led down the wrong path of using it way more often than I should.

I recorded video of bowling the 300 game, but Championship Bowling had one final, bizarre trick up its sleeve. I had been playing the game on my CRT with my AV-modded top-loading NES that I use for quick games or testing carts, but I record gameplay using my flat screen TV and the AVS system. There was a bit of a timing difference that I eventually got used to, but it turns out that my shot sequence above fails on the fifth frame while using the AVS. I suspect that the starting states of the top-loading NES and AVS are not exactly the same. Like I said, it’s completely strange and unexpected. While playing from a fresh boot of the AVS, I needed to use Shot A on frames 1, 2, 3, and 6 while using Shot B on the others. It’s just swapping shots on frames 5 and 6. That sequence is what I recorded in the video. Perhaps different consoles or emulators have a different shot sequence.

For not having any other NES releases to compare it to, Championship Bowling stands on its own anyway as a solid bowling game. The game has good controls and even though it only has as a few songs and melodies, they are catchy and well done. The graphics are nice and clear, although some lanes had poor color choices for the power meter making it hard to see. Each bowler has several frames of throwing animation and the pin action is pretty good considering what the NES is capable of. I’m also thankful the game is not completely random or otherwise I would have given up by now. It’s far from flashy, and the experience wears off quickly, but Championship Bowling is a capable NES game disguised as a surprise puzzler.

#54 – Championship Bowling

 
OCT
02
2017
0

#53 – American Gladiators

You can sort of get the experience with this lovely home version!

A contestant runs around the copyright page before the title.

To Beat: Reach the Ending
Played: 6/26/17 – 7/2/17
Difficulty: 6/10
My Difficulty: 6/10
Video: American Gladiators Playthrough

It wasn’t too long ago that I wrote about Rollergames, and today we have another game based on a 90’s TV show that is right out of the same mold. They were both live-action shows that ran on TV at the same time. Both shows received an NES game to piggyback off the hype. Also, although American Gladiators on NES does a little better in this regard, both NES games deviate somewhat from the source material.

American Gladiators is a US TV show that aired in syndication from 1989 to 1996. It pits two men and also two women against each other in several events culminating in a final obstacle course called the Eliminator. All the events involved the Gladiators, who are recurring athletes that have their own roles in the events to prevent the contestants from scoring. The show eventually featured many different events that came and went through the run of the show, and each episode consisted of different combinations of events. Later, there was a remake of American Gladiators that ran for two seasons, both in 2008.

I’m genuinely disturbed by the concept of lives here.

American Gladiators on NES was released in October 1991 only in the US. It was published by Gametek and developed by Incredible Technologies. This game resembles the show but does not follow its format. There is a different American Gladiators game that is much more faithful to the show. That version was developed by Imagitec Design Inc and also published by Gametek on the Sega Genesis, DOS, and Amiga in 1992. The SNES port was released in 1993.

Similar to the TV show, in the NES game you have to compete in five different events which are modified versions of specific games that appeared on the show. You have to clear all five events within so many “lives.” The events are Joust, The Wall, Human Cannonball, Powerball, and Assault. Once you clear all five events, the game advances to the next level where you get a more challenging set of these same five events. In all, you must clear four different difficulty levels of five events each before moving on to the final event, the Eliminator. If you can clear the Eliminator, then you win the game.

Let’s look at each event. First I will explain how the event is played on the show, and then I will describe how it was converted to the NES game.

Stick and move.

In Joust, a contestant and a gladiator attempt to knock each other off a raised platform with pugel sticks. In the NES version of Joust, you square off against four gladiators one at a time instead of just the single battle featured in the show. During a face-off, you can move around a bit on the platform by tapping Left or Right on the D-Pad. Press A to thrust your pugel stick at the gladiator. You can press B to thrust too but this will also inch you a step toward the gladiator. Just pressing A or B does a middle thrust, and you can also do a high thrust by holding Up or a low thrust by holding Down when you strike. You can also block by holding Left and pressing either A or B. You exchange blows with the gladiator until you knock him off the platform. Then the event briefly switches to a platformer as you must move forward jumping from platform to platform to engage the next gladiator. After you win the third fight, a super pugel stick will fly into play. If you grab it your stick will light up, then if you can land a first strike on the gladiator you will knock him off instantly. If you get hit first then you lose the super pugel stick, so make it count! If you get knocked off or fall off at any time, you lose a life.

Tap it out while making quick decisions.

In The Wall, two contestants race up a climbing wall. After a few seconds, the Gladiators will pursue the contestants attempting to pull them off the wall, preventing them from reaching the top and scoring points. In the NES event, your goal is also to climb to the top of the wall, but this time there are several gladiators that appear at various locations along the wall that you must avoid. The controls for this event are tricky and unlike anything else I’ve ever played. The idea is that the B button moves your left hand and the A button moves your right hand. You combine this button press with a direction to move that hand in all eight directions. There are handholds covering most of the wall and as long as you have at least one hand on one you will stay on the wall. The consequence of this control scheme is that you need to tap buttons quickly to move fast. For instance, to move straight up, you must rapidly alternate between pressing A and B while holding Up. It takes practice to get the hang of it. You can find a glove on the wall that lets you move very fast with just the D-Pad instead of having to tap out A and B, but it only lasts for a few seconds. Each of the four levels is a completely different layout on the wall, and you need to have mastered the control scheme to clear the last wall. If you lose the grip on both hands, or you come in contact with one of the gladiators, then you fall down and lose a life. Plus, you have to start at the very bottom of The Wall.

He doesn’t stand a chance.

The Human Cannonball event begins with a gladiator standing on a small elevated platform holding a foam pad for protection. The contestants swing on a rope from their own platform and try to knock the gladiator down to score points. The NES event requires you to jump from your platform, grab the swinging rope, and then let go at the right time to knock the gladiator down. Like Joust, there is a series of four gladiators that you knock down to finish the event. Both the starting platform and the gladiator’s platform move up and down, making the timing more difficult. At the start, you can walk left or right a bit on the platform, and then press A to jump toward the rope. If you grab onto it, then you automatically swing back and forth and you must press A again to let go and launch yourself. In some levels, during the third gladiator a glove will fly into play, and if you grab it you can move up and down the rope. Normally where you first grab the rope is where you stay until you jump off. The glove comes in handy on the fourth gladiator because there can be a trophy at the top of the rope that gives you an extra life. In this event, it is very easy to lose lives. You can fall off the platform, miss the jump to the rope, miss the gladiator on the launch, or hit the gladiator when he is blocking.

Always score in the center when it is clear.

In Powerball, there are bins filled with balls on both ends of the playfield, and there are five empty pods guarded by three gladiators. Both contestants play simultaneously by taking a ball and putting it into the pods, if they can get by the gladiators to do so. The players must cross to the opposite end before grabbing a new ball, and the object is to score as many points as possible within a time limit. The NES version of Powerball is mostly faithful to the original event. You grab a ball at either end of the playfield with either A or B. Then you have to run around the gladiators and place the ball into the pod by standing next to it and pressing the button. Just like on the show you must cross to the opposite side to grab a new ball. The difference in the NES game is that you are only allowed to put one ball in each pod. If you score on all five pods, you are awarded an extra life as well as free up all the pods so you can continue scoring anew. If a gladiator touches you, he always knocks the ball out of your hand and you have to go get a new one. This is the only event where you don’t lose a life. Just score as much as you can before the timer runs out!

Weird gladiator scrolling, but a fun game mode at least.

The Assault features a gladiator manning a tennis ball cannon, and there is a target on the wall behind him. The contestants run through the playfield dodging the fired tennis balls and reaching the safe spots. Each safe spot has a weapon used to hit the target. The contestant wins if they hit the target or reach the end of the course before time runs out, and they lose if the gladiator hits them with a tennis ball. The NES version of the game plays a bit differently. The gladiator moves back and forth at the top of the screen with the cannon no matter where you are in the course. You scroll the playfield upward and seek out weapons near a safe spot. Neither you nor the gladiator can shoot through barriers on the field. Grab a weapon by standing on the weapon icon and pressing B, then press A to launch a shot upward. Each icon gives you three shots. The gladiator will fall if you shoot him enough times, and you lose a life if he hits you three times. Alternatively, you clear the event if you reach the top of the course before time runs out. This is the only event that you can lose if the timer expires.

Platforming with random projectiles!

Once you clear all 20 events, then you begin the Eliminator. This is a long, slowly scrolling platforming level essentially. You start out by hopping between balance beams with the A button and advancing to the right. During the event, medicine balls will spray out from the bottom of the screen randomly. If they hit you then you fall, but you can save yourself by pressing Down to duck in time and shield yourself from the hit. Be careful when jumping as you can’t block hits. Eventually you come to the hand bike. Press Left or Right to move along the rail and dodge the balls. Past the hand bike are conveyor belts, and then after that is another hand bike section. Finally, the balls go away and you take a series of zip lines to the end of the course. You must time your jump off each zip line to grab the next one. If you get all the way to the end, congratulations!

Finally, here is some miscellany about American Gladiators. Across all events, there is a scoring system in place. You typically earn points by either getting past a gladiator or redeeming each second left on the timer at the end of the event. Once you clear a level of five events, you get 100 points as well as an extra life for the next level. You can also earn a continue by clearing either Level 1 or 2. When you lose all your lives, you get a password, provided you have already cleared Level 1. The password is eight characters long and the only characters are A and B. You enter the password by pressing the corresponding button, which is super convenient. There are only three passwords, one for each level from two to four. Lastly, the game features a two-player mode, but it is alternating play so it isn’t that useful.

This was my first time playing American Gladiators. I have owned the game since childhood and probably got it from a yard sale. It only took one try playing it to discover I wasn’t all that interested in the gameplay. I’m not sure why that was because I enjoyed watching the TV show on cable whenever I saw it was on, and I played NES often as a kid. I’m glad I’m doing this completion project because it gives me the motivation to play through games such as American Gladiators that I’ve owned for over half my life.

This guy is super tough for some reason.

It took me three or four days over a week to solve American Gladiators. Initially I found Powerball to be the easiest event because I always filled up the pods, only to find out later that it truly is the easiest one since you cannot lose regardless. Assault was the next easiest game for me because I am good at dodging, although that was tested during the final level. The Wall tends to be difficult for people due to the weird, exhausting controls, but I took to it quite well. Joust was the event that gave me so much trouble until I figured out how it worked. Human Cannonball to my surprise ended up being the most difficult event as the later levels had me almost pulling my hair out.

Once I got all those games figured out, it was time for the Eliminator. This event was challenging, but it was even harder to learn because I could only use what lives I had remaining after clearing all the Level 4 events. The best shot I had at the Eliminator came from playing the game from the start and accumulating as many lives as possible along the way. I had a few runs that I almost completed before recording anything, and once I sat down to record I ended up completing the game for the first time. I even beat it without continues. I had close to ten lives starting the Eliminator but I used nearly all of them up to beat it.

You really need to master the controls to solve this one.

Here are some pointers for a few of the events that tripped me up in the game. Spoilers apply here, so if you want to try the game yourself and keep your experience pure, now is the time to look away! As I mentioned earlier, Joust was my first major hang up. That was because I was playing it wrong. The opponents also strike with low, medium, and high thrusts, and you can counter each one. You counter a low strike with a medium one, a medium strike with a high one, and a high strike with a low one. The gladiators also strike in a pattern that loops, so once you see it you can predict and counter every hit. If you are fast and don’t know the pattern, you can also counter by observing his strike and attacking quickly. Moving on to the Human Cannonball event, there are a few gladiators that seem impossible to knock down because they always block you. The only way I figured out how to get past them is to swing on the rope back and forth a few times before launching yourself. In other words, if they block on your first swing, try knocking them down on your second swing. You can stay on the rope for as long as you like once you grab on. I won’t tell you which gladiators or how many swings you need to wait. If you need to know, you can see my strategy in the longplay video. Finally, a couple of basic tips for The Wall. Make sure to spend some time in a clear space learning how to move in all directions. Take it slow. This becomes very important in later levels where each incremental movement is critical. Also, it is best to set the controller in your lap and use your pointer and middle fingers to tap out the A and B buttons. The game manual recommends this since you can move around on The Wall much quicker and with less fatigue in your hand.

I’ll say that American Gladiators is an interesting NES game, but I don’t know that I would recommend playing it. It’s a novelty to see how they adapted the show into an NES game, but it’s not quite reminiscent of the show enough to invoke the nostalgia factor. The music is fine, but nothing special, and notably the iconic theme song is not in this game at all. If it is, then it wasn’t recognizable enough for me to notice it. The graphics are decent and every important element is clearly defined. It’s a mish-mash of a game. I had fun with it, but of course I always say that.

#53 – American Gladiators

 
SEP
25
2017
0

#52 – Sky Shark

If only it were literally a sky shark!

Good music and developer info works for me!

To Beat: Finish Level 5
Played: 6/6/17 – 6/12/17
Difficulty: 7/10
My Difficulty: 7/10
Video: Sky Shark Playthrough

Today’s game is a port of an arcade shooter. I have covered a few arcade ports of shooters already. One of them is MagMax, which although it was true to the arcade game, it was ported far too late and wasn’t that much fun to begin with. On the other extreme, I played Gyruss and found the expanded NES port to be a better experience than the arcade version. BreakThru sits somewhere in between the two. It was like the arcade game, but was a decent port and reasonably fun to play. Of those three games, Sky Shark sits pretty close to BreakThru.

Flying Shark is an arcade shoot-em-up released in 1987. It was developed by Toaplan and was published in North America by Romstar. The game was ported to many different home computer systems in Japan, North America, and Europe. Flying Shark was renamed to Sky Shark in North America. Toaplan also developed the 1989 sequel to this game called Fire Shark. The NES version of Sky Shark was released in September 1989. This port was developed by Software Creations, and Sky Shark was their first NES game. Despite being based in England, Sky Shark on NES was only released in North America. You may also remember them as the developer of Pictionary that I played last year. The NES version was published by Taito, who also published the arcade version of Flying Shark in Japan.

Sky Shark is a top-down vertical scrolling shoot-em-up. You play the role of the best fighter in the best squadron of the US forces in World War II. He is given the nickname of the Sky Shark, and according to the comic in the game’s manual, even his plane is painted to look like a flying shark. I guess the name makes sense now! Your task is to fly through enemy forces and rescue your POWs. The mission is broken up into five stages separated by landing your aircraft. Don’t worry, the game does this for you. Survive through all five levels and you have beaten Sky Shark.

Plenty of planes and tanks early on in the game.

This is a simple game with equally simple controls. Use the D-pad to fly in all directions. Press A to fire your machine guns. Ammo is unlimited, but there is no autofire so you have to mash away at the fire button. The B button drops bombs. The Start button begins the game and pauses the action during play. Select is used to choose between one or two player mode on the title screen. Two-player mode is alternating play. That’s all there is to it!

Each aircraft comes equipped with three bombs, and dropping one inflicts heavy damage over a large portion of the screen. Bomb blasts absorb bullets too, so they can get you out of a tight spot if used defensively. Some enemies leave behind a B icon when defeated. Fly over this icon to collect an additional bomb. You can hold up to eight bombs, so you might as well use one before trying to grab a ninth. If you are interested in getting a high score, save up some spare bombs because at the end of each level you earn 3,000 points for each bomb in your inventory.

During play, the status bar is located at the bottom of the screen. You can see the current score for both players in addition to the high score. Underneath the score, you see icons that indicate how many additional fighters and how many bombs you have. Like bombs, you can have up to eight lives. There are no extra lives found on the battlefield, but you earn one every 50,000 points. It’s pretty unlikely you would reach the maximum number of lives, but it could happen!

Red planes are about the only welcome sight in Sky Shark.

One recurring feature in the stages is a wave of eight planes. They all fly in together in one of several formations and leave the screen quickly. Destroying all eight planes of the wave gives you a bonus. If the planes are yellow, you earn 1,000 points, but if the planes are red they leave behind an S powerup. The S flies around in loops on the screen so it can be tricky to grab, but you want to grab it because it powers up your machine gun. You can upgrade your weapon six times total. The first upgrade increases your gun from two shots to four, and you eventually work your way up to the fully powered gun giving you seven shots at once with a slight spread. Any time you die by taking a hit, your weapon reverts to the basic double shot. The S powerups tend to be spread out, so it takes a long time to power up all the way if you can survive that long. The sad thing is that the best weapon is not nearly as powerful as you would like.

Both the levels and enemies are generic, World War II styled elements. The stages do not distinguish themselves very well. Each level is composed of several of the same kinds of locations stitched together. There are jungle, ocean, and desert segments dispersed throughout the stages. The best level type is the trainyard area. Each level ends in an airstrip where you land the plane and get your bomb bonus. The enemies are all planes, tanks, and boats. In the ocean sections, you will pass by huge ships with cannons that you can destroy. Tanks emerge from the sides of the screen and behind buildings, and plane formations fly in often. There is not much variety overall.

There are a few bosses in the game. The Super Tank shows up at the end of the first stage. You don’t have to blow it up though because it will eventually run out of driving room and you can leave it behind. There is an upgraded version of the Super Tank that appears in a few places in the middle of stages, and just like the first boss they don’t follow you very long. There are also some large planes that act the same way, but it’s not exactly correct to call them bosses. There is also a giant final boss near the end of the fifth level.

Giant planes and battleships together at last!

When you are shot down, you resume play from the nearest checkpoint. Each stage has several hidden checkpoints, and I’d say the length between them is just about right. Some areas are harder than others so a checkpoint is a nice relief. When you run out of lives, you can continue up to three times. On the Game Over screen, you see the number of credits remaining and a countdown timer with some ominous music for an accompaniment. Press Start to continue your game from the nearest checkpoint, just as if you lost a life. You do lose your score when you continue. If you run out of credits or choose not to continue, you are taken to the high score screen where you can enter your initials.

This was my first time playing Sky Shark. I don’t remember how I acquired the cart, but it is a common game that I probably got in a bulk lot somewhere. It’s worth about $3 today, so hopefully I didn’t pay much for it. At least I knew it was a shoot-em-up, so that alone got me interested to see what it was all about.

Sky Shark is a tough game. I spent about a week playing the game over maybe a dozen attempts before I reached the end. I wanted to beat the game without continuing, but by the time I beat it I was ready to move on. The game overwhelms you early on with several tanks and aircraft at once, many of which fire aimed shots at you. Tanks appear and start firing right away, so you are forced to be on your toes and keep moving. You really need to know where enemies appear to stand a chance. Enemies have a bad habit of firing off one last shot just before they despawn off the sides of the screen. Even though the enemy bullets are large and change colors, they are often hard to see in the thick of the fight. Your only gun fires mostly straight, limiting its effectiveness, and bombs tend to be used to extend a life just to reach the next checkpoint. Thankfully the game has a continue system, otherwise I would have rated the game either an 8 or a 9.

Busy backgrounds mean it is hard to identify everything going on.

Sky Shark does not have an ending. Once you fight the final boss and reach the end of level five, the game loops seamlessly. In a small twist, the game restarts from level two, so if you keep looping the game you will just repeat levels two through five without every playing level one again. Luckily, there is a way to tell if you have finished the game. I left this little tidbit out intentionally until now. When you enter your initials on the high score screen, there is also a two-digit value displayed on the right-hand column. I can’t confirm this for certain, but that value appears to be a percentage of how much of the game was completed.

There are two quirks about this value that make me doubt my theory a bit. The first thing is that this value is more heavily weighted toward the end of the game. For example, you could Game Over deep in level two and only get a value in the teens when you would expect that you’ve completed nearly 40% of the game by then. It seems to increase more quickly at the end of the game. The other thing about it is that it never reaches 100 but stops at 99. I haven’t seen any evidence that you can achieve 100 here, so the assumption is that a value of 99 is the max value and indicates that you have seen all there is to see in Sky Shark. Capturing a picture of the final landing doesn’t seem to be conclusive, so I also took a photo of the high score screen.

Perhaps the best element of Sky Shark is the music. Tim Follin is the game’s composer and he is one of the best on the NES. I gushed over his music in my Pictionary review. While he does not hit the highs of that sweet Pictionary title theme, the music is still very enjoyable. I think the title screen music is my favorite. It is also played during some of the levels, so you get to hear it often enough.

Aside from the music, Sky Shark is a mediocre game. It does nothing in gameplay to set itself apart from other NES shooters. There’s not much variety here. The levels are generic, and so are the enemies and bosses. There aren’t many enemy types, and they all shoot the same type of bullet. I’ve already outlined the problems in gameplay in light of its difficulty. Now, Sky Shark is not a bad game per say. It controls well, the hitboxes are fair, and there aren’t any glitches to speak of. The graphics are a downgrade from the arcade version, but are still fine for the NES. It’s a game that doesn’t quite match up in quality when compared to other releases of its time. I expect a little more technical prowess from an NES game from 1989, especially when Taito is attached to it.

#52 – Sky Shark

#52 – Sky Shark

 
SEP
11
2017
0

#51 – Dragon Fighter

Don’t just fight a dragon, become one!

You can’t start until you see this title screen twice. Lame!

To Beat: Reach the ending
To Complete: Beat the game in the secret hard mode
What I Did: Completed the game
Played: 5/19/17 – 5/22/17
Difficulty: 6/10
My Difficulty: 6/10
Video: Dragon Fighter Hard Mode

It’s funny. I just finished playing through Dragon Warrior, and then the next game to come up on the list is Dragon Fighter. Don’t let the names fool you, for these two games are really quite different. Dragon Fighter is a side scrolling action game, not an RPG. Dragon Warrior is an early NES game, while Dragon Fighter is a later release. While Nintendo Power gave away Dragon Warrior, Dragon Fighter is a hard to find game that is very expensive now. Finally, Dragon Warrior is really well known, and Dragon Fighter is still pretty obscure. While I can’t get the price down on a cartridge, I can help make this fun game a little more well known.

Dragon Fighter was first released on Famicom in August 1990. The game was developed by Natsume and published by Towa Chika. Natsume developed a few action games on the NES, including S.C.A.T. which I have already completed. Towa Chika did not publish any games outside the US. Perhaps the most infamous game they published is the Famicom platformer A Week of Garfield. Dragon Fighter was brought over to the NES in January 1992. The NES version was published by Sofel, who brought only five games to the NES.

Dragon Fighter is a side-scrolling action game. An evil warlock named Zabbaong attacks the land of Baljing, who are known as a peaceful people with a dragon statue as a symbol of their good nature. The Dragon Spirit had given the people the dragon statue, and now under the enemy attack he brings the statue to life as a fierce warrior. You play as this warrior as you strike back again Zabbaong.

Don’t run away! The green guys aren’t that scary.

This is a relatively straightforward game. In fact, this is a pure horizontal scroller with the playfield only scrolling to the right, just like Super Mario Bros. As the fighter, you wield a sword and can perform basic techniques. Use the D-pad to walk around. You can crouch by holding Down. Press A to jump, and B to swing your sword forward. You can swing your weapon when standing, jumping, or crouching. If you hold down the B button, you will start to flash. Hold it for long enough, and then release the button to perform a charge attack.

The main feature of Dragon Fighter is that you can become a flying dragon. At the top of the screen there are two meters. The top one is your health meter and the bottom one is called the metamorph meter. For each enemy that you defeat with the sword, you will add to the metamorph meter. Enemies beaten by charge attacks do not fill the meter. Once this meter is at least halfway full, then it will start flashing indicating you can morph into a dragon. Hold Up and jump with A, and at the top of your jump you switch over to a flying dragon.

In dragon form, you can fly around in all eight directions and you can fire with B. You always face to the right in this form. Also, the screen begins to scroll forward automatically as your metamorph meter dwindles away. You get more firepower and can avoid attacks much easier as a dragon, so this form is very useful. You can switch back to the fighter at any time by holding Down and pressing A. Keep in mind that you may need to fight more enemies in fighter form to build the metamorph meter back up before you can switch back to a dragon again. If the meter runs out, then you will automatically shift back into the fighter.

Sometimes a defeated enemy will drop a helpful item. There are only a few item drops. The power pearl will restore a couple points of health, while the larger pearl pot will restore eight health units. The power ring wipes out all enemies on the screen. Finally, the dragonweed, shaped like a dragon’s head, will fill up eight points in the metamorph meter.

With the dragon, you can fly over enemies.

In some of the stages, you will find powerups labelled G, R, and B. These are always found in the same location and are not dropped by enemies. Picking up one of these icons will change your fighter into the Green fighter, Red fighter, or Blue fighter. Each color fighter has both a distinct charge attack and dragon attack. The default fighter at the start of the game is the Green fighter. Your charge shot is a green ball that travels to the right, and the dragon form gets a three-way spread fire. The Red fighter’s charge shot is a set of three fireballs that arc in the air and fall down. The Red dragon’s attack is a fireball that spreads out when it hits the ground similar to the holy water in Castlevania. The Blue fighter gets a homing charge shot and the Blue dragon can fire two homing shots.

At the end of each stage is a boss battle. These include a fight with a werewolf, a giant centipede, and a large skeleton with floating hands. The metamorph meter is emptied upon starting the next stage, so don’t be afraid to use the dragon form for the fight. When you defeat the boss, it will drop a staff that you acquire to end the level. Collecting the staff increases the size of your health meter and also restores some health for the next stage. A little spoiler here: The sixth and final stage plays entirely as a horizontal scrolling shooter and you are forced into dragon mode for the whole thing. It culminates in a final boss battle with Zabbaong.

There are no extra lives in Dragon Fighter, so when all your health is depleted it is Game Over. You do have three continues. However, using one sends you back all the way to the start of the stage. Even if you reach the boss and die, you have to replay the entire level. This is the kind of game that you learn over multiple plays.

This was my first time playing through Dragon Fighter. It was among the final 30 games or so I bought for my NES licensed collection, mostly because the game is hard to find and expensive. I bought it in February 2015, and at the time the game was selling for around $100 for a loose cart. I explored many avenues looking for these final games, and for this one I ended up taking a chance on an Amazon listing with no pictures. The cart was only $50, but the game was badly cracked. It was punctured right over the label causing attached shards of plastic to be pushed into the cart shell. I opened the cart up and pushed the damaged part outward to make it flatter. It’s a shame because the cart is in really nice shape otherwise. It does look great on the shelf at least! As of August 2017, a Dragon Fighter loose cart sells in the $250-$300 range, so I’m happy with my choice.

Deploy the dragon strategically during boss battles.

Beating the game wasn’t too much of a challenge for me. I ended up beating the game the first night in over two hours with a few practice runs. A lot of it was figuring out when to deploy the dragon and which color fighter to use. There is a little bit of platforming, but most of the game centers around enemy combat. I think I’m pretty good at seeing the enemy patterns and figuring out how to react. Some fortuitous item drops also came in handy! I gave the game a difficulty rating of 6/10 because of the limited continues and no checkpoints when you use one. I maybe should have rated it higher because I think many players are going to have more of a struggle with it, but I’ll stick with my choice because I figured it out so quickly.

This is not all Dragon Fighter has to offer. The game has an unlockable hard mode. When you beat the game and leave it on the ending screen for a little while, a cheat code is displayed. Correctly inputting it at the title screen changes the copyright text from blue to red, indicating hard mode is activated. There are two major differences in hard mode. First, there are no item drops. This makes health preservation critical as you can only heal once per level after defeating a boss and grabbing the staff. The other difference is that for each enemy you kill in dragon form, a homing bullet fires as the enemy’s death explosion finishes. As far as I recall there were no further changes to the game. It’s a good mode that tweaks how you approach levels. I spent a separate night beating hard mode. For some reason, I was determined to beat the game on hard mode without dying, and I’m happy to report that I accomplished it. It’s one of my better achievements captured on video.

I know the term is overblown to NES fans, but Dragon Fighter is indeed a hidden gem. It’s a straightforward but competent hack and slash action game with the ability to morph into a dragon, so there’s already a lot going for it. The graphics are well done, the music is good, the gameplay is solid, the bosses are fun to fight, the challenge is appropriate, and the optional hard mode is well thought out. Dragon Fighter checks most of the boxes from what you would expect out of one of the most expensive NES games. The price is obviously a major barrier if you want the authentic experience, but if you have a Powerpak or play on an emulator, Dragon Fighter is a game that is worth checking out.

#51 – Dragon Fighter

 
AUG
24
2017
1

#50 – Dragon Warrior

Baby’s first RPG!

Title screen fanfare is nice!

To Beat: Reach the Ending
Played: 4/18/17 – 4/27/17
Difficulty: 2/10
My Difficulty: 1/10
Video: Dragon Warrior Endgame

It took me longer than I expected to get this far, but I have finally reached this milestone of the review of my 50th completed game. I thought I might do special games at milestones like this one, but my current plan is to take games as they come. In this case, it ended up working out to a game that is good enough for the 50th post. Dragon Warrior is an extremely basic role-playing game, or RPG, but it is an important game that eased me to the genre and was a gateway to more complicated and challenging games in this style.

Dragon Quest is the first game is a long running series of RPG games under the same name. Yuji Horii created Dragon Quest in response to other RPGs of the time like Wizardry and Ultima. The driving force behind Dragon Quest was that it would appeal to a much wider audience, even those who are not interested in or familiar with video games at all. The result was a much more simplistic game with a larger focus on story to draw more players in. Dragon Quest was very successful in Japan and it still one of the most popular game series there today. Dragon Quest XI was just recently released in 2017, and there are various spinoff titles and remakes as well as forays into novels, manga, and anime.

Dragon Quest was released on the Famicom in Japan on May 27th, 1986. It was developed by Chunsoft and published by Enix, now known as Square Enix. North America would not receive this game on the NES until all the way in August 1989, just a few months before Dragon Quest IV released in Japan. Here the name was changed to Dragon Warrior due to a naming conflict with the pen and paper RPG DragonQuest. Its success in Japan did not translate over to the US and sales were poor. In 1990, Nintendo Power gave away copies of the game as a subscription bonus for the magazine, and that greatly helped the series gain traction. The NES would eventually receive all four Famicom Dragon Quest titles under the Dragon Warrior name.

Some olde time English here.

The plot of Dragon Warrior is a simple one. In the land of Alefgard, the evil Dragonlord had stolen the Balls of Light from Tantegel Castle under the rule of King Lorik. The hero Erdrick managed to reach the Dragonlord’s castle on an island but was never heard from again. Years later, the Dragonlord attacked Tantegel Castle again, kidnapping Princess Gwaelin in the process. You play as an unnamed hero who seeks to follow in the footsteps of Erdrick by defeating the Dragonlord, retrieving the Ball of Light, and saving the princess.

A lot of what I have to say about Dragon Warrior is not only basic knowledge of this game, but of RPGs in general. If you have played any games of this style, most of the game description will be quite familiar. Dragon Warrior was aimed at newcomers, and so this review is also going to be focused on that same audience. I do think there is still value in Dragon Warrior as a beginner’s RPG, so I’m happy to go into detail that might be more rudimentary for some.

When you begin the game, you choose from one of three save slots. When starting a new game, you will give your hero an eight-character name and set the text speed. The game begins in a top-down view in the king’s throne room in Tantegel Castle. The king will give you an explanation of the task at hand, and from there you are on your own. You will want to visit the king often over the course of your adventure because this is the only place you can save your game. For now, this area serves as a pretty decent tutorial for how you navigate the menu and see all the things you can do.

The game would be over sooner if you could swim.

You use the D-pad to move the hero in the four cardinal directions as well as move the cursor to choose options on the menu. Press A to bring up the Command menu. As a rule, the A button proceeds and the B buttons cancels or goes back. You can also press Start to pause while walking around, but there is never a reason to do so.

There are many options on the Command menu. The first option is Talk which lets you talk or interact with the person you are facing. Status lets you see your statistics such as health, attack power, or which weapons and armor you are using. The Stairs command lets you walk up and down stairs that you are standing on. Most games will assume you want to take the stairs when you stand on them, but here you must use the specific command. Search lets you examine the ground at your feet for anything interesting. Spell brings up a list of spells that you can cast, but at the start of the game you don’t have any available. The Item screen lets you view and use items you are holding. You can only carry eight items, but certain items group together so you can hold several of them while only utilizing a single item slot. Door lets you open a closed door you are facing, but only if you have a key. The Take command lets you open a treasure chest you are standing on.

When you bring up the Command menu or just stand still for a while, you bring up a panel on screen that displays some basic stats. The LV counter is for your experience level. This indicates how powerful you are and it begins at one. HP stands for Hit Points and this is your health. MP stands for Magic Points. You spend magic points to cast spells. G stands for Gold which is the game’s currency. E stands for Experience Points and you earn these by defeating enemies.

I’ll take one of everything, please.

One of the chests in the throne room contains some gold to get you started. One of the first things you will want to do is spend that gold on some equipment. Unfortunately, there are not any shops inside the castle, but you still want to explore and talk to people here. Exiting the castle takes you to the world map. There is a nearby town to the east called Brecconary that should be your next stop. There are more people in town to talk to as well as places to shop.

The shop in the northwest corner of town is the weapon shop. You can only hold one weapon, one armor, and one shield at a time. There are several options and the more expensive options are more effective. An equipped weapon increases your attack power and either an equipped armor or shield increases your defense. When you buy something from this shop that replaces something already equipped, the shop will buy back the old item at half its value.

The shop in the southeast part of town is the item shop. Here you can buy or sell items from your item stock. It might be useful early on to buy an herb that lets you restore some health from anywhere. The inn is located in the southwest corner of the town. You can spend some gold to stay the night which replenishes all your HP and MP. The shops and the inn are the basic features of each town you encounter in the game.

Get used to seeing this screen a lot.

Most of your time in Dragon Warrior will be spent battling enemies. As you explore the world map or caves, an enemy may appear on screen that you must engage one on one. This bring up a smaller Command menu. Both Spell and Item appear on this menu and they act the same as in the standard menu. Fight lets you attack the enemy. Run gives you the chance to run from the fight and keep exploring, although the enemy may not let you escape. You and the enemy alternate turns until one either wins the fight or runs away. There is a text box at the bottom of the screen that describes what is going on, such as whose turn it is and how much damage is inflicted.

When you win a fight, you are awarded both gold and experience points. If your HP is running low, the text boxes all change color from white to red to show that you are getting close to death. If you succumb to the enemy, then you are returned to the castle in front of the king. Not only does he lecture you on dying, but you lose half of your gold. The good news is you do not lose any experience points or equipment when you die, so even if you lose many fights you will continue to get stronger as long as you keep playing.

When you meet certain thresholds of experience points, you will gain a level. This is noted after a battle with some fanfare. Going up a level gives you stat boosts. You can gain strength, agility, maximum HP, maximum MP, and sometimes even learn a new spell. The strength stat translates into additional points in the attack power stat, and agility translates into additional defense points.

A warrior and a wizard!

At certain levels, you will also learn a new magic spell. Each spell requires a certain amount of MP to cast. You will learn ten spells in all and they have various uses either in combat, while adventuring, or both. The Heal spell restores some of your HP. Hurt is a combat spell that deals damage to the enemy. Sleep is a combat spell that sometimes lulls your enemy to sleep, preventing them from taking their attack turns until they wake up. Radiant is used in dark caves to see as many as three tiles ahead of you in all directions. Stopspell is a combat spell that may prevent the enemy from casting their own spells. Outside lets you leave a cave automatically, and the Return spell sends you back to the castle from anywhere in the overworld. Repel is used on the world map to keep weak enemies from engaging you in battle. There is also a stronger healing spell called Healmore and a final attack spell called Hurtmore.

As you venture further out into the world, you will come across stronger enemies. Not only do later enemies have more health, attack, and defense, but some can cast spells of their own or do alternate attacks. You will need to spend a lot of time fighting weaker enemies and testing yourself to see if you can take on stronger enemies that bestow more gold and experience. You will encounter other towns throughout Alefgard that have new shops with better equipment, as well as different tips about the world to point you in the right direction for story progress. But most of Dragon Warrior is spent fighting enemies to strengthen yourself for tougher enemies.

I have beaten Dragon Warrior several times over the years and I am very familiar with the game even now. I remember finding the game while going out to yard sales with my grandparents as a kid. It was out of place for sure, laying on a table complete in box amidst random knick-knacks. It cost only $5 and they were happy to buy it for me. I didn’t know anything about the game from Nintendo Power because I wasn’t subscribing then, and it may well have been one of the subscription incentive copies. Happy to find a new NES game that day, I gave it a play that night and I got sucked in. The simplicity of the game combined with an abundance of childhood free time was the perfect recipe for a new RPG addiction.

You are the Dragon Warrior after all.

Aside from tracking down a few items, Dragon Warrior is a very easy game. For me, the challenge lies in making the time to play through it. I estimate it took me 15-20 hours to complete the game, though I insisted on leveling up to the highest possible level. I already knew the areas that were best for gaining experience points more rapidly. That helped keep the game shorter, as well as reaching towns as early as possible to buy better equipment. The more time I could spend fighting tough enemies, the faster I could max out experience points. Another time saving tip is that Dragon Warrior is just about a perfect game to grind while doing something else, such as watching TV. I’m not ashamed to admit I grinded out a few levels while listening and participating on conference calls while working from home.

The speedrunning community has managed to achieve seemingly impossible times in completing Dragon Warrior. What took me over 15 hours to accomplish has been done in a world record speedrun that runs a little over 25 minutes. There are certain timings to inputting commands that lets the hero do things like make higher damage attacks, dodge enemy attacks, and avoid random encounters. By using these timings combined with a heavy dose of luck, Dragon Warrior can be beaten at a very low experience level. It’s all very impressive!

Dragon Warrior was a formative game for me. It was my entry point into the Japanese RPG genre at a time when I could give a lot of energy into the experience. From there I sought out the NES sequels, and I eventually moved that interest over to the SNES and some of its top-class RPGs. Therefore, I have much appreciation for Dragon Warrior. Outside of that context, it’s not a game I see myself playing again unless I get bit hard by the nostalgia bug. It’s too simple, too plain, and too grindy. But if you are looking to get into the genre while not getting too deep into the weeds, Dragon Warrior is a fine place to start.

#50 – Dragon Warrior

 
AUG
10
2017
0

#49 – Kings of the Beach

No crowns required to be kings in this four-player volleyball game.

Very chill setting!

To Beat: Win a tournament
To Complete: Beat the game on the Difficult setting
What I Did: Completed the game
Played: 4/7/17 – 4/13/17
Difficulty: 5/10
My Difficulty: 5/10
Video: Kings of the Beach – Tournament Mode Final Matches

I am not good at sports. I still like to play them when I get the chance even though I wasn’t blessed with any ability. If there’s one game I am at least decent at, it would be sand volleyball. I organized a weekly sand volleyball night with a bunch of friends for several years, and that afforded me the opportunity to practice often. Now don’t let me fool you, I’m still not all that good at volleyball. However, I am pretty good at playing video games. Therefore, it shouldn’t be that much of a stretch for me to complete one of the few NES volleyball games.

Kings of the Beach is a volleyball game developed and published by Electronic Arts in 1988 on DOS. It was ported to the Commodore 64 in 1989 and the NES in January 1990. Ultra Games published the NES port. However, it is unclear if either Konami or Electronic Arts developed this version of Kings of the Beach. The game was only released in the US.

Kings of the Beach is a two-on-two beach volleyball game. You play as professional beach volleyball players Sinjin Smith and Randy Stoklos. In single-player mode, you only control one character and your partner is computer controlled. The main draw for single player is the Tournament mode. Here you will play against other pairs of players in five different locations all around the world. To win the tournament mode and beat the game, you must win three consecutive matches at each of the five beaches for fifteen total matches.

Interesting cursor choice!

At the start of the game, you move a green cursor around in an overhead map of the beach. This is your menu. The first place you will want to go is the registration tent, which is the game’s options menu. To start, you can assign either a controller or computer control to Smith, Stoklos, and two other competitors. Kings of the Beach supports up to four players simultaneously using the NES Four Score accessory. Next, you can choose between cooperative play or competitive play. This is only needed for a two-player game to decide if you want to play on the same team or not. You can set the difficulty of computer opponents to either Easy, Medium, or Difficult. You can choose if you want to play either a single set or a three-set match, and you can toggle the sound on and off. Choose Exit to Beach to go back to the main menu.

The other menu options are for practice or setting up a game. At the top of the screen there are three beaches labeled Bump, Set, or Spike. If you choose one, you are put in a practice beach where you get easy setups to practice the basic moves. Press Select at any time to exit the training and go back to the menu. At the lower left of the menu is the Match option where you jump directly into an exhibition match with the defined settings. This is the mode you want for a three or four player game. The bottom right part of the menu starts up the Tournament mode. You can select either a new game, or continue a previous game with a password. After that you jump right into the action.

Kings of the Beach plays by standard volleyball rules. Each side has two players and each point starts with a serve from the back of the court. Each side can hit the ball up to three times before hitting it over to the opponent’s court, and teammates must alternate hits. If the ball lands in your opponent’s court, the opponent hits the ball more than three times, or the opponent hits the ball out of bounds, then you win the point. The serving team is the only team that can score, otherwise the non-serving team gains control of the serve if they win the point. In a single set match, the first team to fifteen points wins. In a three-set match, teams play to twelve points per set. In either case, teams must also win by two points. This means play will continue beyond the required winning score until a team leads by two.

Bump, set, spike!

The basic strategy of beach volleyball is to use your three hits to bump the ball, then set the ball, and finally spike the ball. You will use the D-pad to move your player around the court. Quite often you will move on your own to the spot where the ball will land as it’s heading toward you, but sometimes you need to position yourself properly. The ball casts a shadow on the sand that will guide you toward where you want to stand. Press A to bump the ball in the air toward your teammate. To set the ball, press B. To spike the ball, press both A and B. The spike is a powerful jumping hit toward the opponent. You will need to focus on timing for all hits, but spiking the ball requires the best timing. The idea is to run up to the net and jump, meeting the ball with your hands at the top of your jump. For all hits, you can guide it in a direction using the D-pad in conjunction with the hit.

The above moves are mostly offensive moves, but you do have a couple of defensive moves at your disposal. If you know the opponent will spike the ball, you can move up against the net and press A and B together to jump up and attempt a block. Sometimes you can repel the ball right back into the opponent’s court for a quick point. Stoklos has his own signature block called the Kong block, which is very powerful. The other defensive move is called the dig. This happens automatically whenever the ball is just far enough out of reach normally. You will make a dive toward the ball to bump it back up into the air. I didn’t seem to put myself in good positions to do this very often, so in my experience it was left to chance.

Serving the ball effectively is a vital skill. When it’s your turn to serve, you can move up and down the line to put yourself in the position of your choice. There are three different ways to serve the ball. The easiest method is the underhand serve. Simple press A and B together to lob a slow serve at the opposite court. You want to pay attention to the flags that indicate wind direction because an underhand serve may come up short if the wind is blowing in hard. The overhand serve is more powerful. Press A to toss the ball straight up, wait for the ball to come down, and then press B to do a standing, overhand hit. You can use the D-pad to aim the ball while serving. The most powerful serve is the jump serve. Like the spike, it’s the most difficult serve to perform. Press A to toss the ball just before, but this time press A to jump and hit the ball. The more powerful the hit, the more likely the opponent will be unable to return the ball.

With the right timing, the jump serve is the best one.

One neat thing you can do is argue a call with the referee. Every now and then the line judge will make a mistake on a ball that lands near the lines. If you think a bad call went against you, then you can run up next to the judge’s stand and press Start to dispute the call. You will see your player make a scene as persuasively as possible. If you are successful, the referee reverses his call and you get the ball! If the judge disagrees, then he will shake his hand no and hold out a penalty card. This can be either a yellow card or a red card. The yellow card is just a warning, but if you lose a second disputed call in a set the referee will give you a red card instead and you lose a point off your score. Your opponents and even your partner can dispute a call on their own. One key thing is that if you want to dispute a call, you need to decide quickly and get over to the referee right away to plead your case. You lose your opportunity to argue a call if play advances to the next serve.

As stated earlier, to complete Tournament mode you must win fifteen total matches broken up into groups of three. After you win three consecutive matches on the same beach, you get a password for the next beach. The passwords are up to eight characters long and are normal words that are easy to write down or remember. I noticed that the passwords are the same for each beach no matter what difficulty or length of match. For instance, you can win the first round of matches on the Difficult setting with three-set matches, and the next time you play with the password you can select Easy difficulty and single set matches. You can play however you want!

This was my first time playing Kings of the Beach. The game was a later addition to my collection, but it is pretty common and inexpensive so I have had a few copies pass through my hands. I am not a huge fan of sports games even though I enjoy playing a little volleyball. Chances are I would not have given Kings of the Beach much of a chance if not for this project. Chances are I will also say this same thing about many other future games!

Digs are done automatically. This one was successful!

For my playthrough, I decided on playing single set matches on Medium difficulty. I played as the default Smith and let the computer play Stoklos for me. My intent was to learn the game on Medium difficulty and then go back and play the game again on the Difficult setting. At first, Medium difficulty was enough of a challenge. I understood the fundamentals early on, and other than some mistakes with spiking I was already playing well enough to make some progress. My struggles came in the third match of any beach. I could play well enough to win the first two matches, and then I would lose the third and have to start over at the top. That is awfully frustrating. Kings of the Beach became a fight of attrition and required some good old fashioned grinding to seal the win.

It seems like many sports games have some kind of exploit or tactic that makes life much easier. I found one such tactic that helped me win points much more often. The first thing is I needed is the setup to spike the ball myself. Usually this required getting the first hit on the return so that I could get the third hit and spike, but sometimes I would take the spike myself on the second hit instead. It’s a little riskier but it can catch the opponent off guard. My spike position was up against the net either slightly above or below the center. I would spike toward the corner of the net and the closer side line. For example, if I set up below center, I would aim for the lower line near the net, and do the opposite when closer to the top. The opponent tended to favor guarding the larger area so I could sneak it in on the other side close to the line without either player getting to it. That trick does not always work, but it works often enough to be useful.

My partner is disputing a call unsuccessfully.

I beat the entire game on Medium over the course of a few days. Once I accomplished that, I bumped up to the Difficult setting and repeated the final three matches with the last password. If I can beat the last beach on Difficult, then I should be able to beat any other configuration, so I didn’t bother repeating anything else on Difficult. I did not notice any significant changes between Medium and Difficult settings. Perhaps the opponents make fewer mistakes or make powerful serves more often on the higher settings, but I could not tell the difference. With my spiking tactic, I could score more often than not regardless of difficulty. I recorded my video of the final set of matches on Medium difficulty, and then played the final matches again on Difficult unrecorded. The ending is the same on either difficulty.

I would have considered the game more difficult overall if not for the fact that the computer controlled Stoklos handled nearly all the defense for me. Actually, my computer partner played very well in general and handled many situations better than I could have. Most of the time he plays close to the net so he can utilize his powerful Kong block. My job was to back him up and try to get to anything hit past him if I could. We worked together well on the offensive side too. He is a good spiker and serves very well. He’s not a perfect partner and makes mistakes that are unavoidable, but in my opinion he is a more consistent player than I am. It’s a pleasant surprise to have a competent computer player for once!

There are not many volleyball games on the NES to compare, but I think they did well with Kings of the Beach. The game sets itself apart somewhat for having a simultaneous four-player mode. It also performs well as a single player game. The computer controlled players are competent both as opponents and partners. The graphics and music are well done, just as you would expect in a Konami game. The game is a tad lengthy and repetitive, but it’s just the nature of the game so it hard to fault Kings of the Beach for that. If you are looking for an NES volleyball game, you won’t do wrong with Kings of the Beach.

#49 – Kings of the Beach