Take on the NES Library

An 8-bit Extravaganza!

warrior

OCT
28
2019
0

#131 – Werewolf: The Last Warrior

Ripping straight out of your NES!

Didn’t even realize this game had a 2-player mode!

To Beat: Reach the ending
Played: 7/25/19 – 8/1/19
Difficulty: 8/10
My Difficulty: 8/10
My Video: Werewolf: The Last Warrior Longplay

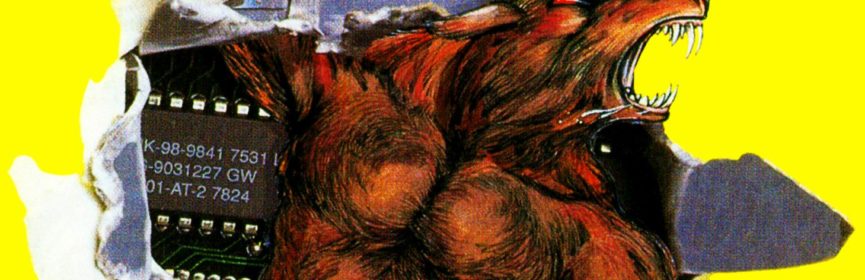
I’m just going to say this right away.  I think Werewolf: The Last Warrior is gonna be my favorite NES Box Art of 2019. The obvious element is the giant werewolf ripping out of the cover, but look closely and you will see that he bursts right out of an NES cart.  You can make out the gray lines and the chips on the green circuit board inside.  At this time, very few people took the carts apart to see what was inside because new carts didn’t need to have the pins cleaned. I bet this aspect of the cover was underappreciated.  Some other parts of the cover I like are the red text on yellow background for contrast and the huge claws on the werewolf.  With a box cover so awesome, the game inside has to be equally good, right?

Werewolf: The Last Warrior debuted on the NES in November 1990.  The game was developed and published by Data East, with development credit given to Sakata SAS.  The Famicom release came later in June 1991, published by Takara.  There the game was called Cho Jinro Senki Wourufu, translating to Super Werewolf Chronicle Warwolf.  Europe also saw an NES release in September 1991.

In this game, you play as Chief WarWolf.  The evil Dr. Faryan has created a bunch of bio-monsters that have imprisoned nearly everyone in the world.  Guess who is the only hope for civilization?  With the help and powers of the Great Spirit, you can become Werewolf which will give you the abilities needed to defeat Faryan and save humanity from his evil schemes.  There are five stages in the game, culminating in the final battle with Faryan. Beat all the levels to beat this game.

Most of the cutscenes involve this guy.

This is your typical platforming game with a mostly familiar control scheme. An obvious downside right off the bat is that you attack with A and jump with B.  I have no idea why developers did this as the convention of using A to jump and B to attack was the de facto standard.  I’ve played games long enough to be able to handle it no problem, but otherwise there is this artificial learning curve added for no real reason other than to be different.  The rest of the controls are fine.  Press the D-pad directions to move around.  You can duck with Down and climb ladders with Up.  The A button does a simple punch and you can punch high while standing or punch low while ducking.  You also wield a Power Ray as a charge attack by holding A to charge and letting go to unleash the attack.  Pressing B jumps normally, but you can do a higher jump if you hold Up while pressing B.  Start pauses the game.  While paused, you can press Select to show your score and number of lives remaining. 

At the start of the game, you meet the Great Spirit.  The game switches over to a brief cutscene where the Great Spirit gives you some advice.  Immediately after this you are thrown into a fight with one of Faryan’s death slaves. This enemy has a health bar displayed at the bottom and is a recurring mini-boss throughout the game.  Defeat him and he will leave behind a red W.  Collecting this item turns you into Werewolf.  Then you get another cutscene where you see his transformation.  Don’t worry, this scene only happens the first time you transform.

In Werewolf form, you have several new options available.  You maintain this form until you are at about a quarter of health remaining.  By default, your attacks are twice as strong as normal.  Your Power Ray now attacks everything on screen via a shock wave, but this deals you a lot of damage just to perform the move.  You also get four new movement abilities.  You can crawl into tunnels too big for you to enter normally. Simply walk into the tunnel to start crawling.  You can perform a backflip that makes you invincible to all attacks by pressing both A and B together.  You can climb walls in Werewolf form.  Simply jump into a wall to cling to it.  Now you can climb the wall by pressing either Up or Down.  To get off, you press the direction opposite the wall and press B to jump off.  Lastly, you can cling and hand-walk along ceilings with your claws.  Jump up to the ceiling, then hold Up and press A to dig your claws in.  Then you can use Left or Right to move across the ceiling and press Down to disembark. Getting hooked is tough.  You have to connect just as you are falling from the top of your jump so that you touch the ceiling with the tip of your claws.

This early spot is tough when you don’t know how to ceiling walk.

There is an anger meter at the bottom of the screen.  You collect these tiny, white bubbles that add a notch to your anger meter.  When the meter hits five bubbles, then you transform into Super Werewolf.  In this mode, you have all the same powers and abilities as Werewolf, but your attacks double in strength, you move faster, and you jump incredibly high.  The downside is that this mode is temporary as the bubbles gradually decrease.  (I guess they pop?)  Once you run out of bubbles, you switch back to Werewolf mode until you collect enough bubbles for another transformation.

There are several other items you can collect in this game.  Finding items is weird.  Some of them are dropped by enemies, and others you find by striking objects in the levels.  Sometimes these locations are obvious, like posts or boxes.  Other times you find items by hitting ledges or other places you might not expect.  It doesn’t hurt to attack random things just in case.  Anyway, here are the other items to look out for.  Small hearts heal one health point while large hearts are full health refills.  Little red bubbles defeat all enemies onscreen.  Big red bubbles make you invincible for a little while.  Why bubbles are so powerful in this game, I have no idea.  Hourglasses give you more time, dollar signs add points, and 1ups are obvious. Some enemies drop a bullet behind that gives you a single shot attack of your own with A.

The final item you need to watch out for are the blue W’s.  While red W’s upgrade you to Werewolf, the blue ones downgrade you.  They take you from Super Werewolf back to Werewolf, or from Werewolf back to plain War Wolf form.  If you grab one as War Wolf, it deals a significant amount of damage.  Therefore, you want to avoid these at all costs.  The game puts you in some situations where if you reveal a blue W, you are forced to pick it up to proceed.  Just be careful.  The manual suggests there is a way to somehow use both a blue W and a red W to go directly to Super Werewolf.  I have no idea how or if that works, and I didn’t find any information about that mechanic.

Knock stuff around until you find the good items.

The levels in this game are usually laid out a specific way.  Stages move from Left to Right with a few exceptions. Stages also typically have a high section and a low section.  You can find ladders to climb between sections and sometimes you can choose between the upper path or lower path all the way through the stage.  This can add some replay value if you want to try a different path and it lets you experiment to find the best way through a level.  All levels end in a boss fight with one of Faryan’s stronger creatures.

This game treats lives as continues.  When you fall into a pit or run out of health, it is Game Over.  If you have any lives remaining, then you can Continue from the Game Over screen or select End to start over.  When you run out of lives, the game puts you at the same screen only you are forced to choose End.  You start the game with three lives.  You can earn more by collecting 1up items or for every 50,000 points earned.  Every time you die your score goes back to 0, so you are incentivized to play well enough early to earn more lives for later.

This was my first time beating Werewolf: The Last Warrior.  I sort of remember testing this game out one time and playing until I died, which didn’t take too long that time.   I might have went further if I knew the controls.  I bought my cart copy of the game at a game store about an hour away from home that I have only visited one time.  I think I paid either $7 or $8 for it.  The game sells now for around $10 which I believe is the same as the going rate was when I bought mine.

Boss fights are much better as Super Werewolf

Beating this game was yet another installment in the series of “making incremental progress each playthrough.”  The first stage has at least a couple of spots that are tough to pass until you get a grip of the controls and all the moves you have available. The worst stopping point was the waterfall stage.  This is one of those two-tiered horizontal levels where the lower section is all water. Evidently, in this universe, werewolves cannot swim, so once you fall in you have to watch yourself drown.  There are leaping fish that can easily knock you in the drink, in part because you have a tough time hitting enemies in the air. Their placements are not quite consistent either.  It makes for a tough section and you can bleed your remaining lives away in a flash. Some other parts of the game aren’t much easier, but the waterfall was the worst I experienced.  I could have knocked the difficulty down a point or two if that stage were easier.  Still, completing the game in a week isn’t all that bad and it was a straightforward game to boot.

What I will remember most about Werewolf: The Last Warrior is how janky the game is.  I’ve already mentioned a few of these instances of jankiness, such as B button jumping, tricky ceiling clinging, and the seemingly random locations of hidden items. There are plenty more.  The backflip maneuver is very helpful in crossing some parts where taking damage is eminent, since you are invincible during the flip.  One downside of that is that there are two forced jumps associated with the move, and if you didn’t plan carefully, you could leap right into a pit.  Another quirk is that during a backflip, the screen does not scroll ahead.  You can backflip all the way to the right and then walk against the right side of the screen, leaving you completely defenseless to the dangers right in front of you.  Bosses soak up a lot of damage before going down and end up being very repetitive as a result.  Super Werewolf status makes them pretty manageable, but you may only build up to that state once or twice in the whole game.  If you are plain War Wolf, forget even trying to fight a boss.  Your attacks have one-fourth the power of Super Werewolf, and even if you play the fight perfectly you will probably run out of time before winning anyway.  There are still other minor nuisances that don’t even make a blip compared to these issues.

Werewolf: The Last Warrior is a game that falls short of most other NES platformers. I would say the graphics are just average.  Most of the sprites are large and detailed.  The Werewolf character has a lot of different poses and such for all the moves available. The music is pretty decent.  My favorite song is the one that plays when you are normal War Wolf, but unfortunately the more you hear that song the worse you are playing.  The controls take some getting used to with the B button jumping and handling specific moves like backflips and wall climbing.  The gameplay has some notable flaws.  The jumping is rather stiff and favors more vertical leaping than horizontal, which is tough considering most of the game is horizontal scrolling. Bosses and some enemies take way too many hits to defeat, leaving the timer as more of a threat here than in other games. You can tell that Ninja Gaiden was an inspiration for this game with things like its interstitial cutscenes and wall climbing moves.  Those are some huge shoes to fill, and in my opinion, Werewolf isn’t half as good as Ninja Gaiden.  It’s not terrible and there are sure to be some people that will go to bat for the game, but I’d rather play something else.

#131 – Werewolf: The Last Warrior

 
SEP
09
2019
0

#129 – Dragon Warrior III

More dragons, more warriors.

Pretty menacing dragon there.

To Beat: Reach the ending
Played: 5/24/19 – 6/30/19
Difficulty: 4/10
My Difficulty: 4/10
My Video: Dragon Warrior III Final Area and Ending

Exactly 50 games later, I’m back with another Dragon Warrior game. The NES does have a few JRPGs of this style, yet the only ones I’ve played so far are all Dragon Warrior games. Actually, I haven’t played many RPGs on this project yet period. The only games remotely close in style I’ve beaten already were AD&D Heroes of the Lance and Gemfire. It’s just a curiosity of the randomized list. I am not complaining though since I thoroughly enjoyed playing through Dragon Warrior III over the course of several weeks.

Dragon Quest III: And thus into Legend… was released in February 1988 on the Famicom in Japan. Just like the other games in the series, the NES version wasn’t released until way later and it was renamed to match the others. Dragon Warrior III appeared on the NES in March 1992, over four years later! The game was developed by Chunsoft and published by Enix. There were many ports and remakes of this game. A Super Famicom remake released in 1996, and the Game Boy Color port appeared in 2001. The game was also ported to mobile phones as well as the Wii. The English Android/iOS release in 2014 added the subtitle The Seeds of Salvation.

For more information on the series, check out my previous posts of Dragon Warrior and Dragon Warrior II. For this review, I will be focusing on things new to this installment in the series.

Scene not indicative of actual gameplay

The story for this game is simple. Our hero awakes on his 16th birthday at home in the kingdom of Aliahan. He is now of age to begin a great adventure, and that first step begins with visiting the king. When you meet with him, he tells you of the archfield Baramos and gives you the task to defeat him. From here, you will travel the world in search of Baramos.

One of the first things you will do before you leave the castle is build your party. On the west end of town is Luisa’s Place and you can do a few special things here. The first counter you will see is for the Vault. You can leave items and gold here and retrieve them later. There is a cost associated with retrieving stored items, but since you will hit full item capacity on your journey this is a great place to stash things for later. Saving your gold here protects it from being lost if your party is wiped out in battle. Past the Vault is the counter where you can add new members to your party. In Dragon Warrior III you can have a party of four people. The default characters available for your party right now are a Soldier, a Pilgrim, and a Wizard. This is the recommended party for starting out and the group I went with. These members are pre-assigned a name and a gender. My party was all men. I had Ragnar the Soldier, Petrus the Pilgrim, and Mathias the Wizard.

If you go upstairs, you can register brand new party members. You can choose the name, the sex, and the class. There are eight characters classes in Dragon Warrior III. Your main character is the Hero class which is an exclusive class with strong stats all around as well as some unique spells. The Soldier is a very strong warrior that can equip most weapons and armor. Soldiers level up quickly but cannot cast spells. Pilgrims are average strength characters with a set of healing and effect spells. Wizards are more fragile but can cast powerful attack spells. More or less, Pilgrims have white magic and Wizards have black magic. Fighters have very high agility, leading them to attack quickly in battle and they have a high critical hit rate. The tradeoff is that the Fighter cannot equip most things and is more effective fighting with bare hands than with most weapons. The Merchant is an average character with a couple of unique capabilities. Merchants can obtain more gold from defeated enemies in battle and they have the ability to appraise items. Select an item held by a Merchant and choose the Appraise option to see who can use the item or how much it might be sold for in a store. The Goof-Off does not offer much in battle. They do have a very high luck stat which helps in getting rare item drops from enemies. Finally, the Sage is a strong class with average battle capabilities but can cast both Pilgrim and Wizard spells. Unfortunately, you cannot start off with a Sage and have to wait to add one to your party until later in the adventure.

Make sure to have a full party before leaving the castle.

With a full party, you are now ready to leave town and begin your adventure, just in time to see the next major development of Dragon Warrior III. This game has a day and night cycle which can impact your journey. The longer you walk outside, time passes and the color palette changes to indicate the time of day. Stronger monsters may appear at nighttime. Shops are closed at night, though inns are always open. Towns are often different at night as far as the townspeople and what they tell you. Several events in the game occur only at day or night. There are a few things you can do to influence the cycle, aside from wandering the overworld. For instance, staying at an inn always brings you back to the start of the day when you wake up. Later in the game, you have more direct options to change to either day or night.

Some towns or castles in the game contain a battle arena. This is like a gambling mini-game where you can watch a fight and bet on which monster will win. You can get the odds of victory or see what other spectators think might happen in a match. You can then place your bet, pick your fighter, and watch a battle play out automatically among the monsters. This is something I only did one time just for kicks. I would rather spend time continuing the journey, but who knows, maybe this is a good way to earn cash quickly if you can game the system somehow.

Speaking of combat, random battles in this game are just like in Dragon Warrior II. Enemies can appear in groups and you decide which group you attack. There is still the problem of wasting an attack on an enemy group that no longer exists. However, I figured out over the course of many battles that your party members do attack somewhat intelligently. When attacking a group, the attacker tends to target the monster with the most HP remaining that they can take out in one hit. In Dragon Warrior II, it sure seemed random which player hit which monster. This is quite helpful for the speed of the game because combat is already plentiful in these games. One issue with this I found was that the AI tends to spread hits around evenly in a group if all the monsters have high HP, meaning those baddies tend to stick around longer. A more intelligent system might opt to gang up on one monster in a group in those situations. As it stands, I do like this hidden system and I’m glad it’s something I paid attention to.

Numbness is a nuisance.

There is one new status ailment in the game. In addition to becoming poisoned, confused, put to sleep, or cursed, now you can become numbed by paralysis. In this state, you cannot do anything except wait it out. It will eventually go away by walking on the world map, or you can use an item or spell to remove the status. Should all your party members become numbed, you lose the fight. I had this happen to me one time and I made sure it didn’t happen again.

The spell list is more expansive in this game. Three character classes, Hero, Pilgrim, and Wizard, all get spells and some are unique to that class. Many of them are various attack spells that are elemental in nature and can target individuals, groups, or entire enemy parties. Rather than go over every spell, I want to draw attention to a few interesting ones. There are two revive spells. Vivify only works half the time to bring back a party member with half HP, while Revive works nearly every time and gives full HP. X-Ray is used to examine treasure chests before opening. Some treasure chests are enemies and this spell lets you know if the chest is safe or not. The DayNight spell lets you switch between day or night. You can turn invisible with the Invisible spell, which can be useful for encounters both good and bad. Bounce can be cast on an ally to have all magic spells bounced back to the caster. BeDragon lets you turn into a dragon and breathe flames every turn for the duration of a battle. Transform lets the caster turn into another party member for the entire fight. The last two related spells I want to mention are Expel and Limbo. This lets you knock enemies out of fights with no gold or experience gained. Expel works on a full party while Limbo only targets one enemy but is much more successful. Sometimes a enemy will cast Limbo on you, and if it works that member is removed from the party entirely. Don’t worry, you can get your ally back but you have to look for him somewhere in the world.

A good part of the way through the game, you can find a place that lets you change your character classes. There are a few rules around this. First off, you cannot change your Hero at all, since he is one of a kind. A character must reach at least level 20 before changing class. After class change, that character goes back to level 1 with half of his current stats. He keeps any spells learned to that point. This is also the only way you can become a Sage if you meet the criteria. Since each class has some better stats than others, you can shape your party any way you want, given enough time grinding for levels.

There are plenty of dungeons, caves, and towers to explore.

The overall flow of the game is similar to the previous one. Roughly halfway through the game or so you get a ship that opens up the entire world. This time instead of collecting five crests, you are searching for six orbs. The map is just as large as in Dragon Warrior II, maybe even larger. Since early on you move around through travel doors between some destinations, it can be a little tricky to piece together the entire map. This game came with an insert containing the world map and charts for monsters, spells, weapons, armor, and items. The manual is a tall, 80-page book that even contains a partial walkthrough and tips for some more difficult sections. While not essential to beating the game, it does help. I did not need the walkthrough but I did refer to the map once or twice.

I beat Dragon Warrior III one time before about 10 years ago. I remember spending a lot of time sitting on the couch in my apartment just grinding away at the game on an emulator. I had picked up all four Dragon Warrior loose carts many years before but I was not able to beat the game on a real cart until now. I had tried several times. It always happened after playing for a few hours where the console got bumped, the game locked up, and I was forced to reset to an empty save file. This was long before I knew how to take games apart and clean the pins. I have owned at least a couple of copies of this game before, including my current CIB copy with the map in decent shape. Just to be sure, I know I let my old cart go in favor of a different one with a confirmed good save battery. Now that I clean carts and consoles I didn’t have any issues holding a save the entire time playing. Dragon Warrior III has always retained value. Loose carts sell around $50-$60 with CIB copies at $150+.

It had been long enough since my first playthrough that I didn’t remember all that much about the finer details of this game, including where most of the quest items were. I knew enough though to have a solid attack plan, particularly around class changes. I changed Ragnar from a Soldier to a Fighter and converted Mathias from a Wizard to a Sage. Switching to a Fighter was a bit experimental. I thought it might be useful to have a decent fighter with high agility. That worked out for a couple of reasons. Fighters are better at getting critical hits and his attack stayed high enough that I could deal out some heavy damage early in a turn. The other thing is that Fighters only benefit from a few cheap pieces of equipment, versus Soldiers that can equip many expensive items. Extra gold in my pocket freed me up to spend on my other characters earlier. Having a Wizard become a Sage gave me two good characters with healing spells, since Sages learn two sets of magic. I always opt for having good healing options in my RPGs whenever I get a choice.

The bad guys get pretty nasty toward the end.

There were a few interesting notes concerning this playthrough. I spent over five weeks beating the game, and one of those weeks I was away on business. I was able to take my game with me in an unexpected way. The AVS can connect to a computer and it has the capability to both apply and back up save files from an emulator. Before my trip, I dumped my save file to the computer, then I continued that file on my laptop that I brought with me. When I got home, I put my updated save file back to the cart and completed the game from there on normal hardware. I’m really glad I tried out that feature. I’ll be using that again to back up save files on longer games. This time I kept better track of my hours spent on the game. I beat the game in a little over 36 hours, right in line with the 30-40 hour estimate I had in mind. I feel like I did very well in solving issues and finding items as they came up throughout the game. Perhaps I had some of those events stuffed into my subconscious from my previous playthrough. Lastly, I am a tiny bit disappointed that I remembered a twist that occurs in the endgame. It would have been nice to have experienced that anew.

If you like these kinds of games, you will find a lot to like about Dragon Warrior III. In some ways it doesn’t feel all that different from Dragon Warrior II. It certainly is less of a leap from the second to the third as it was from the original to the sequel. Most of the main beats are the same. There’s a linear start, then the world opens up with a ship, then you explore the world looking for items, then that opens up the end of the game which is quite challenging. Then again, this game is quite different. The map is new, the enemies are almost completely different, there are more spells to learn, more items to buy, and more places to visit. Changing classes has a huge effect on the way the game is played, making it easier if you can find the right tweaks to make and put in the time to build up your characters. The difficulty curve is gentler than the second game which I found a welcome improvement. The graphics, music, and gameplay are all very good. I imagine the NES version is not the definitive version of Dragon Quest III, but the game does stand up as one of the best RPGs on the console.

#129 – Dragon Warrior III

 
JUN
14
2019
2

#123 – WWF Wrestlemania Challenge

The next in the series both added and removed challenge.

This is very detailed for the NES.

To Beat: Win the eight-man tournament
Played: 5/2/19 – 5/3/19
Difficulty: 4/10
My Difficulty: 4/10
My Video: WWF Wrestlemania Challenge Longplay

I seem to have hit a steady stream of NES wrestling games. It took almost 100 games to get to the first one, and now I seem to get one every 10-20 games. I am pretty sure this pace won’t keep up and that this will be the last NES wrestling game for a while. I guess I’ll have to wait and see! This was the easiest one of the genre I’ve played so far, which is something I’m always grateful for. Let’s take a look.

WWF Wrestlemania Challenge was developed by Rare and published by LJN. It was released on the NES only in November 1990. The game also saw a PAL release in 1991. This is the second of four WWF Wrestlemania games on the NES. This game, like the first, was developed by Rare. However, different developers would work on the other two games.

There is no story to this game. This is just a good old fashioned wrestling game between several characters featuring several different modes of play. The primary mode is the single-player eight-man tournament. The wrestlers you will face in this mode, in order, are Brutus “The Barber” Beefcake, Ravishing Rick Rude, Big Boss Man, Hacksaw Jim Duggan, Andre the Giant, “Macho King” Randy Savage, Hulk Hogan, and Ultimate Warrior. When I say you will face them, I do mean you. You will play the role of the wrestler You, taking on each opponent one at a time. It’s too bad that there’s no customization at all, so the role of You is just a generic white guy. Anyway, if you defeat all wrestlers in all matches, you win the tournament and beat the game.

You are the hero this time.

The controls are more simplified in this version of the game. Use the D-pad to walk around in all eight directions. The ring is oriented like a diamond here so there will be quite a bit of diagonal movement. The A button is used for basic strikes. Tap the A button to do a punch. Press and hold the A button to do a secondary move, such as a kick or headbutt. The B button performs a stronger move. The move depends on which direction the opponent is facing. If you are facing each other, B does a bodyslam. If you approach the opponent from behind, then B does a different move. Most wrestlers have a power move that is performed by pressing both A and B together. This can burn your energy faster, so don’t overdo it. If the opponent is laying on the mat, you can press A to attack. You can also press B here to do a pin, but you have to be lined up with the bottom of the fallen opponent to pin. The different moves will vary depending on the wrestler, but these are the basic controls for all moves.

You have some other move options as well. You can climb up on the turnbuckle in any ring corner by walking up to the turnbuckle and pressing A and B together as you press against it. Once you climb up, you can do an attack by pressing A. While airborne, use the D-pad to aim your attack. You can leave the ring the same way you climb on the turnbuckle by walking into the ropes and pressing A and B together. Be careful not to stay out of the ring past the countout or you will be disqualified. You can dodge an opponent’s power move by pressing both A and B together. If you are being pinned or are caught in a submission move, toggle between Left and Right on the D-pad to break out of it.

To win the match, you will have to pay attention to the energy meters of each wrestler. They are displayed on either side of the ring apron, which I think is a nice touch. Each successful move decreases the opponent’s energy meter. Using power moves will deduct a small amount of energy for each attempt. Avoiding attacks for awhile will also slowly increase your energy. To pin your opponent successfully, you have to run him almost completely out of energy. I believe you can force your opponent into submission with certain moves when low on health, but I didn’t see that happen.

Get his energy low, then pin. It’s that simple!

That’s about it for the core gameplay, but there are some different modes to choose from. One is the tag team match. You can control two wrestlers one at a time against a pair of opponents. Here you can switch between the two by going all the way into your corner of the ring and pressing Select. Each wrestler has a separate health meter and the man in reserve slowly gains stamina while inactive. Tag team matches are won when one of the wrestlers in the opposing tag team is pinned or disqualified. It is possible for teammates to both be in the ring together, but one of the two is subject to a countout if he doesn’t return to his corner. There are a couple of special controls here that occur when on top of the turnbuckle. If you are on the turnbuckle of the opposing team, you can kick the opposing, inactive wrestler by pressing B. Similarly, you can attack your own inactive teammate from the turnbuckle by pressing both A and B together. Another similar mode to the tag team match is the Survivor Series. There are two teams of three wrestlers each with only one active at a time. You can tag other teammates into the match. This time, each wrestler must be eliminated from the match individually. When all wrestlers on one team are eliminated, the other team wins.

There are quite a few variations between these different modes. They are broken down in the menu by either One player vs. Computer, Player vs. Player, or Two Players vs. Computer. There are four single player modes. The eight-man tournament is the main mode but you can also play a single exhibition match, you can control both members of a tag team in a match, and you can form a team in a Survivor Series. For two players competitively, you can engage in a one-on-one match, a tag team match, or a Survivor Series. There is only one two-player cooperative mode which is a tag team tournament against four computer-controlled tag teams.

Sometimes you get hit by a super move, that’s life!

You do get an ending screen for each mode. The text varies depending on what kind of match you won. In a way, you could consider any of them an ending, but most people would agree that winning what amounts to a single player campaign is the real criteria for beating the game. To that end, the game makes it a bit easier in this mode by giving you a couple of continues if you lose a match. You get an instant rematch should you lose, but if you lose three matches then you have to start all over.

This was my first time playing WWF Wrestlemania Challenge. This is a game I pulled off the bottom of my list that I wasn’t originally going to play so soon. I don’t recall when I picked this game up. The WWF games were reasonably popular, but only the first game is the one that is most commonly found. Still, I don’t think WWF Wrestlemania Challenge is too tough to track down. It should be easy to find for around $5-$10.

I didn’t have too much trouble with this game, beating it on my third attempt. I figured out somewhat of an exploit on this game. I wasn’t able to do this every time, but it was consistent enough to beat the game. I noticed the opponents either actively chase you or run away from you. If they run away, go get them! I would hit them with my B button move and then slam them when on the mat. If they come after me, I would retreat to either the top or bottom corner. Once in the corner, face toward the oncoming wrestler and mash the B button. It’s something about that corner where the opponent doesn’t line up with you soon enough to attack and you can get your move in first. The opponent then runs away and you repeat the cycle until you pin him with less than one health bar left. Using that method, I beat the game without using any continues pretty quickly.

A corner strategy worked out well for me.

As an aside, this game provides a turning point for my master game list for this project. I’ve mentioned my master list setup a few times but I’ll recap here. I initially removed a large chunk of games from my randomized game list and placed them at the very end. Lots of sports games, these wrestling games, and others were handled this way. About a year into the project I had a change of heart and decided to pull some of those games forward periodically. I’ve been aggressively promoting games lately and I have reached the inflection point where if I keep this pace up, I will have all those back-of-the-list games finished way earlier than the rest. Also, it has been troublesome and time-consuming managing what amounts to two lists. Finally, I have reconsolidated. Those less-desirable games have been spread out through the rest of the list and will appear more organically instead of me deciding on a whim to play one. I am now pleased with the structure of the overall game list, while still managing, for the most part, to keep the remaining games and their order a big secret even from myself.

Back to WWF Wrestlemania Challenge, I think this is a pretty decent wrestling game. It’s not quite as good as Tecmo World Wrestling, but it’s easier to play and much less demanding on my forearm strength and trigger finger. There are several different wrestlers with many modes and variations on game play, including a few different multiplayer modes. Controls are simple for a wrestling game and don’t require memorizing different moves. You still have to remember a lot of controls, but it comes easy in my experience. The graphics are nicely drawn and animated, and the music is decent as well. It is a touch on the easy side, but that is okay with me. It doesn’t quite live up to the name of WWF Wrestlemania Challenge in the difficulty department. That’s really the only complaint I have from this otherwise solid game.

#123 – WWF Wrestlemania Challenge

 
JAN
25
2019
0

#107 – Isolated Warrior

Taking care of threats from all angles.

Nicely animated title here.

To Beat: Beat all six stages
To Complete: Beat the game without continuing and finish the final special stage
What I Did: Completed the game
Played: 11/28/18 – 12/7/18
Difficulty: 6/10
My Difficulty: 6/10
My Video: Isolated Warrior Longplay

I will always find it fascinating whenever I play an NES game that has some kind of quality to it that isn’t often seen, and then very soon after I play another game that shares that same quality.  This might be the only time anyone has ever linked Bill & Ted’s Excellent Video Game Adventure with Isolated Warrior, but here we are.  I went from an adventure game with an isometric perspective to a shoot-em-up also in that same view.  The difference is I enjoyed playing Isolated Warrior much more.

Isolated Warrior was released in February 1991 in both Japan and North America.  The Japanese title is Max Warrior: Wakusei Kaigenrei.  This game also had a PAL release in 1991.  Isolated Warrior was developed by KID and published by Vap in all territories.  NTVIC is also credited as a co-publisher on the NES title.  I was surprised to learn that KID developed several NES games, including the already completed Burai Fighter.  That tells me that they know how to develop a good shooter.

Isolated Warrior is a shoot-em-up with an isometric perspective.  It follows the story of the fall of the planet Pan which exists outside of our galaxy.  Aliens have taken over the planet and all are advised to evacuate the planet, including the army.  The commander of the army, Max Maverick, refuses to evacuate and goes to take on the alien forces all by himself.  His journey takes him over six stages of shooting action.  If you play well enough, you may unlock the final seventh stage.  Beating that gives you the proper ending to this game.

Just a casual stroll down the street

The controls here are mostly straightforward.  You use the D-pad to move in all directions.  This game includes some light platforming elements and you can press A to jump.  If you hold the A button down, you will perform a somersault in the air.  Press A again while airborne to launch bombs.  The B button fires your normal weapons with unlimited ammo.  Press Select to switch between two different types of firing modes.  You may also press Start to pause the game.

The obvious gimmick here is the isometric viewpoint.  This game is an upward-scrolling vertical shooter that also pans slightly to the right.  Your normal shooting direction is fixed in the direction of the scrolling, which can make it a little tricky to line up with the enemy at first.  You will get used to it rather quickly.

There is a healthy amount of information on the bottom of the screen.  The left side contains your high score in the first row, and your health bar and number of lives remaining in the second row.  The center portion displays which weapon mode you are using, along with the number of weapon pickups collected of that type.  Below that is the current weapon level.  It’s a little confusing but I’ll clear it all up shortly.  The right side contains your current score.  You also see the power level of your bombs and a meter displaying how many bombs you have at your disposal.

At any time during gameplay, you can toggle between the two firing modes by pressing Select.  One is a straight shot and the other is a wide spread shot.  You can upgrade these as you go by collecting L and W icons, which upgrade the standard shot and wide shot respectively.  The game keeps a counter of how many icons you have collected.  You can go from 1 to 12 for each weapon.  You might think there would be twelve power levels for each weapon, but there are only five.  You have to reach a certain number of pickups to level up the weapon.  You can see both the number of pickups collected and the weapon level on screen, but the power level is what really matters.  Each weapon power level gives you an extra shot on-screen to work with.  For instance, at level 3 wide shot you get a three-way spread shot.  In straight shot mode you can fire both straight ahead and backward.

Five-way shot is useful against waves of smaller enemies

You also get five levels of bomb power.  There are B icons that increase your bomb power level directly.   You can power up to level 5.  Levels 1 through 4 give you a single bomb, three-way spread, five-way spread, and eight-way spread respectively.  For the first three bomb levels you can choose the direction you want to toss bombs with the D-pad as you use them.  Level 5 is a more powerful version of the eight-way spread but you can only use it once before being downgraded back to Level 4.  You can hold up to ten bombs, which is quite a lot of firepower if you can keep it at a high level.

There are other powerups.  The S powerup increases your movement speed.  There are also 1ups appearing on occasion.  The remaining powerups look similar enough that it is tough to tell what they are in the heat of the fight.  A long pill-shaped powerup is called The Bullet, which gives you an extra bomb.  A purple sphere is just for bonus points.  Another purple sphere with a wave on either side restores two points of your health bar.  The Barrier is a football-shaped powerup with waves around it and a white center.  This powerup is often carried on-screen by an enemy group near the stage boss and you get to knock it out of their grasp.  The Barrier puts a shield around you that lets you get hit five times without losing health.  After taking four hits, the shield will start blinking to indicate it is almost gone.

Isolated Warrior’s jump mechanic puts a little bit of platforming in this shooter.  There are various traps you will have to avoid by jumping.  There are simple walls that will crush you against the bottom of the screen if you don’t jump in time.  There are hazards on the floors like lava or electricity where you will suffer heavy damage if you set foot there.  Pits are also common and you lose a life if you fall in.  Jumping mostly keeps you from danger because most of the bullets are fired along the ground and you can just leap over them.  I found it normal to spend a lot of time jumping and weaving my landings around bullets.  Sometimes enemies are in the air and you can only defeat them by jumping and shooting precisely.

The purple goop hurts and is everywhere

While most of the game is spent traveling on foot, there are two stages where you get to drive other vehicles.  The second stage features a hovercraft over a river.  You drive upstream much faster than you walk.  The controls are the same and you can still jump and everything, so it’s really just an excuse to make the scrolling faster.  In the fourth stage, you drive a motorcycle up a destroyed highway.  This level feels the fastest of them all.  There is one slight quirk to the motorcycle.  If you press Down before pressing A, instead of jumping you will perform a wheelie.  This lets you pass through bullets that would normally hit you directly.  You can still fall through holes or crash into walls no matter what.

Isolated Warrior has a power down system in place for when you die.  Your current weapon goes all the way back to Level 1 and you also lose a level of bomb power.  Being able to keep your other weapon at its current strength gives you a fighting chance to get back into the game.  If you take a few deaths close together and lose both of your weapons, well, good luck.  Some enemies take enough firepower to defeat that you start stacking them up with the next set of enemies and it becomes too much.  It’s not full-blown Gradius Syndrome, where powering down means a near-impossible road ahead, but resetting and starting over begins to sound like a decent idea.

To combat the powering down, there are a few things that work in your favor.  Having a life bar really helps you plan ahead a little bit so you can stash away the weapon you really want in case you perish.  The game is also somewhat friendly with extra lives.  You earn lives every 300,000 points on top of the pickups.  If you get pretty far in the game on one life, you should have enough lives to at least learn that level so that you’ll be better off the next time.  This game also features passwords after every stage.  These are four-digit passwords that start you at the beginning of the stage with the base equipment.  I found that I was better off playing from the start every time and that the passwords were only useful for practice.

Hello there giant screen-filling boss!

Reaching the end of stage six gives you an ending, but it’s a crummy one.  You are advised to beat all six stages before the game is over to reach a special seventh stage.  I have read that some people think you have to beat all six stages on one life, but you only need to finish them without continuing or using passwords.  The secret stage is challenging and ends in the true final boss fight.  This gets you the good ending.  I am okay with someone getting the bad ending and saying that they beat it.  I think most players would argue that you really need the good ending on this one.  Of course, that’s what I planned to go for anyway.

I played Isolated Warrior a little bit as a Nintendo Age contest game back in 2016.  I stalled out in Stage 4 but didn’t really give it my full effort.  I bought this game for a cool $7 on eBay in August 2014.  It was a good deal for a $12 game at the time, though there is a tear in the back label.  In February 2015, a Nintendo Age thread was created that hyped the game up as hidden gem.  Sure enough, the game price saw a steady climb for the next couple of years, topping out at over $30 for just a loose cart.  The game sells now for around $20-$25.

I ended up with a pretty good run of this game.  I didn’t have a whole lot of trouble learning the game, but I was a little short on time and I needed over a week before I got it all completed.  The run before I recorded was the first time I reached Stage 7, and I just barely beat it.  I had close to ten lives but piddled them away before beating the final boss on my last life.  Even though the game does give you the Stage 7 password, I didn’t need it.  For my longplay video, I beat the game with four deaths.  The first one was during the Stage 6 boss, and then I lost the remaining ones trying to clear Stage 7.  While not an incredible run, it was one I’m quite happy with.

This part is unfair

There’s only one part of the game I dislike, but it is so flawed that it nearly turned me off from this game entirely.  I’m talking about doing wheelies on the motorcycle in Stage 4.  The problem is that it takes away your jump if you happen to be holding Down.  The level design features huge chunks of highway that are broken up by gaps, so you have to jump.  The level also has the fastest scrolling in the game. Instinctively, you would be moving downward often so that you are at the bottom of the screen which gives you the most time to react.  This results in doing a wheelie and you don’t have enough time to let go of Down and jump again before you fall to your doom.  Even worse, the stage boss is played on a looping section of highway with forced jumps, and the boss itself is tiny and slides around a lot.  It is ridiculously easy to fall here given you have to make so many jumps while you wait to align yourself with the boss.  I had to train myself to jump before pressing Down.  The wheelie itself is a useless move anyway since you can dodge normally or jump in a pinch.  This is a real “what were they thinking?” moment in this game.  No wonder I didn’t get past it in 2016.

Level 4 notwithstanding, Isolated Warrior is a really neat shooter that I’m glad I got to play.  The graphics are nice and unique given the isometric perspective.  I dig the enemy and boss designs, and there’s even cutscenes between stages to advance the story.  The soundtrack is energetic and upbeat.  The controls work great.  I like having two base weapons to work with that I can switch between at will.  The game can be hard but I don’t think it’s too challenging if you stay powered up.  Going for the good ending is a solid challenge.  Isolated Warrior has a good number of stages, but the game itself is on the shorter side and it doesn’t overstay its welcome.  One small negative is that there is some noticeable slowdown at times.  There’s a lot to like about this game.  I don’t know that the game is so hidden anymore, but I feel good saying that it is still a gem.

#107 – Isolated Warrior

 
JUN
18
2018
0

#79 – Dragon Warrior II

A much more expansive adventure awaits in Dragon Warrior II.

The gang’s all here!

To Beat: Reach the ending
Played: 3/16/18 – 4/7/18
Difficulty: 5/10
My Difficulty: 3/10
My Video: Dragon Warrior II Final Area and Ending

I know this is a website about old NES games, but this is also a website about nostalgia. Each of these games I’ve been playing has been enjoyed by someone who will remember them fondly. It’s not necessarily about the games themselves, but about the people you played them with, the friends you shared tips with, or the memories you had playing them and what it was like to live your life back then. Perhaps I’ve always been focused on nostalgia because I have made time to play my old games over the years. Sometimes it takes an older game to drop you back in time in a powerful, almost surreal way. Dragon Warrior II is a game that does this for me. It helps that it is a fun game to play even now.

For more information about the Dragon Quest series of games, check out my Dragon Warrior post.

Dragon Quest II: Akuryo No Kamigami was released on the Famicom in January 1987. The name translates to Dragon Quest II: Gods of the Evil Spirits. It was developed by Chunsoft and published by Enix. All the Dragon Quest games on Famicom were brought over to the NES several years later. The NES version was renamed Dragon Warrior II and was released in September 1990. This game was ported a lot more than I thought. There was an MSX version in Japan in 1988 and a Super Famicom version in 1993. Game Boy Color received a combination cart of Dragon Warrior I and II. There are also mobile versions and a Wii version in the Japanese compilation Dragon Quest 25th Anniversary Collection.

The story of Dragon Warrior II is explained through an introductory cutscene exclusive to the NES version. All is peaceful in the kingdom of Moonbrooke until the forces of the evil sorcerer Hargon appear suddenly. The king fights valiantly but is no match for these creatures. He and the rest of the castle are taken down, but not before a single soldier barely makes his escape. This man somehow makes it all the way to the kingdom of Midenhall to warn the king there before he succumbs to his injuries. As the prince of Midenhall, it is your duty to go on a grand adventure to defeat Hargon. Do so and you win the game.

The situation is pretty dire.

Structurally, Dragon Warrior II is a lot like the original game. You still walk around with the D-Pad, press A to open the command menu and give commands, and press B to undo or go back. You are still adventuring around, fighting enemies, getting stronger, exploring caves and towns, upgrading equipment, collecting items, etc. I will still give my traditional amount of detail, but rather than retread a lot of old ground, I will focus more on the differences added and implemented into Dragon Warrior II from the first game in the series.

The first thing you may notice is the Command Menu is updated. There are six commands here instead of eight. Five of these commands are the same: Talk, Spell, Status, Item, and Search. The displays are a little different, but they function the same way. The new command is Equip which lets you swap your weapon, armor, shield, and helmet for a different one you are holding. You may also choose to unequip something and go without if you choose. Three commands from Dragon Warrior are no longer here: Stairs, Door, and Take. You will automatically go up or down stairs when you stand on them, which is an obvious, much welcome change. Door and Take were both redundant commands. Keys are treated as items so you use them through the Item screen, and Take was rolled into the Search command. The popup Status Menu is also streamlined. It appears at the bottom of the screen this time and only displays the first four characters of your name, your HP, and MP. If you want to see Gold or Experience, pull up the Status menu instead.

Some of the basic structures have been changed. You can see the differences from the opening cutscene. All map objects in the first game were all the size of one tile, but that’s not the case here. Castles are four tiles big and towns are two tiles long. That’s all though; everything else is one tile. There are still caves like in the original game. Monuments are special points of interest and are often friendlier environments than enemy-ridden caves. There is a different kind of grass tile that looks like bushes. These are just cosmetic changes, but they do make the environment more interesting. The size differences also help make you feel smaller and the world around you feel bigger.

Slimes and slugs go well together.

Venture out into your first battle to find that you may have more than just a single enemy to deal with this time. It was a logical next step to have more than just one-on-one battles, right? To handle multiple enemies on screen in a fight, the pretty battle background from Dragon Warrior was replaced with a plain black battle screen. Your Status Menu is displayed at the top, and the lower left contains the Command Menu. These options are Fight, Run, Parry, and Item. Parry is the only new one here, which puts you in a defensive stance. You take half damage but don’t do anything else. The lower right display shows the enemy names and how many of them are still active in the fight. Instead of targeting a single enemy when you fight, you get to choose which enemy group to attack. If there are multiple enemies in a group, you attack one at random. If there are no longer any enemies in the group, you will whiff and not hit anyone. Lame, but it happens. When battles play out, the lower half of the screen describes who is attacking who and for how much damage, same as before.

Caves have received a major overhaul. You no longer need to carry torches or use the Radiant spell to see where you are going, so already that’s a huge improvement. Narrow corridors are no more. Caves have the same tile size as the castles on the overworld, so the normal tunnels are always two tiles wide and they are often much longer as well. There are cave entrances where you cannot see where you are going until you walk through to the next room. Then the newly entered room of the cave is drawn while the room you just left is shrouded in darkness. It helps maintain a bit of mystery since you can already see the entirety of the current room. Later in the game, you explore towers that have the same attributes as caves, just with a different tileset.

The most significant change in Dragon Warrior II is the addition of two party members. You will have to go solo for a while before eventually meeting up with the Prince of Cannock. He is given a name at random and you don’t get to change it. My companion was named Esgar. He is not as strong as the main character and he cannot equip as many weapons or armor, but unlike our hero he can cast magic spells. Now you get the ability to heal without resorting to medical herbs or going back to the inn, and you get some extra options in battle as well as another attacker. Sometime later you find the Princess of Moonbrooke. She was named Roz in my adventure. She is the weakest physical attacker but has the most powerful magic. It’s a well-balanced party.

Join forces and help each other.

There are many spells in Dragon Warrior II that can be used by the Prince or Princess, or sometimes both. Some spells are only usable in battle, and some are only usable in the field. When you pull up the Status for a spell caster, the last screen will be a list of spells in each of those categories. If a spell can be used anywhere, then it appears in both lists. The spells can be further categorized into healing spells, field spells, attack spells, and effect spells. Let’s go into more detail!

The healing spells are Heal, Healmore, Healall, and Revive. The three “Heal” spells all restore some HP to one party member. It should be clear by the names that Healmore restores more than Heal, and Healall restores all HP to the affected party member. Revive can bring a fallen party member back to life with a single hit point. The Prince gets Heal, Healmore, and Revive, while the Princess gets Healmore and Healall. HP restoring spells can also be used in battle but Revive is only usable on the field.

These are the field spells: Antidote, Repel, Return, Outside, Stepguard, and Open. Antidote cures one member of poison status so that they don’t take damage while walking about. Repel wards off weaker enemies for a while. Return sends you back to the last place you saved the game. Outside takes you back to the entrance of a cave or tower you are exploring. Stepguard protects you from taking damage from certain tiles that normally hurt you when you walk on them. The Open spell opens doors without using a key. The Prince gets Antidote, Return, Outside, and Stepguard. The Princess learns Repel, Antidote, Outside, Stepguard, and Open.

The Prince has attack spells to aid in combat.

The attack spells are Firebal, Infernos, Firebane, Explodet, Defeat, and Sacrifice. Firebal does a relatively small amount of damage to one enemy, though it is useful in the early going. Infernos and Firebane have the same effect, dealing damage to all members of an enemy group. Explodet does a lot of damage to all enemies. Defeat can be used on an enemy group and may defeat an enemy outright if it works. Sacrifice instantly defeats all your enemies as well as the spellcaster. The Prince learns Firebal, Firebane, Defeat, and Sacrifice, while the Princess learns Infernos and Explodet.

The final set of spells are the effect spells. They are Sleep, Surround, Stopspell, Defence, Increase, and Chance, and they can only be used in battle. Sleep may put members of an enemy group to sleep. Surround generates spirits around an enemy group that causes enemy attacks to miss more often. Stopspell is used on an enemy group and can block enemy spells if it is effective. Defence lowers the defensive stat for an enemy group, while Increase adds defensive points to all party members. The Chance spell has many different effects and one is applied at random when it is cast. It’s a risky spell with the potential for a huge payoff. The Prince gets Stopspell and Increase, while the Princess learns Sleep, Surround, Defence, and Chance.

Having three party members mixes up things somewhat. Menus now include an additional option for which member you want to command. Each character has his or her own set of eight items to hold. Party members may trade items or throw them away through the Item menu. This includes your weapons and armor, unlike Dragon Warrior where they don’t go against your total item loadout. When you buy items, weapons, or armor in the shop, you must choose a member to receive it. The shopkeeper will tell you if the recipient is unable to equip the armor or weapon, which is helpful even though you learn by trial and error. Often you have to shuffle items around to make room for something specific, and those item slots fill up pretty quickly. You can also utilize the House of Healing. Here you can curse poison, remove cursed items, and revive a fallen party member. It costs 20 gold for each experience level of the defeated party member to revive, but it’s often better than losing half your gold when everyone falls.

Drag your partner’s corpse to the House of Healing.

Once you recruit the whole party and explore the world more, you eventually find a ship. This is when the game switches from a linear style to an open world adventure. You can dock the ship at any walkable world tile, leading to vast exploration. This is also where the game takes a sharp upturn in difficulty. Since you can go wherever, you may stumble into an area with much stronger monsters. Go directly east from the port town and you might see something familiar. There’s an island which plays the world music from Dragon Warrior, and indeed it is a more compact version of Alefgard. You can go to Tantegel Castle or pay the Dragonlord’s ancestor a visit in Charlock Castle. It’s a nice throwback that shows just how much larger the world is in Dragon Warrior II. From there, you will need to track down some additional keys, as well as five crests required to reach the end of the journey.

There are a few miscellaneous changes I noticed in Dragon Warrior II. In the first game, you could sell old equipment for half of the original purchase price. In this game you get 75% back. That helps offset the extra equipment you need for the other party members. There are many more quest items in this game that take up precious item slots. I’m not sure if you could sell them in the first game, but you can this time. If it was one you still needed, you can go back to where you found it and get another one. Enemies may drop items after battle. I noticed that you can’t earn two of the better item drops, so if an enemy drops something you already have, you get additional gold instead. You can also get poisoned. This only affects you as you walk, and your experience level is temporarily replaced by “PO” to indicate you are poisoned. This is the only effect obvious on screen. I think it would have been nice to know at a glance if a character is asleep or had spells stopped in battle.

I have played Dragon Warrior II a few times before. The first Dragon Warrior was one of those formative games that introduced me to the genre. I knew there were other NES games in this series, but they were always so expensive to buy even used. Dragon Warrior II might have been the first NES game I played on my PC once I discovered emulation in the late 90’s. I remember sitting at the family computer exploring towers and grinding levels while listening to music. Good memories! Eventually I tracked down all four NES Dragon Warrior carts back when you mostly sent money orders in the mail to buy things from eBay. I’m pretty sure I beat the game on emulator, and I had all the save files used up on my cart copy. I don’t remember exactly but I’ve probably beaten the game at least three times before.

Having a full party gives you the most options.

It’s an RPG of course, so Dragon Warrior II took a long time to finish. I believe I spent 30-40 hours beating the game. The game goes along at a reasonable speed until you get the ship. It’s almost overwhelming to have the entire map at your fingertips, and the new enemies you encounter are quite challenging. The first major goal is to track down the Golden Key, and though I remembered where it was it still took a while to track down. I wrapped up the middle part of the game up quickly. The final cave is really tough to both navigate and fight through. I was under leveled, but this was also the best place to gain experience. For as much time as I spent playing from the start of the game up to the final cave, I spent just as much time getting past it and grinding experience levels before the final showdown. The character levels cap at 50, 45, and 35, and I was 6 or 7 levels shy of that before beating the game.

Dragon Warrior II is a challenging RPG. Even early in the game, some large enemy groups can cause trouble. I already mentioned it gets harder once you meet new enemies after adventuring on the water. Some of the locations you need to visit are out on the open water and tough to find for the first time. A couple of the crests are difficult to locate and require a specific hint from someone likely on the other side of the world. Perhaps the worst of all is the combat near the end of the game. The odds are constantly stacked against you. Enemy effects are always more effective against your party. Your attack spells can miss, while the enemy attack spells never miss. Enemies tend to gang up on one party member, and if a critical hit slips in there, you will likely die. The Prince is the only one with the Revive spell, and though there is an item that does the same thing, you can only hold one of them at a time. Some of the final enemies can cast Defeat and Sacrifice against you. While Defeat usually misses, Sacrifice is instant death and there’s nothing you can do about it except try again. Of course, I rated the game a 5/10 in difficulty because you can reduce the difficulty by grinding longer. It’s just unbalanced at the end of the adventure and there’s not much room for improvising if you get in a bad situation.

Dragon Warrior II is a huge step up from the original. Everything is larger: the world, the dungeons, the characters, the items, the spells, the enemies, etc. The graphics are good. Though they are similar to the first game, this game expands the tileset a bit while adding many new, larger, and more detailed enemies. The music is excellent all around with some great themes that are often underappreciated. On the one hand, Dragon Warrior II is several degrees more complex than Dragon Warrior, but on the other hand it’s not so complex that it becomes overwhelming or unmanageable. New elements are introduced at a reasonable rate and it’s not hard to keep track of everything as you go. The downsides are the spike in difficulty in some combat sequences, getting lost trying to locate important items for the end of the game, and all the level grinding needed to stand a decent chance at the final dungeon. This might be my favorite NES RPG as I find it hits the sweet spot between simplicity and complexity, all while both looking and sounding great. If you like RPGs and haven’t tried Dragon Warrior II, I would recommend giving it at least a few hours of your time to see if it grabs you.

#79 – Dragon Warrior II

 
AUG
24
2017
1

#50 – Dragon Warrior

Baby’s first RPG!

Title screen fanfare is nice!

To Beat: Reach the Ending
Played: 4/18/17 – 4/27/17
Difficulty: 2/10
My Difficulty: 1/10
Video: Dragon Warrior Endgame

It took me longer than I expected to get this far, but I have finally reached this milestone of the review of my 50th completed game. I thought I might do special games at milestones like this one, but my current plan is to take games as they come. In this case, it ended up working out to a game that is good enough for the 50th post. Dragon Warrior is an extremely basic role-playing game, or RPG, but it is an important game that eased me to the genre and was a gateway to more complicated and challenging games in this style.

Dragon Quest is the first game is a long running series of RPG games under the same name. Yuji Horii created Dragon Quest in response to other RPGs of the time like Wizardry and Ultima. The driving force behind Dragon Quest was that it would appeal to a much wider audience, even those who are not interested in or familiar with video games at all. The result was a much more simplistic game with a larger focus on story to draw more players in. Dragon Quest was very successful in Japan and it still one of the most popular game series there today. Dragon Quest XI was just recently released in 2017, and there are various spinoff titles and remakes as well as forays into novels, manga, and anime.

Dragon Quest was released on the Famicom in Japan on May 27th, 1986. It was developed by Chunsoft and published by Enix, now known as Square Enix. North America would not receive this game on the NES until all the way in August 1989, just a few months before Dragon Quest IV released in Japan. Here the name was changed to Dragon Warrior due to a naming conflict with the pen and paper RPG DragonQuest. Its success in Japan did not translate over to the US and sales were poor. In 1990, Nintendo Power gave away copies of the game as a subscription bonus for the magazine, and that greatly helped the series gain traction. The NES would eventually receive all four Famicom Dragon Quest titles under the Dragon Warrior name.

Some olde time English here.

The plot of Dragon Warrior is a simple one. In the land of Alefgard, the evil Dragonlord had stolen the Balls of Light from Tantegel Castle under the rule of King Lorik. The hero Erdrick managed to reach the Dragonlord’s castle on an island but was never heard from again. Years later, the Dragonlord attacked Tantegel Castle again, kidnapping Princess Gwaelin in the process. You play as an unnamed hero who seeks to follow in the footsteps of Erdrick by defeating the Dragonlord, retrieving the Ball of Light, and saving the princess.

A lot of what I have to say about Dragon Warrior is not only basic knowledge of this game, but of RPGs in general. If you have played any games of this style, most of the game description will be quite familiar. Dragon Warrior was aimed at newcomers, and so this review is also going to be focused on that same audience. I do think there is still value in Dragon Warrior as a beginner’s RPG, so I’m happy to go into detail that might be more rudimentary for some.

When you begin the game, you choose from one of three save slots. When starting a new game, you will give your hero an eight-character name and set the text speed. The game begins in a top-down view in the king’s throne room in Tantegel Castle. The king will give you an explanation of the task at hand, and from there you are on your own. You will want to visit the king often over the course of your adventure because this is the only place you can save your game. For now, this area serves as a pretty decent tutorial for how you navigate the menu and see all the things you can do.

The game would be over sooner if you could swim.

You use the D-pad to move the hero in the four cardinal directions as well as move the cursor to choose options on the menu. Press A to bring up the Command menu. As a rule, the A button proceeds and the B buttons cancels or goes back. You can also press Start to pause while walking around, but there is never a reason to do so.

There are many options on the Command menu. The first option is Talk which lets you talk or interact with the person you are facing. Status lets you see your statistics such as health, attack power, or which weapons and armor you are using. The Stairs command lets you walk up and down stairs that you are standing on. Most games will assume you want to take the stairs when you stand on them, but here you must use the specific command. Search lets you examine the ground at your feet for anything interesting. Spell brings up a list of spells that you can cast, but at the start of the game you don’t have any available. The Item screen lets you view and use items you are holding. You can only carry eight items, but certain items group together so you can hold several of them while only utilizing a single item slot. Door lets you open a closed door you are facing, but only if you have a key. The Take command lets you open a treasure chest you are standing on.

When you bring up the Command menu or just stand still for a while, you bring up a panel on screen that displays some basic stats. The LV counter is for your experience level. This indicates how powerful you are and it begins at one. HP stands for Hit Points and this is your health. MP stands for Magic Points. You spend magic points to cast spells. G stands for Gold which is the game’s currency. E stands for Experience Points and you earn these by defeating enemies.

I’ll take one of everything, please.

One of the chests in the throne room contains some gold to get you started. One of the first things you will want to do is spend that gold on some equipment. Unfortunately, there are not any shops inside the castle, but you still want to explore and talk to people here. Exiting the castle takes you to the world map. There is a nearby town to the east called Brecconary that should be your next stop. There are more people in town to talk to as well as places to shop.

The shop in the northwest corner of town is the weapon shop. You can only hold one weapon, one armor, and one shield at a time. There are several options and the more expensive options are more effective. An equipped weapon increases your attack power and either an equipped armor or shield increases your defense. When you buy something from this shop that replaces something already equipped, the shop will buy back the old item at half its value.

The shop in the southeast part of town is the item shop. Here you can buy or sell items from your item stock. It might be useful early on to buy an herb that lets you restore some health from anywhere. The inn is located in the southwest corner of the town. You can spend some gold to stay the night which replenishes all your HP and MP. The shops and the inn are the basic features of each town you encounter in the game.

Get used to seeing this screen a lot.

Most of your time in Dragon Warrior will be spent battling enemies. As you explore the world map or caves, an enemy may appear on screen that you must engage one on one. This bring up a smaller Command menu. Both Spell and Item appear on this menu and they act the same as in the standard menu. Fight lets you attack the enemy. Run gives you the chance to run from the fight and keep exploring, although the enemy may not let you escape. You and the enemy alternate turns until one either wins the fight or runs away. There is a text box at the bottom of the screen that describes what is going on, such as whose turn it is and how much damage is inflicted.

When you win a fight, you are awarded both gold and experience points. If your HP is running low, the text boxes all change color from white to red to show that you are getting close to death. If you succumb to the enemy, then you are returned to the castle in front of the king. Not only does he lecture you on dying, but you lose half of your gold. The good news is you do not lose any experience points or equipment when you die, so even if you lose many fights you will continue to get stronger as long as you keep playing.

When you meet certain thresholds of experience points, you will gain a level. This is noted after a battle with some fanfare. Going up a level gives you stat boosts. You can gain strength, agility, maximum HP, maximum MP, and sometimes even learn a new spell. The strength stat translates into additional points in the attack power stat, and agility translates into additional defense points.

A warrior and a wizard!

At certain levels, you will also learn a new magic spell. Each spell requires a certain amount of MP to cast. You will learn ten spells in all and they have various uses either in combat, while adventuring, or both. The Heal spell restores some of your HP. Hurt is a combat spell that deals damage to the enemy. Sleep is a combat spell that sometimes lulls your enemy to sleep, preventing them from taking their attack turns until they wake up. Radiant is used in dark caves to see as many as three tiles ahead of you in all directions. Stopspell is a combat spell that may prevent the enemy from casting their own spells. Outside lets you leave a cave automatically, and the Return spell sends you back to the castle from anywhere in the overworld. Repel is used on the world map to keep weak enemies from engaging you in battle. There is also a stronger healing spell called Healmore and a final attack spell called Hurtmore.

As you venture further out into the world, you will come across stronger enemies. Not only do later enemies have more health, attack, and defense, but some can cast spells of their own or do alternate attacks. You will need to spend a lot of time fighting weaker enemies and testing yourself to see if you can take on stronger enemies that bestow more gold and experience. You will encounter other towns throughout Alefgard that have new shops with better equipment, as well as different tips about the world to point you in the right direction for story progress. But most of Dragon Warrior is spent fighting enemies to strengthen yourself for tougher enemies.

I have beaten Dragon Warrior several times over the years and I am very familiar with the game even now. I remember finding the game while going out to yard sales with my grandparents as a kid. It was out of place for sure, laying on a table complete in box amidst random knick-knacks. It cost only $5 and they were happy to buy it for me. I didn’t know anything about the game from Nintendo Power because I wasn’t subscribing then, and it may well have been one of the subscription incentive copies. Happy to find a new NES game that day, I gave it a play that night and I got sucked in. The simplicity of the game combined with an abundance of childhood free time was the perfect recipe for a new RPG addiction.

You are the Dragon Warrior after all.

Aside from tracking down a few items, Dragon Warrior is a very easy game. For me, the challenge lies in making the time to play through it. I estimate it took me 15-20 hours to complete the game, though I insisted on leveling up to the highest possible level. I already knew the areas that were best for gaining experience points more rapidly. That helped keep the game shorter, as well as reaching towns as early as possible to buy better equipment. The more time I could spend fighting tough enemies, the faster I could max out experience points. Another time saving tip is that Dragon Warrior is just about a perfect game to grind while doing something else, such as watching TV. I’m not ashamed to admit I grinded out a few levels while listening and participating on conference calls while working from home.

The speedrunning community has managed to achieve seemingly impossible times in completing Dragon Warrior. What took me over 15 hours to accomplish has been done in a world record speedrun that runs a little over 25 minutes. There are certain timings to inputting commands that lets the hero do things like make higher damage attacks, dodge enemy attacks, and avoid random encounters. By using these timings combined with a heavy dose of luck, Dragon Warrior can be beaten at a very low experience level. It’s all very impressive!

Dragon Warrior was a formative game for me. It was my entry point into the Japanese RPG genre at a time when I could give a lot of energy into the experience. From there I sought out the NES sequels, and I eventually moved that interest over to the SNES and some of its top-class RPGs. Therefore, I have much appreciation for Dragon Warrior. Outside of that context, it’s not a game I see myself playing again unless I get bit hard by the nostalgia bug. It’s too simple, too plain, and too grindy. But if you are looking to get into the genre while not getting too deep into the weeds, Dragon Warrior is a fine place to start.

#50 – Dragon Warrior