#100 – Milon’s Secret Castle
I like to think every castle has secrets like this.

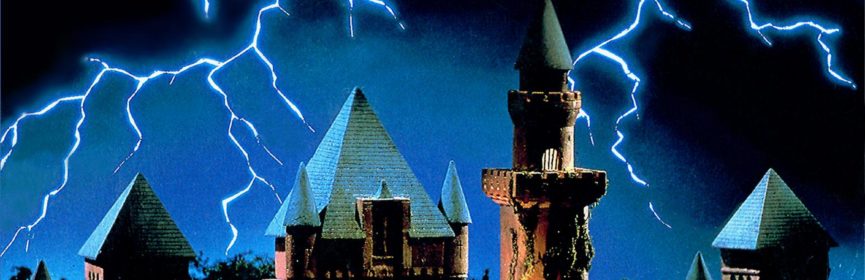
They never show above the castle during the game, just here.
To Beat: Reach the ending
To Complete: Beat the game twice to see a special message
My Goal: Complete the game and beat the first loop without dying
What I Did: Met my goal
Played: 9/8/18 – 9/17/18
Difficulty: 7/10
My Difficulty: 4/10
My Video: Milon’s Secret Castle Longplay
Here we are at triple digits! It took nearly three years to get here, but now that I’m at Game #100 there’s really no turning back. I could have picked any game I wanted to play here and I don’t think anyone would have complained. Instead I decided to keep on trucking with whatever happened to be here on the list. Milon’s Secret Castle is not a flashy choice for a milestone game whatsoever. The good thing for me is that I grew up with the game and have played and beaten it quite a few times before. For this special occasion, I was successful in beating the game without dying for the first time. I even learned a few things in the process. Let’s get started!
Milon’s Secret Castle first appeared on the Famicom in November 1986 titled Meikyu Kumikyoku: Milon no Daiboken. That translates to The Maze Suite: Milon’s Great Adventure. The NES version was delayed almost two years, appearing in September 1988. The game was both developed and published by Hudson Soft in both regions. Milon’s Secret Castle was re-released on Wii Virtual Console in Japan and North America in 2007 and in PAL territories for the first time ever in 2010. There was a sequel on the Super Famicom in 1996 called DoReMi Fantasy: Milon no Dokidoki Daibouken that made its North American debut on Wii Virtual Console in 2008.
Milon’s Secret Castle is a platformer game that takes places inside many rooms of a large castle. In the story, people communicate exclusively through music. Milon is unable to make music and can’t communicate with the people in his land, so he decides to leave hoping to find others like him. Before leaving he decides to visit the queen in the castle, which was a good thing. An evil warlord has stolen all the musical instruments, taken over the castle, and locked away Queen Eliza. Milon volunteers to resolve the problem. The castle’s magician provides Milon the ability to shoot bubbles. He also tells Milon that Eliza has left tools and money throughout the castle to help. Milon must seek and defeat the seven demon monsters inside this maze of a castle before taking on the evil warlord himself.

The scale of the size of the castle here is not too far off.
The game begins with Milon outside the castle. With limited abilities, he is restricted to the first floor for now. He can walk around, jump, and fire bubbles even though they have no use outside. Milon can enter doors by standing in front of them and pressing Up. The first floor has three doors. Two of them lead to maze rooms, and the third leads to a shop. You may also discover that you can enter windows outside the same way you enter doors. The solitary window of the first floor leads to an empty room and you can’t do anything here for now. The action takes place within the maze rooms so this is where you start.
Controls are basic, but movement takes some getting used to. Move left or right with the D-pad and press A to jump. You discover right away that Milon is slow to accelerate from standing skill. Once you get him moving by holding the directional button, he can go pretty quickly. You jump up quickly enough, but side-to-side movement depends on how fast you are moving before jumping. You need to get a running start to make far jumps. Milon can adjust left or right a little bit while jumping or falling. The B button fires bubbles that move in the direction he is facing at a slight upward angle. If you hold Down and press B you will shoot bubbles with a slight downward slope. Bubbles are used to defeat enemies and break blocks within the maze rooms. They travel a short distance before popping, and they also travel through walls unless they hit something significant.

Who knew bubbles were such a good weapon?
The maze rooms for the most part have several things in common. There are different enemies wandering around that you can fight off with bubbles. Most enemies in the game take one hit to defeat, but some take a lot more. There are breakable blocks all over the place in this game. Usually they block off some path within the room, but other times you’ll find money tiles inside. Collect the money tile to add a dollar to his stash as indicated in the upper left of the screen. To exit the maze room you must find the hidden door that is revealed by firing a bubble at its location. You need the key to take the exit to go back outside the castle. The key appears within the room in one of a few predefined spots after defeating enough enemies or breaking enough blocks. The collected key is displayed in the upper right of the screen. Once you collect the key, you keep it permanently and can take the exit anytime. All this means you really need to cover these rooms in bubbles to reveal all of their secrets.
There are other items to collect besides money. Defeated enemies may leave hearts behind that restore a point of health. Milon’s health bar is the vertical bar on the left. After defeating several enemies, an umbrella may appear. This powerup floats up and can get away from you. Grabbing it lets you blow an additional bubble on-screen. Milon starts out with having one bubble on screen at a time and you can shoot up to three at once if you collect two umbrellas. Milon goes back to one bubble whenever you enter a maze room from the outside. Most maze rooms have a honeycomb hidden within a breakable block. This increases your maximum health while also fully restoring Milon’s health. You definitely want to find these. Shooting certain locations may also reveal the Hudson bee. This powerup flies away and can get out of reach like the umbrella. Collecting the bee produces a shield around Milon that lets him take a couple of hits without losing health. You can also collect hearts while holding the shield to strengthen it.

Item shop, hints, and an inventory screen all in one.
Spend Milon’s hard-earned cash within the shops. Some of the shops are found through doors or windows into the castle. Others are hidden within the maze rooms themselves. The shops double as an inventory screen, so you can see the items you’ve purchased and collected throughout the adventure. Milon can walk along the bottom of the shop and jump into a button with his head to interact with the shopkeeper. In addition to purchasing items, you can get hints here for locating items you need. The Power option in some shops let you buy health. You can even get free money occasionally. The main draws here are the permanent items that increase Milon’s abilities.
One of the first-floor shops contains the hint “Bump head to find box.” In each of the maze rooms, there is a music box. There is a specific solid tile that you need to jump into from below to reveal the box. Touch the music box to go to a musical mini-game. Musical icons will arise from the bottom of the screen and you want to grab as many notes as you can. There are three kinds of icons to collect: Notes, sharps, and flats. Sharps count as two notes, while flats take away one note. The number of notes collected is displayed at the top. After some time, the bonus game ends and you earn money. You get a dollar for every four notes collected. If you somehow grab 50 notes or more, then you get a dollar for every two notes. This is a good way to save up for expensive items. A great detail about this mini-game is that every time you play it, the background song gets more and more complex each time as new instruments are added. You can only use each music box once, so to get the full effect you have to find them all.

Stay sharp and don’t fall flat.
Armed with all this knowledge, it’s time to clear the first floor. There are two items you must collect to proceed, which are the shoes and the medicine. The shoes let you bounce up high on certain floor tiles, allowing you to reach areas too high to jump normally. The medicine causes you to shrink whenever you touch a green glove present in some areas. A smaller Milon can fit into tiny gaps to reach previously inaccessible areas, and also gives you a smaller hitbox. For some reason acquiring these two items allows a demon monster boss to appear in the empty first floor room through the window. Go there and beat him by shooting him a bunch of times in the head with bubbles. These bosses are no joke and quite challenging. The defeated boss drops a crystal ball that opens the door to the second floor. There are seven bosses and seven crystal balls in the game. Not only do the crystal balls open pathways deeper into the castle, but they also gradually enhance your bubble by making it bigger, faster, and travel farther.
Access to the second floor starts to open the game up more. Now there are more maze rooms and shops, as well as more money, items, and powerups to go with them. You also have access to the well in the lower right corner of the castle. This area and others like it don’t count as maze rooms. There’s no key and hidden door to be found, instead you exit off one of the sides of the screen. The areas often consist of multiple, connected rooms. There are still items to be found there, as well as money, honeybees, honeycombs, etc. The well in particular has a unique way to exit. There is an enemy resembling a small octopus that takes several hits to defeat and drops a balloon. Grab it before it floats away and it will take you up out of the well.

The well is the first real challenging area.
There are some inconsistencies and a couple other miscellaneous points I want to mention. In addition to the crystal balls, there are two secret items you must track down to beat the game. Money can only be collected once, which is a problem as some items are expensive. Fear not, for there’s one room in the game that replenishes most of its money each time. It does get tedious farming money. One of the maze rooms does not have a honeycomb in it. I went crazy looking for it until I gave up and looked it up after I beat the game. They made up for it elsewhere as another area holds two honeycombs. Another area has a hidden exit that is really tricky. This secret castle does have some baffling mysteries to it.
Milon dies when he loses all his health. Normally the game starts all over again when this happens. There are continues in the form of a continue code, but luckily for us it is spelled out plainly in the manual. On the title screen, hold Left and press Start to continue. This only works after you have collected the first crystal ball. It seems to me there are two different types of continuing. Sometimes continuing plays a different introductory tune and you get dropped off in the same room you died in. Other time, it plays the normal intro song and drops you off at the starting position with all your collected items and money intact. Either way, continues are unlimited and better than starting over each time.
Milon’s Secret Castle was a game I’ve had since childhood. It was bought used since I only had the cart and I read the manual for the first time playing it here. I remember seeing this game in the rental stores and reading about it in some old gaming magazines we had. That was how I knew about the continue code and how to make progress in the game. I distinctly recall getting stuck on the first floor for a long time until later seeing how to proceed in one of those magazines. The game is inexpensive at around $6 and easy to find.

Milon used Bubble Beam. It’s super effective!
Even though I picked the game up for the first time in many years, I still knew enough to clear the game on my own over a couple of hours. I tinkered a little bit more to locate all the hidden music boxes and honeycombs, and then set out to try and beat the game 100% without using a continue. It took a few attempts but I was able to get it done. Some minor missteps in routing and a little bit of health farming are the only issues with my recorded video. Somewhere in post-completion research I found out that there is a hidden ending screen if you beat the game twice in a row. The second loop is hard mode. The differences I noticed are that both the bosses’ attacks and the umbrella powerup move much quicker. Continues still work here thankfully because I needed them. Beating the game the second time gave me the additional screen for what I consider the best ending. It’s underwhelming but still a decent achievement.
In the interest of full disclosure, as well as make an interesting discussion point, due to my inability to set aside a large block of playing time, I used a cheat code to enable hard mode. This is a good of a time as any to talk about NES cheat devices. The most popular one of the era was the Game Genie. It is a passthrough device that you put your cart into and then insert the connected cartridges into your NES. A menu comes up when the game is turned on and you enter either six or eight letter codes to get different effects to appear in your game. You can get more lives, skip levels, jump higher, etc. I have a little bit of expertise in building my own Game Genie codes by using an emulator and debugger to find parts in the game code that I can change to trigger the desired effect. In this case I couldn’t figure out how to enable hard mode with a Game Genie code. There is another NES cheat device called the Pro Action Replay. It functions similarly to the Game Genie but uses a different set of codes. The primary difference between the two devices other than the code format is that the Game Genie can set different ROM addresses while the Pro Action Replay can set RAM addresses. The NES Ending FAQ author did some legwork for me by figuring out that setting the RAM address $00B8 to 01 enables hard mode. Don’t worry if I’m going a bit over your head here. The takeaway is that the Pro Action Replay is the more appropriate device for turning on hard mode. Now I don’t own the Pro Action Replay, but the AVS console I use does accept its codes. Even better is that the AVS also accepts what it calls RAW codes, which I figured out means if I enter the code 00B801 (meaning set $00B8 to 01), I can get hard mode like I want. I played normal mode and hard mode two separate nights and then combined the footage into one longplay video. I hope this was an interesting look into NES cheat devices. I also hope that this doesn’t cast any doubt into the validity of my playthroughs. I don’t use cheat devices even for practice and I didn’t know how to enable them on my AVS until now. You will have to take my word for it though, so I do hope you believe me!

Disappearing floors make this maze room frustrating.
Milon’s Secret Castle has the reputation of a difficult game and I can see why. For a long time, I could not figure out how to get out of the first floor. I bought the medicine, but I couldn’t reach the green glove to use it. I believe the upper portion of the second maze room on that floor is unreachable from the start. It’s too high to reach with even a running jump. I found out there are shoes in a hidden shop up there, but I don’t see how to reach that shop without the shoes! The place I buy shoes is in a hidden shop in the first maze room. On the bottom right there is a discolored block next to two breakable ones. What you are supposed to do is push the block by walking into it for several seconds, then shoot a bubble to reveal the hidden door to the shop. I get that this discoloring is the tell, but this is a terrible idea. There’s no indication at all you can even push blocks, and then you have to push for what seems like forever before it actually moves. If you didn’t already know what to do, it would be hard to stumble upon it. There are other things about the game that can cause issues. Using the hammer item is not exactly obvious to me. The third floor has some rooms that are hard to understand without having certain items or seeing the proper pathway. Combat also proves challenging sometimes. Milon has a ridiculously short invincibility period upon taking damage, so if he gets stuck on top of an enemy his health drains fast. Bosses are difficult because they throw projectiles at random and Milon lacks the mobility to dodge them effectively. He jumps fast but otherwise accelerates slow, so quickly jumping to dodge projectiles is the only way. There are items later that allow you a different, safer strategy to boss fights. Until then, you either get lucky or get good at dodging.
I think Milon’s Secret Castle is an interesting NES game that was released too late on the NES. I’ve seen this happen quite a lot in this project already. For 1986, this is a complex game that plays pretty well. For 1988, while it still has good secrets and complexity, the controls and movement feel like a significant step back. The graphics and music are both pretty good. I like the different items and the effects they have on both Milon and the world around him. The main issues I have are the controls and the obscurity of some of the secrets and traps. Though they diminish the experience a little bit, I have seen far worse things already in NES games than this. This is probably nostalgia-tinged, but I do like this game. It’s worth a look for fans of Metroid.

#100 – Milon’s Secret Castle

#100 – Milon’s Secret Castle