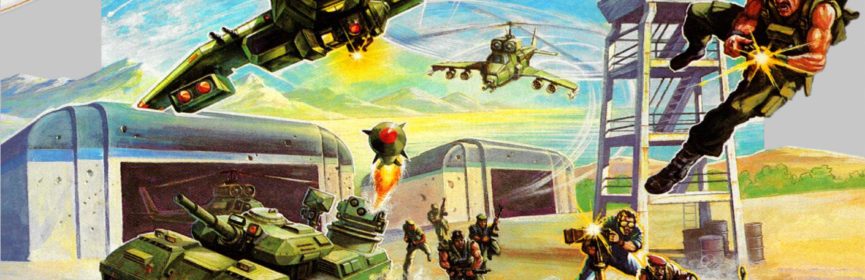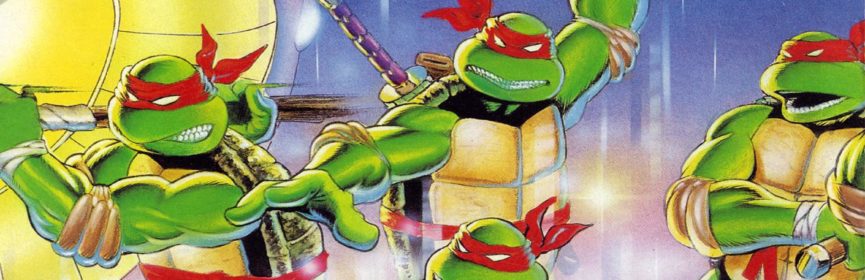
#82 – Teenage Mutant Ninja Turtles
Turtle power! Times four!

The music starts simple and builds up nicely.
To Beat: Reach the ending
Played: 4/26/18
Difficulty: 9/10
My Difficulty: 5/10
My Video: Teenage Mutant Ninja Turtles Longplay
If you have been reading along for a while, you probably know that I am all about video games, and not much else. For instance, I don’t watch too many movies and often don’t watch the ones that have NES games tied to them. The Teenage Mutant Ninja Turtles were quite the phenomenon in the early 1990s, so much so that even I was all about them for a time. I had a bunch of the toys, I watched the cartoon, I saw the movies, and of course I played a lot of the NES games. The first of these games poses a stiff and often unfair challenge but is still a well-remembered game regardless, owing a debt to the source material for keeping it held in esteem among 90’s kids like myself.
The Teenage Mutant Ninja Turtles were created by Kevin Eastman and Peter Laird. They first appeared in a 1984 comic book published by Mirage Studios. The two creators were approached by licensing agent Mark Freedman to try and expand the franchise. They teamed up with Playmates Toys to create a line of action figures, and the company insisted on creating a cartoon to help tie in with the toy line. The Teenage Mutant Ninja Turtles TV series began in 1987, and though it took a little while to catch on, it blew up in popularity over the late 1980s and early 1990s. The comic book continued to run alongside the TV show, and several movies and video games followed throughout the 1990s. The series is still going on today, most notably in the Nickelodeon animated series ending in 2017, with a new series slated for the network later in 2018.
The NES game Teenage Mutant Ninja Turtles (abbreviated TMNT) was first released on the Famicom in May 1989. The NES release in North America followed soon after in June 1989, and the PAL release occurred in August 1990. Konami developed the game. It was published by Konami in Japan, under the Ultra Games label in the US, and Konami’s Palcom label in Europe and Australia. The Japanese version was called Geki Kame Ninja Den, meaning Legend of the Radical Ninja Turtles. The European version was renamed Teenage Mutant Hero Turtles to remove references to ninjas, just like with Ninja Gaiden. This version of the game was ported to various home computers, and even appeared in arcades as a Playchoice-10 title.

You can explore the map or get into the sewer.
TMNT is a side-scrolling action game. The plot begins with the standard “save the girl” trope, as Shredder has captured April O’Neil and you have to get her back. Ultimately, your task is to locate and defeat Shredder, the leader of the Foot Clan. The turtles want to retrieve his Life Transformer Gun, which they hope to use on Splinter to restore him back to his human form. This journey will take you through six stages, culminating in a final battle with Shredder himself.
When you start the game from the title screen, you are first dropped into a top-down view of a portion of the New York City streets. You control a tiny Ninja Turtle here. You can walk in four directions with the D-pad, and attack straight ahead with the B button. Right next to you is an opening to the sewer, and you can go inside if you want. There the gameplay changes to the side-scrolling view where the action takes place. You can also walk around the building and take the path on the left but be careful if you do. Right around the corner is a large steam roller that will drive toward you, and if you touch it you get crushed and die instantly, or in this game, get captured. You can explore the map freely and go in and out of the sewers or doorways freely as well. The idea is to locate the end level boss and defeat him to move on.
You can press Start to pause the game. This brings up an information screen. On the left side there is a minimap of the current area. Red squares indicate where you can walk around, and white squares indicate entrances to the side-scrolling areas. There is also a small, flashing plus sign that shows where you are on the map. On the right side is a small profile of each of the four turtles: Leonardo, Raphael, Michelangelo, and Donatello. You see a small picture of each turtle, his shortened name, a life bar, and what special weapon he has, if any. You can switch between turtles anytime in this game. Press Up or Down to highlight which turtle you want, and you will control him directly when you unpause. The lower part of the screen shows an informational message from one of the other characters, typically master Splinter.

Words of encouragement AND character selection!
Most of the game is played within the side-scrolling areas. You move around with the D-pad, jump with A, and attack with B. The turtles take high, loopy jumps and will curl up into a ball. You can take shorter jumps by tapping the A button. Once you start moving sideways in the air, you can’t stop until you land, making precision jumps on small ledges difficult. The B button attacks straight ahead. You can attack above by holding Up and below by holding Down when you strike with B. Your turtle crouches with Down while standing on the ground.
The lower part of the screen during gameplay holds vital information. The left shows both your current score and high score. The middle part displays your health bar. You begin with eight squares of health and you can get damaged in half-square increments. Below that is an enemy health bar that only appears during bosses or stronger enemy encounters. The right side shows your main weapon, sub weapon, and any other items you may encounter.
Each of the Ninja Turtles is known for mastering a specific weapon and you get to use them as your default weapon depending on which turtle you choose. Leonardo wields a katana. This has the best total range for all directions. Raphael uses sai, which is easily the weakest weapon in the game. It is very fast to deploy repeatedly but has virtually no range and isn’t as strong as you might expect given its natural handicap. Michelangelo wields nunchucks, which have good horizonal range but weak vertical range. Donatello is a master of the bo staff. This weapon has the best reach, but not necessarily the best range. Attacking enemies at your feet is tricky since you either have to attack while crouched, which gives you very little range, or attack downward while jumping. However, the bo is the most powerful of the standard weapons, therefore making it the most useful weapon in the game.

This screen should bring back some painful memories.
There are secondary weapons in the game that you mostly pick up from defeated enemies. They are uncommon drops, but you will see a few of them during play. Shurikens are simple projectile weapons that pack some surprising punch. There is also a three-way shuriken with a much wider range. Boomerangs are slow moving and don’t travel very far, but they come back toward you and you can grab them again to add them back to your stock. There is also the infamous scroll weapon that is not dropped by enemies and can only be found in a few places. This is a wide projectile attack that does heavy damage. Each weapon pickup gives you twenty ammo. Grabbing a new weapon replaces an old one, so typically you will switch turtles to spread the weapons around.
Other items are planted in the levels. Health-restoring pizza is the most common pickup you will find. Slices restore a quarter of your health, half pizzas give you back half of your health, and a full pizza restores it all. This only applies to your active turtle so you may choose who gets health if several turtles are in danger. Missile pickups give you ten missiles for the turtle van in the overhead view of Level 3. Ropes are used in special sections to help you cross large gaps. Finally, there is an invincibility item in the shape of a Ninja Turtle face. Grab it to ball up and swing your weapon all around you for several seconds. Then you can wipe out pretty much any enemy by bumping into them.
There are a lot of weird enemies in this game. Some are TMNT staples, like foot clan soldiers and mousers. There’s an enemy that’s all legs that jumps off ceilings with reverse gravity. There are weird glowing men, and chainsaw-wielding freaks, and flying saucer shaped robots, and men completely on fire, and robot soldiers with detachable heads, just to name a few. Some enemy encounters lock the screen for awhile and one of the stronger enemies will appear with its own dedicated health bar. There’s a weird quirk about the enemies that happens a lot in this game. Most areas have two enemy groups but only one is active at a time. The one you get when you enter a new screen appears to be chosen at random. You’ll find you prefer certain groups over others. Even weirder is that the enemy group can change in the middle of an area if all on-screen enemies are cleared out first. It’s one of the stranger game mechanics I’ve seen, which seems to fit given the equally strange enemies within the groups.

Heads will fly.
Let’s take a brief look at the stages in this game. This is already dipping into spoiler territory, if you care about such things. The first level is a good introductory stage to get used to the map and game mechanics. You will face both Bebop and Rocksteady as bosses here. The second stage is the infamous dam level. In the latter part of the stage you go underwater to disable eight bombs before time runs out. Swim by tapping A to rise and the D-pad to move around. There are electrical barriers and painful seaweed to deal with, but the timer is essentially the boss of this stage. In Level 3, you take control of the turtle van, or party wagon, as you seek out the boss. You can fire small bullets or large missiles that take out barricades in your way. Level 4 takes place at an airport and contain 18 numbered areas to explore. Level 5 has a dark map with searchlights that drop foot soldiers near you if you get caught. The boss is randomly hidden within one of the sewers and the enemies are very difficult. The final area has no map, playing only in the side-scrolling view. This large area contains one of the nastiest stretches of gameplay I’ve witnessed in this project.
You can survive a long time in this game because you manage four full health bars all at once. Inevitably, one turtle will succumb to damage or an instant death trap. In this case, that turtle gets captured and you have to go without him. There is one spot each in Levels 3, 4, 5, and 6 where you can recover a captured turtle, but you can only get one back per level. If all turtles are lost, it’s Game Over. You can continue twice which sends you back to the start of the level.
TMNT was one of the NES games I acquired back in the Ninja Turtles heyday of the early 90s. I have played the game a lot and have beaten it many times before. I remembered all the main points of the adventure despite not playing through the game for a long time. I think the last time I played through the game before now was in college just to show off to my friends. It’s regarded as a difficult NES game for good reason.

Some areas get clogged up with enemies.
It took me two attempts to beat the game. The first time was meant to shake off the rust, so to speak. I almost beat the game anyway. I was able to reach the last level without too much trouble, but that nasty corridor I mentioned earlier reared its ugly head and I couldn’t make it through. That spot is a long area littered with these flying robot soldiers that shoot lasers. They appear constantly throughout the length of the room, while the height of the room gets narrower and you have no room to dodge. They take at least two hits to kill with the best weapons as well. There is a bit of a trick to passing through the area, but it eluded me the first time through. I was successful on my next attempt though I had to use up both continues before figuring it out.
I will defend TMNT as a fun game, but it is kind of a mess in a few regards. The turtles themselves are unbalanced. Raphael is practically useless, mostly serving as either a damage sponge or special weapons expert. Donatello is easily the best character, but the game gets a lot more challenging should you lose him. The changing enemy group mechanic is strange and can hinder you as much as it can help you. I think some enemies take too many hits to beat. I can try and skip some, but that becomes an issue because there is significant slowdown and flicker when too many enemies are stuck on screen. The slowdown isn’t helpful from an enemy avoidance perspective since your movement is on the sluggish side normally. Many areas are too narrow to properly avoid enemies anyway. Another bonus mechanic is that a turtle gets an attack power boost when he is low on health. However, this doesn’t always seem to work, and I don’t think it’s something you can depend on even though it is useful when it happens.
Now that I’ve said my piece on TMNT, I think it is a disappointing game. The technical issues and balancing issues mentioned above hold the game back. I expect more out of a Konami game on NES. TMNT lacks the typical Konami polish, particularly from a 1989 release. By then, Konami had already released several games, including ones I’ve already played like Top Gun, Contra, and Gyruss. All of those games are a better technical experience than TMNT. The game does have some good qualities. The music is really good, and the graphics are solid. I like the overhead map and the variety of the gameplay it provides. The idea of switching between the four turtles each with different weapons is a great idea. I think the difficulty curve is even and each stage is harder than the one before it. The structure of a great game is here, but it falls a tad short of the mark for me. Maybe it’s the nostalgia talking, but I find TMNT to be a fun game anyway despite its flaws.

#82 – Teenage Mutant Ninja Turtles