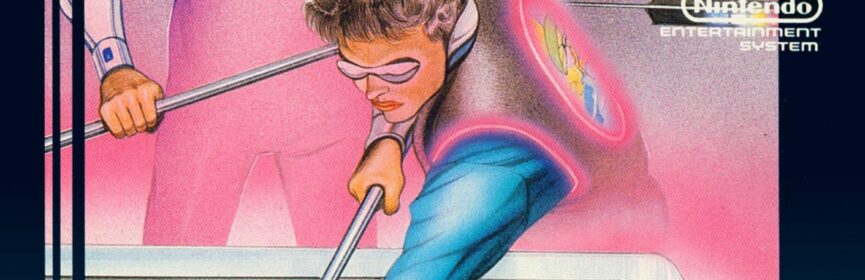
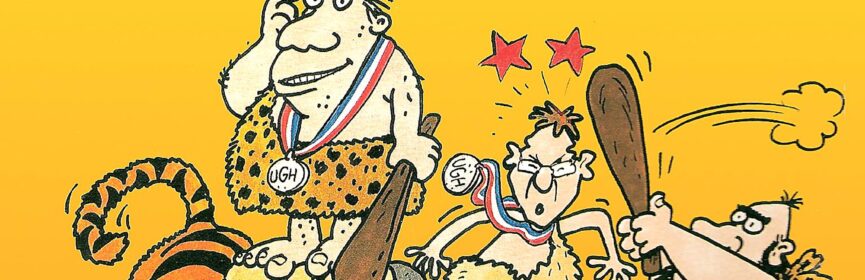
Take on the NES Library

An 8-bit Extravaganza!
NOV
21
2025
0

#181 – Caveman Games

The original Olympians had nothing on this crew.

Impressive font!

To Beat: Set the high score in all events
To Complete: Set the high score in all events in a single playthrough
What I Did: Completed the game
Played: 7/1/21 – 7/13/21
Difficulty: 3/10
My Difficulty: 5/10
My Video: Caveman Games Longplay

The humble caveman in prehistoric times has been a classic framing device for video games. The NES has its fair share of caveman-themed titles. Two I previously finished are Bonk’s Adventure and The Flintstones: The Rescue of Dino and Hoppy. There’s also Trog, The Adventures of Dino Riki, Joe and Mac, and more to come. This trend carried on to the 16-bit era with games like Chuck Rock and Prehistorik Man. I think cavemen in media at large peaked with the Geico Cavemen commercials in the 2000s and haven’t yet recovered from there. But no matter, now is a good time to reflect on today’s game, Caveman Games, a series of mini-games with this prehistoric theme.

The game Caveman Ugh-lympics first appeared on both the Commodore 64 1988 and MS-DOS in 1989. The game was developed by Dynamix and published by Electronic Arts. The only other port of this game was to the NES where it was renamed Caveman Games. The NES version was only released in North America in October 1990. The Caveman Games NES port was also done by Dynamix and published by Data East. This game is Dynamix’s only NES game development credit; they were much more prolific on personal computers.

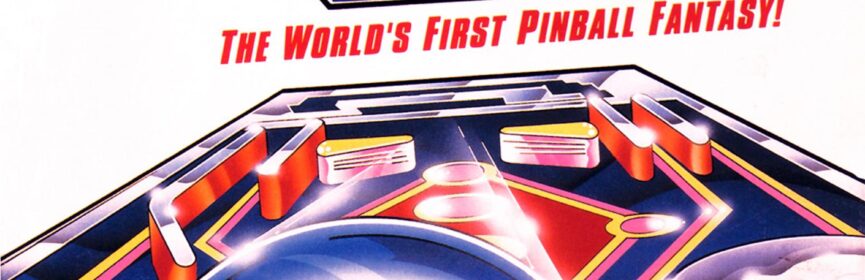
Caveman Games is a simple collection of six mini-games that play out like the cavemen version of The Olympics. There’s no story to be found, and there’s also no ending to this game. The mini-games are called Mate Toss, Fire Making, Dino Race, Saber Race, Clubbing, and Dino Vault. Each game has a default high score, so to beat this game, clear all the games and beat the high score in each one.

Many games would benefit from an Intimidation Phase.

To get started, after the title screen you will select the number of players. Choose from between 1-6 players, alternating play. Each player will get to choose one of six characters from the caveman selection screen. Each character has a portrait and full text description on a separate screen. After that you will see the main menu. Practice mode lets you play any single event as many times as you want. Start The Games is the main mode where you’ll play all six events in sequence. The Caves of Fame is where you go to see the high scores for each of the games. There are practice high scores as well as competition high scores maintained separately. There’s no battery so high scores are not preserved. The menu also has a Restart option to start things over from scratch.

The character you choose will have an effect on your performance in the games. Pick from Glunk, Crudla, Thag, Ugha, Gronk, or Vincent. Gronk is the best athlete and is strong in every event, good for beginning players. Vincent is the opposite. He isn’t good at any of the events and is the choice for experienced players. The other four characters are strong in only two of the six events. In my playthrough I went with Crudla, who is the only female character of the group. I thought she was the most interesting one.

The first event of the game is Clubbing. This is a fighting game between two players on top of a cliff. The event starts off with the Intimidation Phase. Here you press the D-pad buttons and A and B as frantically as you can. A strong performance here will put your competitor closer to the edge on their side. Then you’ll go into the battle part or the Clubbing Phase. Press Left or Right to move along the cliff and press A to do various attacks. Just tap A to do a face hit. Up with A does an overhead smash, while Down with A does a knee attack. You can press Down to duck. Another thing you can do is hold the A button to point your finger in an attempt to distract the opponent. This game has rock, paper, scissors mechanics where some attacks naturally counter others. To win this game, you can either deplete the opponent’s health bar or push them to the edge of the cliff so they fall off. Matches are best two out of three.

Just escaped the jaws of defeat!

The next event is the Mate Toss. This is like the hammer throw. One character drags another character across the screen by their ankles. Press the D-pad directions in a counter-clockwise motion to spin around. As you spin you can gradually speed up the rotation to build up momentum and speed. When you are ready to launch press and briefly hold A. This builds up the angle meter for the launch angle of the throw, then let go of A to toss. You can’t take too long spinning or everyone will get dizzy and you’ll miss the throw altogether. You get three attempts to toss as far as you can.

The third event is the Dino Vault, this game’s version of the pole vault where you leap over a dinosaur. This game is scored based on how high the dino’s head is positioned. You begin by setting the height anywhere you want, then you can start running. Mash the A button to run as fast as you can. When you approach the dinosaur, you’ll press and hold the B button to plant your pole. It will bend back far, and at the right time let go of B to make your jump. If you wait too long to plant your pole, you’ll fall into the ravine. But if you don’t jump high enough you’ll end up in the dino’s mouth, and that’s no place for a caveman. You get three attempts at this event too.

Game 4 is the Dino Race. This race is done with split screen with your character on the top and the opponent at the bottom. When the race begins, mash the A button to start running. This course has obstacles in the way and you press B to jump over them. The dino leaps are deliberately slow so you need to press B in advance to time the jump properly, and you also need to be running fast enough to clear the obstacles at all. If you miss an obstacle, you may have to press Left to back up and try again. Another thing you can try is pressing Right to bop your dino in the head. This can cause the dino to start running faster and he will automatically jump over obstacles for you for awhile. This technique is helpful but is best used sparingly as it can cause the dino to get confused and stall your progress for some time. You only get one try at this event before moving on.

Fire starting is exhausting work.

The penultimate event is Fire Making. This is one of the more complex events, as I would expect starting a fire would be. You will be competing alongside another caveman here. Once again, mash the A button to start rubbing your sticks together. You want to get the meter from the green bar into the red to start making sparks. Here is where you will use Up to breathe in and Down to breathe out to generate some oxygen for the fire to burn. The technique is to tap Down to do short breaths to get the sparks to ignite, then once it starts smoking you want to do deeper breaths in a slower Up and Down cadence to build up the fire. Sometimes you need to go back to mashing A to get more sparks if the fire doesn’t light the first time. If you are breathing too fast, you’ll get lightheaded and dizzy, taking you briefly out of the action. What’s more is that you can press the B button to bop your neighbor and impede their progress, but they can do the same to you. They will look over toward you if they are about to strike. You can duck by pressing Down to avoid the blow and keep your fire going. It’s a neat idea for a game but it takes practice to get the feel for it. For this event, you get two tries to set a strong time.

The last event is the Saber Race. This is similar to the Dino Race with the same split-screen setup and similar controls. The player and opponent appear together on the top half while a tiger is in view on the bottom half. The camera stays focused on you and the tiger on the respective halves. Mash the A button to run and press B on the run to jump over obstacles. If you line up with your opponent, you can press any direction on the D-pad to grab them and shove them backward, putting them in harm’s way before yourself. Of course, the tables can be turned against you too. You only get one shot to clear this event.

This was my first time beating Caveman Games. I have a vague memory of playing this game when I was a kid, perhaps at a babysitter’s house or friend’s house. It’s not the kind of game, thematically or gameplay-wise, that I would have rented myself. This is a common game, worth about $10 for a loose cart.

Putting your opponent in danger is key.

Caveman Games is pretty straightforward to beat. A few runs of the practice mode to learn the controls will lead quickly to a clear of this game. What felt right to me to consider it done was to beat all of the records in a single playthrough. Over multiple playthroughs in a session, this isn’t that bad, but to do it all at once can be tricky. I found the challenge here greater than in Snoopy’s Silly Sports Spectacular, a similar game I already finished, as there is less of a margin for error because here you must do well in each individual event.

The worst issue I dealt with in clearing Caveman Games is fatigue. Four of the six events in the game have a focus on mashing the A button, and they all come in a row at the end of the Games. I was good for two attempts, maybe three, in a single session before I lost effectiveness and had to shelve the game for the night. I don’t know if it was simply fatigue or just general difficulty, but it took many tries to get a clean run at the Saber Race, the final event. I would either get thrown to the tiger and lose or finish too slowly to break the record. It’s annoying for sure for that to be the last event of the sequence where you only have one attempt and are at the mercy of the opponent’s randomness. After wearing out from 20-30 minutes of attempts, I started ahead on the next NES game on my list, and that was the right call.

Mini-game compilations like Caveman Games don’t excite me too much, but this game is well done for what it is. The graphics in the game do well to carry the theme, with an intentionally crude looking font and unique looking characters. There are some nice looking animations at times, such as the wobbling of the pole in the Dino Vault. The music is also pretty decent whenever it actually plays. Much of the game is either in silence or backed by sound effects only. The controls here are solid. Everything responds as it should, and though jumping in some of the running events feels sluggish, I can tell it is done that way by design. It is unfortunate that most of the games resort to mashing the A button, but that is just how these games were designed, a product of their time. I would rather play Snoopy, but that doesn’t make this a bad game, far from it.

#181 – Caveman Games

 
OCT
17
2025
0

#180 – Lunar Pool

Simplistic yet stellar!

The title is all rainbow colored, very nice

To Beat: Finish all levels 1-60 without continuing
Played: 6/3/21 – 6/29/21
Difficulty: 8/10
My Difficulty: 8/10
My Video: Lunar Pool Longplay

My instinct as a programmer is that a game like Lunar Pool would be challenging to program. It’s not super-fast action with parallax scrolling, screen-filling bosses, and DPCM sound effects, far from it, but there are just so many considerations with a game like this. The developers must allow dynamic speeds, angles, and collisions with friction on all of those objects at once with each other and the table. I’ve seen plenty of NES games lag up with only a few relatively simple sprites on the screen. I can’t imagine how one could smoothly handle all those interactions. Still, there were several developers that figured it out successfully. Lunar Pool was the first billiards game on the NES, and even though it is a simple game on the surface, I found this to be quite an impressive piece of software, and a fun game to boot.

Lunar Pool was developed by Compile, who are best known for both their scrolling shooter games and Puyo Puyo. The company was originally known as Programmers-3 Inc. until 1985. Lunar Pool was one of the first, if not the first, developed games under the Compile name. It was released in 1985, first on the PC-88 in June 1985, then on the Famicom in Japan in December 1985. There it was published by Pony Canyon. In October 1987, Lunar Pool came to the NES in North America, published by FCI. The PAL version was released way later in 1991. The game was also part of the Wii Virtual Console, released in North America in October 2007.

After starting at the title screen, press Start to get to the options menu. First choose the game type, either a one-player game, a two-player game, or a game against the computer, where you take turns to compete for score. Press Up or Down to select the round number. Lunar Pool has 60 tables to choose from. You can also adjust the level of friction with Left and Right. The default value is 32 but you can select any value within the range 0-255. With zero friction, balls will slide around forever, and with max friction they barely move at all. Once all is decided, press Start to begin the game.

It looks standard, but goes beyond that very quickly

The game kicks off with a standard looking pool table. Six numbered balls are arranged in the classic triangular layout. To start, use the D-pad to aim. The cursor moves in a circle centered around the cue ball. Press Right to rotate the cursor clockwise, and use Left to rotate counter-clockwise. Up moves the cursor away from the ball while Down brings the cursor back toward the cue ball, i.e., increasing and decreasing the radius, respectively. The angle is all that matters here; the position of the cursor is simply a visual aid to help line up faraway shots. The cursor movement is very granular and even changes its shape on every tiny adjustment so you can dial in the exact shot that you want. The power of the shot is determined by the power meter at the top-right that grows and shrinks on its own. Here you will have to time your shot and press the A button to get the desired power.

The goal here is to pocket all the balls to move on to the next stage. You can pocket them in any order you like. The Ball counter is for how many cue balls, or lives, you have. If the cue ball goes into the pocket, you lose a ball and the table resets to the state prior to the shot. You get up to three chances to pocket any ball, as shown by the Shot counter. If you fail to pocket a ball in three consecutive attempts, you also lose a ball. You earn an extra ball after clearing each table. If you can clear the whole table without missing a shot, you get a Perfect bonus of an extra ball on top of the extra ball you get for clearing the table.

Lunar Pool also has a Rate mechanic. You are rewarded for pocketing many balls in a row without missing. The Rate counter starts off at 1 and resets back to 1 on any missed shot. Pocketing a ball increases Rate by 1. If you can pocket two balls in one shot, your rate goes up by 1 for the first ball and by 2 for the second ball, 3 total. This scales up accordingly if you can pocket three or more at once. Keeping a high Rate counter has two benefits. Your score for pocketing each ball goes up as your Rate counter increases, acting as a sort multiplier. More importantly, if you can get up to a Rate of 20 or more, you earn an extra ball. Beyond that, you earn an extra ball for every multiple of 5 you reach beyond 20. A big streak across multiple tables can give you many extra balls to better manage the challenging tables ahead.

I had a streak going until here.

This is my first time beating Lunar Pool. This is a game that is fun to tinker with, and so I’ve played the first few levels several times over the years. I can’t recall if I had this game at all when I was younger or if this is something I got more interested in later. This is the kind of game that appears on multicarts so I know I’ve seen it that way quite a bit. This common game exists as both a 3-screw and a 5-screw cart where the 5-screw cart seems more common in my experience. It’s the form factor I have. This is an inexpensive cart selling for around $8 and you are pretty likely to find it in a lot for less money.

While this is a straightforward, simple game, there is a catch if you want to beat it. You must clear all 60 stages in a row without a Game Over. Any Game Over sends you back to the title screen, and from there you can continue the game from the level you lost. You could go through 1-60 that way, but it’s not quite good enough. There is a special ending screen that is shown after Stage 60 if you clear it all in one go. This special screen is what sets this game apart from an easy clear to a quite challenging one. This is where building up a good rate and a large stash of extra balls goes a long way toward managing this long experience.

A large part of the challenge is that the difficulty curve is all over the place. Some tables have a lot of angles, weird shapes, or tough ball placement. The pockets can have portions blocked off, and the worst is when only a quarter of a pocket is showing, blocked by the walls. It is very difficult to wedge a shot into that tiny area, and shot finesse is very important. Sometimes those challenging tables are tough to even get started and things can spiral out of control quickly. On the other hand, some stages were laughably easy. Some levels are retreads of previous levels, and one particular stage in the middle of the game has only one ball to sink, which can be routed easily. With 60 tables to clear, I had to take notes to keep track of outlier stages on both ends of the curve.

Shoutout to this level, easy clear!

My primary approach was to get off to as strong a start as possible. There were a few tables I tried my best to route out a perfect clear. The most important of these to me was Stage 3. The first stage isn’t all that bad to finish perfect even without a plan, and Stage 2 lined itself up to a natural order I didn’t have to plan for. Stage 3, however, is an X-shaped level with pockets tucked away where it seems impossible to handle in one go. Through lots of trial and error, I managed to come up with a plan that gave me a pretty good chance of getting a perfect clear. Stage 3 was the level that revealed to me that the power levels on the shots are more nuanced than the visual meter would appear. There are several in-game frames between when the icons light up on the power meter, and the actual power of a given shot seems to be frame dependent. That means you have to have precise timing within 1/60th of a second to dial in an exact shot power. This is different than the angles which you can take your time to set them and make them consistent every time. I could tell in Stage 3 particularly when I got the shot I wanted and when I was off just a touch. Carrying a perfect run into Stage 4 gave me a huge jumpstart and it was worth the effort.

I’ll admit this came a lot later in the process than it should have, but the most important factor for me beating this game was utilizing the built-in stage select. I know speedrunners use save states and other tools to practice levels and sections over and over. I don’t do that to beat NES games, even if it costs me extra time replaying learned levels over and over. But since stage select is built-in, I took full advantage of it with no reservations. I practiced difficult levels, I planned out opening shots, I routed out levels, and I identified easy tables to full clear. Finding the stretches in the game where I could build up a high Rate and get extra balls was so helpful. I credit the stage select for helping me finish this game.

These barely exposed pockets are very hard to use.

My winning run wasn’t anything special. I started off well with perfect clears in the first two stages, and I was only one ball off from the perfect Stage 3. I also got back-to-back perfect clears in Stages 5 and 6. Not my ideal start, but definitely good enough to keep it going. My rate maxed out at 30, and then I got it back up to 25 in the early game, just good enough for a couple additional extra balls. It turns out I didn’t really need them. The most important stretch of the run was through the 20’s, this is what made the run viable. I got 3 perfect tables and managed to raise my ball count from 19 to 25 during this stretch. The back half of the game went good enough. It became important to ignore consecutive shots and rate and just set up as many easy shots as possible. It was also important not to panic and take my time. I finished the final stage with 9 balls remaining for a comfortable first time clear. This game took me 2 hours to beat, almost exactly.

The current best speedrun of Lunar Pool any% was by Rabadoom with a time of 1:05:26, far and away the best time on the board. You can tell that they practiced a lot to get the time down. There’s plenty of mistakes in the run but it’s really the only way to play Lunar Pool, since there is only so much you can strategize for. My completion of the game is fast enough for second place on the leaderboard, so I will be submitting that. I haven’t submitted any speedruns in quite a long time so this is a nice bonus. The primary speedrun category for Lunar Pool only covers the first 5 stages with the top times coming in just under 3 minutes.

I really enjoyed my time with Lunar Pool. There’s something so appealing to me about a simple game that functions well, plays well, and is challenging enough to keep my interest. The graphics are clear, colorful, and concise. All tables have moon theming aligned with the name of the game, which also fits thematically with the adjustable friction. The music might be repetitive, but it fits the game and doesn’t become annoying to me. It might not be a fully featured billiards game on the NES, but I think it could be the most fun to play.

#180 – Lunar Pool

by :
comment : 0
 
MAR
21
2025
0

#179 – Pinball Quest

Has it really been almost a year!? Well how about a pinball RPG then!

It’s a quest, a Pinball Quest!

To Beat: Reach the ending in RPG Mode
Played: 5/31/21 – 6/3/21
Difficulty: 5/10
My Difficulty: 5/10
My Video: Pinball Quest Longplay

The genre mashup is a neat trend in video games that has been around for a long time. It is best done when the resulting game feeds off its inspirations to be better than the sum of its parts. There are plenty of examples and I can think of a few that really hit the right way in recent years. Portal is an obvious example to me, a first-person shooter and puzzle game. Undertale is more than just inspired by Earthbound; it is a bullet hell turn-based RPG. Crypt of the Necrodancer is a rhythm game mixed with a roguelike. You get the idea. Well, the NES has genre mashups for its own. Gumshoe is a light-gun based platformer, and River City Ransom is an open world beat-em-up with RPG elements. Today’s review is on Pinball Quest, a mashup of pinball game and RPG, and I find it quite fascinating!

Pinball Quest is an NES exclusive game. It was developed by TOSE and published by Jaleco in all regions. The initial release was in Japan in December 1989. It was brought over to the US on June 1990, and later it was released in some PAL territories in 1992. Currently there are no ways to play this game besides the original release.

Pinball Quest features four different modes. Three of these modes, Pop! Pop!, Viva! Golf, and Circus are standalone pinball tables. You can play these just for fun with up to 4 people alternating. There are no endings or anything to these modes. I’ll be honest, I barely played these other tables, so we’ll spend just a little bit of time on them toward the end and focus primarily on the main attraction, the RPG Mode. It is the primary way to play this game and the mode that has the ending. This mode is a vertical stack of six tables where you try to progress upward to the top, fighting enemies and bosses on the way to save the captured princess. Clear the topmost table to reach the ending and beat the game.

I spent a lot of time on this starting screen

This game features what I would call standard pinball controls. The flippers are controlled with Left on the D-pad and the A button, for the left and right flippers respectively. You can shake or tilt the table with either Right on the D-pad or the B button. Each table in RPG Mode has at least two places where you can move the flippers up and down the table. Press Up or Down to move the flippers between these locations. The Start button pauses the game. In the RPG Mode, press Select to bring up a list of special items you can use.

The game begins at the first table in the courtyard of the castle. The initial playfield is split into two halves, top and bottom. There are trees and gravestones, a ghost captain that will relay some backstory if you get close enough, and a gate on the left side blocking the upper half of the table. As you make your way up, you’ll want to press Up to move the flippers to the top part of the table. Likewise, should you fall, press Down to put them back at the bottom. The top half of the board has some skeletons walking around that you can bop to disassemble. Once all three are brought down, they reform into a skeleton boss. Each table has a boss encounter like this. On the bottom left you will see the boss’ HP value, which is 18 for this boss. Below that is your attack meter. This will grow as you keep your ball active and attack the enemies on the table. By the time the boss appears, you should have filled some of the attack meter. Every hit into the boss decreases its HP, and having more attack power does more damage. When the boss is defeated, he drops a key. Collect the key to get warped up to the castle door and upward to the next table. If you drop off the very bottom, you get a short message and can continue again for free, as many times as you need. Don’t be too afraid to fail early on since there is no penalty at all here.

Before advancing to the next table, you’ll get the opportunity to use the shop. This shop appears between every table transition. You can skip the shop altogether via the left pipe if you don’t want or need anything. The shop items are various stoppers and flippers. Purchasing any items here get added to your inventory of up to four items. During gameplay, press Select to bring up the list of items, then press A on the one you want to use. Some items require you to choose a location, such as positioning a side stopper on either the left or right side. One neat feature of the shop is the ability to steal items. While it has a low success rate, if you can pull it off, you can get some really nice flippers and stoppers for free. Fail to steal and you’ll lose half of your gold. Perform at your own risk!

Top of the first table and already a boss!

There are four types of stoppers and two types of flippers. The single stopper is a cheap, single use side stopper for only one side per item. Hit it once and it’s gone. The floor stopper is the same thing but it is much more sturdy. It remains for as long as you stay on the current table. The permanent stopper is pretty expensive but it gives you both left and right stoppers that stay while you are on the table. Even better is that this item stays in your inventory and can be used again and again, giving you truly permanent side stoppers the entire game so long as you remember to activate them every table. The center stopper goes between the flippers and lasts until you advance up to the next table. The two pairs of flippers are permanent upgrades that don’t have to be reactivated out of the inventory. The strong flippers add an attack multiplier to your ball, which takes bosses down much faster. The devil flippers add an even higher multiplier and can take bosses out very quickly, but they are flawed. Sometimes the devil flippers will freeze up for a short time, so you’re taking a risk that they might fail on you in a critical spot.

After your shop visit, you’ll head up to the second table, straight to the top half, where Ziffroo the Witch is waiting for you. She has 30 HP, a more formidable foe than the skeleton boss. She is flanked by demon dogs that can get in the way of your attacks. They also fire bubble shots that aim for your flippers and will disable them temporarily on contact. The lower half of the table not only blocks you from the boss but also is a good defense from getting back up to the top. The center drain from the top half is blocked off by one way rocks. The left side doesn’t really give you an easy path back up. There is a drain hole accessible on the right. Hitting that will send you through a chain of drain holes that propel up back to the top half. Defeating the boss opens the door to the third table.

It is worth pointing out here that you can very easily fall back to previous tables, often multiple tables if things go poorly. The table bosses return on every visit at full HP. However, once the door to the next table is opened, it will remain open for the entire game. The bosses block you but you can work around them to advance without defeating them a second time. A few extra bops to the bosses along the way will increase your attack meter, perhaps annoying but beneficial. Also, you never lose any money aside from the stealing penalty. With some intentional play, you will usually end up making some kind of permanent forward progress.

The third table features goblins, several of them. The bottom half is patrolled by two goblin kids and they are interested in your ball. They will try and grab it given the chance, but this isn’t usually a bad thing. While they sometimes attempt to spike your ball through the flippers, they typically carry your ball to the right and deposit it on a lift car that carries you to the top half. With enough damage output, you can also defeat the goblin kids, which is often more trouble than its worth in my experience. The top half of the table contains a couple rows of statues. The statues can be destroyed, just hit them a few times. After most of the statues are cleared, the Goblin King comes to life as the boss of the table. Defeat him to proceed to the fourth table.

Seems pretty risky to steal from this guy, he looks mean …

The next table is a river-themed table featuring turtles and a more interesting structure than previous tables. The turtles saunter back and forth while popping into their shells on occasion, mostly serving to just get in your way. Bop them a few times to clear them away. What you want to do is aim for the hole on the left side to bring you upward and into a horizontal lane guarded by yet another turtle. You’ll normally bonk him and be forced back down through a return hole, but sometimes if the timing is right you can slip by the turtle altogether. When the path is clear you circle around a large drain hole with three smaller holes inside. You’ll fall into one of those holes at random, and the one you want is on the top-right to bring you up to the river. There you wait for a boat to carry you to the boss fight at the top of the table. Sometimes the boat you ride is broken down, in which case you sink into the river and drain back to the bottom of the table. This whole sequence to the top is very random, which gets very frustrating if the game keeps denying you. The boss of this table is a spirit that haunts and animates these suits of armor. You’ll need to defeat all of them one at a time to clear the table, and each subsequent armor has more HP than the one before.

Table five is the throne room table. This one is simple in effects but more winding in layout than all the other tables. There are several different placements of flippers in this one in different formations than the standard flipper pair. To advance in this table, you want to climb all the way up the right side of the table first. You can adjust the flippers as needed to propel yourself all the way up, or you can drop into the hole on the right side to carry you all the way up. There you will fall back down the middle of the board across pegs. Falling through the left side carries you toward the final part of the table on the upper left. A princess on a throne is circled by four monsters. First defeat the monsters, then hit the princess to save her. By saving her, it means turn her into the boss of the table. She flies all over the place and can hurt your flippers as well. Once you take her down, you’ll reveal the stairs to the final table underneath the throne.

The sixth and final table is a boss fight against Beelzebub, the Dark Lord of the Machine, as the manual puts it. There are three lanes in the center with lit candles that can carry you up to the top of the table, or you can pass through and reach the upper flippers if you’re lucky. Beelzebub sits at the top holding his position. He has a pretty devastating skull attack that can lock your flippers up. Do your best to keep up the pressure and you can defeat him to win the game.

The witch and her guard dogs gave me an awful time.

Let’s briefly discuss the three standard tables also available in Pinball Quest: Pop! Pop!, Viva! Golf, and Circus. Pop! Pop! is a simple table with a bowling theme. It’s interesting to note that you need to press Up and Down to set the position of the flippers from the top and bottom just like you do in RPG mode. The top half of the table has a few bumpers and a pair of holes, nothing super notable. The flippers are offset here and the ball tends to go around them most of the time anyway. The bottom of the table is a bit more interesting with bowling pins set up and an entrance to a pool table mini-game. You aim a cursor in 8 directions with the D-pad and try to sink all the balls before you accidentally scratch the cue ball.

Viva! Golf is a golf course theme that is infested by gophers. In this one, the top and bottom flippers are fixed, no moving them around. The top half of the playfield has the hole on the green, along with some other holes and bumpers. There is only a right flipper up here so it is tough to keep the ball up top. The lower part of the playfield has a row of four holes with gophers that occasionally pop out. You need to hit one out of each hole to unlock some bonuses at the top of the playfield. This level also features a water hazard that is very easy to hit. Land there and your ball will eject out of another hole in such a way that you often lose the ball between the lower flippers.

I found Circus to be the most fun of the three standard tables. The main feature of this one is a slot machine that can activate some features of the table, including an extra ball light and a bumper scoring increase. You do have to shuffle the flippers up and down on this table. The top half of the table features four target lanes and some more pop bumpers. The bottom of the table contains the slot machine, some other bumpers, and a side lane back to the top of the table. This table has a center bumper built-in at the bottom, which solves the problem from Viva! Golf with the water hazard. The table also has a bonus game where you throw balls at animals to protect a girl, according to the manual. I was not able to reach this mode despite several tries, but I don’t feel like I’m missing anything truly necessary.

This was my first time playing through Pinball Quest. I was already familiar with the premise of the game from watching others play it briefly, as well as reading up on it from time to time over the years. This was my first time diving in beyond the first table, certainly. This game is not rare, and worth about $10 loose.

Appearances can be deceiving! I appreciate the help!

Beating Pinball Quest has one of the widest possible outcomes of time needed to clear once you know what you are doing. With the unlimited continues and randomized outcomes of some of the tables, it is a constant push and pull to make progress on the board. It’s possible to beat the game in a matter of minutes if things go very well, and it also could take hours if it goes awry. My initial playthrough took a couple of hours, which isn’t bad at all for a first time. I recorded two follow up runs after that to try and improve the video, and both runtimes were around an hour each. The run I kept was just under an hour. I could have grinded out a much more respectable time if I really wanted, but I was ready to move on.

I came up with a way to approach the game that made winning consistent. To do this, you need both the permanent stopper for the side drains and a steady supply of the center stoppers. Better flippers are nice to have, but strictly speaking they are optional. The quickest way to go about this is to steal from the shop at every opportunity! Between the first two tables, you won’t really grind up the cash fast enough to worry about losing it on failed steal attempts. It might take some time to get anything good out of it but I think it’s worth it. The permanent stopper is the real prize here, but getting either of the upgraded flippers was good enough to give up my thieving ways. From there, just keep marching up the table. If you didn’t steal the permanent stopper, save up for that first and foremost, and use it on every table once you get it. The center stoppers are permanent until you change tables. I don’t bother using those at all until I can afford one for the current table plus all others tables ahead. As long as you play carefully, you should not fall back down with both stoppers active.

Pinball Quest is a unique genre mashup that feels very forward thinking, but what I have failed to mention until now is just how janky this game feels. The physics are functional enough but lack any sort of polish. It’s like the ball just wiggles around on its own accord. I haven’t covered the black box Pinball game yet, but it has a very good feel to it for such an early game, and Pinball Quest did not learn any lessons from that whatsoever. Pinball machines in real life are miracles of mechanisms and electronics combined, and in a way, Pinball Quest is its own kind of miracle in that it manages to function in spite of itself. The gameplay concept is just so neat that it covers for its technical shortcomings. The graphics, music, and controls are all adequate, nothing at all flashy but good enough. I really like what they did with the ending, it feels wholly out of place, but I dig it. I don’t mean to rag on this game too hard right at the end, I just want to be clear that I think Pinball Quest is a good game with some obvious issues. I believe it is worth your time to give it a try and see if it might be fun for you!

#179 – Pinball Quest

by :
comment : 0
 
APR
19
2024
2

#178 – Sesame Street 1-2-3

Easy as 1-2-3

Each game has a more detailed looking title screen than this one.

To Beat: Complete All Modes
Played: 5/27/21 – 5/28/21
Difficulty: 1/10
My Difficulty: 1/10
My Video: Sesame Street 1-2-3 Full Playthrough

As much as I enjoy a good challenge, I’m also keen on short, quick entries.  Not only do they get quickly marked off the list, but they also get added to my ever-growing backlog of reviews!  Today we are taking steps in the right direction!  There are several Sesame Street titles on the NES, which I imagine were in-demand both as a way to help kids learn the basics in a fun way and as a way for parents to justify having video games in the house if they can also be made educational.  These weren’t just cash grabs either, as they are very well made in order to be as engaging as possible.  Sesame Street 1-2-3 is the first of these games that has more in store than just teaching counting.

I touched on Sesame Street briefly in my review for Muppet Adventure, so now we will take a closer look.  Sesame Street is an educational TV series created by TV producer Joan Ganz Cooney and Carnegie Corporation vice president Lloyd Morriset, as a way to use television for good by tapping into its addictive qualities to help prepare young children for school.  After a period of research and preparation, the show premiered on PBS in 1969.  As of this writing, there have been over 4500 episodes throughout its 54 seasons, and it has won over 200 Emmy awards.  The show has evolved over the years to keep up with research in early childhood development, as well as following the trends in how toddlers consume media.

There have been many, many Sesame Street video games over the years, way too many to count.  The earliest known Sesame Street game that I could find is Ernie’s Quiz, released for the Apple II in 1981.  The NES received five Sesame Street carts, the first of which is Sesame Street 1-2-3.  It was released in January 1989, developed by Zippo Games and published by Hi-Tech Expressions.  Zippo Games, the company founded by Ste and John Pickford, was contracted by Rare to develop NES games, starting with Sesame Street 1-2-3.

Shapes come out of the hat, find ones that match

This game is a port of two existing games, Astro Grover and Ernie’s Magic Shapes, which were released for several home computers in 1984.  Astro Grover is a counting and basic arithmetic game, while Ernie’s Magic Shapes is all about shape matching and color matching.  Each game has multiple sub-modes that get more advanced as you go.  This game has no ending.  The best we can do is to play each mode long enough until it brings you back to the menu screen.

The first game listed is Ernie’s Magic Shapes, so we’ll go to this one first.  This game has six modes, plus an introductory mode showing you how to play, how convenient!  The basic idea is that there will be a shape displayed over Ernie’s head, and he can conjure new shapes out of his magic hat.  Press any key on the D-pad to switch to a different shape out of the hat.  When both shapes match, press either A or B to test that shape out.  If you’re correct, you’ll get a cute animation and a melody to celebrate, along with a rabbit out of the hat, of course.  Press Select or Start to exit the mode and go back to the Ernie’s Magic Shapes menu.

Each of the six modes when selected from the menu displays a description of what you’ll be doing.  The first two modes, Presto Shape-O and Abracadabra…Colors!, are the most basic shape matching and color matching, respectively.  Zip Zap the Shapes begins with a picture made up of multiple shapes.  You have to identify if the shape presented is part of the target image, and you’ll match enough times to complete the full picture.  Poof Pop the Colors is this same idea but with matching colors.  Shazam! More Shapes is harder shape matching, which is the same as Zip Zap the Shapes with a little bit more complicated pictures to match.  The final mode is Ta Dah! What a Figure, listed as “Hardest of all.”  It’s just matching pictures of multiple shapes with different colors, combining what we’ve already done into one game mode.

Martian counting never looked so good.

Now let’s talk about Astro Grover.  This is a math game with five different sub-modes.  You interface with the game using the number line at the bottom of the screen.  Use Left and Right on the D-pad to move a cursor that circles one of the numbers from 1 to 9.  Press A or B to choose that number.  You can also press Select or Start to exit the mode and go back to the Astro Grover main menu.

The first mode is How Many Zips, which are little green Martians that emerge from a spaceship.  When they have finished leaving the ship, you count them up and choose the correct number from the bottom.  Done correctly, they will enter the ship and then part of the cityscape in the background will be colored in.  When the entire city is colored in, you’ll get the ending tune and well as an animation of Grover flying about.  Some of the other modes share this basic structure.

The next mode, Beam That Number, plays a bit differently.  This time Zips are scattered on the screen, along with three satellite dishes at the bottom and a rocket ship on the right.  The ship has a number written on it.  The satellites will cast a beam around the Zips causing a group of them to flash.  You want that flashing group to equal the number on the spaceship.  If they match, they beam into the satellite for some reason, and the ship flies a little bit upward.  Once the ship gets high enough you get the ending fanfare.

The other modes are based on one of the two prior modes.  Adding Countdown plays out on the cityscape.  A group of zips will fly in, you choose the correct count.  A second group flies in and you count those too.  Then you add both groups together and select that count as well.  Repeat this process to color the entire city.  Take It Away, Zips! is the same game as above with subtraction instead of addition.  Sum Up, Sum Down is the final mode and takes place with the satellite dishes.  This time numbers appear beneath each of the three dishes. You have to choose the right combination of numbers that add up to the target number on the spaceship.

Here you find groups that match the number on the ship.

To be honest, this was not my first time playing Sesame Street 1-2-3.  My kids are now 9 and 4 years old and I definitely played this with my 9-year-old when she was younger.  My 4-year-old is the right age for it, and we might well try it out some time, but I know he’d rather play TMNT 3 or Jackal (or Roblox) instead of Sesame Street 1-2-3.  This is a common game that is still pretty cheap.

There really isn’t much to say about my playthrough of this game.  I finished it up in about 20-30 minutes and I even streamed it on Twitch to impress my friends.  I made one or two small menuing mistakes, so this wasn’t even a perfect run, much to my own personal dismay.  I do want to point out a few miscellaneous aspects of this game.  The first is that in Ernie’s Magic Shapes, a few of the games exit to the menu after a few puzzles, while others keep going on until you exit manually.  Looks like an oversight to me as Astro Grover always kicks back to the menu when you complete a mode.  Another thing is that you can’t switch between Ernie’s Magic Shapes and Astro Grover once you’ve started one of them.  You have to physically reset the console to switch games.  Lastly, this game is also part of a compilation cart with Sesame Street A-B-C.  That game also has two games built-in, so Sesame Street A-B-C/1-2-3 contains four educational games for kids, which is an awesome value!  Personally, I don’t go back to replay all the games on compilation carts, so I’ll get to mark off two carts whenever I do Sesame Street A-B-C in the future.

I think Sesame Street 1-2-3 is an educational game done well.  It has simple objectives with gentle difficulty levels, wrapped up with familiar characters.  It looks nice, with some impressive graphical effects like the circling stars of Ernie’s Magic Shapes and the satellite beams in Astro Grover.  The music is great in it, very pleasant to listen to.  I think it’s neat to know that the Pickford Brothers got their start here on console development.  They did a great job on this and would go on to do greater things later on.  Considering that I also got to play this game with my kids, I’m glad I have this one on the shelf.

#178 – Sesame Street 1-2-3
(Ernie’s Magic Shapes)

#178 – Sesame Street 1-2-3
(Astro Grover)

by :
comment : 2
 
MAR
01
2024
2

#177 – Bases Loaded 3

The Bases are in fact still Loaded.

Admiring the home run ball

To Beat: Get a perfect 100 rating against a Level 5 team
Played: 5/27/21
Difficulty: 4/10
My Difficulty: 2/10
My Video: Bases Loaded 3 Longplay

The NES has several game series with an excellent third installment. Super Mario Bros. 3 is one of the best games of all time. Castlevania III: Dracula’s Curse is a fan favorite with an all-time soundtrack made even better when utilizing the expanded chips on the Famicom. Dragon Warrior III is often considered one of the best RPGs on the NES and one I personally enjoyed very much. Ninja Gaiden III is awesome, as is TMNT III: The Manhattan Project. Mega Man 3 might well be the best of the 6 NES installments, at least to some. Bases Loaded 3 is not considered, well, at all, when talking about great 3rd games of a series. But I can confidently say that Bases Loaded 3 is my favorite game in the series for one very specific reason that I’ll get into.

For more information on the Bases Loaded series, check out my reviews for Bases Loaded and Bases Loaded II: Second Season. As before, this review will focus primarily on the changes between the previous installments. Let’s get started.

Bases Loaded 3 was first released in Japan, originally named Moero!! Pro Yakyuu ’90: Kandouhen. That translates roughly to Burn!! Pro Baseball ’90: Exciting Edition, or perhaps Impressive Edition. It was released in Japan in July 1990, about six months after Bases Loaded II reached North America. The US release came in September 1991. Here it was called just Bases Loaded 3 but it features MLB Hall of Famer Ryne Sandberg on the box cover. Like the other installments, the game was developed by Tose and published by Jaleco in both regions.

They really want you to understand what’s going on here.

Let’s get the biggest change out of the way first. Bases Loaded 3 does not require playing a full season to beat the game. In fact, there is no season mode at all! This game features five difficulty levels for the opposing team, but you’ll always start off playing the weakest, Level 1 team. At the end of each game, you are given a special screen and a rating value. I’ll spare the full details until later, but you can score up to a 100 rating with very good, efficient play. The rating determines which difficulty level you’ll face in the next game. If you lose a game, or have a low rating, you’ll go back to the base Level 1 team. To beat this game, you need to earn a match against a Level 5 team and then beat that team with a perfect 100 rating.

Here are other changes between versions that take place prior to starting up a match. From the title screen you can select Watch mode to watch the CPU square off against itself. Choose the teams and settings, then sit back and enjoy. There is also an Edit mode for creating your own team. Behind the scenes, there is a special team designated for the Edit mode, so you can only build and update that specific team. You can change any of the players’ names and stats with no restrictions or limits. Build the super team of your dreams, go crazy! In this game there are 12 standard teams to choose from, plus the Edit team. After choosing teams, pick one of three stadiums to play in. Each stadium has different outfield dimensions, so you can opt for the pitcher’s park with long distances or a more hitter friendly park with closer walls down the lines. You can also adjust your starting lineup and pitcher as you can in the other games.

The pitching is tweaked a little for Bases Loaded 3. You begin a pitch the same way as before, hold any direction and press A to target a specific location. From here on, it is handled differently. To increase the direction of the pitch, tap A between the windup and delivery. The more you tap A, the more the pitch travels in that direction. For example, for a right-handed batter, you can throw a pitch up and away by holding Up and Left before winding up with A. This pitch will target the upper left of the strike zone. By adding A button taps before the pitch is thrown, you can aim the pitch further up and away beyond the strike zone. This gives you a more granular adjustment on where to aim pitches. During the windup, to throw the ball faster, you’ll hold Up on the D-pad. Because the D-pad only increases speed during the windup, you really can’t curve the ball like you can in the other games. Finally, you can press B to initiate a pickoff move.

You can choose the field that favors your abilities.

The developers managed to set this game around yet another defensive perspective, this time putting the camera out in center field. Logically this makes sense, as now batting, pitching, and defense are all oriented the same way toward home plate, but this is uncommon compared to other baseball games of the time. The controls for choosing a base to throw or run to also reflects this perspective. Press Up to target home, Left for first base, Down for second base, and Right for third base. Another tweak the manual calls out is that the speed of the throw is determined by how quickly you get rid of the ball. As soon as you grab the ball on defense, throw it right away. This gives you the crispest throw, otherwise if you delay even a little bit the throw will be much slower. It’s an interesting timing mechanic. The other controls are the same: Press A and a direction to throw to a particular base, press B and a direction to run to a base.

Batting is made simpler here. The A button swings like usual. This time you can do a level swing, a high swing with Up and A, and a low swing with Down and A. In earlier games you could adjust your swing to reach inside and outside pitches. To do that now, you must position yourself in the batter’s box prior to the pitch. This might seem like a downgrade but this is how it is done in most other NES baseball games. To bunt, press Select. You can cancel a bunt by pressing Select again or pressing A.

Baserunning is much improved this time. They finally standardized the baserunning controls in Bases Loaded 3 to align with other contemporary NES baseball games. To advance a base, press B and the D-pad direction for the base you are heading toward. To go back, press A and the base you want to return to. The directional mapping for the bases is the same as when fielding, from the centerfield perspective. These controls are so much more intuitive to me. To move multiple runners, you have to control them separately. You can even halt the baserunners by holding both A and B together during a play.

With only the shadow in view until the end, it’s tough to place your fielder.

With the controls and other differences out of the way, it’s time to explain the new winning condition. To win the game you’ll need to understand how to score 100 points in the new rating system. To get a rating at all you need to win a game first. Interestingly enough, the rating screen is more a list of your flaws rather than how well you played. You start with the base score of 100, and most of the categories are negative factors that reduce the rating by 3 points for each infraction. You’ll see a count of the number of faults made in each category with the total score at the bottom.

Here are the 13 categories, mostly taken straight from the manual:

  1. Making an error
  2. Delaying a throw, i.e. making a slow throw
  3. Allowing an inside-the-park home run
  4. Throwing to an unmanned base
  5. Forcing in a run with a walk
  6. Leaving a tired pitcher in the game
  7. Allowing more than 3 runs in an inning
  8. Throwing a wild pitch that allows a runner to advance a base
  9. Striking out
  10. Getting caught stealing
  11. Getting picked off or doubled off a base
  12. Making a great play
  13. Bonus

A few things stand out to me about this list. The manual claims a few times about playing the perfect game, but by baseball definition, you don’t actually have to play or pitch a perfect game, not even close. You can allow hits and walks, and even runs, and not necessarily be penalized for them. Most of the categories center around playing clean defense. Miscues on defense that are not necessarily errors in an MLB game tend to count against you here. Many of these are pretty straightforward to avoid. By far the hardest to avoid is striking out, this is what burned me the most starting out. For any point-reducing penalty during game play, you’ll hear a set of beeps to indicate that you messed up.

The biggest moment of the game in the 3rd inning.

The final two categories add points to your score. Funny that these are here to help cover up a mistake or two that let you maintain your “perfect” run, but I digress. A great play will add 2 points to your score. These are for very good defensive plays, such as diving for a ball just barely in reach and throwing out the runner at first base. You can’t fake these points by diving after everything unnecessarily, trust me, I tried that. The mysterious Bonus category gives you 1 point, and I have no idea how this works at all. I was just happy to see points there. Note that with these last two categories it is possible to exceed 100 points, but your rating will round down to 100 if that occurs.

The game rating determines which difficulty level of team you’ll play in the next match. Score 90 points or higher, and you’ll face the most difficult Level 5 team. Every 10 point range down from there reduces the difficulty level by 1. Scoring fewer than 60 points, or losing the match outright, will reset you back to playing the Level 1 team. To beat the game, it’s not just enough to get the perfect 100 rating. You need to earn the right to play the Level 5 team by scoring 90 points or more, and then you have to secure a 100 rating against that team to win for good.

This was my first time playing Bases Loaded 3. Just like the others, this is an affordable cart that is not difficult to find, though it is not nearly as ubiquitous as the first two installments. When you do find a cart, it isn’t expensive, about $5-$10. I have had maybe one or two extras of this game during my heavy collecting days.

The math isn’t exactly right but I’ll take it.

I knew going into Bases Loaded 3 that it would be a much quicker play than the other two games I’ve completed, but I was not prepared for just how quickly I would actually finish. These games usually have a bit of a ramp up to get a feel for the batting timing, to learn the tendencies of the opposing defense, to adapt to pitch types, etc. That ramp up also means that I’ll lose a few of the first few games before I catch my stride. This time was special because none of that really happened. The first game I won with a rating in the 80s, good enough to face the Level 4 team. In the second game, I won and got the perfect 100 rating. That earned me an audience with the Level 5 team, which I beat and got another 100 rating. Victory after only three matches!

The only bad part of it was that I didn’t capture video of the entire playthrough. I realized part way through the first game that I didn’t start the recording. At the time, I assumed it wouldn’t be a big deal because certainly I would lose a match and have to start all over anyway. To try and fix the issue, initially I intended on recording a brand new full playthrough, hoping to replicate my success from the first time. On the first game of the replay, I got a similar enough rating to get from Level 1 to Level 4, just like I did on the winning run. I decided then to call it, and so for my final video I stitched the replay of the first game together with the final two games of the winning run. There are probably some continuity errors at that split point as far as the video goes, but I’m not bothered by it. Getting the full final game with the 100 rating against the Level 5 team to finish it is really all that is needed for proof anyway. I just want to be obsessively open with my process in all this!

The developers did some good work with the tweaks they made from the prior games. I appreciate the upgrade to the baserunning controls and simplifying the batting and pitching. The outfield defensive perspective is not the greatest, but it works fine. I wish the viewpoint was zoomed out more than it is. It makes it more challenging to get your fielder in the right spot, particularly in the outfield, when you can’t see the fielder you’re controlling until the ball gets close enough. But also, I had no real trouble finishing this game, so perhaps it is fine the way it is. Bases Loaded 3 is a solid NES baseball game. I’m not saying this is an essential game that you need to play, but if you appreciate a different style of challenge in sports games, then I think this is worth trying out.

#177 – Bases Loaded 3

by :
comment : 2
 
DEC
01
2023
0

#176 – The Flintstones: The Rescue of Dino and Hoppy

Have a Yabba-Dabba-Do time!

Including the iconic theme song!

To Beat: Reach the ending
Played: 5/18/21 – 5/24/21
Difficulty: 5/10
My Difficulty: 5/10
My Video: The Flintstones: The Rescue of Dino and Hoppy Longplay

When you mention The Flintstones to someone who knows a lot about the NES, specifically the collecting side, they don’t think much about the cartoon, or Fred and Wilma, or Hanna Barbera, nothing like that.  Minds go straight to The Flintstones: The Surprise at Dinosaur Peak.  If you don’t know, it’s the hardest to find licensed NES game aside from Stadium Events.  The collector will either be smug about owning a copy (I try not to be this way!) or go on some long monologue about how collecting old games shouldn’t be so expensive and all that.  But Surprise at Dinosaur Peak is not what we’re here to talk about today, for there was an earlier Flintstones NES game that is much more affordable, and also a pretty decent game in its own right.

The Flintstones is an animated sitcom that premiered on ABC in September 1960.  The cartoon ran through April 1966, spanning 6 seasons and 166 episodes.  It was the longest running and most successful animated series until it was dethroned by The Simpsons all the way back in 1997, which is still going strong today.  Despite its apparent success, The Flintstones was not well received by critics at the time, only catching on as a classic through repeated reruns over several decades.  The series and characters have been featured in numerous spin-offs, films, TV specials, and all kinds of other media, on a consistent basis since release.

The Flintstones have appeared in several video games, even pre-dating the NES entries.  The first Flintstones game was called Yabba Dabba Doo! and it was a European only release on a few different computers in 1986.  There were a couple more Flintstones games that appeared on personal computers before they started to come to consoles.  The first console Flintstones game is the one we are covering today.  The Flintstones: The Rescue of Dino and Hoppy was developed and published by Taito, releasing first on the NES in North America in December 1991.  It was subsequently released in Europe, Japan, and Australia in 1992.  Mattel was the publisher for the Australian release.  Sol Corporation is also credited as a developer on this game, but not much information is known about their development credits so we cannot say for sure.

There sure are some interesting gadgets in these times.

The plot of the game is simple and almost completely evident from the game’s title.  The Flintstone family was hanging out with their neighbors, the Rubbles, and their alien friend Gazoo.  Suddenly, a time machine appeared that was piloted by Dr. Butler.  He is from the 30th century and preparing a zoo full of prehistoric creatures, and so he kidnaps the families’ pets Dino and Hoppy.  Not only that, but on the way out he destroys Gazoo’s time machine so they cannot follow him, scattering the parts all over.  It is up to Fred Flintstone to collect the pieces over several platforming stages in order to rebuild the time machine and travel to the future to rescue Dino and Hoppy.

As soon as you finish the opening cutscene, you’re jumping right into the platforming.  Move Fred around with the D-pad.  Press the A button to jump.  Fred can grab onto ledges and pull himself up to get to higher ground.  Press and hold the A button while at the edge of a ledge to grab on.  If you release A, Fred lets go quickly, but if you press and hold Up while continuing to hold A, Fred slowly pulls himself up the ledge.  The B button swings Fred’s club.  This is a short range attack to bop enemies.  Also, you can hold the B button down to charge up a swing, then let go to bash even harder.  There are secondary weapons you can find along the way, and you use them by holding Up and pressing B.  The Select button cycles through the secondary weapons, while Start both pauses the game and summons Gazoo to help out with some other special abilities.

The display at the bottom of the screen tells you all you need to know.  Fred’s lives and current health are on the left side of the display.  On the right side you have the power meter, which grows while Fred is charging a club attack.  Below that on the bottom right are the number of coins.  These are spent as Fred uses his special weapons, so you’ll want to have enough of these for tougher encounters.  In the middle of the display is a square that shows which secondary weapon Fred has selected.

Fred also collects various weapons and items throughout the stages.  Defeating enemies cause coins to drop so you can stock up on cash.  The other items are found in barrels or crates.  The heart item restores all of Fred’s health points.  The cactus cooler, which looks like a log with spikes out the top, extends Fred’s maximum health by one heart.  The bronto burger extends the maximum length of the power meter for stronger hits on the bad guys.  The 1up item in this game has Fred’s head on it.  In the barrels you also uncover the secondary weapons.  The stone axe costs 3 coins per use, and it travels in an arc much like the axe from Castlevania.  The slingshot is a simple projectile attack that also costs 3 coins.  You need 10 coins to wield the boomasaurus egg.  It is akin to a time bomb that damages enemies in a wide range.

Sweet hang-time in prehistoric basketball!

Another fun thing you can do is play the basketball mini-game.  After clearing the first stage you are brought to the world map. Some of the areas on the map are the basketball stages. Your opponent, Hard-Head Harry, has some useful tools for you as long as you can best him in a match first.  Each match lasts only one minute, and you earn two points for every basket made.  When Fred has the ball, you can jump with A, then press B at the top of the jump to throw the ball.  The baskets are the mouths of giant birds that can open and close at will, a fun visual gag the likes of which you’d see in an episode of the show.  On defense, you can press B to do a body bash and try to knock the ball away from Harry.  You have to outscore Harry outright to win, no ties allowed.

Defeating Harry on the court unlocks one of three special powers that you can utilize in the platforming stages.  Press Start to summon Gazoo, then select the power.  The Jump power summons a giant Hoppasaurus that can take one mighty leap before leaving the scene.  The Fly power gives Fred bird wings allowing him to fly until landing.  The Swim power dons a snorkel and flippers to swim more effectively in water.  These abilities cost coins to use but can be very helpful in some situations.

This was my first time playing through The Flintstones: The Rescue of Dino and Hoppy.  This game is a bit uncommon, but not super hard to find.  I’ve only had one copy that I picked up in a lot.  For a couple of months back in 2008 or 2009, I started buying a few specific NES games and bidding on bulk lots on eBay.  After a few auction wins, I already started to get overwhelmed with the extra games and duplicates, so I stopped doing that.  I do remember that I got this game and Metal Storm in the same lot, and those games were cheap back then, so I made out very well in the long term.  Anyway, I’m not even sure if I tried the game back then or not, I just shuffled it into my collection.

Getting dinner together the old fashioned way.

If you haven’t been paying attention to the dates, I’ll point out that I have criminally fallen behind on posting these reviews.  Here almost two and a half years late I’m finally getting around to it!  Writing is going to be a bit of a struggle to try and recap something from so long ago, but where I can I’ll attempt a replay to catch back up.  Maybe it will help the thoughts crystallize somewhat, or it will make the game feel brand new again.  Who knows?

Back in 2021, I was able to beat this without too much trouble.  I had to continue once or twice, but it has unlimited continues so no issue there.  The final stage and final boss are the trickiest parts, but a few attempts was all it took.  In my recent replay, I felt like I had a harder time beating this than I did before.  I needed several continues in the mid and late game, especially that final stage.  Beating the final boss went better than I thought, but also felt a bit like I got lucky with dealing a bunch of damage while not caring about Fred’s own health, and surviving just long enough to finish.  The little bit I remembered from playing this back in 2021 helped a lot in that respect. Anyway, I do not think a fourth playthrough is in order, that’s enough Flintstones, it’s time to move on!

The Flintstones: The Rescue of Dino and Hoppy is your typical average NES platformer.  Graphically, the game is quite appealing.  The characters are all drawn well and are recognizable even as tiny sprites.  The environments are varied, with different levels themes and gameplay tweaks sprinkled throughout.  The transformations, while seldom used, add an extra element to help get through certain sections.  The music overall is pretty good as well, with the familiar Flintstones theme done well, along with others.  There was nothing here that was particularly catchy or an earworm, but solid anyway.  The gameplay is a tad bit weaker.  The controls and movement feel just a bit sluggish, while some enemies are much more mobile and difficult to handle.  Fred’s club range is shorter than you would expect, and when charging up the club there’s really no clue how much damage you’re actually dealing.  On the other hand, grabbing a ledge to climb feels more generous and is used often in the level design to good effect.  The Flintstones is somewhat of a mixed bag but is generally a good game.  I’m excited to see what the expensive sequel has in store.

#176 – The Flintstones: The Rescue of Dino and Hoppy

 
MAY
26
2023
2

#175 – Skate Or Die

If I have to choose, I’m choosing to skate.

Fine, fine, let’s skate!

To Beat: Get the high score in all events
Played: 5/17/21 – 5/18/21
Difficulty: 3/10
My Difficulty: 3/10
My Video: Skate or Die Longplay

Skateboarding and video games seem like a perfect match with each other.  I did some looking into early skateboarding history and I noticed some similarities.  Skateboarding began as a niche hobby, really blew up in its early days, then had a very quick downturn for several years, dismissed as a fad.  Video games had a similar trajectory early on.  Computers were inaccessible to all but engineers, researchers, and educators because they were so huge and costly, but that didn’t stop them from designing games on early hardware.  As video games got bigger and bigger, they too had a very quick rise and quick fall from the infamous video game crash in the US.  But both activities recovered quite nicely and are still very popular.  A match made in heaven, indeed.  Today’s game is one of the earlier attempts to capture the essence of skateboarding into video game form.

For as popular as video games and skateboarding were in their early days, the first skateboarding video games didn’t appear until around 1986.  Atari Games’ 720 is considered the first skateboarding video game, which had an NES port that I will cover in the future.  Skate or Die followed not too long after, first released on the Commodore 64 in 1987 by Electronic Arts, their very first game developed in-house.  The game was ported to various computers in 1988 and 1989, such as DOS and the ZX Spectrum.  Skate or Die came to the NES via Konami in December 1988, published under their Ultra Games label.  It was also released in PAL territories in 1989.

Skate or Die is a collection of five skateboarding themed mini-games.  They are the Freestyle Ramp, High Jump, Downhill Race, Downhill Jam, and Joust.  You can play them solo or all of them back-to-back in the Compete All mode.  Up to 8 players can play the events in alternating play, except for one competitive event.  This game does not have a traditional ending screen, so the next best thing is to get the high score in all events, as well as defeat your opponent in Joust.

Not intimidating at all!

The first thing you’ll need to do is visit Rodney Recloose in his skateboarding shop.  This is the launching area for the game.  Move your “Skate or Die” themed cursor with the D-pad.  You can hover over various things in the shop to get some commentary from Rodney.  At the bottom of the screen, there are options for Go Practice and Go Compete.  You can select Go Practice at any time to jump straight into game selection, but if you want to Go Compete solo or with friends, you’ll need to register on the Sign In sheet.  There you can name up to 8 players, one at a time.  In single player, if you want to Compete All, you need to enter just your name as Player 1.

Outside of the shop, you can control your skater on the street to choose an event.  The events are broken up by where they take place.   The right side leads to the Ramp where you can choose the Freestyle Ramp or the High Jump.  The downhill events, Downhill Race and Downhill Jam, are off the bottom of the screen.  To the left is the Pool where you can Joust, or you may choose the Compete All option.  Just move your skater down the road toward the event you want to try to get started.  I’ll get more into controls in a bit, but your skater on the map screen uses Goofy Foot controls, which are from the perspective of the skater, not the TV screen.

I’ll cover the events in the same order as Compete All, beginning with the Freestyle Ramp.  The goal of this mode is to score as many points as you can by completing as many tricks as you can.  You get 10 tries, 5 from each side of the half-pipe, to pull off these tricks.  To get started, press the A button to enter the ramp.  You can press Up and Down to move in and out of the pipe.  The trick you perform is determined by how many times you press the A button while down in the ramp, plus an optional direction when you reach the lip of the ramp.  There’s a table in the manual that describes each trick you can do.  If you want to simple soar high, press A multiple times in the ramp plus no direction at the top of the ramp.  You’ll fly up into the air and you can turn your skater with Left and Right to spin, just be careful to line up properly when you land back on the ramp.  If you press a direction, either into the ramp or away from the ramp (i.e, press Right when moving right, or Left when moving right), you’ll do a different trick, depending on if you pressed A once, twice or more, or not at all.  Each successful trick nets you points, but if you mess up, then you’ll slide down in shame with no points that try.  After 10 trick attempts, you’ll finish up with bonus points that scale up very quickly the more different types of tricks you do successfully in the run.

Show off your moves, as many as you can.

The next event is the High Jump, also taking place at the ramp.  Press A to start your descent down the ramp.  For this one, you need to mash the D-pad and the B button as fast as you can to gain speed through the ramp.  You can go back and forth up to 10 times to try and record the best jump you can.  The manual says that once you’re ready, you want to press A at the edge of the ramp to soar high, then press A again at the very apex of your jump to “kiss the sky” for a little extra height.  Once you do that, you’ll go back to the left side and automatically dismount.

Next up is the Downhill Race.  This is an obstacle course where your goal is to skate to the finish line at the bottom of the course.  Here, and in the Downhill Jam, you can choose your control method of either Regular Foot or Goofy Foot.  Regular Foot essentially amounts to reverse controls, but those controls line up from the perspective of the TV screen.  For example, pressing Left turns your skater to the right, but since you are moving down, your skater will turn toward the left side of the screen.  In Regular Foot, the Up and Down controls are reversed too; press Down to go faster and Up to slow down.  Goofy Foot is the same controls as the map screen, which are from the perspective of the skater character instead of the TV screen.  It’s confusing to describe, but maybe that made sense.

Anyway, on to the Downhill Race.  First choose your control method, and off you go!  Navigate the obstacles the best you can and try not to crash.  You can earn points by doing tricks as you go.  You can jump by holding Up and pressing A, and you can duck by holding Down and pressing A.  The jumping and ducking controls are the same for both Regular Foot and Goofy Foot.  You can jump off ramps or duck through tunnels for extra points.  Crashing only gives you a slight time penalty as you get yourself back on the board.  The bulk of your score is awarded at the end of the course depending on how quickly you finish.

Love to leave Lester in the dust!

The fourth event is the Downhill Jam.  This one is a different kind of obstacle course, only this time you compete against another skater.  In single player, you’ll go up against the computer-controlled Lester, but in a multiplayer game you compete against each other!  Movement controls for this mode are the same as the Downhill Race, including choosing either Regular Foot or Goofy Foot.  The Downhill Jam is a glorified race to the end of the course.  You can earn points along the way by knocking over small objects like cans, and you’ll crash if you stumble into anything sturdier than that.  Running through a chain link fence and crumbling to pieces is pretty funny!  The other thing you can do for points is to beat up your opponent.  There are surprisingly sophisticated controls for the attacks.  When your opponent comes alongside you, press the D-pad toward him and A to punch.  If you press away and the A button instead, you’ll do a kick.  Furthermore, you can do a high kick with a diagonal Up and away with A, and a low kick with diagonal Down and away with A.

The fifth and final event is the Joust.  It takes place inside of an emptied out pool.  At the start of this mode, you can choose your computer-controlled opponent.  Poseur Pete is the easiest opponent, Aggro Eddie is medium difficulty, and Lester is the toughest, coming right out saying the title reference: “Skate or Die!”  In this mode, players take turns between offense and defense.  The offensive player needs to use the jousting stick to knock the opponent down, while the defensive player must move to avoid getting knocked out.  The defensive player gets five passes across the pool, and should he survive that, then he becomes the aggressor and the players switch roles.  At the edge, press A and toward the pool to enter, then you can use Up or Down to position yourself inside the pool.  You can slide along the top edge of the pool as well.  As the attacker, press A to swing your joust and knock the opponent down within range.  Each knockdown is a point and the first to three points wins!  This mode also has competitive multiplayer where you can square off against your friend.  If you play with more than two people, the mode becomes a single bracket tournament, for up to 8 players, which is a pretty cool addition!

This was my first time beating Skate or Die, at least I think so.  I didn’t play this one until adulthood, but it was one of the old NintendoAge weekly contest games and so I played it for that.  I only remember giving it an hour max, probably not even that long, just enough to post a respectable score on the board.  This is an affordable game, around $5 for a loose cart, not hard to find at all.  It’s weird that I didn’t come across this one as a kid, but I know I picked up multiple copies from buying lots as an adult collector.  It’s the type of game you’ll find bundled with other games you were going after.

Jousting is tough, try to get close and strike.

I stated above that to beat this game you need to get the high score in all events and win Joust, which is only partially true.  You can do all events in a row using the Compete All option, taking them in the order I reviewed them above.  The thing is that there aren’t really high scores for this.  The game keeps track of the top three scores in each event but the lists start off empty, so any score is good enough for the top score.  In the Compete All mode, you are awarded a separate, overall score of 5 points for clearing each event in single player.  I assume when playing with multiple people you earn fewer points the lower you place among your friends.  Now you do not earn the 5 points if you lose Joust, so winning that one is required, but the other ones don’t matter at all.  There’s no ending screen for this game, but the ending blue screen for Joust showing the full 25 points is good enough in this case.

I did want to try to perform reasonably well in each event, so here’s how I did that.  In the Freestyle Ramp, if you play it properly, most of your points are earned from the bonus points at the end.  You need to perform as many unique tricks as you can to boost the bonus points.  My run wasn’t perfect by any means, but I scored a little over 6000 during the round and earned another 6000 points in bonus.  For the High Jump, I just tried to mash as much as I could.  When the jump felt right, then I performed the “kiss” move for a little extra height to end the event.  I don’t think pushing A at the top of the ramp really did anything to improve my height, in fact I think it slowed me down as it threw off my mashing rhythm.  The Downhill Race doesn’t have too much strategy other than trying to avoid crashing.  There are some stunts you can do on certain obstacles to get to the end faster and earn a few style points, but it’s not necessary.  I only crashed once in my attempt which is fine.  For the Downhill Jam, I didn’t bother attacking Lester at all.  I focused on clearing the event as smoothly as possible.  You can gain time on Lester by leaving him behind, as the game will pull him forward automatically and give him a small time penalty.  In my run I crashed once through a fence, but so did Lester so no big deal.  The Joust was the hardest event for me.  My offensive strategy was to wait until he went, then enter and hit him right away on my side, which worked often enough.  Defensively though, I think I just got lucky.  What I wanted to do was stay right behind him so that we only cross paths at the top where he isn’t likely to land an attack.

The speedrun World Record of Skate or Die is currently at 2:16.9 by OldSchoolMcFly.  The run itself looks quite straightforward.  Do the bare minimum to clear the two half-pipe events, and get to the end of the course as quickly as possible in the two Downhill events.  There was a pretty neat route to the Downhill Jam that I wouldn’t have known about before the speedrun.  The Joust is where the run is made.  The runner chose the middle character, Aggro Eddie, perhaps because he is actually more aggressive and enters the pipe more quickly than the others.  Two of the offensive points were scored the same way as my strategy above.  For the third point however, the runner waited out the clock in the pipe until he could go on offense and then timed it to where he was already overlapping the opponent so he could score the point immediately.  That’s definitely not easy to do and I bet it requires a lot of luck to set it up.

For me, Skate or Die is a basic skateboarding game that doesn’t have a lot to offer.  It does have a variety of events that are pretty fun to play, but they are so short and it starts to lose appeal for me quickly.  The graphics are basic, with simple backgrounds and tiny sprites, but the animation is quite smooth and nice to look at.  The music is pretty catchy, in line with other Konami developed games.  The controls are responsive, but they don’t feel very responsive at times due to the momentum based movement and turning in the Downhill events.  These are nitpicky complaints.  This is a good game; I just got my fill of it pretty fast.

#175 – Skate or Die


#175 – Skate or Die

 
OCT
28
2022
1

#174 – The Uncanny X-Men

The ‘X’ in X-Men is for crossing this game out.

Probably the best part of the game honestly.

To Beat: Clear all stages, including the final secret stage
Played: 4/27/21 – 5/14/21
Difficulty: 8/10
My Difficulty: 8/10
My Video: The Uncanny X-Men Longplay

I’ve been looking forward to writing this review.  Long time readers may know that I believe that most NES games are good.  Not just the popular ones or the hidden gems, but any ordinary NES game has something to offer me that I end up appreciating.  To put it another way, if I didn’t enjoy playing most of the games on the NES, I wouldn’t be doing this project.  But that’s not to say that there aren’t any bad NES games, oh no.  With over 70% of the library left to play, I feel comfortable saying that The Uncanny X-Men is a contender for worst NES game ever.  Let’s find out exactly what went wrong.

For me to try and describe the X-Men series and its far reach into all things media would do it a great disservice, but we’re gonna briefly try anyway.  The X-Men comics were created in 1963 by Stan Lee and Jack Kirby.  The series initially didn’t catch on well and was cancelled in 1970, though it was later revived in 1975 under writer Chris Claremont.  New characters were introduced, and Claremont steered some of the biggest story arcs in the comics for over 25 years.  The X-Men really took off in popularity, spawning more comic series, TV shows, books, films, and of course video games, way too many to mention.  The first X-Men video games were released in 1989, including our game here, The Uncanny X-Men.  The NES game released only in North America in December 1989.  It was published by LJN but the developer is unknown, possibly either Bothtec or Pixel.  Of those two, through cross referencing development credits of other NES and Famicom games from what I could find online, I personally suspect that Bothtec is the more likely developer.  I can also see why no one would want to take credit for developing this game.

The Uncanny X-Men has a basic story.  Magneto and his henchmen and planning to take over the world.  It is up to you and the X-Men to go after them!  The group of X-Men accepting this mission are Wolverine, Cyclops, Nightcrawler, Iceman, Colossus, and Storm.  You must clear each of the five stages to stop Magneto’s plans for world domination and win the game, but it won’t be easy.

Fighting for justice in the ruined city or something

At the start of the game, you’ll first choose from either a 1 player or 2 player game, which is simultaneous cooperative play.  Then you’ll choose your starting level.  There is a practice stage where you can get your bearings, or you can select from one of four regular stages.  Next, you’ll be presented with the character screens.  There is a screen for each character and you can toggle between them with Select.  Each screen shows the character’s relative stats in one of four categories: Power, Endurance, Speed, and Willpower.  The manual doesn’t explain what these mean at all, but you can sort of figure it out as you play.  Each screen also displays a character portrait and a short bio.  In both 1 player and 2 player modes, you must select two characters.  In the single player game, you control the first character while the second is AI controlled.

The Uncanny X-Men is a top-down action game.  Use the D-pad to walk around in four directions.  The A button attacks, and each character only has one kind of attack.  The B button can either jump or fly.  The Select button toggles between the two characters in a single player game letting you swap control at any time.  The Start button brings up a status screen.  For each character you can see their name, score, and remaining health.  You also see how many keys have been collected as well as any key items.  This is a vertically scrolling game, most often from bottom to top, though there are some single screen areas and some that go downward instead of up.

While all the X-Men play similarly, there are several distinguishing factors between them.  The most obvious difference is the way they attack.  Wolverine, Nightcrawler, and Colossus have short range punch attacks, just a quick thrust forward.  Cyclops, Iceman, and Storm have beam attacks that can hurt enemies from across the screen.  Iceman and Storm can fly around the levels by holding down B.  You can coast through the levels much faster and can fly over damaging floor tiles, however, your health gets drained while you take flight, all the way to your death if you fly too long.   There are a couple of other special abilities.  Nightcrawler has the ability to walk through solid walls, though this also drains his health.  I don’t know if this counts as a special ability or not, but I found that Colossus was quite the tank, and he can get bopped around by the enemies pretty good and barely take any damage.  I used him a lot when I was learning the stages in spite of his short-range attack.

The object of the game is to stop Magneto’s plans by recovering a floppy disk from each stage.  You’ll explore the stages to find them.  Every room has some sort of floor tile that acts as a door to a different screen, and often there are branching paths or a maze to sort out.  There are also physical door barriers that you need to open with a key that you find somewhere in the stage.  Other gates or barriers open and close at random but you need to be very careful here as getting stuck inside the closing door can both trap you and zap you of your health in a flash.  At the end of each stage is a boss encounter.  Defeat the boss to obtain the disk.  This causes a time bomb to start counting down, and you’ll need to backtrack all the way to the beginning of the stage to escape before time runs out.  Often enough there will be a door past the boss that brings you a good chunk of the way toward the exit.

Imagine what manages to live below

Defeated enemies will drop powerups at random and they are vital to your success.  The energy restore powerup has the letter E in it and collecting that powerup restores your health.  A similar looking powerup with the letter S in it is the statis bomb.  This freezes all enemies for a short time.  A powerup with a large lightning bolt on it is a smart bomb, which destroys all on-screen enemies.  The force shield has a weird look, sort of like a worm with a red circle at the bottom.  This makes you temporarily invincible.  The keys and disks I already mentioned, which show up in certain locations and are not random drops.  The final item is actually a power-down and is very dangerous.  The magnet item stuns you for quite a long time.  Enemies will continue to swarm you and knock you around, so many times this item ends up being fatal if you collect it accidentally.

The levels themselves have some differences, but at the end of the day they are all pretty much the same.  Some levels have shorter rooms with lots of doors, others have long stretches with few exits or long branching paths.  It’s up to you to navigate them to find the quickest way through.  All levels have some sort of floor tile that hurts you, as well the gates and barriers I mentioned earlier.  The walls and such are fairly obvious, but the damage tiles are not the clearest to make out, so you may die to them without realizing exactly what happened.  There’s no physical difference to the character upon taking damage, just a low droning sound effect, with some slight knockback if it’s a direct enemy attack.  There are plenty of other quality issues, and some major ones as well, that we’ll cover in the spoiler section shortly.

This was my first time playing The Uncanny X-Men.  I was not a comic book fan and never cared much about the X-Men so I ignored this game, definitely for my benefit.  I only learned of its reputation after I started seriously collecting.  I managed to pick up a loose copy locally for a few bucks.  Right now, it sells for around $10-$15 loose.

Where to begin with all the problems this game has? I guess we’ll start with the most obvious one from playing the game for any length of time: the AI controlled second player.  This game is almost completely unplayable in single player mode in part because the AI just doesn’t work well at all.  The AI has two modes.  When you switch control between characters, the AI goes into a defensive mode, wiggling back and forth and attacking in a tight space for 5 seconds.  Then it switches over to follow mode where it tries to find a path to keep up with you.  In either mode, the AI character is vulnerable to attack.  The hitboxes for collisions and attacks are imperfect, to say the least.  It is very easy to get juggled between two enemies and not be able to counterattack, for both yourself and the AI.  It isn’t very fun to try and swap control around constantly to attempt to defend both characters on your own and make progress, in fact it is harder to play that way.  I could only get as far as maybe two screens of any level with both characters still intact, so inevitably the AI character will die and that’s the end of that character.  Once a character is defeated, they are gone for good.  There are no continues in X-Men.  Since there are 5 stages, you’re pretty much guaranteed to lose a life in each stage, leaving you with only one of the X-Men for the rest of the game.  Of course, you’ll start completely over from the beginning if you fail.

Rare image of a surviving AI companion

Another problem is dealing with the gates.  These things are on most screens of the game and are just awful to deal with.  The AI characters will walk right into them with complete disregard, which is the source of many of their deaths (provided they live long enough to get that far in the first place).  If there’s a pattern to their opening and closing, I couldn’t figure it out.  They don’t seem to stay open long enough to pass through very often at all.  So how do you deal with them?  Thankfully the invincibility powerups keep you safe.  There are enough enemies out there that are easy to respawn that drop powerups most of the time.  But sometimes it takes minutes to get the invincibility drop, and sometimes you’ll end up grabbing a magnet power down by mistake putting yourself in severe danger of dying defenseless.  You will certainly want to play through the game as a character with a ranged attack to mitigate those risks.  It’s telling too how difficult the game is to beat in spite of the fact that there are basically unlimited invincibility and health upgrades as long as you’re willing to grind for them.

So, you’ve put up with all the headaches and the glitches and the AI killing off all your lives for you, and you manage to finish all four stages!  First of all, great job!  But now what?  The game unceremoniously drops you off back at the mission select screen.  Though you can still put your cursor on them, you can’t go back and play already completed stages.  The only thing you can do is to go back to the Practice stage.  There’s no ending to be found.  You might think this is a quirk of the game or perhaps it really is as unfinished as it plays.  It turns out there is indeed a final stage with a very unintuitive way of reaching it.  I went ahead and googled the answer, and well, I was left with as much confusion as when I started.  Here’s the deal.  There is a code printed on the label of the cart.  It’s in very tiny text, on the top row of the copyright text at the bottom of the label.  It reads “+ B + UP together with START.”  On the mission select screen I tried inputting this code, but it does nothing.  That is because the code is incomplete!  So, not only is there no indication about this code hidden in plain sight on the cart label, but also the code is wrong to begin with.  But it’s close, you also have to press Select along with B and Up, then press Start.

With all of this now in place, I was able to beat the game.  It took me a long while to get it done.  I ended up beating all the stages separately and I identified routes through each level that I had committed to memory.  It’s still pretty tricky to clear everything in one shot as it is pretty easy to die from all of the things already mentioned.  The final stage is no cakewalk either.  More than once, I died pretty quickly in the stage, and since you lose all of your lives through the bad AI, it was frustrating setback after frustrating setback.  That’s 20 to 30 minutes wasted on every failure.  The final stage is more cramped, has fewer good spots to grind enemies, and is confusing to navigate, but it’s not all that much harder than the rest of the game.  It took me close to 30 tries from start to beat this game, including a few quick resets, in about 12 hours total to finish the game.

Avoid the blobs and get out

That’s not all there is to this story, however.  I have inadvertently spread some misinformation about this game, including here in this very review to some degree.  Time to set the record straight.  The secret code on the label for the final stage is not incorrect, but intentionally incomplete.  Here’s the scoop.  The game maintains a hidden counter that increases when you defeat some special enemies.  I played the first stage on emulator watching this counter in RAM (located at $0513) to confirm this.  Some of the spawning enemies appear using a different color palette, and defeating these enemies advances the counter.  If you can defeat 30 of these enemies in the stage, the victory text after completing the stage will have some of the words highlighted in red.  What you need to do is complete all four stages with enough special kills, copy down the red text that appears, and piece all four stages together for the secret message.  Now one of the screens takes some liberty here, deliberately misspelling a word and combining it with part of another word elsewhere in the text.  When you combine everything properly, you get the following: “The last mission can be reached from the mission screen by pushing select and seek the advice of the label to make it to the final mission.”  So, there you have it.  I completely missed this in my own playthrough; I don’t recall seeing any red text during any of my attempts.  But indeed everything you need for the code is included on the cart.  Thanks to this article at The Cutting Room Floor for clearing this up for me.  This is extremely clever, but the problem is that it is too clever and gets in the way of an already troubled game.  The crazy thing is that this isn’t the only time something meta like this was done in an X-Men game.  The X-Men game on the Sega Genesis has a section that asks the player to “reset the computer,” which is done by physically pressing the reset button on the console to continue, without any indication that this is the necessary solution.  

The speedrun of this game is pretty quick.  The record is currently 5:54 by TooOrange.  The runner takes full advantage of Nightcrawler’s walking through walls ability to run straight through everything in each stage.  In retrospect, this makes a ton of sense, but I assumed it was impossible to play through the game this way.  Being inside of walls still drains health, and Nightcrawler has the lowest max health of any character.  I don’t remember seeing any intentional grinding of enemies for health drops, so it sounds like it’s the appropriate strategy.  I imagine you need to avoid any damage whatsoever along the way to actually pull it off.  There are only 3 runs on the board and one is from 14 years ago, so this is not a popular game.

Even though I did have something nice to say about this game at the very end, The Uncanny X-Men is truly a horrendous game.  The gameplay graphics are murky and dull, the music is uncomplicated and boring, the controls are both too touchy and also unresponsive at times, and the gameplay is frustrating and repetitive.  The character portraits are drawn well enough, and the hidden secret final stage is a clever, though poorly implemented, idea.  That’s about all the good I can find here.  Bad games are often made more challenging due to their poor design and bugs, which is absolutely the case here.  It’s not a pleasant experience at all, but hey, I took care of this one so you don’t have to!

You’ll notice some changes in the ending screenshot below.  In between games, I bought the Analogue NT Mini Noir and added it to my setup.  I had been thinking about getting one secondhand about the time the final batch of them arrived for sale, really just perfect timing on my part.  I wanted to get away from using the flat screen TV for playing games, both in not having to deal with input lag and having the ability to play Zapper games without compromised recording quality, so the Analogue system with its dual output capability just made the most sense for me.  The streaming and recording setup has moved back into my office room full time, just the way I want it.  The only thing remaining is getting around to playing better games on it!

#174 – The Uncanny X-Men

 
JUN
08
2022
1

#173 – Teenage Mutant Ninja Turtles II: The Arcade Game

Turtle Power! This time at home!

The cursor stares into your soul.

To Beat: Reach the ending
Played: 4/20/21
Difficulty: 7/10
My Difficulty: 2/10
My Video: Teenage Mutant Ninja Turtles II: The Arcade Game Longplay

A lot can change in just a few years.  It was four years ago when I beat the original Teenage Mutant Ninja Turtles for the site.  I wouldn’t have guessed that I would end up learning the speedrun for this game and getting a pretty decent time for my efforts, as well as making good friends in the speedrunning community at large.  I don’t speedrun too many games and not any more of the TMNT games, but I do like them quite a bit.  Last April, I played TMNT II: The Arcade Game, a familiar game that got a lot of play over the years.  Now this April, I am finally working the backlog and starting to write up this review.  (Yes, I realize it is now June, I’m not exactly sprinting through things to get fully caught up.)  Purely by coincidence, it is very fitting that April has become the de facto Turtle month for me!

For more information about Teenage Mutant Ninja Turtles, check out my review of the first NES game.

Teenage Mutant Ninja Turtles was a smash hit in the arcades after its 1989 release.  Tens of thousands of arcade cabinets were sold and shipped worldwide, and Konami had trouble keeping up with the demand.  Naturally that demand was high enough that home versions were created and released on various home computers, as well as a port to the Famicom and NES.  The Famicom version was released first as just Teenage Mutant Ninja Turtles, then a week later Teenage Mutant Ninja Turtles II: The Arcade Game (TMNT II for short) arrived on the NES.  Both releases were in December 1990.  The game was developed and published by Konami worldwide, except for North America where it was published under the Ultra Games label.  The PAL release, Teenage Mutant Hero Turtles II: The Arcade Game came out in November 1991.  The arcade version was released on Xbox Live Arcade in 2007, and both the NES version and arcade version of the game are a part of the newly announced Teenage Mutant Ninja Turtles: The Cowabunga Collection coming later in 2022.

How did they get the wrecking balls upstairs?

The NES port of the TMNT arcade game is notable for adding two brand new stages to the mix.  While the story of the game is rather basic, there was some detail added in the NES manual to cover for the new stages.  This game plot-wise is a follow up from the 1990 Teenage Mutant Ninja Turtles film.  At the end of the movie, Shredder is thrown off the roof of a building into a garbage truck and crushed.  But as it turns out, Shredder was saved from death by his titanium-laced helmet, so he is able to escape unseen and rebuilds in secret.  During this, he recruits two bounty hunters, Tora and Shogun, who star in their own brand new levels.  With everything lined up, Shredder captures April O’Neil again, putting our heroes on the rescue path once again.
Let’s get started with playing the game.  TMNT II has two-player simultaneous play, so you can choose from 1 Player or 2 Player mode to get started.  Next, each player will choose their turtle of choice.  Each turtle is shown in their own square in grayscale and selecting the turtle you want will brighten him up in full color.  After all players have chosen their turtle, another cutscene plays before launching into the game proper.

TMNT II is a side scrolling beat-em-up.  Use the D-pad to move your turtle around the screen.  Stages typically move from left to right, and you can use Up or Down to move in and out.  Press A to jump.  Some stages have elevated floors and you can jump up ledges to higher ground.  The B button attacks.  While standing or moving, this does a simple attack with your weapon.  While airborne in a jump, press B to do a jump kick.  This move is great for quick attacks or as a defensive maneuver if you need a short burst of speed.  Perhaps the most helpful move in the game is the jump attack.  To do this, press A and B at the same time.  If performed correctly, you’ll do a short hop immediately into an attack.  I usually perform this move by rolling my thumb across A then B, pressing B just a little bit after pressing A.  This prevents me from accidentally attacking before jumping which doesn’t do the proper move.  The jump attack does extra damage and defeats many basic enemies in a single strike, and there’s no penalty of any kind to use it, so I do this pretty much the entire game.

The top of your screen contains a few stats for each turtle.  You see the name of your turtle, your score, your remaining health, and the number of lives in reserve.  Scoring in this game is very basic; each enemy defeated is worth one point, including bosses.  Your health bar starts off all the way across your status box and ticks down as you suffer enemy attacks.  Some stages have pizza on the ground that you can collect to restore your health fully.  You begin the game with two extra lives, and you earn another life every 200 points, a fairly tall order given the slow rate of scoring.  There are no other powerups or anything else.  There is a limited continue system.  You get three continues to beat the game, and each one brings you back to the beginning of the current stage.

The orange glow means you’re about to win.

This is a very straightforward game.  There are 10 total scenes in the game across 7 stages.  In each scene, you defeat all the enemies that appear on the screen before continuing to move to the right.  Most stages end in a boss fight against one of Shredder’s big baddies.  Most of the enemies in the game are the standard foot soldiers, with standard attacks.  As the game progresses, they come in different colors with some different abilities.  For instance, yellow foot soldiers throw boomerangs.  Even the default purple color enemies can vary sometimes, like the enemies that throw sticks of dynamite.  There are other types of recurring enemies like the tiny mousers.  The turtles themselves are pretty much interchangeable as there aren’t any turtle-specific special moves and there doesn’t appear to be any benefit to one turtle over the next.  I do have fun with this game, but there’s no denying that it sticks to the same formula throughout.

TMNT II: The Arcade Game was one of the NES games I had growing up.  I was big into TMNT for a few years as I was just the right age for that.  I know I played the arcade release a few times but the NES version is what I remember the most.  This was a multiple time rental before I got my own copy of the game.  I’ve since beaten the game many times over the years.  My collection copy now is not the same one I had as a kid.  I loaned my cart out to a friend at school, he stuck it in his backpack, then later slipped and fell down hard.  The cart inside his bag got cracked and a corner of the plastic broke off entirely.  Thankfully I am not super nostalgic about having the exact same copies I grew up with, even though for the most part I took good care of my things.  This is a pretty common game, but it is desirable, so it goes for about $20 for a loose cart.

This was an easy clear for me.  The game came up once, maybe twice in the NintendoAge contests. (They are still going on now at videogamesage.com, though I haven’t participated in a year or two at this point.)  The ruleset was to get as far as you can on one credit, with lowest score as the tiebreaker.  Some stages have interactable elements that you can hit into enemies to kill them, without earning points.  Grinding out attempts for a week, even years ago, got me trained up to play through the game well.  For this playthrough, I did two attempts and won both times without continues.  I wanted to see if I could go deathless, but that will take some effort to accomplish.  In my video longplay, I actually died to Rocksteady, the Stage 1 boss, then got all the way to Krang at the end of the game before dying again.  I died quite a few times to Shredder too.  I would have to clean that fight up significantly.  This was a clean enough run and I’m happy with it.  Maybe someday I’ll go back and work on a deathless run.

Home sweet home

I bet a lot of retro gamers my age will remember the cross promotion between the NES game and Pizza Hut.  Most notably, there was a coupon on the back page of the NES manual for a free, personal pan pizza.  There was advertising for this plastered on the front of the game box, and Pizza Hut is referenced a few times within the game itself.  I lived in a small town growing up, and the only pizza place we had in town was Pizza Hut.  Those personal pan pizzas were one of the greatest things ever.  My local place also carried a few arcade cabinets, and while I don’t know for sure, it’s certainly possible that there I got to play the arcade version while waiting for the cheesy goodness.  While my original copy is long gone, and I’ll never know if I redeemed that coupon or not, I now own a CIB copy of TMNT II with the coupon still intact.  It’s only 30 years expired at this point!

TMNT II: The Arcade Game sits in an almost overlooked place these days.  I believe TMNT III is the better game of this style.  The original NES TMNT game is so weird and wonky, but also unique and challenging, and I really like what it offers.  The arcade version is a beautiful game and still looks amazing today, and it plays so well with different moves and 4-player simultaneous action.  I think the NES port is really well done considering the limitations of the console, and after looking into it, I say it fared better than its computer ports.  This game has a clean graphical style with recognizable characters and detailed sprite work.  The music is great, as you would expect from Konami, and faithful to the Turtles theme.  Controls are rock solid, and the gameplay is equally solid action.  There are plenty of tense boss fights and scenes to keep things engaging.  The only criticism I see is that the game is pretty long for just fighting enemies and moving to the right.  You literally need to defeat hundreds of enemies in one sitting to beat this game.  That can be tedious for some, certainly.  Some people are really disappointed in this game, and others would claim its average, maybe above average at best.  I say this is quite a good game, one of the better NES games out there.

#173 – Teenage Mutant Ninja Turtles II: The Arcade Game

 
APR
08
2022
0

#172 – Muppet Adventure: Chaos at the Carnival

Oh it’s an adventure alright.

Featuring some serious music

To Beat: Reach the ending
Played: 4/11/11 – 4/17/11
Difficulty: 5/10
My Difficulty: 5/10
My Video: Muppet Adventure: Chaos at the Carnival Longplay

Well, after the long, complicated playthrough that was Ultima: Exodus, we are definitely taking a step back with this one.  This is the premier NES Muppets game, though if you wanna be technical about it, this is not the only NES game to feature muppets, as I learned researching this that the Sesame Street characters are indeed muppets.  If you are wanting a game featuring Kermit the Frog, Miss Piggy, et al, then you’ve come to the right place.  This game even provided a stiffer challenge than I expected from this game, sort of.

The Muppets are puppet characters created by Jim Henson.  They were originally created for entertaining adults, not children, first appearing on the show Sam and Friends in 1955.  Kermit the Frog was one of the first characters created and is still one of the most recognizable.  Henson created brand new characters to launch Sesame Street in 1969, which is widely known as classic children’s programming that is still going strong today.  The next major project was The Muppet Show, the 1976 sketch comedy show that would win four Emmy awards and paved the way for the Muppets’ foray into film with The Muppet Movie in 1979.  The Muppets would remain popular through many TV shows and movies over the years.  Disney would eventually acquire the Muppets in 2004, almost fifteen years after an attempted purchase where negotiations were derailed after Jim Henson’s death.

Aside from Sesame Street, given their popularity, there haven’t been many Muppets video games.  Six years after the first Muppets game, Pigs in Space on the Atari 2600, we have this one, Muppet Adventure: Chaos at the Carnival.  The game was originally released in 1989 for the Apple II, Commodore 64, and DOS.  The NES version followed later in North America in 1990 with some significant changes to the 1989 versions (which among themselves had some variations in gameplay).  The NES version was published by Hi Tech Expressions and developed by Mind’s Eye Technology.  Very little information is out there online about the developer, so chances are this is their only released game.

Toobin’

The story goes, unsurprisingly, that the evil Dr. Grump has kidnapped (pignapped?) Ms. Piggy and is holding her hostage.  Dr. Grump’s hideout is a carnival, and that’s where the action takes place.  You control a band of Muppets one at a time over four different attractions.  Each ride contains a key that is used to unlock the final area.  To beat this game, you need to beat all four areas plus the final stage.

In this single-player adventure, you can play each of the first four stages in any order you like.  In each one, you play as a different character and each one is a completely different experience.  In each level, at either the bottom or top of the screen, you’ll see your cumulative score, your power meter in hearts, and the number of “rides” remaining, which is this game’s way of saying how many lives you have.  I played through the stages in the order presented as there wasn’t any compelling reason for me to play them differently.

First up is the River Ride.  You control Kermit in a life raft floating down the river.  This is a vertical scrolling game where all you need to do is reach the key at the bottom of the river.  This is a D-pad only game.  Press Left or Right to steer in that direction, hold Down to move faster, and hold Up to slow down.  This one is pretty straightforward, simply avoid obstacles and make your way down.  You can take a few bops off of rocks and the shore with your health meter.  Red periscopes restore your health and collecting a red buoy gives you an extra life.  Logs will sway side to side and get in your way, whirlpools can swerve you around the river, and at one part this critter on a raft follows you around for a bit.  The whirlpool can be tricky because sometimes it can trap you against objects and you have no choice but to lose a life.  One interesting tidbit: the level design guides you directly to the key at the end, but you can avoid it and keep going downstream which restarts the level entirely.

Fit the slidey car through small gaps.

The next stage is the Car Course.  In this one you take control of Animal in a bumper car.  Your task is to clear the obstacle course, moving from left to right.  Use Left and Right on the D-pad to rotate the car toward one of eight directions.  Then press and hold A to go forward.  This is a very momentum based game but you’ll automatically brake a little bit when you let go of A.  The course itself is decently long and consists of various traps and obstacles in basic, repeatable patterns.  There are oil slicks, bombs, bouncy walls, that sort of thing.  Flags can be collected here as well, red ones for points and green ones for power restoral.  To restore health, you need to grab a series of green flags.  A new green flag appears once you collect one, and after nabbing so many of them you’ll get your health back.  The later sections in this course you have to take pretty slowly to clear some of the traps through small gaps.

The third game is the Space Race.  This one is pretty similar to the driving in Car Course.  You play as Gonzo inside of a spaceship in this auto-scrolling side-view space shooter.  Use Left and Right on the D-pad to turn the ship in eight directions.  Press A to forward thrust in the direction you are facing.  To attack, press B.  Obstacles in this one include drifting rocks and satellites, as well as turrets and Space Dogs riding pods similar to your own.  There are electric barriers blocking pathways that you can shoot repeatedly to destroy.  Fuel canisters can be picked up to restore health, and saving Camilla grants you an extra life.  Be careful as you can shoot and destroy the powerups, losing out on those lives and health.  The scrolling in this one is very, very slow and it takes some time to clear.  This ride even ends in a boss fight.

The fourth level in this game is the Amazing Maze.  Fozzie will have to work his way through the maze, picking up prizes along the way culminating in the key.  Each screen is its own self-contained maze.  Prizes will appear one at a time at a random spot in the maze.  When you collect one, another item will appear somewhere else.  After collecting three prizes, you clear the screen and proceed to the next.  The order of these items is always a bow tie, a gift box, and … another bow tie.  Along the way you have to avoid various enemies that are wandering the maze.  Some levels have collectible weapons to distract the enemies such as bones, hearts, and banana bunches.  Once grabbed, press B to toss them forward.  You can only hold one weapon at a time, and they are thrown in a weird arc that makes them more difficult to use then they are worth.  This game goes on for such a long time but doesn’t get much more difficult.  The background color changes every few screens to help indicate some progress.  A little tip:  There are these larger enemies that blend in with the background that only walk periodically.  You can walk through them freely when they stop.

Seems fun but the scrolling is super slow.

When all four keys are collected, now you can choose the Dr. Grump stage from the menu.  In this final level, you control Kermit armed with a, uh, feather.  This is a platformer level.  Press Left or Right to walk, press B to jump, and A to wave your feather.  You can hold your feather high or low with Up or Down as well.  This stage might take a little getting used with the atypical B-button jumping.  Make your way to the right while avoiding fireballs, fire pits, flying bats, and other enemies.  You can grab these papers with a P on them, Miss Piggy’s lipstick, or her necklace to gain additional lives.  At some point in the level the ground runs out and you have to make jumps across gaps from brick to brick.  The feather does nothing to affect the enemies, so you have no line of defense and will need to dodge attacks as best you can.  The end of this stage is something special, which I’ll discuss at length shortly!

I never owned this game or even rented it or anything like that, but I have played it before.  A friend of mine had this game when we were kids and I remember playing it a few times.  I specifically remember the rafting level with Kermit, and when I played the game for this review the Amazing Maze jogged my memory too.  For some reason, I felt pretty confident that I had beaten this game back then, but knowing what I know now, I don’t think there was any chance I could have beaten it.  For collectors, this cart isn’t common but also pretty inexpensive, totaling around $10 for a loose copy.

We need to talk about the end of the final stage, as it took this game from a 2/10 difficulty to a 5/10 pretty swiftly.  Avert your gaze for a couple of paragraphs if you don’t want to be spoiled.  You only need a couple of tries at the other stages to get the feel for them, but the final stage, one part in particular, took many, many tries to figure out.  The sad thing is that it’s not even the final boss, but the boss right before that.  Enter the Grumpasaurus, your worst nightmare.  This fight begins on a row of tiny ledges, so right there we are off to a hot start.  The idea here is you need to tickle him with the feather to push him back all the way so he falls off and you can continue.  The problem is how exactly you need to hit him.  Even though the feather is tiny, there really seems to be no way to do anything at all at first.  The Grumpasaurus periodically punches, knocking you backward when he connects, and then creeps forward toward the left side of the screen.  A punch is pretty likely to knock you down, and either way he gets to move forward making your task that much more difficult.  This is where I lost all my lives on several attempts.  There are no continues in this game, so back to start I went, again and again.

The enemies are kind of dumb, just keep your distance.

Of course, I did figure out the trick, and once I did I was able to send him on his merry way.  Not easily, mind you, but it was manageable at least.  The trick to the fight is that the Grumpasaurus has a weak point – his armpit.  You need to tickle him there when his arm is outstretched, leaving that weak spot open.  It seems counterintuitive as he already has to be in his attacking position before you can push back.  What I did was jumped up and dragged the feather across his body on the way down, timing the feather to his punch.  When you connect you should move forward since his next move after the knockback is to push forward himself.  With the gaps between the blocks, sometimes you have to push him twice before you can safely hop to the next stone.  After several properly timed tickles, you’ll take down the Grumpasaurus and move on to the real final boss, Dr. Grump.  This fight is much easier.  You now toss these hearts up into the air, and the idea is to drop them on Dr. Grump’s head.  He blocks the heart if it is moving upward, and if you throw it too high it despawns.  He tosses bombs out at you and walks back and forth on his ledges.  The fight is easier than it sounds, and then at last this game is over.

I wrote about the speedrun for Ulitma: Exodus in my last review and I’d like to carry that idea into this review and all others going forward.  The leaderboard for this game is only 6 runs long and most of those were completed years ago.  The current World Record for the game is 26:45 by Apollo22237.  There’s nothing too fancy about the run for this; it is a straight run through the game.  The runner chose Car Course first, then Space Race, then Amazing Maze, and finally the River Ride.  I see why Car Course was chosen first as that has the most that could go wrong in it with all the bouncing around.  Watching the run reminded me of how slow and long the Space Race is, taking up almost 10 minutes by itself.  The Amazing Maze feels longer but it isn’t, at least when done fast.  One thing I really like about the run is that there’s a quick kill on Grumpasaurus where you can both get knocked off with one tickle.  Thankfully it counts.  A fair tradeoff if you ask me!

Muppet Adventure: Chaos at the Carnival is not a great game overall.  The graphics are plain and kind of murky in some spots, but at least you can tell who the primary characters are.  The music is unremarkable.  One or two of the songs are catchy enough, the rest are kinda drab and feel too dark for a game that takes place at a carnival.  The controls are quite good, everything operates like it should for each game.  I would have done away with the B button jumping in the final stage, and turning corners in the Amazing Maze can be a tad slippery.  The gameplay is where this game really suffers.  While you have variety in the stages, and they control well, the level design is nothing special and some of the levels drag on too long.  There are lots of repeated patterns in the Car Course, unbearably slow autoscrolling in the Space Race, and screen after screen after screen in the Amazing Maze.  This game is pretty easy and you get a bunch of lives, and then the Grumpasaurus boss is so unfair that it ends up undoing all of the time you put to get there.  I really didn’t like playing 30 minutes at a time of tedious gameplay just to fail at the boss and have to restart.  I would much rather have had an easy game and not have much to say about it instead of writing up this long review just to complain about how boring it is. But I suppose that’s what I signed up for when I decided to Take On The NES Library.  Muppet Adventure is a below average game, fully playable, but mostly boring.  The Muppets deserved better.

#172 – Muppet Adventure: Chaos at the Carnival