Take on the NES Library

An 8-bit Extravaganza!

american

DEC
20
2019
1

#136 – Amagon

Not to be confused with Amazon.

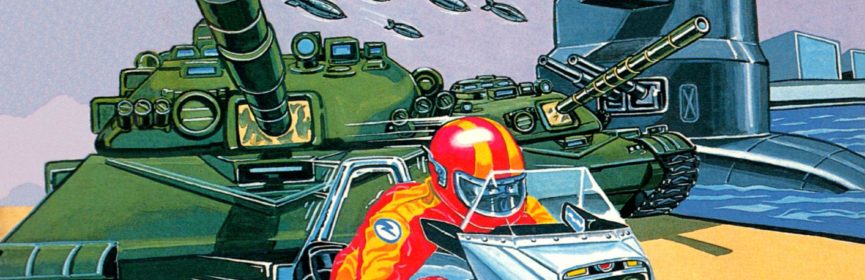
Either Amagon is huge or his plane is tiny.

To Beat: Reach the ending
Played: 10/5/19 – 10/12/19
Difficulty: 6/10
My Difficulty: 6/10
My Video: Amagon Longplay

The process of reviewing games after I beat them is interesting in part because my opinion can fluctuate all the way until the end of the game. At first blush, Amagon is a solid, but uninspiring platformer. It quickly becomes quite a challenge. As I’m battling through, a few neat surprises show up improving my disposition toward the game. Then the crushing difficulty settles back in and I make no movement ahead. Finally, all of a sudden, the game clicks with me and it almost becomes trivial to complete the entire game. If I reviewed the game after playing only a little bit, I would have dismissed it as frustrating. Instead, I have more measured thoughts on what this game accomplishes. Let’s get to the bottom of what Amagon is all about.

Amagon appeared only on the NES and Famicom. The Japanese release, named Totsuzen! Machoman, arrived in December 1988. The NES release had the name changed to Amagon when it came out in April 1989. The game was developed by Aicom Corporation. The Famicom version was published by Vic Tokai, while American Sammy took publishing rights for the NES version. This game hasn’t seen a re-release anywhere, so the only official way to play this game is with the actual cart.

The story is a simple one. Amagon is a marine sent on a mission to check out a strange island from which no one has every returned. Amagon flies to the island only to crash land his plane on a beach. At the opposite end of the island is another beach where his rescue ship is located. Armed with only a machine gun, Amagon makes his way across the island to secure his mission and return home safely. His journey covers six geographical zones, each containing two stages each. The game is won once all twelve levels are completed.

Spiders and mushrooms, both typical game enemies.

Amagon is a run-and-gun game with simple controls. Use Left and Right to walk around, press and hold Down to duck, and you can jump with A. Jumping is rather stiff. Amagon jumps very high but doesn’t cover much horizontal distance. Amagon wields a machine gun with B. Bullets are only fired straight ahead and reach about half of the width of the screen. He begins with 300 bullets as indicated at the top of the screen. Once you run out of bullets, he will hold his gun over his head and you can only use it as a short-range melee weapon with B. The Start button pauses the game.

Enemies can drop powerups that help Amagon. Bullet packs add 20 bullets to his ammo. The always appreciated 1ups give you extra lives. A powerup showing a flexing man is called the Mega-key. This powerup doesn’t seem to do anything at first glance, other than to sometimes display “Go!” at the top of the screen. The rest of the powerups increase your score. Clearly marked powerups increase your score by 500, 1,000, 3,000, or 5,000 points. A crown gives you 10,000 points. As you can see, most of the powerups are only for increasing your score, and there’s a good reason for that.

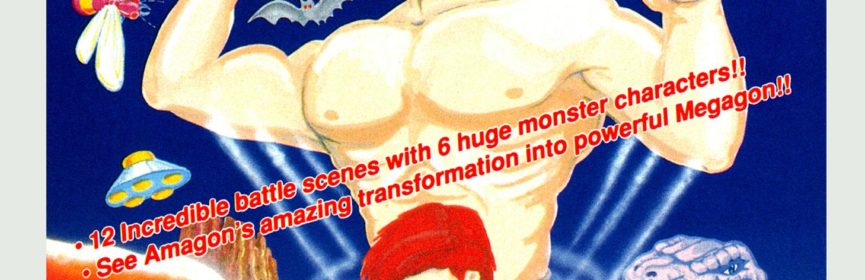
Amagon is a fragile character. A single hit from an enemy or an enemy bullet will defeat him. The key to getting far into this game is to use the Mega-key to transform into Megagon. To use the Mega-key after you collect it, first you need to have scored at least 5,000 points. This is what causes “Go!” to display at the top. Then press Select to become Megagon. Now you are a bulking behemoth of a man that can both deal tons more damage to enemies and also absorb damage from enemies with his newly acquired health bar. You trade 5,000 points from your score for each unit of his health bar. Megagon can have a maximum of 14 health points if you have 70,000 points or more. You remain as Megagon until either you run out of health, you reach the end of the stage, or you fall into a hole. Running out of health transforms you back into regular Amagon. Reaching the end of the stage also puts you back to normal, though your leftover health converts back into score for the next level.

Megagon pummels even strong enemies with ease.

Though Megagon is very powerful, there are some tradeoffs to assuming his form. The controls are the same for both characters. You trade your machine gun for a punching attack. The hitbox for this attack is incredibly generous. While it doesn’t hit too far in front of him, punching has a very tall range. You can punch low enemies while standing while also reaching enemies just above your head. Punches are eight times as strong as Amagon’s regular attacks, so this is the preferred way to fight big enemies and bosses. Enemies defeated while you are Megagon do not drop powerups, which matters if your score is low or if you could use an extra 1up somewhere. Megagon has a special laser beam attack performed by holding Up and pressing B. This is a tall wave shot that tears through enemies and is twice as strong as his punch, but at the cost of one health point. You can’t use this if you are out of health either.

The different zones in the game all have a similar structure. You begin on the coast, then you travel through the jungle, river, deep jungle, and the mountains before finishing at the beach on the opposite side of the island. Each zone has two stages. The first stage usually ends in a fight with one or two of the larger enemies in that zone’s enemy set. The second stage culminates in a boss battle. These battles are pretty weird as you fight things such as a double-sided lion head and a walking tree.

Amagon has a continue system and you get unlimited continues, but there’s a catch. First off, the continue system only kicks in once you reach Zone 4. When you run out of lives and have the opportunity to continue, you can only resume play from one of the zones you’ve already cleared on that credit. For instance, if you continue from Zone 4, you can only choose from Zones 2 and 3. From there, if you lose in Zone 3, you are forced to restart from the beginning. You keep your score when you continue, which helps a little. Continuing almost isn’t worth it if you have a low score, since that limits how far you can get as Megagon.

This game has goofy bosses and I am here for it.

This was my first time playing through Amagon. I have tinkered with this game a bit before and I always failed out in the first stage. I am glad to have finally figured this game out since I did enjoy my little time with the game. This is an affordable cart at around $5. I have had a few copies of this cart during collecting. I actually owned a copy of this game that did not work. The cart itself was in great shape, the pins were nice and clean, and the circuit board looked to be in good shape. It just wouldn’t do anything inside the NES. I ended up keeping the shell and swapped in a good circuit board before offloading the other copy as broken in an eBay lot.

I pretty much summarized my experience playing through Amagon in my introduction to this blog post. This game is tough to get started. Falling spiders get in your way. Flying birds move quickly and are tough to react to. Jumping is more helpful in the vertical than the horizontal. You fall fast so you don’t cover much distance, meaning gaps are tough to cross and enemies aren’t so easy to jump over. Wasps fire bullets in a spread pattern and I needed a strategy to cope with them. You don’t get a Mega-key until near the end of the stage and everything is out to get you before that point. This part teaches you how to be effective as normal Amagon while allowing you to build up some score for your upcoming transformation to Megagon. Getting to that point however is pretty challenging, especially for the early part of the game.

Falling snails are no match for Megagon.

The game does get easier once you clear the first stage, but while progress was steady for a little while, I really struggled once I got to Zone 3. That’s the river zone, which provides dangers like leaping fish and logs floating on the river. I had many runs die out once I got this far, and it never really felt like I was learning anything about the patterns and enemies coming up. The solution to all this was really quite simple: Be Megagon every possible chance you get. I was focusing too much on progressing as Amagon because I didn’t want to miss any extra life drops and I wanted to keep my score high for later. I’m also a powerup hoarder in games by nature. I do well enough from playing that way for the most part, so I suppose that’s why I was hesitant to give in to becoming Megagon more often. Many levels give you a Mega-key very early in the level so there’s big incentive to use it right away. I did well as Megagon so I always traded back extra health for points at the end of the stage, and I never came close to running out of score. I did play more early game as regular Amagon than was really necessary, the parts that I learned anyway. A bit of a buffer is always nice just in case. I more or less breezed through the rest of the game once I embraced the Megagon strategy.

Amagon is a solid NES game, but I don’t think it presents itself very well overall. Graphically the game has a cartoony look that is more simplistic in nature. The music in the game is just okay, mostly unmemorable. The ending theme is awful and not a suitable reward for finishing this tricky game. The controls are responsive. The stiff jumping makes things tougher than they need to be sometimes, particularly during the small amount of necessary platforming. Playing as Megagon is pretty fun, ripping through enemies and bosses with relative ease. The better you play, the more time you’ll have as Megagon. For me that meant the game became more fun once I got better. The boss fights were a pleasant surprise that I was not expecting to see in this game. I think that was because the overall presentation of this game feels like a game from a couple years earlier than when it was released. NES games were getting quite advanced and polished by 1989 and Amagon feels dated by that standard. I classify it as an average run-and-gun style platformer, though as usual, I had fun with it.

#136 – Amagon

 
MAY
10
2019
0

#118 – Thundercade

Where there’s lightning, there’s Thundercade.

Featuring a slow rise and shiny gleam!

To Beat: Reach the ending
Played: 3/10/19 – 3/16/19
Difficulty: 7/10
My Difficulty: 7/10
My Video: Thundercade Longplay

Thundercade appears to be an unassuming game. It’s a scrolling shoot-em-up and an arcade port. These are things we’ve seen come up time and time again, and there will be plenty more like this. There’s just one thing that sets Thundercade apart from the rest. This game is hiding a deep, dark secret. Not a malicious one this time, but it’s something quite extreme that I haven’t seen before on the NES. But before we get there, let’s take a look at this game.

Thundercade was released in arcades in 1987. It was developed by SETA and published by Romstar. The game is also known as Twin Formation in some regions. The only other platform the game appeared on was the NES in July 1989. The NES port was developed by Micronics, published by American Sammy, and released only in North America. This is the first American Sammy published game I have played for this project.

Unlike the arcade version, the NES version included a brief story in the manual. The AATOM, Atomic Age Terrorist Organization of Miracali, has built a nuclear power plant and are threatening to destroy the world with it. You play the role of a combat motorcycle driver under Operation Thundercade with the goal of stopping the terrorist threat. The mission takes place over four areas, culminating in a final battle at the nuclear plant. Destroy the power plant to complete your mission and beat the game.

This tiny motorcycle just blew up a huge building.

This is a relatively simple game with simple controls. Use the D-pad to move your motorcycle in all directions. Press B to fire your cannons. You have unlimited shots but no autofire. Press the A button to deploy bombs via your air support. Bombs typically remove all enemy shots from the screen while dealing heavy damage to parts of the screen. If you deploy another bomb right after the first, then the bomb pattern for the second bomb covers more of the screen. You start the game with three bombs as indicated by the B in the lower left of the screen. You also see the number of lives remaining at the bottom and your score on top. This game has two player simultaneous play with the second player’s information on the right side.

Your normal cannon fires single bullets straight ahead, which are weak in the thick of the fight. Supplement your firepower by attaching side cars. This setup is reminiscent of Tiger-Heli (another Micronics-developed NES port) and its support helicopters. You can find side cars out in the open or within destructible objects like buildings. Simply drive into them to attach them to your motorcycle. They attach to whichever side of the motorcycle you touch and you can have one on both sides at the same time. Collecting a new side car replaces the old one on that side. Some side cars fire shots horizontally while others supplement your vertical shots. You can mix and match to your heart’s desire. Side cars are destroyed when shot, acting as defensive tools since they shield you from taking damage. Your motorcycle is otherwise destroyed in a single hit. There are several different kinds of side cars and you can find more powerful ones later in the game.

One car can shoot ahead and the other shoots sideways.

There are other pickups to find besides side cars. Red bomb icons add a bomb to your reserves. You can also find 1up icons for those precious extra motorcycles. The V-shaped icon is a Vulcan cannon which is a very powerful weapon. You automatically get two side cars with cannons that fire large bullets in a V-formation. This is hands down my favorite weapon in the game. You get to keep it until you die, lose a side car, or collect a different side car. These items are all hidden in the environment and you need to blow up various objects to reveal them.

There’s one more item that sends you off to a bonus game. At the end of the first two stages is a boss battle with a huge gunship. It has multiple turrets that you must destroy. If you take too long to defeat it, enemy support helicopters start appearing and the fight is much more difficult. If you can manage to defeat the gunship before that happens, then the bonus stage item appears behind it. The bonus game is an opportunity to grab a bunch of items. The view changes to side scrolling and a plane will fly overhead, dropping the goods. Steer left and right to collect them as they fall. Most of the items are parachutes that contain four missiles each. At the start of the next stage, you will automatically fire these powerful missiles when you shoot your normal cannons. Too bad they only last at the start of the following stage because they are quite powerful. You can also collect bombs, 1ups, and Vulcan cannons from the bonus stage. You also enter the bonus stage for free just for completing the third stage.

There’s an interesting game mechanic that comes up from time to time. There are sometimes inclines or other hazards such as pools of water that you can jump over. Simply drive into the obstacle to fly high. While airborne, your movement is slowed considerably, but you fly over all enemies’ shots and so you can’t be hurt during this time. Just make sure to steer to a safe landing spot.

Look ma, no hands!

While you don’t have too many lives to spare in Thundercade, there’s only a few ways you can be killed. You can touch most solid objects freely without being damaged. You will die however if you get squished against the bottom of the screen due to scrolling. Enemy bullets and the enemies themselves will beat you when you touch them. You are able to defeat basic enemy soldiers by driving into them. Given your advantage over them it makes sense, but not too many games implement a feature like that.

You start the game with three lives. You don’t earn lives from points in this game, only from 1up items. There are several of them in the game if you know where to look. Dying gives you a new motorcycle as play continues, as well as a fresh set of three bombs. Lose all of your motorcycles and it is Game Over. You then see a screen showing a map of your overall progress, the total number of shots fired, number of enemy hits, and your hit rate as a percentage. It’s curious to see your hit rate in a game that encourages you to shoot everything, thereby decreasing your rate. You get the same screen after completing each stage too. You can continue your game twice and the game will place you at a nearby checkpoint within the current stage. If you can clear the third stage, you earn a third continue.

This was my first time playing Thundercade. This is a game I know I’ve seen before in old gaming magazines that I never got a chance to play until now. It looked interesting but not interesting enough to rent or find cheaply. It turns out it is a cheap, common game that can be had for about $5.

Of course you go up against a gigantic tank.

Playing this game can be a bit slow going at first, but most of the game isn’t really that difficult. Bombs and side cars are plentiful and they helped me make rapid progress. After a few tries, I reached the final stage. I found that the last half of the final stage was a steep upturn in difficulty. There’s a big section with these huge turrets that emerge from the ground. Not long after they pop up they fire a string of missiles in your direction. Having good side cars is crucial here, otherwise your normal shot can’t really keep up and there’s not a lot of wiggle room to get around. The final showdown at the nuclear plant is also really difficult. There are ten snipers that briefly appear at each of ten windows. All of them aim at you but at different intervals, so you have to weave around all the bullets carefully over just the lower part of the screen. Worst of all is that your bombs here don’t remove enemy bullets. It can be a long, grueling fight. Each sniper takes several hits to defeat, but eventually you’ll defeat a few making the fight easier the longer it goes on. My run for my longplay video was just okay. I used a continue in Level 2 and another in the last stage. I’ve made it to the last part on the first credit before.

Now it’s time for the big reveal of this game’s deep, dark secret. This isn’t exactly a spoiler since it’s easy to miss. Thundercade has a special ending. If you beat the game, you might notice that this game doesn’t loop again like many shooters do. You have to let the game sit on the ending screen for roughly one hour of real time before the special ending appears. There will be a procession of tanks and soldiers, followed by a developer message written in Japanese. I suppose the localizers missed this entirely, but can you blame them? Thanks to The Cutting Room Floor, you can read the translation of the special message. After all that wait, it doesn’t stay on the screen very long before going back to the title screen. I left my recording running so I captured the special ending. I left the room with the game running but managed to walk back in the room in time to watch most of this ending live.

Even though Micronics has a poor reputation as far as their game output on NES, Thundercade is a pretty decent shooter that I enjoyed. The whole package is not incredibly special. The graphics are okay. They did a good job with all the destructible buildings and things. The music is repetitive – there’s only one main song throughout most of the game – but I found it catchy enough and didn’t get tired of it. The controls were responsive. The game mechanics have mostly been found elsewhere, which is a little disappointing. Overall, I consider it an average, run-of-the-mill type game. There are plenty of better NES shooters, but Thundercade isn’t all that bad and it is worth trying out if you like shoot-em-ups.

#118 – Thundercade

 
AUG
31
2018
0

#92 – Whomp ‘Em

The name is a terrible pun, but the game is fun.

I wonder how much thought was put into the name.

To Beat: Reach the ending
Played: 7/1/18 – 7/5/18
Difficulty: 5/10
My Difficulty: 5/10
My Video: Whomp ‘Em Longplay

I know this is cliché, but first impressions aren’t always what they seem. I played Whomp ‘Em many years ago on an emulator on one of my first computers. I wish I could remember what led me to play this game in particular, but whatever it was, I got a solid recommendation. I had a great time working through the game, that is, all the way up to the very end. The final boss completely wrecked me, and after a few failed attempts, I quickly decided that seeing the ending was not worth the effort required to learn how to beat the boss. I let it lay there until now. When Whomp ‘Em came up, the first thing I remembered was that final boss and my past struggles. My second impression was more favorable than the first impression. Read on to see how it all shook out.

Whomp ‘Em has an interesting origin, which begins with the game Saiyuki World on Famicom. Saiyuki World is a port of the game Wonder Boy in Monster Land. The Wonder Boy series is perhaps one of the most confusing series of games to try and deconstruct, and I’m not touching that here. Anyway, a sequel, Saiyuki World 2: Tenjokai no Majin, was released on Famicom in December 1990. This was brought to the NES as Whomp ‘Em, with the main character changed to a Native American. Whomp ‘Em was released in March 1991 in North America. The game was published and developed by Jaleco in both regions.

Whomp ‘Em is a side-scrolling platformer. There is virtually no story to this game, which really is a breath of fresh air if you ask me. You play the role of Soaring Eagle, a young Native American who is seeking out totems for his magical pouch. That’s it. There are eight levels and you beat the game if you complete them all.

Good start for a kabob.

This game has simple controls. You use the D-pad to walk around. Press the A button to jump. Soaring Eagle wields a spear. You can attack above you by holding Up while you jump, and similarly attack below by holding Down while jumping. Press B to attack forward with your spear. He thrusts the spear ahead of him a short distance. You can duck by holding Down, and you can raise your staff by holding Up. Ducking lets you attack low against the ground, but holding your spear above your head seems to serve no purpose in the game, other than a visual cue that you are holding Up. The Select button pauses the game this time, while Start lets you switch between your totems after you collect them.

You are thrust into the action right away when you start a new game. This is a special introductory stage to get you accustomed with the game. You work your way to the right and come to a screen where you must go upward to proceed. Later in the level you encounter another vertical subsection where you go back down. Most if not all levels in the game travel in different directions like this. When you complete the level, you are presented with a map screen. This contains the next six levels in the game. You can play these stages in any order you want. The eighth and final stage is available once the other stages have been beaten.

The top left corner of the screen is your on-screen display. At the top is the current totem you have selected. To the right of that there may be some magic potions. These act as your extra lives. If you run out of health, the potion kicks in automatically if you have one, restoring some of your health back. Below the totem is your health meter in the form of hearts. You begin the game with a maximum of four hearts but can earn up to twelve throughout your adventure.

Vertical sections are a good place for downstabbing.

There are quite a few items you can collect in the game. You can get these from defeated enemies or from touching certain locations in the levels to make items appear. The most common pickup is the gourd. When you pause the game, you get a display saying “More” along with a number. This is how many gourds you need to collect to increase your maximum health meter. You’ll want to defeat a lot of enemies to get these. The small heart restores a heart and the large heart refills your health to the max. There is a flint spearhead that boosts your attack power temporarily. You will see this hover in the bottom corner when you collect it and it goes away after four spear strikes. Similarly, the headdress gives you a temporary boost in defense. The deerskin shirt makes Soaring Eagle invincible for a few seconds. Certain enemies in each level drop a spear which gives you a longer reach to your default weapon for the rest of the stage. Finally, you can find those magic potions. You can hold up to three at one time. One bad thing about the potions is that some bosses can steal them from you. That’s awfully unfortunate and something to be aware of.

Whomp ‘Em has a little bit of Mega Man to its structure. Not only can you play stages in the order you want, but you also earn a new weapon by defeating the boss at the end of each stage. Press Start to cycle through the totems you have collected. Most of these are more like tools than weapons. Beating the Sacred Woods gives you the Spear Whirlwind. You spin the spear in front of you to break certain blocks. The Fire Wand is your reward for completing the Fire Test. This makes flames come out of the tip of your spear that is useful for melting ice blocks. You get the Cloud by completing the Ice Ritual, which summons a cloud that you can jump on and ride with the D-pad. Beating the Water Test gives you the Ice Crystal, which can freeze enemies. You obtain the Web from the Magic Forest. This lets you capture an enemy in a web and you can then throw the trapped enemy. You earn the Dart from beating the Secret Cliff. This is a weak projectile attack that shoots darts, which can then stick into the wall and be used as makeshift platforms. The manual states that using the totems and their abilities cost you health, but all of these weapons can be used as much as you want without penalty.

Fire is sometimes used to melt ice.

There’s one final level remaining after all six selectable stages are beaten. This is your typical “use all of your abilities” stage and it is quite a bit harder than the rest of the game. One neat tidbit about the last level is that all the enemies are miniature versions of the bosses you fought in the previous six stages. You also get one last totem for this final stage as well. This attack fires a large dragon head forward. It is the most powerful weapon in the game, however this totem does cost you a full heart of health each time you use it.

Whomp ‘Em is somewhat forgiving when it comes to failure. Since you get healed with magic potions when you exhaust your health, you get to keep going as if nothing happened. Losing all your potions and health means Game Over. Then you get sent back to either the level select screen or the start of the final level if you died there. Repeating the full level can be a bit frustrating, but you do get unlimited continues.

I finally got to beat Whomp ‘Em for the first time. This is a game that used to be much more affordable. I am certain it has been featured many times as a hidden gem which would account for the price hike. I was able to grab a couple copies of this game locally for around $8-$10 each a few years ago, in combination with either buy two get one free, or buy three get one free, back when my local stores didn’t realize the value of this game. Loose carts sell for around $35 these days so those were great value buys for me.

Poke bosses, get totems.

I had sat down to record Jordan vs. Bird and then had enough time to start looking at Whomp ‘Em. Not even two hours later I beat the game for the first time. It was mostly a leisurely romp through the bulk of the game, aside from a couple bosses that took more than one attempt. The final level wasn’t all that bad, though it included one random section of anti-gravity with some strange movement controls. I finally got to face that final boss again, and I can see why I gave up before. He has an attack that damages you anywhere on screen and it is not obvious at first that this is happening. The trick to the fight, unfortunately, is to cheese the boss. I entered the fight with as much health as possible and all three potions, and then used the dragon attack to whittle his health down, in effect trading one heart of my health for one of his. It was a bit of a letdown that strategy was thrown out the window, but what can you do when the boss is unfairly designed? I am relieved that I figured it out this time, anyway. I beat the whole game again a few days later and captured it on video. This was a no-continue run with only using a few potions, mostly on the final boss battle.

Whomp ‘Em is a fun game that bears some flaws. I like the graphics in this game. Everything is nicely detailed and the enemies and bosses were animated well. The music is hit or miss. Most songs are good but there are a few that get on my nerves. I spent a lot of time in the final level and that song could have been a little less painful. The gameplay is exactly what you want out of a platformer. The controls are tight and being able to attack in all directions keeps the action going. I found the special weapons almost entirely useless until the final level where they are forced upon you. I am disappointed that the final boss went from too hard to too easy after employing a now-obvious strategy. My second impression of Whomp ‘Em took a much different turn than my first. Most of the ride through the game is great fun and I’m glad I got to play through it here.

#92 – Whomp ‘Em

 
NOV
06
2017
2

#57 – M.C. Kids

This fun, golden platformer isn’t kidding around!

This screen doubles as a little playground to move around in.

To Beat: Reach the ending
To Complete: Beat all stages and collect all puzzle cards
What I Did: Completed the game
Played: 8/27/17 – 8/29/17
Difficulty: 6/10
My Difficulty: 6/10
Video: M.C. Kids 100% Longplay

McDonald’s is one of the most iconic and ubiquitous brands in the world. Ronald McDonald is a household name, and just about everyone recognizes the golden arches. It’s no surprise that there are licensed video games based on their cast of characters. What may be surprising is that the NES game is quite good. M.C. Kids channels the spirit of Super Mario Bros. 3 with some clever twists that makes it a great NES platformer.

McDonald’s is an American fast food restaurant that was first founded in 1940 by Richard and Maurice McDonald as a barbecue restaurant. In 1948, they changed over to a hamburger stand and subsequently expanded to other locations. Ray Kroc purchased the chain from the McDonald brothers in 1955 and established McDonald’s Corporation. Today, McDonald’s has vastly expanded worldwide approaching 40,000 total restaurants in over 100 countries.

The character Ronald McDonald may have been created by Willard Scott. The former NBC Today Show’s weatherman was the original Ronald McDonald in three television ads in 1963, and he claims to have created the clown character himself. McDonald’s expanded their advertising by introducing McDonaldland in 1970-1971. Many new characters came and went over the years to accompany Ronald. McDonaldland was officially phased out of advertising in 2003.

Something tells me the kids weren’t part of McDonaldland.

A few video games were created using the McDonaldland characters. The Famicom exclusive Donald Land was released in Japan in 1988, and was both developed and published by Data East. The NES game M.C. Kids was released in North America in January 1992. It was both published and developed by Virgin Games. The European version was renamed McDonaldland and was published by Ocean Software in 1993. In a strange twist, the Game Boy port of this game was released as McDonaldland in Europe and rebranded as Spot: The Cool Adventure for North America. A Sega Genesis follow up named Global Gladiators was also released in 1992. Another Genesis game, McDonald’s Treasure Land Adventure, was released worldwide in 1993 by the developer Treasure.

M.C. Kids (pronounced “Em-Cee” Kids) is a side-scrolling action platformer. The Hamburgler has stolen Ronald’s magic bag, and Ronald asks the kids Mick and Mack to help him track it down. To do this, the kids must locate some of Ronald’s puzzle cards from the levels in the world. When you collect enough puzzle cards, the path to the next world is open. This cycle repeats until you track down the Hamburgler and recover the magic bag.

On the title screen, you take control of Mick. This is a great place to get a basic feel for movement and jumping in a safe environment. There is a signpost pointing to the left labeled 1up, and another pointing to the right labeled 2up. Walk off the appropriate side of the screen to activate either one-player or two-player mode. Above the signposts are moon blocks. Bumping your head into the block changes you between Mick and Mack. They control the same, so simply pick the one you prefer. For two-player mode, the second player gets the other character. Two-player mode is alternating play.

This map style reminds me of some other game…

After the introductory story, you are taken to the world map. Use the D-pad to walk on the predefined paths between stages. Press A to enter a stage or house. Each stage is noted with a flashing M with a signpost next to it indicating the level number. At the top of the screen, you see the name of the world you’re in, as well as the level name if you are standing on a stage tile. You also see how many puzzle cards you need for this stage, the number of lives remaining, and how many arches you have collected. The puzzle is on the top right of the screen in a rectangle of six tiles. The cards not yet collected are displayed as M tiles. For each puzzle card you find in the levels, a tile is flipped over revealing part of the puzzle for this world.

The levels themselves are large side-scrolling levels where you control the kid directly. The controls are easy to understand but movement takes time to master. You move with the D-pad and use A to jump. You can duck by holding Down. You get a higher jump by jumping while ducking. You run automatically by walking on the ground in one direction for a while. Movement is momentum based and you maintain your speed well while jumping around. There are slopes that can either boost or reduce your speed accordingly. Running at full speed or close to it produces the highest jumps.

The B button is used to pick things up. The most common thing to grab are blocks that you hold above your head and use as weapons. Walk into a block and press B to lift it, or you can stand on a block, duck, and press B to grab them that way. You then throw the block with B. You can throw the block up or down, or press B without a vertical direction to throw the block forward. Thrown blocks will bounce once or twice before dropping off the screen, and sometimes you can hit more than one enemy with the same block.

Well, I need health, so this little bird has got to go!

At the top of the screen in a level you see a few indicators. The M stands for how many arches you have. These are floating M’s within the levels that you collect just by touching them. The L shows how many lives you have. Underneath that are hearts that represent your health. You begin each new life with three hearts. You lose single hearts when colliding with enemies, and you die when all hearts are depleted. There are no item drops or health pickups in M.C. Kids, but you can restore hearts in a couple of ways. Defeating ten enemies will restore one heart, and if you defeat two enemies with the same block you also recover a heart. You start with three hearts but can go up to four. Health also carries over between stages which is something to keep in mind.

The most important item in M.C. Kids is the puzzle card. They are solid blocks with an M on them and you collect the card by picking up the block. To keep the card permanently, you need to finish the level after grabbing it. You end a level by touching the goal line situated between two goal posts. There is a floating M across the line that will give you some arches if you touch it while breaking the string. When the level ends, you will high five your friend and see a message indicating which puzzle card you acquired, if any. Some cards in a world are for a puzzle in a different world, and some levels have two cards instead of one. The cards can be well hidden or stashed in hard to reach places, so it’s crucial to explore the levels thoroughly.

Most puzzle cards are a little harder to find.

There are several types of blocks in M.C. Kids. Blocks with a 1 on them are extra lives, and you will see many of them in the game. The reverser is a left-facing arrow block that sends you flying and flipping all the way back to the start of the level. Sometimes you will see a block outline moving around in a level. If you find a similarly shaped fill-in block and touch it to the outline, it will make the block solid and you can use it as a platform. A boat lets you float on water and you can climb in it and use the D-Pad to move the boat across water left and right. You can even grab this boat like a block and throw it into a different body of water. There are also porous blocks that float in the water and drift forward on their own. There are sand tiles that you can dig through like in Super Mario Bros. 2.

One of the neatest elements in M.C. Kids is the spinner block. It is a solid, fixed block that is located at the end of a long platform. You want to get a running start and run right over the spinner block. Do this and you will run around to the underside of the block, letting you walk on the ceiling with reversed gravity. You can reach high areas this way. One thing to note with reversed gravity is if you fall off the top of the screen, you lose a life just as if you fell down a pit.

There are also several different springboards and lifts found in stages. Small springboards let you jump high. These are usually found in the open but sometimes are hidden behind grabbable blocks. Super springboards require you to carry a block with you to spring very high. The travel lift is a platform that begins stationary and starts moving when you jump on it. The continuous lift winds around in a predefined pattern and you have to watch it for a while to see its path so you can reach it safely. The conveyor lift shows up near the end of the game. It travels along a guidewire and you move it yourself by standing in the center of it and walking either left or right. Walking left moves it forward and walking right moves it backward. This lift is particularly tricky to learn. The zipper is neither a springboard or lift, but it comes up often. Press B while standing in front of it to transition to either a new room or different location within the level.

This path for this lift winds around a lot.

As you play, you will accumulate arches. You will lose some whenever you collide with an enemy. If you manage to collect over 100, the arch counter rolls over and starts blinking. If you finish the level from here without dying, then you get to play a bonus game. This is a small level containing four blocks on upward rails. One of the four will light with an up arrow, and then shortly after the rest will display downward arrows. You want to jump quickly to the one with the up arrow to slide it upward a little bit before the down arrows activate and lower the block you are standing on. The idea is to lift at least one block high enough to reach a ledge at the top with a couple of zippers. Use the zipper to go to a 1up room with several 1up blocks suspended over a pit. Grab as many as you can! If you fall off the blocks in the bonus game, there’s a moon block on the floor you can use to switch characters if you want.

When you collect enough puzzle cards, you can go to the house in that world and speak with its owner. He or she will then provide you a path to the next world. If you are missing cards for a particular puzzle, you can drop by the house for a hint. Collecting all the cards for a world and visiting the house may provide some other benefits. There is nothing on the map to indicate if a completed level still holds a card, which makes it more difficult to track down missing cards. However, you don’t need every card to beat the game. You may also find secret cards. There is an optional secret world in the game that you can find that only opens if all secret cards are collected.

This was my first time playing through M.C. Kids, though I have owned the game for quite a while. I bought it during a brief collecting phase I had around 2009 or so. There was a deal on eBay where you could pick 10 games for either $20 or $30, and M.C. Kids was one of the games I chose. Those kinds of deals make me wonder if I had missed out on another game that would eventually become more expensive. M.C. Kids sells in the $10-$15 range these days, so it ended up being a good purchase.

This bonus level features multiple fake goal markers.

It took me a couple of days to beat M.C. Kids. The first night I streamed gameplay on Twitch, and I was doing decently until the end of the third world. I was really struggling to figure out a few different sections, and after 90 minutes or so I called it a night. The next night I pushed my way through to the end of the game in a near three-hour session. It wasn’t pretty but I got the job done. However, I wasn’t recording my attempt, and I also beat the game without visiting the special world at all. Once you get to the ending, there’s no way to go back. I also missed two puzzle cards that weren’t necessary to play all the levels and I looked online to find out where they were hiding. I had ideas on where both cards were located, but I don’t think I would have found them on my own unless I grinded out a few more hours of playing. With all that in mind, I beat the whole game again on my third attempt and captured video this time. I had to play the special world blind, but it went relatively well for the toughest stages in the game.

The deeper I get into this project, the harder time I have figuring out how to rate games on difficulty. If you can keep your NES running for a long time, then you could probably beat M.C. Kids. There are unlimited continues, and beyond that there are several places where you can grind out extra lives to not even need to continue. There is at least one level that has two extra lives right at the beginning, so by grabbing both and dying right away, you can slowly build up a stock at any time. I also found a cache of eight lives or so in a level in the first world, which is even better for grinding. Therefore, lives are not much of an issue in beating the game. The two things that make the game challenging are the momentum-based physics and locating some of the trickier-to-find puzzle cards. This seems like an average difficulty game to me, but I decided to tick up the rating to a 6 since I had trouble the first night I played.

M.C. Kids is a fun NES game that I recommend playing. The levels are often sprawling with many things to do, and the game introduces many different elements along the way that keep the experience fresh. The reverse gravity gimmick works well and it is used in clever ways. The graphics are very clean with some nice animation, and the music is equally great. I had this track stuck in my head for several days after playing. It’s no Mario 3, but it resembles it enough that it’s an easy game to recommend. The AVGN video on M.C. Kids has raised awareness of the game, but it’s been long enough since that review that the game has backed up a bit into mild obscurity. Now that I’m shining some light on the game, make sure you don’t skip this one.

#57 – M.C. Kids

 
OCT
02
2017
0

#53 – American Gladiators

You can sort of get the experience with this lovely home version!

A contestant runs around the copyright page before the title.

To Beat: Reach the Ending
Played: 6/26/17 – 7/2/17
Difficulty: 6/10
My Difficulty: 6/10
Video: American Gladiators Playthrough

It wasn’t too long ago that I wrote about Rollergames, and today we have another game based on a 90’s TV show that is right out of the same mold. They were both live-action shows that ran on TV at the same time. Both shows received an NES game to piggyback off the hype. Also, although American Gladiators on NES does a little better in this regard, both NES games deviate somewhat from the source material.

American Gladiators is a US TV show that aired in syndication from 1989 to 1996. It pits two men and also two women against each other in several events culminating in a final obstacle course called the Eliminator. All the events involved the Gladiators, who are recurring athletes that have their own roles in the events to prevent the contestants from scoring. The show eventually featured many different events that came and went through the run of the show, and each episode consisted of different combinations of events. Later, there was a remake of American Gladiators that ran for two seasons, both in 2008.

I’m genuinely disturbed by the concept of lives here.

American Gladiators on NES was released in October 1991 only in the US. It was published by Gametek and developed by Incredible Technologies. This game resembles the show but does not follow its format. There is a different American Gladiators game that is much more faithful to the show. That version was developed by Imagitec Design Inc and also published by Gametek on the Sega Genesis, DOS, and Amiga in 1992. The SNES port was released in 1993.

Similar to the TV show, in the NES game you have to compete in five different events which are modified versions of specific games that appeared on the show. You have to clear all five events within so many “lives.” The events are Joust, The Wall, Human Cannonball, Powerball, and Assault. Once you clear all five events, the game advances to the next level where you get a more challenging set of these same five events. In all, you must clear four different difficulty levels of five events each before moving on to the final event, the Eliminator. If you can clear the Eliminator, then you win the game.

Let’s look at each event. First I will explain how the event is played on the show, and then I will describe how it was converted to the NES game.

Stick and move.

In Joust, a contestant and a gladiator attempt to knock each other off a raised platform with pugel sticks. In the NES version of Joust, you square off against four gladiators one at a time instead of just the single battle featured in the show. During a face-off, you can move around a bit on the platform by tapping Left or Right on the D-Pad. Press A to thrust your pugel stick at the gladiator. You can press B to thrust too but this will also inch you a step toward the gladiator. Just pressing A or B does a middle thrust, and you can also do a high thrust by holding Up or a low thrust by holding Down when you strike. You can also block by holding Left and pressing either A or B. You exchange blows with the gladiator until you knock him off the platform. Then the event briefly switches to a platformer as you must move forward jumping from platform to platform to engage the next gladiator. After you win the third fight, a super pugel stick will fly into play. If you grab it your stick will light up, then if you can land a first strike on the gladiator you will knock him off instantly. If you get hit first then you lose the super pugel stick, so make it count! If you get knocked off or fall off at any time, you lose a life.

Tap it out while making quick decisions.

In The Wall, two contestants race up a climbing wall. After a few seconds, the Gladiators will pursue the contestants attempting to pull them off the wall, preventing them from reaching the top and scoring points. In the NES event, your goal is also to climb to the top of the wall, but this time there are several gladiators that appear at various locations along the wall that you must avoid. The controls for this event are tricky and unlike anything else I’ve ever played. The idea is that the B button moves your left hand and the A button moves your right hand. You combine this button press with a direction to move that hand in all eight directions. There are handholds covering most of the wall and as long as you have at least one hand on one you will stay on the wall. The consequence of this control scheme is that you need to tap buttons quickly to move fast. For instance, to move straight up, you must rapidly alternate between pressing A and B while holding Up. It takes practice to get the hang of it. You can find a glove on the wall that lets you move very fast with just the D-Pad instead of having to tap out A and B, but it only lasts for a few seconds. Each of the four levels is a completely different layout on the wall, and you need to have mastered the control scheme to clear the last wall. If you lose the grip on both hands, or you come in contact with one of the gladiators, then you fall down and lose a life. Plus, you have to start at the very bottom of The Wall.

He doesn’t stand a chance.

The Human Cannonball event begins with a gladiator standing on a small elevated platform holding a foam pad for protection. The contestants swing on a rope from their own platform and try to knock the gladiator down to score points. The NES event requires you to jump from your platform, grab the swinging rope, and then let go at the right time to knock the gladiator down. Like Joust, there is a series of four gladiators that you knock down to finish the event. Both the starting platform and the gladiator’s platform move up and down, making the timing more difficult. At the start, you can walk left or right a bit on the platform, and then press A to jump toward the rope. If you grab onto it, then you automatically swing back and forth and you must press A again to let go and launch yourself. In some levels, during the third gladiator a glove will fly into play, and if you grab it you can move up and down the rope. Normally where you first grab the rope is where you stay until you jump off. The glove comes in handy on the fourth gladiator because there can be a trophy at the top of the rope that gives you an extra life. In this event, it is very easy to lose lives. You can fall off the platform, miss the jump to the rope, miss the gladiator on the launch, or hit the gladiator when he is blocking.

Always score in the center when it is clear.

In Powerball, there are bins filled with balls on both ends of the playfield, and there are five empty pods guarded by three gladiators. Both contestants play simultaneously by taking a ball and putting it into the pods, if they can get by the gladiators to do so. The players must cross to the opposite end before grabbing a new ball, and the object is to score as many points as possible within a time limit. The NES version of Powerball is mostly faithful to the original event. You grab a ball at either end of the playfield with either A or B. Then you have to run around the gladiators and place the ball into the pod by standing next to it and pressing the button. Just like on the show you must cross to the opposite side to grab a new ball. The difference in the NES game is that you are only allowed to put one ball in each pod. If you score on all five pods, you are awarded an extra life as well as free up all the pods so you can continue scoring anew. If a gladiator touches you, he always knocks the ball out of your hand and you have to go get a new one. This is the only event where you don’t lose a life. Just score as much as you can before the timer runs out!

Weird gladiator scrolling, but a fun game mode at least.

The Assault features a gladiator manning a tennis ball cannon, and there is a target on the wall behind him. The contestants run through the playfield dodging the fired tennis balls and reaching the safe spots. Each safe spot has a weapon used to hit the target. The contestant wins if they hit the target or reach the end of the course before time runs out, and they lose if the gladiator hits them with a tennis ball. The NES version of the game plays a bit differently. The gladiator moves back and forth at the top of the screen with the cannon no matter where you are in the course. You scroll the playfield upward and seek out weapons near a safe spot. Neither you nor the gladiator can shoot through barriers on the field. Grab a weapon by standing on the weapon icon and pressing B, then press A to launch a shot upward. Each icon gives you three shots. The gladiator will fall if you shoot him enough times, and you lose a life if he hits you three times. Alternatively, you clear the event if you reach the top of the course before time runs out. This is the only event that you can lose if the timer expires.

Platforming with random projectiles!

Once you clear all 20 events, then you begin the Eliminator. This is a long, slowly scrolling platforming level essentially. You start out by hopping between balance beams with the A button and advancing to the right. During the event, medicine balls will spray out from the bottom of the screen randomly. If they hit you then you fall, but you can save yourself by pressing Down to duck in time and shield yourself from the hit. Be careful when jumping as you can’t block hits. Eventually you come to the hand bike. Press Left or Right to move along the rail and dodge the balls. Past the hand bike are conveyor belts, and then after that is another hand bike section. Finally, the balls go away and you take a series of zip lines to the end of the course. You must time your jump off each zip line to grab the next one. If you get all the way to the end, congratulations!

Finally, here is some miscellany about American Gladiators. Across all events, there is a scoring system in place. You typically earn points by either getting past a gladiator or redeeming each second left on the timer at the end of the event. Once you clear a level of five events, you get 100 points as well as an extra life for the next level. You can also earn a continue by clearing either Level 1 or 2. When you lose all your lives, you get a password, provided you have already cleared Level 1. The password is eight characters long and the only characters are A and B. You enter the password by pressing the corresponding button, which is super convenient. There are only three passwords, one for each level from two to four. Lastly, the game features a two-player mode, but it is alternating play so it isn’t that useful.

This was my first time playing American Gladiators. I have owned the game since childhood and probably got it from a yard sale. It only took one try playing it to discover I wasn’t all that interested in the gameplay. I’m not sure why that was because I enjoyed watching the TV show on cable whenever I saw it was on, and I played NES often as a kid. I’m glad I’m doing this completion project because it gives me the motivation to play through games such as American Gladiators that I’ve owned for over half my life.

This guy is super tough for some reason.

It took me three or four days over a week to solve American Gladiators. Initially I found Powerball to be the easiest event because I always filled up the pods, only to find out later that it truly is the easiest one since you cannot lose regardless. Assault was the next easiest game for me because I am good at dodging, although that was tested during the final level. The Wall tends to be difficult for people due to the weird, exhausting controls, but I took to it quite well. Joust was the event that gave me so much trouble until I figured out how it worked. Human Cannonball to my surprise ended up being the most difficult event as the later levels had me almost pulling my hair out.

Once I got all those games figured out, it was time for the Eliminator. This event was challenging, but it was even harder to learn because I could only use what lives I had remaining after clearing all the Level 4 events. The best shot I had at the Eliminator came from playing the game from the start and accumulating as many lives as possible along the way. I had a few runs that I almost completed before recording anything, and once I sat down to record I ended up completing the game for the first time. I even beat it without continues. I had close to ten lives starting the Eliminator but I used nearly all of them up to beat it.

You really need to master the controls to solve this one.

Here are some pointers for a few of the events that tripped me up in the game. Spoilers apply here, so if you want to try the game yourself and keep your experience pure, now is the time to look away! As I mentioned earlier, Joust was my first major hang up. That was because I was playing it wrong. The opponents also strike with low, medium, and high thrusts, and you can counter each one. You counter a low strike with a medium one, a medium strike with a high one, and a high strike with a low one. The gladiators also strike in a pattern that loops, so once you see it you can predict and counter every hit. If you are fast and don’t know the pattern, you can also counter by observing his strike and attacking quickly. Moving on to the Human Cannonball event, there are a few gladiators that seem impossible to knock down because they always block you. The only way I figured out how to get past them is to swing on the rope back and forth a few times before launching yourself. In other words, if they block on your first swing, try knocking them down on your second swing. You can stay on the rope for as long as you like once you grab on. I won’t tell you which gladiators or how many swings you need to wait. If you need to know, you can see my strategy in the longplay video. Finally, a couple of basic tips for The Wall. Make sure to spend some time in a clear space learning how to move in all directions. Take it slow. This becomes very important in later levels where each incremental movement is critical. Also, it is best to set the controller in your lap and use your pointer and middle fingers to tap out the A and B buttons. The game manual recommends this since you can move around on The Wall much quicker and with less fatigue in your hand.

I’ll say that American Gladiators is an interesting NES game, but I don’t know that I would recommend playing it. It’s a novelty to see how they adapted the show into an NES game, but it’s not quite reminiscent of the show enough to invoke the nostalgia factor. The music is fine, but nothing special, and notably the iconic theme song is not in this game at all. If it is, then it wasn’t recognizable enough for me to notice it. The graphics are decent and every important element is clearly defined. It’s a mish-mash of a game. I had fun with it, but of course I always say that.

#53 – American Gladiators

 
JUN
06
2017
0

#44 – R.B.I. Baseball

Crush monster home runs in this quintessential NES baseball game!

Not shown is the giant baseball and corresponding *pling* sound effect at power on.

To Beat: Win 9 Games
Played: 12/29/16 – 12/30/16
Difficulty: 2/10
My Difficulty: 2/10
Video: R.B.I. Baseball Longplay

The NES library holds a large collection of sports games. While Mike Tyson’s Punch Out!! and T&C Surf Designs could be loosely classified as sports games, I feel comfortable saying that today’s game is the first major sports title covered on the blog. There are more baseball games on NES than any other sport. So not only is it fitting that this first sports game is a baseball game, but it also happens to be one that I really enjoy and have spent a lot of time playing over the years.

R.B.I. Baseball is the first in a long series of baseball games developed by Namco for release in Japan. There it is known as Pro Yakyuu Family Stadium. Subsequent games on the Famicom were released yearly spanning 1986 through 1994. The 1989 installment was called Famista as a play on the name Famicom, and the series has been named Famista ever since. R.B.I. Baseball on the NES was released in June 1988 and was published by Tengen. This is one of three licensed NES games published by Tengen. It was also released as an unlicensed black cart version that seems to be much more prevalent than its gray cart equivalent.

The Famista series in Japan would carry on to many other consoles such as the Super Famicom, MSX, and Game Boy, as well as modern versions on the 3DS and Android/iOS. Not related to Famista, the R.B.I. Baseball name would be used in a brand new series developed by Major League Baseball (MLB) themselves in 2014. This separate series has received new entries every year. Also unrelated to both this new series and Famista are two R.B.I. Baseball games on NES. Developed by Atari Games and published by Tengen, R.B.I. Baseball 2 was released in 1990 and R.B.I. Baseball 3 came out in 1991. These games share a similar style as the original game but with all MLB teams and rosters included. They are not officially licensed by Nintendo and so they will not be covered in the main project, though I will probably play and write about them one of these days.

Choose your abbreviation and let’s get started!

R.B.I. Baseball lets you play a typical nine-inning match against either a computer opponent or another human player. When you begin, you get a list of ten teams and you can choose the team you want. The list only consists of two letter abbreviations and only a fraction of the teams are covered. The last two teams in the list are the American League All-Stars and National League All-Stars, and their rosters are comprised of best players not already included within the other eight teams. Once teams are selected, choose from one of four pitchers. Then the game begins!

The gameplay for R.B.I. Baseball breaks down nicely into pitching and fielding on the defensive side, and batting and baserunning on the offensive side. The one common thread between everything is base selection. On the controller, Right represents first base, Up is second base, Left is third base, and Down is home plate. Most baseball games will use this same scheme because it is both sensible and intuitive.

Player 1 is always the away team, meaning he bats first. While batting, the pitcher is shown at the top of the screen and the batter on the bottom. When batting you can position your player anywhere within the batter’s box with the D-Pad. Press the A button to swing the bat. You can hold the button down to do a full swing, and you must press A again to bring your bat back if you swing way too early. If you tap the A button the bat will immediately stop at whichever point it lies during the swing path, and if you get the bat to stop over the plate you can bunt the ball. The B button is used for sending your baserunners on a steal attempt. While the pitcher is winding up to throw, you press B along with the direction of the base you want to steal. For instance, if you have a runner on first base, press B and Up to have the baserunner start running toward second base.

It doesn’t look like it but this is good swing timing.

When a batted ball is put into play, the perspective shifts to an overhead view of the field and now you control the baserunners. Here the A button is used to go back and the B button is used to go ahead, and you combine this with a D-Pad direction to direct a specific runner to the nearest base. This is the same as baserunning while batting. For example, say you hit a ball all the way to the outfield wall. When your batter reaches first base, you can press Up and B to advance the runner to second base. Now if the throw from the outfielder is going to beat you to second base, you can send the runner back to first by pressing Right and A and avoid making an out. As long as the ball is hit fair and the screen remains in fielding mode, you can move runners around as much as you want, though you run the risk of getting tagged out for being careless on the bases.

In the bottom half of the inning you control the pitcher and defense. To pitch, you start by positioning your pitcher on the mound with either Left or Right. Press the A button to start your windup and throw a pitch. If you hold Down with A, you will throw a faster pitch, and if you hold Up with A you will throw a slower pitch. The slow pitch plays a different sound effect than that other pitches and sometimes it will bounce off the ground, causing the batter to swing right over top of it. After the pitch is thrown you can steer it with Left or Right to curve the pitch. Finally, the B button in combination with a D-Pad direction lets you do a pickoff move toward a base.

If the opponent puts a ball into play, then you play defense from the overhead view. Depending on where the ball is hit, the game will automatically give you control of the nearest fielder. Actually, you get to control most fielders simultaneously. Just run your fielder into the ball to pick it up, or you can follow the ball’s shadow if it is hit into the air. Once you have possession of the ball, press A and a direction to throw the ball to the desired base. If you press A without a direction the throw goes to first base which is useful for infield grounders. If you press B with a direction then your fielder will run toward the base with the ball in hand. This is useful for running down baserunners. The game goes back to pitching once the fielder has the ball without any controller movement for a while.

Sometimes you have to make a long throw to get an out.

The team rosters are very simple. As selected at the start, there are only four pitchers per team. The first two pitchers are the starters and the other two are relievers. This is important because the starters maintain their stamina longer than the relievers. Also in consecutive games, the prior game’s starter is unavailable. You can change pitchers in the middle of the game by pressing Start to call timeout while pitching. You can then bring up a menu of available pitchers and get a fresh arm into the game right away. The same goes for hitting if you want to bring in a pinch hitter. Each team has four pinch hitters on the bench and they can be swapped anywhere into the lineup regardless of position. Just like in a real game, if you pinch hit for the pitcher, then you must select a new pitcher at the start of the next half inning.

Players have different attributes that are not always spelled out in the game. For pitchers, you can see their ERA. Typically, the lower the ERA the better the pitcher. What the ERA doesn’t indicate is that some pitchers throw faster, some have better curves, and a few even throw sidearm for a different look. On the hitting side, you can see a hitter’s batting average and home run count. Hitters with high batting averages tend to hit the ball more often in places it can’t be fielded easily, and hitters with high home run totals have more power. The hitters also have different speeds while baserunning with no visible stat to suggest how fast they run. Finding skilled players in certain areas requires trial and error.

Love that 32 home run power!

R.B.I. Baseball was one of the few sports games I had growing up and I played it often. I owned both the unlicensed black cart and the licensed gray cart and those same copies are still in my collection today. This game was particularly popular in college and people would drop in to play matches all the time. I haven’t lost to the CPU in ages but I lost quite a few games in the two player mode. Our preferred house rule was “straight pitch” style where we always threw pitches right down the middle, focusing just on hitting, fielding, and baserunning.

Despite all those years of playing R.B.I. Baseball, it turns out I learned something new about the game when I set out to beat it. I was expecting that I would have to win a single match to consider the game beaten. However, there is a different ending screen if you win nine matches, one against each opponent. The downside to that is that there are no passwords or saving in the game, so you must complete all nine games in a single sitting. The upside is that the game has a mercy rule which can shorten games significantly. If you lead by 10 or more runs at the end of an inning, then you win immediately.

My favorite team in the game is the National League All-Stars, but similar to college it’s not quite fair to play as one of the teams completely stacked with talent. I would have definitely picked my favorite team, the Chicago Cubs, except they aren’t represented in the game at all. So I decided to play as my backup team Detroit. They are a very good offensive team which aligned with my desire to score a bunch of runs to win quickly by the mercy rule. Since I have the game mastered already, it was a breeze to beat all nine teams.

It’s true! Chicks dig the long ball.

Here are some stats about my 9-0 run of the game. I outscored my opponents 112-4, and I allowed all four of those runs in one inning of my first game. Every game I won by the mercy rule and I averaged a little over 5 innings per game. I pitched two separate three inning no-hitters and struck out 90 batters total. I got 145 hits, including 28 home runs, and I only allowed 23 hits. It was a pretty thorough bashing of the other teams, but I expected nothing less!

One interesting tidbit about R.B.I. Baseball is that it is the first console baseball game that uses actual MLB player names. This is because the game is the first baseball game officially licensed by the Major League Baseball Players Association. However, the game is not licensed by MLB, and as a result it cannot include the names of the actual teams. So here you have the names of the players but not the name of the team, leaving only the city names to represent the teams.

It may not be easy to see just looking at the game, but R.B.I. Baseball is a classic title that is still fun to play today. Appearances can be deceiving, since the characters are large, chunky sprites and the movement feels slow. The music, while catchy, can get repetitive over a long play session. What really matters is that R.B.I. Baseball is simple and easy to play. It may be a trimmed down experience, but it is so intuitive and quick to start playing that it has maintained its popularity for all these years. If the formula is good enough for a modern remake, then it is good enough here.

#44 – R.B.I. Baseball