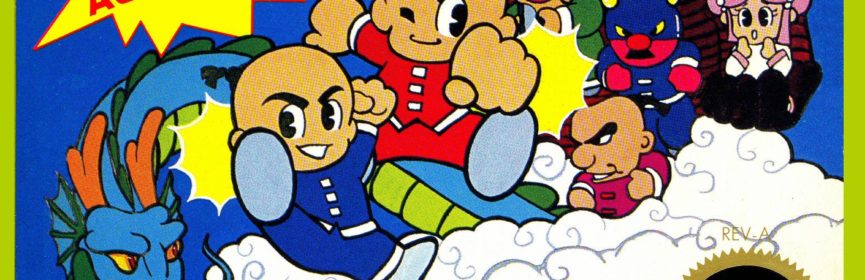
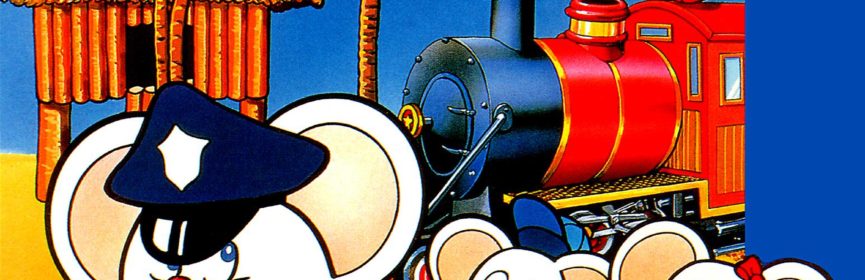
Take on the NES Library

An 8-bit Extravaganza!

namco

APR
19
2019
0

#116 – Mappy-Land

Another one of Namco’s iconic characters gets his own land!

There’s no gradient, but a three-color title is good enough

To Beat: Finish Level 4-8
Played: 3/8/19 – 3/9/19
Difficulty: 3/10
My Difficulty: 3/10
My Video: Mappy-Land Longplay

Mappy was a popular arcade game by Namco that released in 1983. The NES received many arcade ports during its lifespan, including many other Namco classics such as Galaga and Pac-Man. Mappy did get a Famicom port but never saw an NES release. Instead, what we got was Mappy-Land, a console-only sequel that extends the formula from a score-based arcade game to an adventure game. Let’s dive in and see how that panned out.

Mappy-Land was developed by Tose. It was first released on the Famicom in November 1986. There it was published by Namco. The NES version in North America came out way later in April 1989, published by Taxan. It was also included on Wii U Virtual Console worldwide in 2015. This game and the arcade original were the only two Mappy games released in the US. Japan had the arcade sequel Hopping Mappy in 1986 and a Famicom platformer in 1989 called Mappy Kids.

In Mappy-Land, you play the role of Mappy over four different stories, most of which center around Mapico, Mappy’s girlfriend. In the first story, you are collecting cheese as a present for Mapico’s birthday. In Story 2, you gather wedding rings because Mappy wants to marry Mapico. The third story has you collecting Christmas trees for a party. In the final story, you find baseballs for Mappy Jr.’s birthday party. Each of these stories consist of eight areas, so in all there are 32 areas to clear in Mappy-Land to consider the game beaten.

Collect items, avoid enemies. Sounds simple!

This is a simple maze-chase style game with equally simple controls. The D-pad controls Mappy. You can walk left and right. Press Up or Down to use ladders. The B button lets Mappy perform a small jump. Most items are in the air and Mappy jumps to grab them, and even though B-button jumping is normally something I hate, it didn’t bother me this time. The A button is used for deploying weapons. That’s all there is to it.

The ground rules for this game are also simple, mostly following from the original Mappy arcade game. You start on the bottom left and the enemies, the cat Nyamco and his crew of Mukies, begin pursuing Mappy from the upper right. This is a scrolling game that expands several screens horizontally. The structure of each level is four floors high that are sometimes connected by ladders. Empty vertical columns often contain a trampoline at the bottom that Mappy and the enemies can use to switch between the floors. Mappy passes through all enemies unharmed while on the trampoline. You can only get off the trampoline while moving upward, and after a few consecutive bounces the trampoline will vanish until you either get off or fall through to your death. Mappy loses a life if he collides with an enemy or if he falls, except when he is either on or leaving a trampoline. You can also fall on top of a partial ladder and be okay. The goal of each level is to collect the six items from the story, then exit to the right.

Since you can’t always navigate your way around all the pursuing enemies, you have some defensive weapons at your disposal. These are displayed in a row at the top of the screen and you can collect more as you find them. Press A to use them, however you can only the item positioned at the end of the list, so the last item collected is the first one used. You start off with three cat toys. Mukies will get distracted by them allowing you to pass through them, but Nyamco is unaffected. Coins do just the opposite; they distract Nyamco but the Mukies don’t bother with them. Pots cause Mukies to faint, letting you pass by safely. Fish are thrown forward and bounce ahead, which causes all enemies to chase them.

I was able to distract the muky but not Nyamco.

Each of the eight areas has a different visual theme, a different costume that Nyamco wears, and a unique attacking weapon that shows up at fixed locations in the stages. The first area is Railroad Town and it contains pulleys. Grab one and Mappy will slide to the left, knocking out any enemies in the way. The second area is Western World and there are punching bags. Jumping into one cause it to rock back and forth for a while which knocks out passing enemies. The next area is Tropical World with fireworks. These are like bombs. Set them up with a jump and they will sit there until an enemy passes and it explodes. The fourth area is Jungle World. This area has a different structure from the others. There are no weapons here, but the level layout is a wide open space with no floors and no enemies that actively pursue you. There are trampolines strewn about, many of which are high up off the ground and slide left and right. Use these trampolines to catch and cling to vines that help you cross pools of water. You can fall safely after bouncing and you can control Mappy with Left and Right as you fall, but you must land on a trampoline after leaping from a vine or you will lose a life.

The fifth area is Pirate World. This one has horizontal bars and Mappy will swing around them for a time, hitting any enemies that pass by. The sixth area is Ghost Town which also has a different play style than the other stages. This is another open area where Mappy uses a balloon to fly around. Use the D-pad to fly in any direction. Mappy is armed with an infinite use flashlight that he shines when you press A. The cats fly around as ghosts and you can vanish them with the flashlight. Here you collect keys to open a door leading to a side area. You have to find an item here that lets you pass through to the end of the stage. The next area is Seventh Avenue and it contains sticks that you bop from underneath to hurt enemies above you. I never was able to utilize these when I played. The final area is Muky Town. There are bowling balls that roll along the ground when you release them, taking out enemies along the way. Instead of going off to the right when you collect all the items, you must enter the castle door in the center. This takes you to another side area with no enemies and a new set of items. You must collect all the items here and reach Mapico at the end of the area before the level song completes. If you fail, you are awarded no bonus points but you get to repeat that part again as many times as needed without losing any lives. Complete it to earn a point bonus, then you go to the first area of the next story.

It’s nice not being chased sometimes.

As you proceed through the stories, the enemies start chasing you faster and thus are harder to avoid. Some areas also have the exit blocked, just like how I described above about Ghost Town. In that case, you need to locate the sub area that opens once all items are gathered. Inside the sub area, you have to collect another item that lets you pass through to the end of the main area outside. The entrance to the sub area is often telegraphed by a doorway in the background that you wouldn’t have otherwise noticed.

Now I’ll cover a few miscellaneous features and tips about Mappy-Land. Sometimes, the necessary sub area is made a little bit harder to find because you need to jump into the entrance. This tripped me up on one specific level. You can use both kinds of weapons together. For instance, you can distract a bunch of Mukies with the cat toy and then run them all over with the pulley in the first stage. Combo attacks like this also earn you a bunch of points. It is also possible to jump over a single enemy if you get trapped. I wasn’t aware this was possible until I re-read the manual after beating the game. Even though it’s not necessary for beating the game, I know it would have been handy to know that.

Mappy begins with two extra lives. There are no extra life pickups but you do earn a free life at 40,000 points. I didn’t score much higher than that so I don’t know if you can earn more lives or not. Dying in a level maintains the items collected, and that’s helpful for clearing some of the more difficult areas. You have unlimited continues to use when you run out of lives. You go back to the title screen but you can choose the Continue option on the main menu to restart the latest level. Be careful to manually select the Continue option so that you don’t accidentally start from the beginning and lose your progress. Mappy-Land has your back anyway in case that happens. The game features a built-in Stage Select option. You can choose to play any story and any odd-numbered area in that story. This means you can skip straight to 4-7 from the start and only have to play two areas to get the proper ending!

Some levels have you entering rooms in the background.

This was my first time playing through Mappy-Land. I only played one area during my initial cart testing. I remember reading about this game in my old gaming magazines. I didn’t get a chance to try it until I collected the game as an adult. I haven’t personally come across many copies of this game, but it is reasonably common. A loose cart sells for around $8 or so. My copy has some label peeling, so I wouldn’t mind running into a condition upgrade in the future.

I didn’t have much trouble beating this game for the first time. This is a straightforward game that you can just keep trying until you get through. There are a few tricky spots to cope with. Jungle World is cumbersome at first with the floating trampolines and unintuitive physics. If you don’t catch the vines in the right way, it is possible to fall to your doom between them. It reminds me of Spelunker but not in a good way. Some of the later levels are laid out where one of the objects you need is located on a one-way path. It can be tricky to get the enemies to cooperate so you can get through, but that’s why you have your weapons. I would take an intentional death just to ensure I could get an item in an out of the way location. This is a minor spoiler, but there’s a level where the floors are invisible unless you have a torch that you found in the previous area. If you have to continue on that stage then you are locked out of the torch altogether. While possible to navigate blind, it is really helpful to see the layout at least once before. I didn’t have to go back a level via the stage select or anything, but that was an option I might have considered if I were stuck for a long time. My longplay video was my second attempt and it went well enough. I got stuck for several minutes on 4-1, which was the only major blemish in an otherwise average run.

I had a fun time playing Mappy-Land, though it’s not without its issues. The graphics are simplistic but detailed enough with the different backgrounds and costumes for Nyamco. They might be nice for 1986 standards but not as great by 1989 when it reached the NES. I liked the music and how there was a different song for every area. They even brought back the original Mappy song for one of the sub-areas. The controls are easy to learn and use. The gameplay is okay but it gets repetitive. It’s not a terribly long game, but 32 levels of being chased around simple mazes is quite enough. The mechanics drag this game down a little bit. Mappy can fall from any height after bouncing off a trampoline and be fine, yet if he takes a tiny fall of a ledge he dies. But you can fall onto a half-ladder with no trouble. The rules don’t really make sense, but to be fair, neither does passing through deadly enemies on the trampoline. The Jungle World is the worst offender here, trying to flesh out some platforming that doesn’t fit the style of this game. Ghost Town with the floating balloon does it much better. The game is a little bit janky overall. I haven’t sold the game well here, but I had fun playing it and I appreciate its modest difficulty and some nice touches along the way.

#116 – Mappy-Land

 
OCT
23
2018
2

#99 – Sky Kid

Take to the skies in this lengthy shoot-em-up.

It’s called Sky Kid, not SkyKid.

To Beat: Defeat the spaceship to see the ending
To Complete: Complete two loops
What I Did: Reached the halfway point of the second loop
Played: 8/21/18 – 9/7/18
Difficulty: 9/10
My Difficulty: 9/10
My Video: Sky Kid Longplay

This project is constantly full of surprises. Most of them are good, and I’d like to think I have hit a nice string of positive surprises. Sky Kid was the kind of surprise that blindsided me a little bit. Here we have a cutesy shoot-em-up game with little airplanes, tanks, and loop-de-loops. It’s just the happiest looking game. Underneath the pretty exterior, however, is something far more devious than I would have imagined. Sure, the missions get more challenging as you go, but Sky Kid just keeps going and going. Just how many missions does this game have? I won’t keep you waiting too long for the answer.

Sky Kid was first released in the arcades in Japan in December 1985. It was developed and published by Namco. It was quickly followed by a sequel, Sky Kid Deluxe, in February 1986, featuring expanded missions, enemies, music, and other features. The original version of the game was ported to the Famicom in August 1986. The NES port came out later in September 1987 and was published by Sunsoft. Both the arcade version and NES versions were released on all versions of the Virtual Console.

Sky Kid is a horizontal scrolling shoot-em-up. You play the role of Baron and the second player is called Max. The names are short for Red Baron and Blue Max. There’s no story here, just fly your plane through the standard missions as they are called out on the screen. Sky Kid features a whopping 26 missions. It may not sound like a big deal, but trust me, it’s quite a lot for a game like this. The goal of the game is to destroy a spaceship that appears in the final mission. Do that to get the ending.

Up, up, and away!

The controls are simple. Use the D-pad to fly in all directions. This game is an auto-scroller so when you fly left or right, you are actually just speeding up or slowing down. The A button fires your machine gun. You have unlimited shots and can have three bullets on screen at a time. The B button lets you perform a loop-de-loop move. If you collect a bomb, drop it with the B button. The Start button pauses the game.

All missions share the same structure. You begin a mission on the runway with the goal of bombing the target. Then the game starts scrolling to the left, instead of to the right like most horizontal shooters. You have to steer upward right away so you don’t crash into the scenery ahead. When you approach the end of the mission, you will see a row of three girls wearing red. Soon after that is the runway with text on the screen telling you to Land Here. Simply touch the runway to land and end the mission, no matter if you actually bombed the target or not. If you skip the runway you will be taken over open water and will automatically crash into the sea. I guess this is the way the game tells you that you have no more fuel. Crashing past the runway does complete the mission, at least.

A game mechanic clear from the start is that you can fire your machine guns in three directions. Shots will fire only in the direction you are facing. Fly up and your plane will angle upward, allowing you to shoot diagonally. Same thing goes for flying down. Hold steady to shoot forward. To take advantage of this style of aiming, the game has both air enemies and ground targets for you to blow up.

You can aim upward or downward toward pesky enemies.

The loop-de-loop is a handy maneuver that you can perform at any time. Simply press B while holding still to fly quickly in a clockwise arc. This moves you backward to the right a fair distance and you can use the move while being tailed to get behind the enemy. You can also perform an upward loop by pressing B while flying up, and a downward loop while flying down. The upward loop pushes you both up and to the right a little bit, while the downward loop pushes you down and slightly forward. Beware that some enemy aircraft can also perform loops. While in the loop, you are invincible to both enemy fire and enemy planes, so this is both an evasive move and a defensive move. You can’t just spam the loop-de-loop the whole time because there is a brief delay between finishing one loop and starting another, not to mention you can still collide with the scenery while looping and die that way. You can loop as many times as you want! You can also shoot your gun while looping. With good timing you can fire backward. In my experience this isn’t something you can reliably count on, rather it’s more of a happy accident if you hit someone behind you.

In addition to the basic air and ground enemies, there are large bases on the ground. You destroy these bases with bombs. As you are flying along you will hear a beeping indicator over the music to tell you a bomb is approaching. The bomb lays on the ground and you pick it up simply by flying into it. Now you will hold the large bomb underneath your plane. You can deploy the bomb at any time by pressing the B button. Now since the B button is used for this purpose, that means you can’t do loops while holding a bomb. Ground bases are comprised of three parts and you want to aim for the center section. Hitting the middle destroys the entire base and gives you more points than if you hit either side of the base.

Sky Kid also has a recovery mechanic for when you get shot or fly into an enemy. When you get hit you start to spin out and descend, and you lose complete control of your plane. You can regain control by holding Up on the D-pad while pressing A and B rapidly. You are bound to hit the loop button after recovering like this, and normally that is okay. It does put you at risk of colliding with something else and spinning out all over again. It takes longer to recover for every time you get hit and eventually you will end up crashing if you take too many collisions like that. During a two-player game, a player can shoot his partner to recover him during a fall instead of performing the button mashing. Teamwork does make a difference!

Enemies come from almost every direction.

There is a wide variety of enemies and enemy types. Air enemies are mostly planes that resemble yours, however there are a few different movement patterns and tactics to deal with, plus they can enter the field from either the left or right side of the screen. Large planes fly in from the right side and drop several slow-moving bombs that you can destroy with normal fire. There are green parachute enemies that have an upper and lower portion. You get a point bonus for destroying both parts before they get away. Ground targets include armored cars that have no guns and tanks that either fire straight ahead or up at an angle. Ground turrets fire large shells that have a spread effect when they blow up, and these shells are even aimed at you a little bit. Boats can fire both normal and large shots. Submarines pop up briefly but give you a point bonus if you take them out. In later levels, if you hang out in the upper-right part of the screen for too long, Kamikaze pilots will come at you and detonate large explosives. There are other hazards that show up in later stages.

At the end of each mission you can earn bonus points. Sky Kid keeps a tally of each air target, ground target, and base you destroy within the mission. For both air and ground targets, you get a medal for every five enemies of each type you shoot down up to a total of six medals for destroying thirty or more enemies. The bonus points are awarded depending on your medal count. You get 1,000, 2,000, 3,000, 5,000, 7,000, or 10,000 points for one through six medals respectively. You earn a large medal for each base you destroy which is worth 10,000 points. You must blow up the entire base by hitting the center to earn the medal.

Drop your bomb early so that it hits the center of the base.

Missions 8, 16, and 24 are Shooting Gallery stages. There are no enemies at all, just targets to aim at. These are short levels and are a nice breather from the normal firefights. After the mission you get medals and bonus points depending on how well you do. You can earn up to four medals for a total of 20,000 points. I know you get 10,000 points for three medals. I never scored any worse than that. Interestingly, there is no bonus for shooting all the targets beyond the 20,000 points for four medals. You are allowed to miss either three or four targets and still get the best bonus.

There are a few other fun ways to earn even more bonus points by clever use of loop-de-loops. Some stages will have ladies dressed in blue. Fly above her and loop to cause her to release several hearts. Each heart collected is worth 1,000 points given out in a special scene after the mission. Some levels have large billboards in them. Loop above the billboard to generate either a medal or an explosive. The medal is worth 1,000 points but the explosive will kill you. I think this was more lucrative in the arcade version. In this port it’s neat to try but not worth it. Some stages have background elements that you can interact with by looping. For example, in the second level, you can loop while flying in front of the sun to turn it into the moon. This also changes the entire color palette of the level from day to night. You get a 1,000 point bonus too. There are a few of these one-off type interactions over the course of the game.

Each game of Sky Kid begins with three lives and you can earn more lives through your score. You earn a life at 30,000 points, another at 80,000 points, and one for every 80,000 points thereafter. There are no continues in the game and no other ways to earn extra lives. Every life you can earn and every life you can save from crashing matters in this game.

Break the targets!

This was my first time playing Sky Kid on NES. I know I tested this game when I bought my cart but I only vaguely remembered it. I believe I bought this game at a local game store for cheap. Sky Kid was featured on a James and Mike Mondays episode in February 2016 and the game shot up in value for a short time. It started under $10 and peaked at $25 and above for loose carts only. Now it has settled back down into the $10-$15 range. For some reason, 5-screw variants of Sky Kid tend to sell at $15 while 3-screw copies sell for closer to $10. As far as I know, there’s no real difference in rarity between the two games.

It turns out I was misled a little bit on where the game ends. The very useful NES Ending FAQ states you get the ending by blowing up the spaceship in Mission 11 and every eleven missions after that. It also says later that you have to let it go in Mission 11 and get it when it shows up next in Mission 26. Allow me to clear it all up here. The spaceship does appear in Mission 11 but it is just a tease. You need a bomb to destroy it as your bullets go right through it harmlessly, but the issue is there isn’t a bomb available until after the spaceship leaves. You could theoretically beat the game in Mission 11 if you used some kind of cheat code to get a bomb early, and it sounds like that’s what the author of the FAQ did. In Mission 13 there’s a large blimp that appears and you can shoot it down by dropping a bomb right on top of it. It’s not the spaceship though. It counts the same as blowing up a base and the game keeps going. I had hoped that maybe the game looped after Mission 15, and that Mission 26 was just the second run of Mission 11 with an early bomb. That was wishful thinking too. Indeed, there are 26 unique missions you have to play under normal circumstances.

What a tease!

Playing through the whole game is quite a feat. I really had no idea this game would be so challenging to beat. I wish now that I had better documented my attempts. I estimate that it took me 30-40 attempts to beat the game over 15-20 hours total. Progress through the game was slow but steady. At first I could only beat a couple of missions. By the end of the first day I reached only Mission 7 or 8. Missions 11-14 represented the first major roadblock and a noticeable bump in difficulty. Mission 20 was a particularly challenging one as it introduces a new hazard that appears to be somewhat randomized. The last two missions are very difficult. Once I was consistently reaching the 20’s, it became a matter of getting that far with enough lives in reserve to survive until the end.

I experienced several near misses and heartbreak before finally beating the game. I reached Mission 25 seven or eight times and Mission 26 at least four times. One time I got to Mission 25 with four or five lives in reserve and lost them all in a row. I had a run where I played almost perfectly through the 20s only to have the TV get shut off during the final mission. My AVS console is powered by the TV through USB so that run vanished when I lost power to both. I saw the Mission 26 spaceship for the first time on my last life of a run. I picked up the bomb I needed, but I got shot soon after which causes you to drop the bomb. I watched the spaceship go by hoping the stage would repeat somehow. It turns out the final mission has no runway, just the final expanse of water. Watching my plane crash into the sea was devastating. The next time I saw the final spaceship I kept my bomb and didn’t miss. Sky Kid’s second loop increases the difficulty by making everything fire much more frequently. In my longplay video, I got up to Mission 39 before losing for good. Reaching halfway through the second loop was more than I could have hoped for.

The action can get a little overwhelming.

I have a few tips and observations of the game that might be a little helpful. I appreciate that Sky Kid has some innate risk and reward elements to its playstyle. If you think about it, the safest place for you to be is the top of the screen. Being as high as you can offers you the most time to make a recovery if you are shot down. It also helps you fly over the hills and buildings that often appear in a level’s landscape that force you to the top anyway. Now you don’t want to be in the upper-right corner because that triggers the Kamikaze pilots. I found the safest location on-screen is a bit left of center at the top. There’s enough time to handle threats from the left while keeping distance from everything else. Ground turret shells can still reach you but there’s enough time to react. If you are being pursued by a plane from behind, you can sometimes do a loop at the top of the screen so that they will follow you and despawn. Now you could stay up there the whole game but you will forfeit a lot of points. Bombs must be obtained from the bottom of the screen and blowing up bases is the key to racking up points and extra lives the fastest. Besides, you are in danger at the top of the screen more often than you would think. There’s room here to play the way that fits your style. I like to score a bunch of points anyway, but here it’s a good strategy because I know I’m better off with more lives and more chances. I tend to stay in the middle of the screen where I can just reach the ground targets. Of course, there’s value in learning the mission layouts and being in position to nix enemies before they become threats. You do have to know some of that to have any shot at later challenges. I have proven you can beat the game with an aggressive approach, and I’m sure you can beat the game with a low score and conservative approach as well.

Sky Kid is a cute shoot-em-up that is fun to play. The graphics are cartoonish in quality and lack some detail, but it looks nice for an early NES game. One graphical issue I failed to mention is the white text is hard to read against a light blue background. There are only a few short songs in the game but they are upbeat and happy for the most part. The controls are responsive. Looping is a fun mechanic that can bail you out of a tough spot but can also get you in trouble if you abuse it. There are several neat details and embellishments such as interacting with background elements and all the ways to earn points. This is a game suitable to play casually, with a friend, or just for points. Trying to beat the game will test you for sure and not many are going see it through to the end. Because this is a simple game, I am going to assume that most people interested in NES games will pass over this one in favor of better, more complex games, and I think that’s okay. Even an average NES game can still provide a good time.

#99 – Sky Kid

 
AUG
03
2018
0

#86 – Kung-Fu Heroes

Punch, kick, and flip your way through this challenging action game.

The title logo palette changes, I think this color looks best.

To Beat: Reach the ending
To Complete: Reach the ending without warping
What I Did: Completed the game
Played: 5/19/18 – 5/26/18
Difficulty: 9/10
My Difficulty: 9/10
My Video: Kung-Fu Heroes Longplay

As you may know, before I started Take On The NES Library, I generated a randomized list of games and I am clearing games in that order. Once that list was set, I have completely ignored it aside from revealing only the next game in the list as I finish new games. I love the mystery of it all and I’m glad I’m doing it this way. Still, there are a few games that I remember where they fall on that list. For no particular reason, I remembered that Kung-Fu Heroes appeared somewhere in the 80s. Well, here we are! Perhaps this game stuck out to me because I knew that it was a sneaky difficult game. Let’s jump in and see what I was up against.

Kung-Fu Heroes began as an arcade title named Chinese Hero. It was developed by Nihon Game and published by Taiyo System in Japan and Kitcorp in North America. It released in 1984. A Famicom port of the game released in 1986 under the name Super Chinese. That version was published by Namco under the Namcot label. The NES version wouldn’t come out until March 1989. The NES version was also developed by Nihon Game, but by then they had renamed the company to Culture Brain. They also published the game on NES. Kung-Fu Heroes is the first game in the Super Chinese series. There were three Famicom games in the series. Super Chinese 2 would release on the NES as Little Ninja Brothers, and Super Chinese 3 is exclusive to the Famicom.

Kung-Fu Heroes is a top-down action game. You’ve heard this kind of story before. Monsters come and capture Princess Min-Min while also taking away ten treasures. You control either Jacky or Lee to battle the monsters and restore peace. (I wonder where their names came from?) Kung-Fu Heroes has a two-player mode with simultaneous gameplay if you want to tackle the game with a friend. The game takes places over eight castles with four areas each. Your task is to defeat enough monsters in each area so that the door opens to the next area. Once you complete all 32 areas, you save the princess and beat the game.

A nice courtyard becomes a battleground.

The controls to this game are more complicated than they first appear. You walk with the D-pad, moving in the four cardinal directions. Press A to punch. You reach forward by stepping quickly ahead and back when you punch and enemies break apart completely when you defeat them. You can perform the moon sault kick by pressing the B button. This also acts as a jump button. Hold down a direction and press B to jump kick into the air. You can defeat some enemies while airborne, and others you can defeat when you land on top of them with the kick. If you press B while standing still, you will perform a special move called the miracle kick. During the miracle kick, you move really fast and can jump much further than with the moon sault kick. There are a few other things you can do under special circumstances that I’ll cover later.

It’s a little unclear what you have to do in this game when you first start playing the game, so I’ll clear that up first. All the action takes place on a single screen. Enemies will appear one at a time periodically from the sides of the screen. There will be no more than four enemies on the screen at one time. After defeating twelve enemies, the door at the top of the screen will open, accompanied by a loud beeping noise. Unfortunately, there is no indicator for how far you have progressed within a level. Sometimes you don’t need to defeat all twelve enemies. Either way, as soon as the door opens the enemies speed up significantly. You can continue to beat them up if you want. To end the level, walk through the open door.

The top of the screen contains most of the information you need during game play. The first row has a bunch of icons and counters. The first one is of a little face that displays how many lives you have remaining. The next one is a letter K which indicates how many miracle kicks you can use. The second player also has these indicators on the right side of the screen. There are three more counters in the middle that are shared between both players. E indicates the number of E-balls you have, the fist icon indicates your punching power, and the money bag displays how much money you have. The second row on the menu bar contains the score for each player. In the middle of the row is a space reserved for any permanent treasures you acquire.

Punch to collect treasures, for nothing is fist-safe.

As you can see, there are a lot of items and abilities in this game. Most of them are acquired through collecting items within each area. Many levels will contain several rocks or blocks. You can punch these blocks to reveal an item that emerges from the block as a bubble. Then punch the item to collect it. The most common item you will see is a treasure box. This will hold one of many different items or upgrades that may not be immediately apparent. It may upgrade your punching power one level, which caps out at three, and you need certain power levels to defeat certain enemies. It may give you five miracle kicks. It might give you a money bag, which you can hold up to six. It might also contain one of the ten treasures. A new treasure will appear blinking at the top of the screen when you get a new one.

Another item you can find is a key. Collecting this opens up a staircase on the block where the key came from. It will close up after some time, but you can enter the stairs before then to go to one of two areas. The more common area is the bonus room. This is a timed room that generates items for you to collect. Red apples just give you points. The E balls are better in that collecting five of them gives you an extra life. This is also what E balls do in the main levels, however collecting them in the bonus area is separate from collecting them during levels. Also, in the bonus areas are a stream of bullets that you should dodge. Dying in the bonus area just ends it early without losing a life. Besides the bonus room, stairs may also lead to a warp room. In this room there are two holes and you can jump in the one you want to advance either a few levels or several levels ahead.

Some levels contain a gun ball item. This is a ball with the letter G on it. When you collect it, you can fire gun balls when you punch for a short time. Firing horizontally causes the gun balls to bounce on the ground as they move ahead. Firing vertically throws them in a straight line very quickly. There are a few upsides to the gun ball. You can use this to kill enemies that usually require more difficult techniques to defeat. Enemies will run away from you while the gun ball is active, and they are unable to shoot projectiles of their own. A few enemies take several gun balls to defeat, so fighting them may not always be worth it.

Bonus rooms are full of items and bullets.

The final items you can collect are question balls and 1ups. Blocks that do not hold items any more, or blocks that don’t hold items at all, can still be interacted with in a couple of ways. Some blocks go flying when you punch them. You can shove the blocks into other enemies and defeat them for more points than with standard attacks. Otherwise, you can keep punching an empty, stationary block to eventually generate a question ball. This will either contain a money bag or an X ball. The X ball resets your money bag count to zero. These blocks are the easiest ways to collect money bags but it is risky. 1ups are uncommon items that tend to appear on empty spaces and you reveal them by punching the air. Makes sure to take note of these special locations if you happen to find one. Finally, the last thing you can find in the levels is another bonus area called Break Time. This takes you to a separate screen where you gain half a million points and can take a free 30-second break if you desire. You can’t control your character or do anything aside from leave early.

Money bags are used to trigger two special items. Simply collecting five money bags generates an E ball somewhere on screen, and remember, five E balls equals an extra life. If you have six money bags, you can redeem them for a P ball. Press A and B together while standing still to make the P ball appear. Be patient because the controls for this are very rigid and I think you have to press both A and B together on the exact same frame to get the P ball to appear. Collect the P ball to turn invincible to enemies for a little while. Enemies turn blue and will run away from you. You can defeat them by simply running into them. It’s a great way to help when clearing difficult rooms.

The ten treasures you find throughout the game all have various effects. Most of them boil down to making it easier either to defeat or to avoid certain enemies. A couple of them reveal hidden dangers in later levels. If you mysteriously die in some of the later levels, you might be missing a treasure that could help. One treasure is a sword. You unsheathe the sword by pressing both A and B at the same time while you are walking, and you put it away the same way. The trigger is similar to the P ball and it’s important to remember the difference so that you don’t accidentally reveal the P ball when you don’t need it. Our hero will hold the sword out while it is in use. There are a couple of enemies that are only vulnerable to the sword.

Uni-Gon is the closest thing to a boss in the game.

There is a wide variety of enemies in this game. Most of them have different attacks, too. The standard commando enemies can punch and kick just like you. There are spear men and gun men. There’s a coffin enemy that will hold you inside of him briefly. A couple enemies fire medusa beams that freeze you for a bit and leave you vulnerable. One enemy just pushes you around. There are two large enemies that you need to watch out for. Uni-Gon is a huge, mummy-like monster that pursues you alone. All other enemies leave when he shows up. He can also breath fire. You can defeat him by punching him five times, but it is extremely risky. I’ve only done it once and usually I just avoid him until he goes away. If you can defeat him, he will leave an E ball behind. The other large enemy is a dragon. He is only vulnerable to the sword and you also have to hit him five times.

There are other features to some levels. One useful feature is the quick passage. These are doors on the left and right edges of the screen and most levels have them. If you walk through the door you will wrap around to the other side of the screen. Some levels have two pairs of quick passage doors. These are most helpful in evading Uni-Gon, but enemies can use them too so that’s another thing to keep in mind. Some levels have wells in them. These are just like the holes you enter in the warp room, only these kill you if you fall in. Some levels have fireballs streaming out of these wells. They are deadly to the touch, even if you are jumping in the air or are invincible with the P ball. Stay away. Some levels have pools of water or lava, and those kill you too. Finally, a few of the later levels have moving or disappearing blocks within the water or lava. If you can get on top of those blocks for just a brief time you will earn a bunch of points as well as some E balls.

You start the game with five lives. You can earn up to nine through the various methods already described. It’s a little frustrating to get good enough at the game to go beyond nine lives only for them not to count. There are no continues to the game either. There is a continue code I found by holding A and pressing Start at the title screen. It will take you back to the first area of the castle you were on. However, it is not listed in the manual so it is off-limits for me. The only nice thing Kung-Fu Heroes does for you is that you will always start each new level with at least three lives. If you finish a level with one or two lives remaining, you will get three lives to start the next area. I believe this is a holdover from the arcade game. It’s very generous, but it also speaks to the difficulty of the game in that death is so swift and frequent that those extra lives don’t always help.

If you’re playing for score, don’t miss Break Time.

This was my first time beating Kung-Fu Heroes. This is a game I have tinkered with a little bit off and on. Mostly I didn’t get through the first castle before turning off the game, but it was fun to pick up and try out a few times. I also played this game for the NintendoAge contest a few years back, but I didn’t get much beyond the third castle. I remember buying my copy of the game at my local game store several years ago when prices were still cheap. This game is still cheap today if you are looking to buy a copy.

I was able to beat the game in about a week. I sure played the game a lot in that one week, however. I think it took me over thirty attempts to beat the game. I took detailed notes on item locations which I found helpful for learning the game. By the end, I had all the item locations memorized that I needed. The first couple days of attempts didn’t get me very far. This was because I was spending all the time combing levels for items while also properly learning how to fight the enemies. Soon enough I was getting to the 6th, 7th, and final castle somewhat regularly when I hit another wall. Many of the final areas have no items along with difficult sets of enemies. A few areas include enemies that cannot be defeated, so you have to wait for them to leave so they can be replaced with enemies you can attack. I could do the early game really well only for it all to be wiped out in a flash at the end. I resorted to warping just so I could quickly get to the end of the game to practice. I beat the game that way once, and then the next day I beat it again without warping. The game loops continuously after you beat it, but the difficulty does not seem to change and there’s no special ending beyond the first loop.

It gets tough when there are no items late in the game.

Beating this game requires good technique and strategy. I found each enemy has either a specific way to beat them or a preferred way to beat them. Mastering the moon sault kick is important since you can dodge enemy projectiles and even get a nice point bonus for jumping over attacks. Then you land on top of the enemy to defeat it. It’s dangerous to jump on enemies that can also jump since they will evade your attack. For them, I approach them from the side and punch them or slice them with the sword before they go airborne. Defensively, I always keep my finger on the B button to moon sault kick my way out of danger, such as when the lightning obstacle quickly appears. I didn’t have much use for miracle kicks offensively, but they are very helpful as an evasive maneuver since you move so fast. It might not be best practice, but I use miracle kicks sometimes to go straight at the open door when it’s surrounded by enemies. Miracle kicks are also useful in the bonus room and they are unlimited for that room only. I just avoid both Uni-Gon and the Dragon. Shuffling back and forth through the quick passage keeps Uni-Gon away pretty easily. I also came up with a nice strategy for the final area. I saved four E-balls and six money bags for that stage since it’s the hardest one. I spent the money bags on a P ball when there were four enemies on screen, and then I went to town wiping out as many enemies as possible using the quick passages. Uni-Gon appears here and I can beat him with the invincibility, and then he drops the fifth E ball I need for an extra life. This level is still awfully tough after that, but every little bit helps.

I enjoyed my time with Kung-Fu Heroes. It does feel a little out of place for a 1989 NES release. The graphics and aesthetic are nice. The music is catchy at its best, and a bit dull at its worst. The controls are fine aside from trying to press A and B together. The action is very quick. This is an easy game to pick up and play for a few minutes or to sit down and try to dig into it. This game is also part of a trend among early NES games I’ve noticed where there is more internal complexity to the game systems than it first lets on. All the treasures with different effects and all the other things to keep track of like miracle kicks and money bags seem so overwhelming for what looks like a simple action game at first glance. Therefore, this game is easy to start playing but tough to master. This is a game for people who like quick action games and don’t mind a challenge in the endgame, but I think it’s also a great NES game if you don’t take it too seriously and just want to carve up some enemies for a little while.

#86 – Kung-Fu Heroes

 
OCT
23
2017
0

#56 – Mendel Palace

Shuffling panels has never been this much fun!

The baddies look far less menacing in the actual game.

To Beat: Reach the Ending
To Complete: Beat both the game and the Extra mode
What I Did: Completed the game
Played: 8/7/17 – 8/18/17
Difficulty: 7/10
My Difficulty: 7/10
Videos: Mendel Palace Longplay and Mendel Palace Extra Mode Longplay

There are a lot of weird video games out there, especially today when the barriers to development and distribution are much lower. The NES was around in a time when some gaming conventions were being defined, so developers had the liberty to make some weird games too. Ghoul School is one that comes to mind that I’ve already played. I classify Mendel Palace as a weird game, and in this case I mean it in a good way. Mendel Palace is a frenetic action game that is dripping with character.

Mendel Palace was released in North America in October 1990. The game was developed by Game Freak, who are best known as the developers behind Pokémon. This was the first game they developed. The NES version was published by Hudson Soft. This game debuted first on the Famicom under the name Quinty. There it was released in June 1989, over a year earlier. Quinty was published in Japan by Namco. Mendel Palace has not been re-released, nor are there any sequels.

Mendel Palace is a single-screen action game. You play the role of Bon-Bon. The princess Candy has become trapped in a dream that she cannot escape, and so you might fight all her dolls that have come to life and free Candy. It’s the typical save the princess trope. The object of the game is to defeat all the enemies in each stage. There are 100 total levels spanning several different worlds. If you clear all the stages, then you save Candy and win the game. You can go at it alone or play with a friend in the two-player mode.

It’s a block party!

The main gimmick to Mendel Palace is how you attack enemies. Each stage is in a top down perspective consisting of a 7×5 grid of large panels on the floor. You can walk around in the four cardinal directions using the D-pad. When you press the A or B button, you will shuffle the floor panel in front of you. It is a little tricky at first to determine which panel you will move. If you stand on the edge of the panel facing the middle of it, you will shuffle the one you are standing on. Otherwise, you will shuffle the next tile over in the direction you are facing. The idea is to shuffle tiles when enemies are standing on them, which causes the baddies to get pushed away a short distance. Enemies are defeated when they get shoved into the side of the screen or against a solid object. Sometimes enemies can push you into the wall as well, but if an enemy touches you then you can also die that way.

The other side effect with shuffling panels is that you can reveal other panels underneath. This is not merely a binary flip. Sometimes there are three or more different layers underneath each panel that continuously cycle as long as you keep shuffling. There are many kinds of tiles that can appear in Mendel Palace, including several different item tiles. The most common item tile is the star. You must stand exactly on the center of an item tile to collect it. Stars are accumulated through play and you can see how many you have in a counter at the bottom of the screen next to the amount of lives remaining. The final star tile in a level will blink and you get 10 stars if you grab that one. Collecting 100 stars awards you an extra life, and it also makes you walk faster.

There are two more item tiles that are not as abundant as the star tiles. The first of these is the roulette tile. This cycles between four different items and you get whichever one is face up when you collect it. You can get either a puny 10 point bonus or a generous 10,000 point bonus. You can get a 10 star item for more precious stars. The best award is the 1up! Aside from star collection, this is the only other way to gain lives. The other item panel is the time panel. This is labeled FIVE SEC when you see it in the game. Each level has an invisible timer that causes the enemies to become very aggressive when it runs out. Grabbing these panels extends that timer.

The smile on the sun panel is quite appropriate!

There are a few panels that can affect nearby panels. The most common of these is the cross panel. When you step on it, the tiles in all four cardinal directions will shuffle chain reaction style. If you can get an enemy caught up in the shuffle wave it almost always sends them all the way to the wall. There is a similar panel that does not show up often called the clock and time panel. This one looks like the cross panel but with only one direction lit up at a time. Like a clock, the lit direction changes rhythmically. Stepping on this panel causes a wave in only the direction it is pointing. The sun panel is the most powerful of these in that it shuffles all tiles on the screen radiating outward from the sun panel. Most of the time this wipes out all the enemies in one shot, so it can be very nice to find.

There are a couple of bonus panels that transform the game board in ways that can be helpful. The more common of these two is the moon panel. This one dims the lights in the level and replaces all walkable tiles with stars. There is a tradeoff with this one however. Solid panels remain solid but you cannot see them in the dark. If you are being pursued by enemies in a level with now invisible solid panels, it may not be worth the extra stars. The better bonus panel is called the special bonus panel. It has a swirl design on it and flashes colors. Run into this panel and you will be whisked off into a bonus screen filled with stars and no enemies. There will be an additional counter at the bottom of the screen indicating how many stars are available in the bonus area. Sometimes you need to shuffle panels to reveal stars, but most of them are visible from the start. There is a time limit indicated by faint color changes in the small tiles around the border of the level. If you collect all the stars before time runs out, then you get bonus stars. Play proceeds to the next level, so using the special bonus panel is an easy way to clear a stage for free.

Special bonus panels flip you right into star paradise.

Here are the remaining panels in Mendel Palace. The metal panels are solid panels that appear raised on the screen. You cannot pass through them, but you can shove enemies into the metal panels to defeat them. Some enemies can smash through the metal panels leaving behind a broken panel, which acts like the standard blank panel. The lock panel has screws in the corners indicating that this square can no longer be shuffled. The attack panel is an orange panel with the same swirl design as the special bonus panel. This launches you forward in the direction you enter the panel. It’s called the attack panel because you can defeat enemies if you collide with them after this panel pushes you. It spins for a little while so you can run back into the panel to do more damage. The final panel is the game is the enemy panel. It looks like a warp portal, and it acts like one too. New enemies will spawn from the enemy panel if there is room for them in the level, and then the panel transforms into a blank panel. Revealing these panels can keep the level going even if all other enemies have been defeated.

At the start of the game, you are shown a map screen with nine different houses. You can choose any of the houses except for the one in the center which is saved for last. Each house is based around a specific enemy type and consists of ten levels. The enemies themselves may have multiple variants, and the more difficult versions appear in the later levels of the house. The final level in each house is a boss fight that somehow incorporates the base enemy for that house. Let’s talk about each one!

This is the best choice for the new player.

The upper left area is the house of Moko-Moko, and this is the recommend level to begin the game. Moko-Moko is a rather plain enemy that doesn’t do anything other than walk around. The second form of Moko-Moko has light blue coloring, and he splits into two smaller enemies whenever you push him.

C’mon get hoppy!

The upper area is the house of Dragon. This enemy moves by making small jumps across the board. You can only push Dragon whenever he lands on the ground, so you have to time your shuffles to fight them. There are three different versions of Dragon. The normal one wears pink pants. The second version wears green pants and they don’t start hoping around until you approach them. The third version wears red and makes longer jumps.

Their drawings are so life-like!

The upper right area is the house of Vinci. These are often referred to as doodlers. They move slowly around the level and will occasionally stop on a panel to draw on them. This leaves them vulnerable to attack. If the finish their drawing, that panel becomes locked. The normal doodlers wear pink, and the green ones can also generate a ghost enemy upon completing a drawing. One interesting tactic is that is it possible to leave every tile in the level locked by either doodles or lock panels. If this happens, you win the level automatically and get a large point bonus to boot.

They can take your frustration to new heights.

The right area is the house of Toby. These enemies take a long jump straight up if you try and shuffle the panel beneath them, but they are vulnerable when they land. While waiting for one to land, you can easily get surrounded by other ones. The ones with red hair jump higher than the ones with brown hair.

Taking Follow the Leader too seriously.

The lower right area is the house of Mira. They attempt to imitate your movements. They take a step forward when you do, and they shuffle panels when you do. They will even move if you simply turn your body in another direction. If you stand still they don’t move at all and the music even stops. They can shove each other so you can get them to defeat themselves sometimes. The red versions move faster than the yellow ones.

Just keep swimming.

The lower area is the house of Wasser. They are swimmers and are often referred to as such. They will walk around the perimeter of the level and then swim straight across the stage when they line up with you. As they swim across, they shuffle the panels behind them with their feet. Wasser is a clever enemy type in my opinion. The regular version of Wasser is colored green and they swim in straight lines, while the harder blue version swims at angles and can also turn toward you mid-swim.

I like the flowing stage music here.

The lower left area is the house of Tako. These enemies are dancers and resemble ballerinas. Most enemies cannot move diagonally, but Tako can. They glide around the level homing in on you, but they take time to turn around if they pass you. Eventually they wear out and stop for a break before moving again. The normal Tako is orange, and the red ones move much faster and can break through metal panels.

These heavy enemies may take several pushes to defeat.

The left area is the house of Sumo. These are large, slow enemies that only get pushed a short distance, so the idea is to keep pushing them several times consecutively. After a Sumo is shoved, he will attempt a sumo stomp that shuffles a wave of panels away from him. The white Sumo is the regular type, and the purple one is heavier and takes more shuffles to move.

One final enemy type for good measure.

Once all eight houses are finished, Mendel Palace in the center opens. This stage features ten more levels that use all the enemy types so far. After that, there are ten final levels that feature one last enemy type.

Mendel Palace is a difficult game to take on all at once. The enemies swarm constantly and it takes either good technique or luck to get the breathing room to start defeating them. The difficulty is mitigated heavily by unlimited continues. After Game Over, the title screen displays the word Continue and all you have to do is press Start to resume play at the same level you lost. As long as you keep the NES powered on, you can brute force the entire game one level at a time. Holding the A button causes the Continue text to disappear, so if you want to start all over you have to press Start with A held down. It’s very kind of the developers that they made it simple to continue and you have to go out of your way to start completely over.

I have played some Mendel Palace before for the NintendoAge contest. I got a taste of each of the houses as I tried to figure out the best way to score the most points. The later part of the game was all new to me. Mendel Palace is not exactly common, but it is not hard to find online. I picked up my copy at a local store during a buy two, get one free promotion. I believe I bought Mendel Palace, TaleSpin, and Whomp ‘Em together for $16 total. That is a little more than what Mendel Palace is worth alone at the time of this writing, and I did particularly good on Whomp ‘Em given its current price.

I intended to play Mendel Palace for about an hour, but like most good intentions of mine that turned into me beating the game over about two hours. Some of the later levels are very challenging and it made me want to keep playing until I could surpass them. However, not only was I not recording my playthrough, but I also forgot to take a picture of the TV when I finished. It took me about a week before I got the time to play through the game with everything set up. I think I played the second time a little better but I still died plenty.

This level still gives me nightmares.

Mendel Palace has a secret Extra mode containing 100 new levels. Nothing in the manual or the game mentioned this mode. To play Extra mode, first make sure the NES is powered off. Then hold down Start and Select and turn on the NES. If successful, you will see the word Extra on top of the title as well as a different color on the title text. This mode has a few differences over the normal game. The biggest change is that there is no map or level selection. Instead you play all 100 rounds in the same order. There are stars but there is no counter displayed like in the normal mode. The number of extra lives caps out at five and even the lives display is different. You will get different enemies from level to level instead of grouped together. This mode is significantly harder than the normal game. It took me almost three hours to finish all the levels and I stayed up way too late to get it done. The ending you get is the same as the normal game, so this is purely an optional mode. I beat it anyway because I really like Mendel Palace and I’m not going to leave new levels on the table.

Mendel Palace is a very fun game and one that I give my full recommendation. There’s not another game quite like it, and all the different enemy types, stage layouts, and the action all bundle together nicely. The music is upbeat and catchy, and the graphics have a pastel and almost cell shaded look to them. There’s a lot of stuff going on at one time, from the multiple panel shuffling animations to the marble spray when an enemy bites the dust. Mendel Palace manages to run fast despite all the action on screen. There is a lot of sprite flicker, and that’s a negative you have to accept for a game like this on the limited NES hardware. A few stages and bosses are very frustrating in their difficulty too. Aside from those complaints, Mendel Palace is this weird game that’s a blast to play.

#56 – Mendel Palace

 
JUL
31
2017
0

#48 – BurgerTime

Build the biggest believable burgers in BurgerTime.

Another plain arcade title screen.

To Beat: Finish 6 Levels
Played: 3/28/2017 – 3/29/2017
Difficulty: 6/10
My Difficulty: 6/10
Video: BurgerTime Playthrough

BurgerTime is another one of the many arcade ports that made its way to the NES. I did not play the arcade version of the game, but I do have some nostalgia for this NES port. I had left the game mostly untouched for the past 25 years as just about all my experience of this game came when I was young. It’s time for me to experience this blast from the past and shed some new light on both this game and its successors.

BurgerTime was first released in arcades in Japan as Hamburger, and then the name was changed over when it came to the US. It was originally released in 1982 by Data East as part of the company’s DECO Cassette System. This was the first arcade system where one could buy a standardized cabinet and load different games to the machine using cassette tapes. BurgerTime also got its own standalone cabinet published by Bally Midway. The game received around ten ports to various computers and consoles, such as Intellivision, ColecoVision, and the Apple II. The Famicom port of BurgerTime was developed by Data East and published by Namco. It was released in November 1985. BurgerTime was brought to the NES in May 1987, this time published by the developer Data East.

There are also a number of sequels and spin-offs for BurgerTime. An Intellivision-only sequel named Diner was released in 1984 where you push balls of food to the bottom of the screen and into enemies. Peter Pepper’s Ice Cream Factory was also a 1984 release in arcades where you build ice cream cones. Super BurgerTime was a 1990 arcade game that is an enhanced version of the original concept. The Game Boy received BurgerTime Deluxe in 1991. Namco released an updated version of the original game for mobile devices named BurgerTime Delight in 2007. Lastly, a 3D version of the game called BurgerTime World Tour was released in 2011 on Xbox Live Arcade and the Playstation Network, with a Wiiware version arriving in 2012.

Who put all this stuff here in the first place?

BurgerTime is a single screen action game. The screen is filled with platforms and ladders, and there are various slices of hamburgers, buns, and toppings across the board. You control the chef Peter Pepper as he must use all the ingredients on screen to build gigantic hamburgers underneath the level. You do this by running across the ingredients causing them to fall to the level below. If an ingredient falls on top of another one, it falls as well potentially setting off a chain reaction. Once all the burgers are assembled, you complete the round and move on to the next stage.

A game like this wouldn’t be complete without enemies, and there are three different types in BurgerTime. They are named Mr. Hot Dog, Mr. Egg, and Mr. Pickle. All three enemies behave in the same way by following you around the board. Mr. Hot Dog is the most numerous of the enemy foods. Mr. Egg appears in fewer numbers and he tends to be a little bit smarter as he tracks you. Mr. Pickle appears in the later levels and also tends to be a bit smarter like Mr. Egg. The only way the enemies defeat Peter Pepper is to run into him, so you should always be on the move.

Peter Pepper can use the ingredients to his advantage in dealing with the enemies. If one of the ingredients falls on an enemy, they get squished and you get points. After a few seconds, a new enemy will take his place and join the fray. You can also displace enemies by dropping an ingredient they are standing on. Not only does this knock out enemies for a short time, but it also causes the ingredient to drop more ledges than when dropped alone. You score double points for each additional dropped enemy on the same ingredient, so this is the best way to rack up points in a hurry as well as clear the level more quickly.

A dash of pepper can help if you get trapped like this.

The only weapon our chef has at his disposal is pepper. It is only limited to a few uses but it is incredibly useful to get out of a bind. Simply press A or B to throw a dash of pepper in the direction you are facing. Pepper stuns all enemies it touches and you can run right through them without getting hurt. It can be used as an evasive move if you get trapped, but you can also use it to stack several enemies together on top of an ingredient and then drop them all at once for huge points. You get five peppers at the start of the game and you can acquire additional ones from powerups that appear in the middle of the level periodically. Depending on the level you will find an ice cream cone, a cup of coffee, or a bag of fries that give you points as well as pepper.

BurgerTime has six levels and it only takes a couple of minutes to clear each one. However, it’s a challenging game. At first, it gets overwhelming being chased around by four or five enemies at one time. After getting used to it, the first couple of levels are pretty straightforward. The third level requires you to work your way up through narrow space to reach the top part of the stage. This is a solid test for understanding how the enemies route their way across the level in order to navigate around them. The fifth stage has long platforms without branching paths, leading you to get trapped easily if you aren’t careful. The final stage is nasty, including several ingredients placed on dead ends. Having several shots of pepper handy goes a long way to clearing it. After all six stages are finished, the game loops back to the first level with faster enemies. It will keep looping until you run out of lives.

BurgerTime was one of the very first games my family owned for our NES. If memory serves it was the third game we owned after Super Mario Bros./Duck Hunt and Pinball. Therefore, BurgerTime is among my earliest gaming memories. I do remember beating this game as a child by hoarding pepper for the final stage and setting up a super combo with all the enemies included. As we collected new games, I put BurgerTime on the back burner for many years. I played it again in 2015 when it showed up as a NintendoAge contest game. I did not beat the game that week, but now I got to beat the game again for the first time since I was 7 or 8 years old.

The level layouts get tricky at the end.

I beat BurgerTime in one late night, but it wasn’t easy. Stage 6 is the most challenging by far, but Stage 5 is the make it or break it level for me. I typically have to use a lot of pepper because it’s easy to get surrounded on the long platforms, and I need to hold on to as much pepper as possible for the final level. When I did reach the final level, I had some close calls. I was one ingredient drop away from beating the game on my first attempt. On a couple of later tries I botched some near finishes with several lives remaining. I completed the game on my ninth attempt, and I finished it off by playing into the second loop until I lost all my lives.

The one thing I run into trouble with in this game is moving on and off ladders. You have to be lined up with them pretty close to center before you can climb them. To get off, you must be at the very top or bottom before you can move laterally. The inability to make precise movements when you get stuck on an edge makes BurgerTime much more frustrating than it should be. I like it when games automatically nudge you the rest of the way if you start to switch direction just a tad early. That would have really come in handy here.

BurgerTime is a serviceable arcade game port that plays just fine on the NES. As this port is based on an older game, the presentation matches the arcade version. However, on the NES it comes off as a bit sparse. The graphics are plain and include solid black backgrounds. The music is one continuous, droning loop and the sound effects are simplistic. Gameplay is what matters most, and BurgerTime has it where it counts. Rounding up the enemies and dropping them in bulk is satisfying, as is crushing them with a bun or lettuce leaf. It’s fun to play for high scores and it’s fun to work through all the levels. BurgerTime is not a bad choice to consider adding to your NES collection if you are interested in 1980s arcade games.

#48 – BurgerTime

 
JUN
06
2017
0

#44 – R.B.I. Baseball

Crush monster home runs in this quintessential NES baseball game!

Not shown is the giant baseball and corresponding *pling* sound effect at power on.

To Beat: Win 9 Games
Played: 12/29/16 – 12/30/16
Difficulty: 2/10
My Difficulty: 2/10
Video: R.B.I. Baseball Longplay

The NES library holds a large collection of sports games. While Mike Tyson’s Punch Out!! and T&C Surf Designs could be loosely classified as sports games, I feel comfortable saying that today’s game is the first major sports title covered on the blog. There are more baseball games on NES than any other sport. So not only is it fitting that this first sports game is a baseball game, but it also happens to be one that I really enjoy and have spent a lot of time playing over the years.

R.B.I. Baseball is the first in a long series of baseball games developed by Namco for release in Japan. There it is known as Pro Yakyuu Family Stadium. Subsequent games on the Famicom were released yearly spanning 1986 through 1994. The 1989 installment was called Famista as a play on the name Famicom, and the series has been named Famista ever since. R.B.I. Baseball on the NES was released in June 1988 and was published by Tengen. This is one of three licensed NES games published by Tengen. It was also released as an unlicensed black cart version that seems to be much more prevalent than its gray cart equivalent.

The Famista series in Japan would carry on to many other consoles such as the Super Famicom, MSX, and Game Boy, as well as modern versions on the 3DS and Android/iOS. Not related to Famista, the R.B.I. Baseball name would be used in a brand new series developed by Major League Baseball (MLB) themselves in 2014. This separate series has received new entries every year. Also unrelated to both this new series and Famista are two R.B.I. Baseball games on NES. Developed by Atari Games and published by Tengen, R.B.I. Baseball 2 was released in 1990 and R.B.I. Baseball 3 came out in 1991. These games share a similar style as the original game but with all MLB teams and rosters included. They are not officially licensed by Nintendo and so they will not be covered in the main project, though I will probably play and write about them one of these days.

Choose your abbreviation and let’s get started!

R.B.I. Baseball lets you play a typical nine-inning match against either a computer opponent or another human player. When you begin, you get a list of ten teams and you can choose the team you want. The list only consists of two letter abbreviations and only a fraction of the teams are covered. The last two teams in the list are the American League All-Stars and National League All-Stars, and their rosters are comprised of best players not already included within the other eight teams. Once teams are selected, choose from one of four pitchers. Then the game begins!

The gameplay for R.B.I. Baseball breaks down nicely into pitching and fielding on the defensive side, and batting and baserunning on the offensive side. The one common thread between everything is base selection. On the controller, Right represents first base, Up is second base, Left is third base, and Down is home plate. Most baseball games will use this same scheme because it is both sensible and intuitive.

Player 1 is always the away team, meaning he bats first. While batting, the pitcher is shown at the top of the screen and the batter on the bottom. When batting you can position your player anywhere within the batter’s box with the D-Pad. Press the A button to swing the bat. You can hold the button down to do a full swing, and you must press A again to bring your bat back if you swing way too early. If you tap the A button the bat will immediately stop at whichever point it lies during the swing path, and if you get the bat to stop over the plate you can bunt the ball. The B button is used for sending your baserunners on a steal attempt. While the pitcher is winding up to throw, you press B along with the direction of the base you want to steal. For instance, if you have a runner on first base, press B and Up to have the baserunner start running toward second base.

It doesn’t look like it but this is good swing timing.

When a batted ball is put into play, the perspective shifts to an overhead view of the field and now you control the baserunners. Here the A button is used to go back and the B button is used to go ahead, and you combine this with a D-Pad direction to direct a specific runner to the nearest base. This is the same as baserunning while batting. For example, say you hit a ball all the way to the outfield wall. When your batter reaches first base, you can press Up and B to advance the runner to second base. Now if the throw from the outfielder is going to beat you to second base, you can send the runner back to first by pressing Right and A and avoid making an out. As long as the ball is hit fair and the screen remains in fielding mode, you can move runners around as much as you want, though you run the risk of getting tagged out for being careless on the bases.

In the bottom half of the inning you control the pitcher and defense. To pitch, you start by positioning your pitcher on the mound with either Left or Right. Press the A button to start your windup and throw a pitch. If you hold Down with A, you will throw a faster pitch, and if you hold Up with A you will throw a slower pitch. The slow pitch plays a different sound effect than that other pitches and sometimes it will bounce off the ground, causing the batter to swing right over top of it. After the pitch is thrown you can steer it with Left or Right to curve the pitch. Finally, the B button in combination with a D-Pad direction lets you do a pickoff move toward a base.

If the opponent puts a ball into play, then you play defense from the overhead view. Depending on where the ball is hit, the game will automatically give you control of the nearest fielder. Actually, you get to control most fielders simultaneously. Just run your fielder into the ball to pick it up, or you can follow the ball’s shadow if it is hit into the air. Once you have possession of the ball, press A and a direction to throw the ball to the desired base. If you press A without a direction the throw goes to first base which is useful for infield grounders. If you press B with a direction then your fielder will run toward the base with the ball in hand. This is useful for running down baserunners. The game goes back to pitching once the fielder has the ball without any controller movement for a while.

Sometimes you have to make a long throw to get an out.

The team rosters are very simple. As selected at the start, there are only four pitchers per team. The first two pitchers are the starters and the other two are relievers. This is important because the starters maintain their stamina longer than the relievers. Also in consecutive games, the prior game’s starter is unavailable. You can change pitchers in the middle of the game by pressing Start to call timeout while pitching. You can then bring up a menu of available pitchers and get a fresh arm into the game right away. The same goes for hitting if you want to bring in a pinch hitter. Each team has four pinch hitters on the bench and they can be swapped anywhere into the lineup regardless of position. Just like in a real game, if you pinch hit for the pitcher, then you must select a new pitcher at the start of the next half inning.

Players have different attributes that are not always spelled out in the game. For pitchers, you can see their ERA. Typically, the lower the ERA the better the pitcher. What the ERA doesn’t indicate is that some pitchers throw faster, some have better curves, and a few even throw sidearm for a different look. On the hitting side, you can see a hitter’s batting average and home run count. Hitters with high batting averages tend to hit the ball more often in places it can’t be fielded easily, and hitters with high home run totals have more power. The hitters also have different speeds while baserunning with no visible stat to suggest how fast they run. Finding skilled players in certain areas requires trial and error.

Love that 32 home run power!

R.B.I. Baseball was one of the few sports games I had growing up and I played it often. I owned both the unlicensed black cart and the licensed gray cart and those same copies are still in my collection today. This game was particularly popular in college and people would drop in to play matches all the time. I haven’t lost to the CPU in ages but I lost quite a few games in the two player mode. Our preferred house rule was “straight pitch” style where we always threw pitches right down the middle, focusing just on hitting, fielding, and baserunning.

Despite all those years of playing R.B.I. Baseball, it turns out I learned something new about the game when I set out to beat it. I was expecting that I would have to win a single match to consider the game beaten. However, there is a different ending screen if you win nine matches, one against each opponent. The downside to that is that there are no passwords or saving in the game, so you must complete all nine games in a single sitting. The upside is that the game has a mercy rule which can shorten games significantly. If you lead by 10 or more runs at the end of an inning, then you win immediately.

My favorite team in the game is the National League All-Stars, but similar to college it’s not quite fair to play as one of the teams completely stacked with talent. I would have definitely picked my favorite team, the Chicago Cubs, except they aren’t represented in the game at all. So I decided to play as my backup team Detroit. They are a very good offensive team which aligned with my desire to score a bunch of runs to win quickly by the mercy rule. Since I have the game mastered already, it was a breeze to beat all nine teams.

It’s true! Chicks dig the long ball.

Here are some stats about my 9-0 run of the game. I outscored my opponents 112-4, and I allowed all four of those runs in one inning of my first game. Every game I won by the mercy rule and I averaged a little over 5 innings per game. I pitched two separate three inning no-hitters and struck out 90 batters total. I got 145 hits, including 28 home runs, and I only allowed 23 hits. It was a pretty thorough bashing of the other teams, but I expected nothing less!

One interesting tidbit about R.B.I. Baseball is that it is the first console baseball game that uses actual MLB player names. This is because the game is the first baseball game officially licensed by the Major League Baseball Players Association. However, the game is not licensed by MLB, and as a result it cannot include the names of the actual teams. So here you have the names of the players but not the name of the team, leaving only the city names to represent the teams.

It may not be easy to see just looking at the game, but R.B.I. Baseball is a classic title that is still fun to play today. Appearances can be deceiving, since the characters are large, chunky sprites and the movement feels slow. The music, while catchy, can get repetitive over a long play session. What really matters is that R.B.I. Baseball is simple and easy to play. It may be a trimmed down experience, but it is so intuitive and quick to start playing that it has maintained its popularity for all these years. If the formula is good enough for a modern remake, then it is good enough here.

#44 – R.B.I. Baseball