Take on the NES Library

An 8-bit Extravaganza!

family

APR
05
2019
0

#115 – Street Cop

Just your everyday police officer.

Street Cop is a good cop.

To Beat: Reach the ending
Played: 2/27/19 – 3/2/19
Difficulty: 5/10
My Difficulty: 4/10
My Video: Street Cop Longplay

We are dipping back into the world of Power Pad games for this one. Street Cop by name alone would not provide any indication that this is meant for the Power Pad. It seems to me like it would be some kind of action or adventure game instead. It turns out that’s exactly what it is! There is nothing else like this game on the NES and I’m excited to share it with you today.

Family Trainer: Manhattan Police is the sixth game in the Family Trainer series of Power Pad games on the Famicom. The game was developed by Sonata (later known as Human Entertainment) and published by Bandai. The Famicom version came out in August 1987. The NES version, renamed Street Cop, was released in June 1989. The NES versions of the Bandai Power Pad games did not appear in the same order of release as Japan. Super Team Games, for instance, was the next game in the Family Trainer series in Japan but appeared on NES several months before Street Cop debuted.

Street Cop is an action/adventure game that uses the Power Pad controller. You play the role of “Little Ben,” a new police officer fresh out of the academy. He always hoped from a young age to be a detective, and you get to help make his dreams come true. In this game, you take to the streets of Manhattan. There are six stages in the game, each one featuring a bad guy on a wanted poster. You beat the game once you arrest all six main criminals.

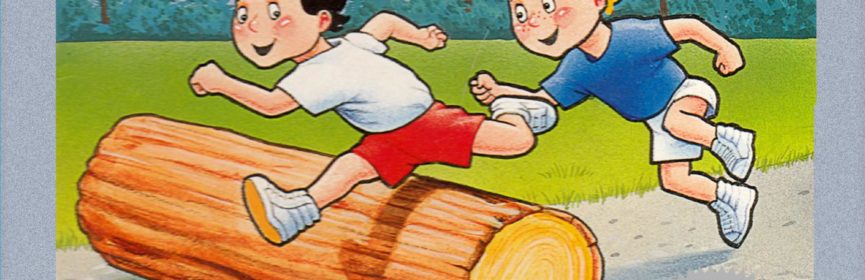
Gonna take a walk in the park real quick.

Before we get into the game description, let’s recap briefly on the setup for this game. You will plug a standard controller into the first controller port on the NES. Then plug in the Power Pad to the second controller port. This game uses Side B of the Power Pad. In this configuration, there are three rows of four buttons each. All buttons are numbered from 1 to 12. The first row contains buttons 1 to 4, the middle row is 5 through 8, and the last row is 9 to 12.

Here is how you control Little Ben with the Power Pad. The neutral position is standing on buttons 6 and 7, right in the middle of the Power Pad. Alternate presses by either walking or running on those buttons to move forward. There are three different running speeds depending on how quickly you move. If you jump in place, Little Ben will jump, but you need to be standing on both buttons before you jump and sometimes it doesn’t respond like you would expect. You face either left or right and you are locked into that direction. To turn around, step once on either 10 or 11 in the bottom row. To move sideways, step on either 5 or 8 to sidestep one time in that direction. You will move in or out on the screen depending on the direction you are facing. If you need to walk into a building or down an alleyway, turn right by standing on 3 and 7 or turn left by standing on 2 and 6. The idea is you need to turn your body and face in the direction you want Little Ben to turn. The corner buttons are for using items. Thrown items can be tossed by pressing 1. Little Ben wields a baton at the bad guys by stepping on 4. Either 9 or 12 is used for any secondary items you may be holding. You also have the option to use the controller for a couple of options. Press B to use throwing items and press A to swing the baton.

Not sure throwing bombs is legal, but whatever.

All six levels have similar structure. In each stage, you see a wanted poster with the main bad guy you need to arrest. At the bottom of the wanted poster are images of some cohorts of the criminal along with a count. First you need to track down and capture all the cohorts. Then you will be able to track down the primary baddie. Some levels have two different types of cohorts. Each stage has a different layout you must explore.

The bottom of the screen shows information you need. On the left is the stage timer and Little Ben’s health meter. You get ten minutes to clear each stage. In the middle is the map of the level. Your position is represented as a blue dot, while an X appears where a bad guy is located. The right side shows how many cohorts are left to track down, as well as ammo for any items you find.

Capturing criminals can prove to be a little tricky. You can only go after one at a time. If his or her position shows up on the map, you first have to chase them down. When you catch up and see them, then you have to line yourself up with the criminal. The city streets have three running lanes. You can do the sidestep maneuver to change between those lanes at any time. The bad guys also switch lanes frequently. Once you get lined up with them, then you need to draw close enough to use either your throwing items or your baton. While enemies move relatively slowly, it’s tough sometimes to get everything to line up while navigating the controls. An easier way to catch a criminal is to knock them down by running into them at full speed. It doesn’t always trigger, but it works often enough that I found it to be the preferred method of fighting. Many enemies take more than one hit to defeat. Sometimes it works out where I can run into them once, and when they get up they walk right into me so I can baton them.

There is some straight up platforming here.

Each stage has a unique criminal to capture as well as some minor differences in the gameplay. In Stage 1, you capture Snatcher Joe. This is a basic level with only one strip of street to explore. This is a great introduction to the controls with plenty of time to meet your goal and get acquainted with the movement. As you walk through the city, there will be other pedestrians walking around, but you don’t interact with them and just walk right past them. It should be clear enough who is good and who is bad. Along the way you may find soda cans. Just walk into them to collect them, then press 1 to throw them. This simple stage does have one little trick to it. You might meet up with the enemy on the map but don’t see him walking around. In that case, he is hiding in one of the trash cans on the top row. Go up to the trash can and smack it with the baton to lure the bad guy out. He won’t hide again unless he goes off screen. Once all the cohorts are gone, then track down Snatcher Joe. He takes several hits to capture.

Stage 2 has you looking for Speedy Louis. This stage is more expansive than the first one, with a larger map connected with various alleyways. You will need to learn the turning controls to proceed down those paths. Another thing you need to learn is watching yourself on the map to make sure you are going the way you expect. When on the top row of the map, if you run to the right for example, your position on the map moves left instead. Just something to be aware of. This stage introduces a couple of new elements. There are some sewer entrances as holes on the street. Avoid them. Falling into one is always a setback and there is nothing down there for you to find at all. If you get stuck there, you need to move all the way to the right, jump onto the rightmost step, and then jump again to get out of the sewer. This level also introduces some other powerups. A clock adds one minute to the stage timer, up to the initial ten minutes. Picking up a can with a heart on it refills a portion of your health meter. Specific to this stage, you will find throwable bombs used as projectile weapons. One guy also holds a V-Max Turbo Drink. Just having this in your possession lets you run fast enough to chase down Speedy Louis.

You can just walk in and take the mustard.

In Stage 3, you must locate and capture Animal S. This stage consists of two long streets connected by a warehouse. If the enemy shows up on the other side of the street, then you need to cross through the warehouse. That section is a pure side-scrolling area with a single lane through to the other side. You’ll have to jump over boxes to get across. This stage has oranges you can pick up for throwing weapons. You also find a hyper drink useful for capturing Animal S. Animal S is one tough character. He has a charge attack that knocks you down on contact. He is very tough in a straight up fight. Here you will want to press 9 or 12 to use the hyper drink. You will turn red for a short time and Animal S can’t hurt you. Throwing items are also effective, especially when the drink effects wear off.

In Stage 4, you go after Big Burger. He can be found at the top of a skyscraper under construction and you will need to climb up after him one floor at a time. This level features stores that you can enter. Go inside and look for useful items. Mustard is the throwing item of choice in this stage. You can also find dog whistles in pet stores. Pressing one of the rear corner buttons blows the dog whistle, calling a dog on screen that attacks any bad guy in sight.

Stage 5 features Bloody Betty. She likes to shop so you will find her in one of the stores. You’ll need to explore all the doors here looking for items and her cohorts. The special items in this stage are throwing bombs and dog whistles. This level also features the subway. If you find Bloody Betty but let her get away, she will escape to another town. In that case, you will use the subway to travel over there, but you’ll have to search for her and defeat more cohorts all over again.

Bosses can be hard to find and tricky to beat.

The final stage squares you off against Don Mayonecheese. This level is a tricky one. There are three separate towns in this stage connected by the subway. Each town has a hideout where you might find the final boss. First you need to defeat the baddie that holds the key to the hideout. Then you can enter the hideout and search for Don. Of course, you have to defeat all the cohorts first per usual, both on the streets and in the hideout. You’ll be able to find bullets for your gun in case of a shootout as well as dog whistles in the stores. However, neither of those are effective against Don Mayonecheese. You’ll have to use all of your skills plus a little luck to finish the game.

There are no passwords, saving, or lives in this game. You can run out of health or run out of time, and then it’s Game Over. The good news is that you have unlimited continues. The bad news is that, if you are like me, you will need a rest break in between attempts. This is a more cerebral game than the other Power Pad games I’ve played so far, but it can still wear you out with all the footwork needed.

This was my first time playing through Street Cop. I didn’t bother testing out any of the Power Pad games beyond making sure they booted to the title screen. I remember watching TheMexicanRunner play this game so I already had an idea of how it works. This is an uncommon game that sells for around $20-$25. The only copy I’ve ever seen in person was the one I bought. I think I snagged it for around $8. This was at a game store where the owner didn’t yet understand how to value games using the Internet, so I ended up buying several uncommon games there for great prices before he caught on.

This is why he really wanted to be a cop.

I am glad that this ended up being a Power Pad game that I didn’t have to completely exhaust myself to play. I can’t help but break a sweat playing these games, but Street Cop took longer for me to get to that point. I even played it while I was a little bit sick and that seemed to have no effect on me. Once you get a handle on the controls, this game isn’t too difficult. You are free to pause with Start at any time to take a quick break. The enemies move slower to compensate for your lack of reaction time. The only real danger was running out of time, which happened a few times. I only had to continue at most twice per level before I cleared it. When I recorded my video longplay, I didn’t need to use any continues and only took small pause breaks in between levels. The only blemish on the run was skipping a cohort in the fourth stage. I was able to find the final boss in the second building I tried. Quite a solid run overall. I noticed I have the best completion time for this game (I can’t imagine that many people would try speedrunning it) so I have submitted it to speedrun.com as a new world record! I wonder how many more accidental speedruns I am going to get out of this project.

Street Cop is a basic action game. The graphics are simplistic but carry the idea well. The music is fine, nothing special. The controls work well and are more responsive than I would have guessed. The only tricky move is jumping which doesn’t always trigger. The gameplay is simplistic, but that’s what you want when playing a game with your feet. This is a notable game because this is the only game on the NES, and maybe one of the only games ever, with this kind of control scheme and gameplay merged together. There is strategy and exploration in what amounts to a fitness game. I think the developers did a great job of varying your goals and designing the stages. Sure, combat is usually the same, repetitive action, but there’s just enough variance and some clever boss encounters to make this game worthwhile. Good on the developers to try something different while getting it to work well. While it is tough to recommend any of the Power Pad games today, if you happen to own one and are looking for something that’s a little bit different, I think you might have fun with this game.

#115 – Street Cop

 
MAR
09
2018
0

#68 – Super Team Games

Great, another exhausting Power Pad game!

Some balloons burst to get you started.

To Beat: Win all four events in single player
To Complete: Win all events on the highest difficulty
What I Did: Beat all events on the lowest difficulty
Played: 12/21/17 – 12/28/17
Difficulty: 7/10
My Difficulty: 7/10
Video: Super Team Games – All Events

Another Power Pad game already? I just finished World Class Track Meet not even a week before this. There are only a handful of Power Pad games that reached the NES, and it is just dumb luck that we get two such games almost back to back. This may have been a good thing here since my Power Pad muscle memory from the previous game carried over to this one. I needed that because Super Team Games is significantly more challenging than World Class Track Meet.

Super Team Games was developed by Sonata (who would later become Human Entertainment) for release in Japan in November 1987. It was originally published by Bandai, and it was the seventh game in their Family Trainer series. Nintendo published the NES release in November 1988, branded as a Power Pad game. It did not include any Family Trainer or Family Fun Fitness branding, just like World Class Track Meet. This was the final game of the Famicom’s Family Trainer series to reach North America.

Super Team Games is a running race game where you compete in different types of events and try to beat your opponent. There are several smaller events that are arranged into larger obstacle courses. There are several different modes for single player, two players, and two teams of players. Since multiplayer modes are competitions against each other, only the single player modes count for beating Super Team Games. There are four different obstacle courses in single player mode, and when you win all of them you have won the game.

You gotta start jumping pretty early.

This Power Pad game uses Side B, which contains blue buttons on the left and red buttons on the right, all individually numbered from 1 to 12. In single player, we are only concerned with the blue buttons. The top row buttons are 1 and 2, the middle row buttons are 5 and 6, and the bottom row buttons are 9 and 10. Multiplayer games use the red buttons, so just add two to each button number to get the same mappings for the second player.

The menu controls are the same as World Class Track Meet. On the title screen, press Select to move the cursor and press Start to go to name entry. In the tournament mode, you first select how many teams you want between three and six. Use the D-Pad to move the cursor at the bottom and press Select to lock in your choice. You then move to name entry which is identical for all modes. The blinking cursor at the top part of the screen determines which character in the name you want to choose, and you move that cursor by pressing B to move it left and A to move it right. Use the D-Pad to move the letter selection cursor at the bottom part of the screen. Press Select to write the selected character in the name field. When all names have been entered, press Start to begin.

Now you move to the event screen. There are flags displayed with the names of all the events. Press Select to choose the event and press Start. In 1 Player and 2 Player modes, the events are Super Obstacle Course, Obstacle Course A, Obstacle Course B, and Skateboard Race. The 2 Team Play and Tournament mode events are 6 Legged Race, Tug of War, and Relay Race. More on these modes later. The next screen is the versus screen showing who is competing in the race. If you are playing Tournament mode, you will see a screen in between showing the bracket setup. In single player, the versus screen lets you decide which computer character you want to race against. Press Select to choose from either Ollie, Jimmy, or Jack, and press Start to go to the race. Ollie is easy mode, Jimmy is medium difficulty, and Jack is the fastest.

What lovely flags!

The gameplay screen has the same structure in all events. The left runner, designed as the White team, is displayed on the top part of the screen and the right runner, or Red team, is below. At the bottom of the screen is a minimap that shows how far each player or team has reached in the current race. You also see times for each runner. This timer freezes briefly during checkpoints so you get a better glimpse of how you are doing as you compete. To begin the race, all active participants must be standing on the Power Pad in their designated spots. For single player, stand on 5 and 6. A whistle is blown and soon the referee fires the starting gun.

Let’s look at each of the events first. Then I will explain how they combine into the different courses.

The Log Hop is exactly how it sounds; you run and jump over stationary logs. This introduces the standard controls that apply to many events in the game. Run on 5 and 6 in the middle row to move forward. Take a step back and run on 9 and 10 to back up a little bit if you need to. You can run right up to the log and then jump in the air so that your character jumps as well. The logs are medium height so they aren’t too tough to jump over. You can even land on top of the log and run right off.

No, you can’t run around the ball.

The Belly Bump Ball has the same controls as the Log Hop. Here a giant beach ball is in the middle of the track and you have to bump it forward by running into it. The faster you run into it, the farther down the track it goes. Ideally you want to get into a good rhythm of bouncing it far ahead and then running fast to knock the ball ahead again. If you come at it slow, the ball won’t go very far and then you don’t have the distance necessary to build up speed unless you take a few steps back and give yourself some running room.

Water Cross is similar to the Log Hop. There are pools of water on the track that you want to jump completely over if you can. Run up to the edge and jump to hopefully get across. More than likely you will fall into the water. You can swim by running on 5 and 6, but you will cross very slowly and use up a lot of time.

In the Crab Walk, I guess you wear a crab outfit? It’s weird. You want to put your left foot on the 1 and your right foot on the 9 and then run in place to inch ahead. It’s different than the other events since your feet are much further apart. I could move forward but really couldn’t get the hang of this one like I should have.

The Wall Jump is exactly like the Log Hop. The walls are thin and much taller than the logs. You really need to jump high to get to the top of the wall. Not only that, but there are two different heights of walls just to make things more exhausting.

This is a very sturdy bubble.

In Bubble Run, you first approach an air pump and must blow up your bubble. Hit 1 and 2 in the first row to inflate your balloon. The manual says to hit the buttons with your hands, which makes sense since you are working an air pump. You can run on it if you want, but my legs needed a break! Once the bubble is filled, then run on 5 and 6 and take the bubble to the end.

These are all the basic events that combine to form the larger events that you choose from the menu before play. In the Super Obstacle Course, you run all six of the above events in that exact order. In Obstacle Course A, you do the Log Hop, Water Cross, and Wall Jump, and in Obstacle Course B you do the Belly Bump Ball, Crab Walk, and Bubble Run. The Relay Race in the team play modes is the same as the Super Obstacle Course. Instead of running the whole thing alone, you pass the baton and substitute team members after each pair of events.

That’s not all! There are also three other unique special events:

The Skateboard Race is for one or two players. In this mode you don’t have to run, which is quite the relief! Your front foot position will either be on the 5 or 6, and your back foot position is either 9 or 10. First, stand on 5 and 6 to start with the whistle blow, then put your front foot on 5 and your back foot on 9. I like to face right while on the mat. This will position you in the top row in your course. Move your front foot to the 6 and then move your back foot to the 10 to move your character to the bottom row in the course. You can switch positions one step at a time to slide your skateboarder. You may rhythmically step between positions to slalom and that lets you move faster down the course. You also need to sidestep to dodge obstacles on the course. Some obstacles block both lanes and you must jump to get past them. If it sounds complicated, I’m sure you will get it once you finish the course once or twice.

Try to weave around the obstacles.

The 6 Legged Race is a team event only. You need six players for this event! Each team of three stands back to back on the respective spaces on the Power Pad so that there is a foot on every button. Each team must take left and right steps together as if their feet are tied together. If someone is out of step the racers will fall over and make it harder for the team to continue to walk. There’s no feasible way for me to play this event, but I bet it would be hilarious!

The Tug of War is another team event that can be done with either two, four, or six players against each other. Within a team, the first player stands on 5 and 6, the second player stands on 1 and 2, and the third player stands on 9 and 10. The other team takes the respective positions on the right side of the Power Pad. When the firing gun starts, everyone runs as fast as they can. Whichever side has pulled more of the rope after 30 seconds wins the Tug of War.

I’ve never been a Power Pad player, so this was my first time playing through Super Team Games. All of the Power Pad games tend to teeter between common and uncommon, but they are neither difficult nor expensive to track down if you really want them. Well, aside from Stadium Events that is. I got my original copy in a lot on eBay early on when I had made my big push to collect the other half of the NES licensed set. I remember seeing it and getting pretty excited since I had never seen the game before and thought it might have been worth something. I quickly found out that it was cheap because no one wants it. I’ve had a few different copies come through my possession.

This was a really bad jump attempt.

Super Team Games is a significant step up in difficulty from World Class Track Meet. Naturally, I learned this the hard way. My first time playing I picked the Super Obstacle Course against the fastest computer runner Jack. He completely blew me away. He completed the entire course in under three minutes while I hadn’t even reached the halfway point yet. I had to stop and step away in the middle of the race for a little while to catch my breath. I kept at it just to get through it, but I never did finish the race. After 10 minutes have elapsed, the race just ends. I was at the very end of the course with the finish line in sight when this happened. So annoying. I’m calling it impossible for me to beat this on the hardest difficulty and immediately accepted the idea of beating it on Easy and stopping there.

I moved on to the Skateboard Race next which is the easiest mode and much less strenuous. It still took me two attempts to beat easy difficulty Ollie. The first attempt was learning the course and the controls, and then the second try was enough to win the race. I then switched over to trying Obstacle Course A and managed to win that race too. The only problem is I forgot to hit the record button on my PC. That really upset me and I knew I wouldn’t be happy unless I completed it again. I was completely spent from playing this game to the point where I had to rest for a couple of days before trying again.

I finished all of the modes over the next three play sessions. The Super Obstacle Course took me two tries to win against Ollie. He finishes the race in around six minutes. I was about twenty seconds behind the first try and then I won by more than that the next try. It also took me two tries to beat the Obstacle Course A again. The first try I quit part way because I was too far behind and exhausted from winning the Super Obstacle Course just before. The next try I won the race by just barely passing Ollie on the final stretch. That was way too close for comfort. Obstacle Course B is quite a bit easier than the other two obstacle courses, but I think that took a couple of tries as well. I used the Skateboard Race as a warm up exercise and finished it a couple more times for good measure. I learned from my mistakes and recorded everything the way I wanted.

That’s how close I was to losing Obstacle Course A.

I think Super Team Games requires more consistency and better form than World Class Track Meet. You can be successful by stepping on the Power Pad as quickly as possible, since that’s more or less what I did. However, it does seem that you are rewarded for having proper form in your steps and jumps. I will caution that I cannot be entirely sure about this. The manual tells you what to do, but not how to do it well. It’s not really feasible for me to test any hypotheses either because I can only play a little bit at a time before wearing out. My theories will have to do. I was able to do a really long jump a few times and I never understood how it happened. I’m sure it has to do with the timing of my jump while running with some speed, maybe even by jumping off of one foot and landing on the other. I also noticed that I accelerated sometimes while jogging for some distance. There does seem to be some momentum inherent in the game physics as long as you keep going without slowing down too much or missing any steps on the buttons. Again, these are just theories. I assume there has to be some kind of technique that I didn’t understand that could help me perform at a higher level.

I do have a few observations about racing Ollie that might be helpful if you want to play this game single player. I found that I was about on par with Ollie in all events but two. Ollie does the Crab Walk well, but does the Belly Bump Ball terribly. I have no idea what the secret is to crab walking and I always lost ground during that event. The Belly Bump Ball is best way to take a big lead. Ollie gets no momentum at all and only pushes the ball a short distance while never backing up to get a better shot at it. If you run fast, pause briefly just after you bump the ball, and repeat, you should clear the event quickly. This was the key for me completing the Super Obstacle Course and Obstacle Course B, leaving only Obstacle Course A without an easy exploit. The sad thing is that the game manual tries to make you feel bad for even coming close in a match with Ollie. From the manual: “Ollie: A push over. Shame on you if you lose!” Let me tell you, there is no shame in losing to Ollie. This really is a tough game.

Super Team Games is not fun to play in my opinion, but it is a competent title. The graphics are simple and clean. The music, while not notable, is decent. The controls work well once you learn how to navigate the menu. There is a wide variety of events, especially when you include many players. The real fun of Super Team Games lies in playing this game with someone else. Racing against another player or coordinating large groups for team events are the kind of activities that form memories and build bonds, even in the heart of strenuous competition. Super Team Games is also a good exercise tool for Power Pad owners, so long as you take it easy and don’t worry about trying to outrun the computer players. Trying to beat the game in single player mode is too tedious and exhausting to be fun, and I missed out on everything in the other modes that would have made it enjoyable. I think the best part of Super Team Games was the feeling of relief to check it off the list and move on to the next game.

#68 – Super Team Games (Super Obstacle Course)

#68 – Super Team Games (Obstacle Course A)

#68 – Super Team Games (Obstacle Course B)

#68 – Super Team Games (Skateboard Race)

 
FEB
22
2018
0

#66 – World Class Track Meet

Get out the Power Pad and run until your lungs wear out!

Might as well stick the menu under the title.

To Beat: Finish Tournament Mode
To Complete: Finish both Tournament and Olympics Modes
What I Did: Completed the game
Played: 12/15/17
Difficulty: 4/10
My Difficulty: 2/10
Video: World Class Track Meet Tournament and Olympics

This is a special day for Take On The NES Library for two reasons. First, this is the first Power Pad game I have covered here, and with that comes both a history lesson and technical details of what the Power Pad is and how it all works. Second, World Class Track Meet has some history of its own that ties in with the most expensive NES licensed cart, by far, and the only one that I don’t own for myself.

The discussion for World Class Track Meet begins with Stadium Events. Maybe you’ve heard about it? Stadium Events was developed by Human Entertainment and published by Bandai. This developer was known as Sonata at the time of this release and renamed themselves Human Entertainment in 1989. The game was first released in Japan in December 1986, then on the NES in North America in September 1987, and finally in Europe in 1988. It is the second in a series of ten fitness games in Japan called Family Trainer that utilized a special floor mat controller also called the Family Trainer. Bandai branded the controller and game series for the NES as Family Fun Fitness. However, only two games were released under Family Fun Fitness banner: Athletic World and Stadium Events. Athletic World originally came in a big box set with the controller, but Stadium Events was only released as a standalone title and therefore you had to already own the Family Fun Fitness mat to play it.

It was around this time that Nintendo decided to recall both the Family Fun Fitness sets and Stadium Events so that they could rebrand it as a first-party product outside of Japan. The Family Fun Fitness mat became the Power Pad, and Stadium Events became World Class Track Meet. Both the controller and the game function exactly the same just with different names and branding. The Power Pad with World Class Track Meet were quite widespread, selling both separately and bundled with the NES console in the Power Set. Stadium Events however had very limited sales due to both its brief availability and reliance on the Family Fun Fitness set. It is unknown how many copies still exist today. Some have guessed around 200 copies, and though I suspect there may be more it’s still a rare game regardless. A loose cart of Stadium Events is valued somewhere around $10,000 today, while complete and even sealed copies are worth at least three to four times that. I have all the other NES licensed carts, but I don’t plan to buy Stadium Events unless I get some enormous windfall of cash or get ridiculously lucky and find one for cheap.

The infrequently used Side A of my actual Power Pad.

The Power Pad itself is a pretty large floor mat controller. It measures a little over three feet long and a little under three feet wide when completely unfurled, and it is made of two layers of gray, flexible plastic with twelve pressure sensors in between. The sensors appear on the mat as large buttons and are arranged in three rows of four buttons each. Just like the Zapper peripheral, the Power Pad is connected to the NES on the second controller port. When you apply pressure to one of the buttons, usually by standing on it, the NES will detect that the button is pressed. I don’t fully understand the technology of it, but I do know that it is a little more complicated than handling the standard controller because the game has to be programmed to read twelve simultaneous button states on just the one controller port as opposed to eight on the regular gamepad.

The other interesting thing about the Power Pad is that you get a different button layout depending on which side of the mat is facing up. The Power Pad is clearly labeled either Side A or Side B. Side A only uses eight of the twelve buttons. The four corner buttons are neither labeled nor utilized whenever a game is designed for Side A. All the remaining buttons are blue except for the two red center buttons. This side of the Power Pad was not often used. Side B is the one most players remember when they think about the Power Pad. This side uses all twelve buttons and each one is clearly marked with a number from 1 through 12. Blue buttons are on the left side and red buttons are on the right side.

World Class Track Meet is an exercise game that simulates four Olympic events: The 100M dash, the 110M hurdles, the long jump, and the triple jump. This game uses Side B of the Power Pad. Two players can race in the 100M dash and 110M hurdles at the same time by using both the left and right sides of the Power Pad, while both the long jump and triple jump are single player only. Each of these events can be played on its own. There is also a Tournament mode which is for one player against computer controlled runners and an Olympics mode which can support anywhere from one to six players. To beat the game, you must complete the Tournament mode. All other modes are exhibition only, but I figure it doesn’t hurt to also compete solo in the Olympics.

This is Side B, used for this game.

To play, you will need to plug a standard controller in the first controller port and the Power Pad in the second port. The controller is for choosing the game mode and any other information. These controls are not really intuitive. The title screen displays all six possible game modes. Press the Select button to toggle the cursor one at a time between all six options, then press Start on the one you want. If you choose Tournament, it goes directly to gameplay. For all other options, you are brought to a name entry screen. First, choose how many players you want. Use Left and Right to move the selection arrow and press Select to input your choice, then press Start to proceed to the actual name entry. There will be empty names displayed for each player and names can be up to ten characters long. Each player is also assigned a color. On this screen you are controlling two cursors at once. One is the pink selection arrow at the bottom for choosing letters and the other is the blinking cursor underneath one of the characters in the names at the top. Use the D-pad to move the pink arrow and choose a letter, and press Select to input that letter. This writes the letter into the name underneath the blinking cursor and moves that cursor one space to the right. To position the blinking cursor, press A to move it one space to the right and B to move it one space to the left. The idea is to input one name and then press A enough times to position the blinking cursor to the start of the next name in the list. I know I explained it poorly, and like I said it’s not intuitive, but you will get the hang of it. Finally, after all the names are set, press Start to jump into the game.

The general idea in all gameplay modes is to run on the mat as fast as you can. For single-player, you will want to use the blue side of the mat. When you choose an event, it doesn’t begin right away. This gives you an opportunity to stretch, rest, coordinate in a group game, or whatever. The event will begin when all active players stand on two buttons of the same color in the same row. Stand still and wait for the starting gun if necessary, then run in place on your two buttons to run in the game. You may choose to run on any of the three rows on the mat, and whichever pair you choose influences your top speed in the game. As player one on the blue side of the Power Pad, your character runs the fastest when you use the top row buttons 1 and 2, the middle row buttons 5 and 6 are average speed, and the bottom row buttons 9 and 10 let you run the slowest. In multiplayer games, you can enforce using certain rows of buttons as a handicap to help even out the competition. Aside from running, you will also need to jump in place for some events.

The 100M dash is the most basic event. The top of the screen shows all the data, beginning with the name of the event and player names. You can also see both a timer and current running speed for each player, as well as a progress bar with tiny runners to show how both competitors match up during the race. At the bottom, you see both runners sprinting into the screen. There will always be two runners shown during this event; if there’s only one player the right side will be computer controlled. After you stand in position on the mat, the referee will appear and fire a pistol to signal the start of the race. Start moving too soon and you get a false start penalty, and three false starts gets you disqualified. Other than all that, just tap those floor buttons as quickly as you can!

Eat my dust, Turtle!

The 110M hurdles is similar in structure to the 100M dash. You race against the computer or another player with all the same on-screen indicators as before. Naturally, in this event you must sprint and then jump over hurdles as they come into view. This can be a little tricky to get the hang of because you need to jump earlier than you might think to properly clear each hurdle. Running into a hurdle just slows you down, so for the best times you shouldn’t knock any over. This is also an event that is more difficult while running in the fastest position simply because the hurdles can come at you so quickly.

The long jump in a single-player only event. Here the second runner’s information at the top of the screen is replaced with the distance for each of three attempts. Stand on the mat with both feet in the desired starting position to trigger the starting whistle. Then run in place up until the white line approaches. Jump in the air just before you cross the line and see how far you go. Successful jumps will display the distance reached and it will be recorded in one of the spaces up top. If you forget to jump, accidentally cross the line before jumping, or fail to plant your feet back on the buttons, it is considered a foul and doesn’t count. Your score for the event is the furthest distance out of those three attempts.

The triple jump is set up the same way as the long jump with one runner only and three attempts. This time when you reach the line, you must jump three times consecutively. I’m not completely sure about this, but I believe the idea of effective triple jumping is to jump, land and jump off one foot, land and jump off the other foot, and land at the end with both feet. That seems easier to do while actually leaping forward versus jumping in place on the Power Pad. Fortunately, World Class Track Meet is pretty lenient with the jumping technique. You can land on both feet each time and jump again even after a noticeable delay and you will still perform a decent jump in the game. The best of three attempts is your score for the round.

The hurdles can present a decent challenge.

The Olympics mode is a competition of all four events for one through six players. The races are run two at a time, and the jumps are done one player at a time. Times and best distances are recorded and given a score from 1 to 100 based on the world records for each of those events as of 1982. Then the sum of all four events for each player is the total score, and the highest score wins. When three or more players complete the Olympics, the winners are displayed on the podium as well as displayed on the final scoreboard, whereas for fewer players you just see the final tallies on the board. There’s no ending in this mode for single-player, so it’s not really required to beat the game even though I did it anyway.

The tournament mode is one player only. You will race against six different competitors: Turtle, Bear, Horse, Rabbit, Bobcat, and Cheetah. The mode starts against the slowest competitor, Turtle, in the 100M dash. Win that race and then you go up against Turtle in the 110M hurdles. If you win both races you get a medal and move on to the next opponent. This continues until all six opponents are defeated or you lose a single race. There are no continues in the Tournament so you need to win all twelve races in a row. You get medals for beating each of the first three racers, and you get trophies for beating the last three runners.

This was not only my first time playing through World Class Track Meet, but also my first Power Pad game completion. I bought my Power Pad for $20 at the monthly flea market in my area several years ago, and it came in a white box with the Power Pad labeling on it. That day I also saw a boxed Power Glove from the same seller for probably the same price, but I passed on it in favor of the Power Pad. That was a mistake looking back, and I wonder if I just didn’t carry enough cash with me that day because I should have just bought both. Still, a boxed Power Pad for $20 is not a terrible price. I didn’t even bother trying it out when I bought it, rather I stuffed it in storage for a couple of years. It’s in good shape and it works fine. I don’t remember where I got the World Class Track Meet cart, but it’s common and cheap anyway.

I wonder how I’ve already cleared almost five meters.

Before playing this game, I broke protocol and looked up what kind of times I needed to achieve in this game to succeed. I try to avoid doing any kind of research like this, but I justified it this time for two reasons. The first is that I wasn’t too sure if I would physically be able to beat the game in the first place. I am by no means an athlete and never have been, plus I just turned 34 years old and I’m not getting any younger. I would say I’m in average shape, maybe a little overweight but not too bad. The other reason is that I have to be considerate of my other family members when I play something like this. I do most of my gaming at night after my wife and daughter are asleep, and it wouldn’t be good for me to be shaking the house and waking them up while I play late at night. My setup at home is favorable for this though, since my gaming TV is in the basement with a concrete floor under the carpet. I can’t be stomping around super hard, but there’s a good chance I could play and be quiet enough to go unnoticed. Anyway, the point I’m really trying to make here is that I don’t want to be experimenting around with this game just in case I disturb anyone sleeping. When I play, I want to get right to it and minimize the possibility of being a bother to my family.

As it turned out, those above points were non-factors. I played the entirety of the game during my lunch hour from work at home while my wife and daughter were out of the house, and I didn’t have any trouble beating the game in one attempt. It all comes down to beating Cheetah at the end. I don’t know if his times are consistent or not, but in my game he ran the 100M in 9.88s and the 110M hurdles in 14.70s. I decided to give my all on each and every race. Unfortunately, I ran out of breath trying to do all these sprints and it took me quite a lot of rest in between tries just to muster the strength to keep going. It’s really an exhausting game to beat even though it wasn’t that tough. I was consistently running the 100M in under seven seconds, so that mode was trivial. The hurdles were tougher but I still managed to win every race by at least a second or so. I started doing the hurdles in the medium speed position to work on my timing, but there I would not have been fast enough to beat Cheetah. For the fifth run of the hurdles I switched over to the super speed position in the top row and clocked in under 14 seconds, which was good enough. There is really no reason in single player to run in either of the slower positions, and there’s no shame in beating this kind of game in the easiest way available.

After the tournament, I also completed the Olympics mode by myself. I scored 379 points out of a possible 400, which I think is pretty good for one attempt. I might have scored better if I played it completely rested. I was gassed by the end of it all and I pushed myself just to have the final event, the triple jump, over with. This is a very short game to complete. My video of it is around 20 minutes long with most of that being unedited footage of waiting while I rested and caught my breath. I thought the game was easy to complete for myself, but what happens if you are unable to do this fast enough? Depending on your fitness level, it could possibly take weeks or longer to improve enough to win at World Class Track Meet. I’m no fitness expert so I’m just speculating on that. I don’t know how to effectively assign a relative difficulty to this game, and so I arbitrarily decided on 4/10.

I was beyond exhausted by this last event.

I played the game as it was designed to be played, but there are a few ways to cheat at the game that I bet many people would think to try. One common technique is to get on your knees and use your hands to slap the buttons. You can cheese the long jump and triple jump by jumping completely off the mat and back on quickly enough to trick the game into thinking you jumped super high. You could also hold onto a bar or piece of furniture or something when you jump to push yourself up higher. Finally, if you are really brave in a two-player game, you could try shoving your opponent off the pad entirely to gain an advantage. I don’t condone this in any fashion and you are entirely at your own risk if you do this!

Another little tidbit about World Class Track Meet is that it is one of the few NES games that doesn’t have a box to go with it. The game cart was bundled with the Power Pad and was not sold separately. The game also appeared as part of a triple combo cart along with Super Mario Bros and Duck Hunt as part of the Power Set, which included the Power Pad along with the console, controllers, and the hookups. That combo cart also doesn’t have a box. The manual for World Class Track Meet is also the manual for the Power Pad itself and is branded as the Power Pad manual. These are the kind of oddities that somewhat complicate things for full set collectors.

Today, both the Power Pad and World Class Track Meet are nothing more than a novelty. There just weren’t very many Power Pad games released to go with it, and World Class Track Meet itself is a very basic experience that isn’t all that fun. The idea of fitness games peripherals still lingers on. Dance Dance Revolution would become a huge cultural phenomenon years later, and Nintendo themselves eventually came around to the idea again in the form of Wii Fit and the Wii Balance Board. Therefore, World Class Track Meet has some historical importance, but doesn’t offer much else.

#66 – World Class Track Meet (Tournament)

#66 – World Class Track Meet (Olympics)

 
JUN
06
2017
0

#44 – R.B.I. Baseball

Crush monster home runs in this quintessential NES baseball game!

Not shown is the giant baseball and corresponding *pling* sound effect at power on.

To Beat: Win 9 Games
Played: 12/29/16 – 12/30/16
Difficulty: 2/10
My Difficulty: 2/10
Video: R.B.I. Baseball Longplay

The NES library holds a large collection of sports games. While Mike Tyson’s Punch Out!! and T&C Surf Designs could be loosely classified as sports games, I feel comfortable saying that today’s game is the first major sports title covered on the blog. There are more baseball games on NES than any other sport. So not only is it fitting that this first sports game is a baseball game, but it also happens to be one that I really enjoy and have spent a lot of time playing over the years.

R.B.I. Baseball is the first in a long series of baseball games developed by Namco for release in Japan. There it is known as Pro Yakyuu Family Stadium. Subsequent games on the Famicom were released yearly spanning 1986 through 1994. The 1989 installment was called Famista as a play on the name Famicom, and the series has been named Famista ever since. R.B.I. Baseball on the NES was released in June 1988 and was published by Tengen. This is one of three licensed NES games published by Tengen. It was also released as an unlicensed black cart version that seems to be much more prevalent than its gray cart equivalent.

The Famista series in Japan would carry on to many other consoles such as the Super Famicom, MSX, and Game Boy, as well as modern versions on the 3DS and Android/iOS. Not related to Famista, the R.B.I. Baseball name would be used in a brand new series developed by Major League Baseball (MLB) themselves in 2014. This separate series has received new entries every year. Also unrelated to both this new series and Famista are two R.B.I. Baseball games on NES. Developed by Atari Games and published by Tengen, R.B.I. Baseball 2 was released in 1990 and R.B.I. Baseball 3 came out in 1991. These games share a similar style as the original game but with all MLB teams and rosters included. They are not officially licensed by Nintendo and so they will not be covered in the main project, though I will probably play and write about them one of these days.

Choose your abbreviation and let’s get started!

R.B.I. Baseball lets you play a typical nine-inning match against either a computer opponent or another human player. When you begin, you get a list of ten teams and you can choose the team you want. The list only consists of two letter abbreviations and only a fraction of the teams are covered. The last two teams in the list are the American League All-Stars and National League All-Stars, and their rosters are comprised of best players not already included within the other eight teams. Once teams are selected, choose from one of four pitchers. Then the game begins!

The gameplay for R.B.I. Baseball breaks down nicely into pitching and fielding on the defensive side, and batting and baserunning on the offensive side. The one common thread between everything is base selection. On the controller, Right represents first base, Up is second base, Left is third base, and Down is home plate. Most baseball games will use this same scheme because it is both sensible and intuitive.

Player 1 is always the away team, meaning he bats first. While batting, the pitcher is shown at the top of the screen and the batter on the bottom. When batting you can position your player anywhere within the batter’s box with the D-Pad. Press the A button to swing the bat. You can hold the button down to do a full swing, and you must press A again to bring your bat back if you swing way too early. If you tap the A button the bat will immediately stop at whichever point it lies during the swing path, and if you get the bat to stop over the plate you can bunt the ball. The B button is used for sending your baserunners on a steal attempt. While the pitcher is winding up to throw, you press B along with the direction of the base you want to steal. For instance, if you have a runner on first base, press B and Up to have the baserunner start running toward second base.

It doesn’t look like it but this is good swing timing.

When a batted ball is put into play, the perspective shifts to an overhead view of the field and now you control the baserunners. Here the A button is used to go back and the B button is used to go ahead, and you combine this with a D-Pad direction to direct a specific runner to the nearest base. This is the same as baserunning while batting. For example, say you hit a ball all the way to the outfield wall. When your batter reaches first base, you can press Up and B to advance the runner to second base. Now if the throw from the outfielder is going to beat you to second base, you can send the runner back to first by pressing Right and A and avoid making an out. As long as the ball is hit fair and the screen remains in fielding mode, you can move runners around as much as you want, though you run the risk of getting tagged out for being careless on the bases.

In the bottom half of the inning you control the pitcher and defense. To pitch, you start by positioning your pitcher on the mound with either Left or Right. Press the A button to start your windup and throw a pitch. If you hold Down with A, you will throw a faster pitch, and if you hold Up with A you will throw a slower pitch. The slow pitch plays a different sound effect than that other pitches and sometimes it will bounce off the ground, causing the batter to swing right over top of it. After the pitch is thrown you can steer it with Left or Right to curve the pitch. Finally, the B button in combination with a D-Pad direction lets you do a pickoff move toward a base.

If the opponent puts a ball into play, then you play defense from the overhead view. Depending on where the ball is hit, the game will automatically give you control of the nearest fielder. Actually, you get to control most fielders simultaneously. Just run your fielder into the ball to pick it up, or you can follow the ball’s shadow if it is hit into the air. Once you have possession of the ball, press A and a direction to throw the ball to the desired base. If you press A without a direction the throw goes to first base which is useful for infield grounders. If you press B with a direction then your fielder will run toward the base with the ball in hand. This is useful for running down baserunners. The game goes back to pitching once the fielder has the ball without any controller movement for a while.

Sometimes you have to make a long throw to get an out.

The team rosters are very simple. As selected at the start, there are only four pitchers per team. The first two pitchers are the starters and the other two are relievers. This is important because the starters maintain their stamina longer than the relievers. Also in consecutive games, the prior game’s starter is unavailable. You can change pitchers in the middle of the game by pressing Start to call timeout while pitching. You can then bring up a menu of available pitchers and get a fresh arm into the game right away. The same goes for hitting if you want to bring in a pinch hitter. Each team has four pinch hitters on the bench and they can be swapped anywhere into the lineup regardless of position. Just like in a real game, if you pinch hit for the pitcher, then you must select a new pitcher at the start of the next half inning.

Players have different attributes that are not always spelled out in the game. For pitchers, you can see their ERA. Typically, the lower the ERA the better the pitcher. What the ERA doesn’t indicate is that some pitchers throw faster, some have better curves, and a few even throw sidearm for a different look. On the hitting side, you can see a hitter’s batting average and home run count. Hitters with high batting averages tend to hit the ball more often in places it can’t be fielded easily, and hitters with high home run totals have more power. The hitters also have different speeds while baserunning with no visible stat to suggest how fast they run. Finding skilled players in certain areas requires trial and error.

Love that 32 home run power!

R.B.I. Baseball was one of the few sports games I had growing up and I played it often. I owned both the unlicensed black cart and the licensed gray cart and those same copies are still in my collection today. This game was particularly popular in college and people would drop in to play matches all the time. I haven’t lost to the CPU in ages but I lost quite a few games in the two player mode. Our preferred house rule was “straight pitch” style where we always threw pitches right down the middle, focusing just on hitting, fielding, and baserunning.

Despite all those years of playing R.B.I. Baseball, it turns out I learned something new about the game when I set out to beat it. I was expecting that I would have to win a single match to consider the game beaten. However, there is a different ending screen if you win nine matches, one against each opponent. The downside to that is that there are no passwords or saving in the game, so you must complete all nine games in a single sitting. The upside is that the game has a mercy rule which can shorten games significantly. If you lead by 10 or more runs at the end of an inning, then you win immediately.

My favorite team in the game is the National League All-Stars, but similar to college it’s not quite fair to play as one of the teams completely stacked with talent. I would have definitely picked my favorite team, the Chicago Cubs, except they aren’t represented in the game at all. So I decided to play as my backup team Detroit. They are a very good offensive team which aligned with my desire to score a bunch of runs to win quickly by the mercy rule. Since I have the game mastered already, it was a breeze to beat all nine teams.

It’s true! Chicks dig the long ball.

Here are some stats about my 9-0 run of the game. I outscored my opponents 112-4, and I allowed all four of those runs in one inning of my first game. Every game I won by the mercy rule and I averaged a little over 5 innings per game. I pitched two separate three inning no-hitters and struck out 90 batters total. I got 145 hits, including 28 home runs, and I only allowed 23 hits. It was a pretty thorough bashing of the other teams, but I expected nothing less!

One interesting tidbit about R.B.I. Baseball is that it is the first console baseball game that uses actual MLB player names. This is because the game is the first baseball game officially licensed by the Major League Baseball Players Association. However, the game is not licensed by MLB, and as a result it cannot include the names of the actual teams. So here you have the names of the players but not the name of the team, leaving only the city names to represent the teams.

It may not be easy to see just looking at the game, but R.B.I. Baseball is a classic title that is still fun to play today. Appearances can be deceiving, since the characters are large, chunky sprites and the movement feels slow. The music, while catchy, can get repetitive over a long play session. What really matters is that R.B.I. Baseball is simple and easy to play. It may be a trimmed down experience, but it is so intuitive and quick to start playing that it has maintained its popularity for all these years. If the formula is good enough for a modern remake, then it is good enough here.

#44 – R.B.I. Baseball