Take on the NES Library

An 8-bit Extravaganza!

brain

JUL
24
2020
0

#154 – Little Ninja Brothers

Putting the RPG figuratively into Kung-Fu Heroes.

It comes in all wiggly!

To Beat: Reach the ending
Played: 4/7/20 – 5/9/20
Difficulty: 8/10
My Difficulty: 8/10
My Video: Little Ninja Brothers Longplay (Part 1) (Part 2)

I was really looking forward to playing Little Ninja Brothers.  It was a game that I knew nothing about when I started collecting NES.  To find an action RPG I had never heard of was very intriguing, since no one talks about this game in various discussions on NES titles.  It wasn’t until I dug a little deeper that I discovered that this was the sequel to Kung-Fu Heroes.  All of these things made my interest grow more and more.  That to me is the real beauty of a long project like this.  Finding interesting, largely undiscussed games and playing through them to find out what they are really like.  On paper this seems like my kind of game, and in the end, I enjoyed my playthrough as I expected.

If you want a little more background on this game, check out my review of Kung-Fu Heroes.  Little Ninja Brothers is the second game in the Super Chinese series.  Super Chinese 2 was developed and published by Culture Brain in all regions.  It was first released in Japan on the Famicom in May 1989.  The North American version, localized as Little Ninja Brothers, came out in December 1990.  The European version released in 1991.  The game also saw a Virtual Console release on Wii U in PAL regions in 2015 and in North America in 2017.

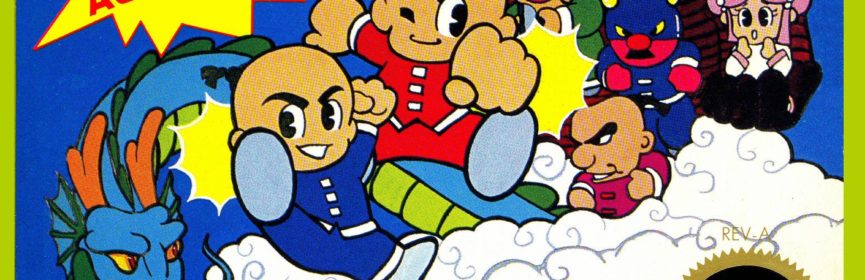
This game has a simplistic story line.  An emergency TV broadcast goes out across Chinaland.  It is from Blu Boltar, lord of the Yoma Clan, who has captured the emperor.  The Little Ninja Brothers themselves, Jack and Ryu, set off on their quest to defeat Blu Boltar.  This adventure will take you all across Chinaland.  Simply follow the events of the story and conquer the Yoma Clan to beat the game.

Oh, his name is Blue because he is blue.

There are several options to choose from when starting the game from the RPG option on the title screen.  You can start from a new game or continue a previous game with your password.  Next, choose either a single player or a two player game.  Player 1 goes as the red-clad Jack, and Player 2 gets to play as the blue-dressed Ryu.  Then you can choose the text speed from either Fast, Normal, or Slow.  Finally, select the difficulty level between Hard, Normal, and Easy.  The neat thing is that you decide from all of these options every time you play the game.  For example, if you want a second player to join your saved game or switch the difficulty level around, you can do that as you see fit.  For all of my play sessions, I did single-player, fast message speed, and hard difficulty.  Finally, if you chose Password, you will enter that in here before play begins.  The passwords themselves are long and variable, usually ranging from 30-40 characters long, with the character set of capital letters, numbers, and some symbols.  Taking photos of the passwords was really helpful for a game like this.

At first, the game looks and feels like a turn-based RPG.  The game begins with an introductory cutscene explaining the base story.  Your adventure starts out on the map where you can walk around and explore.  You emerge out of a temple and there’s a town nearby.  You can go in the town and talk to people to figure out what you are supposed to do next, as well as buy items and equipment there to aid you.  All seems standard until you get into the battle scenes and the real fun begins.

Battles begin with images of the enemies you will be fighting as well as their relative experience level.  You can choose to Fight or Run away.  Should you end up in battle, now you are in a single-screen action arena with enemies emerging from the sides of the screen.  These battles are identical to the fighting in Kung-Fu Heroes.  You can walk in four directions with the D-pad.  The A button punches, causing you to lunge forward.  Holding a direction with the B button performs a moon sault kick.  For this move you leap into the air and hurt enemies by landing on them.  These are the basic moves you have at the beginning and they are more than enough to deal with the enemies at hand.  More enemies will spawn as you defeat them, but once you beat enough enemies the rest will run away and you will collect your experience points and money.

Battles are plentiful and dangers are high.

You can collect some items from your journey within the battle scenes.  Most of the arenas contain rocks that you can bash with your punches.  It is common for some of the rocks to generate items that float around the screen until you collect them with a punch.  Question balls are the most common item you’ll find.  They either give you an M adding to your M count at the top of the screen or a skull which depletes your M count back to 0.  When you have 6 M marks, you can use the Mighty Ball which makes you temporarily invincible.  Rocks may also hide treasure chests that contain various items shown as you collect them.  K marks add 5 Dragon Kicks to your stash.  These are performed by pressing B without any D-pad direction held to start.  Hearts restore some of your HP.  You can also collect throwing stars.  You can hold up to 8 in reserve for later use, but sometimes they activate immediately.  Throwing stars are tossed during punching when activated.  Another item collected in battle is a Boo Bomb.  When used, the screen shakes stunning most enemies in place.

To further enhance your fighting capabilities, you need to go to the towns and buy items and equipment to build yourself up.  There are several recurring stores throughout the villages of Chinaland.  The convenience store lets your perform configurations during your journey, such as changing the number of players, reviving your second player, viewing experience points to the next level, and viewing your password.  The tool shop lets you buy consumable items, such as sweet buns to restore HP, skateboards to allow you to escape during difficult battles, whirlybirds to teleport between towns you’ve visited, and batteries for the Dragstar allowing you to drive across the map quickly without any random battles.  There is also a weapon shop where you can buy equipable weapons and other items.  You can buy things such as throwing stars, punch power increases, robes, shields, amulets, and talismans.  These increase your battle capabilities, give you defense boosts, or debuff your enemies in various ways.  You can pick up a sword that you can swap with your punch attack in battle at any time.  The sword is more powerful and can defeat some enemies unharmed by punches, though you do not gain as many experience points from enemies when using the sword.  Finally, you can buy a few kinds of candles to light up darkened caves.

If you want to use some of your new items or equipment in battle, you can select them from the menu during battle.  Press either Start or A+B to bring up the menu.  You have two choices of Equipment or Items.  The Equipment menu is mainly used for switching between your punch and sword.  You also use this sub menu to summon the Mighty Ball if you have 6 M marks.  The item menu is where you use your consumable items, such as healing buns and throwing stars.  Another technique you have access to through the Item menu is the Surger.  The technique is gained whenever you purchase a new type of throwing star and it requires using a throwing star to activate.  The Surgers have different names throughout the adventure, usually named as some kind of wave.  Activate the Surger through the menu, then punch anywhere in the air to deal damage to all enemies on screen.  I believe you can use it throughout the entire battle multiple times, but I barely used it during my play so I’m not the expert on it.

It’s not a race … slow and steady!

There is also a menu that you can access from the world map screen or within towns and dungeons.  Just press A.  Here you can talk to someone in front of you, call an ally to help in a handful of specific situations, or access the subscreen which contains several options.  You can browse your items and use some consumables like your healing items.  Status displays your experience point, experience level, max HP, base attack power, and your current stash of money.  Equip lists out your equipment, simply enough.  The Treasure option shows some special items you’ve collected.  Finally, you can access the password at any time to continue play later on.

In a few places during the game, you may be asked to participate in some field training.  This takes places in a split screen view with some different controls.  In a two-player game, each player takes one half of the screen, while in single player you take the top half and the computer plays the bottom half.  This is a timed event where you have to run all the way to the right, sometimes collecting items or popping balloons along the way.  The controls are a little different here.  You run by mashing the A button.  You use the D-pad Up and Down to steer a little bit or Left to turn around if needed.  Kicks and dragon kicks are performed as normal.  While it appears you are racing against the other player, you are really just aiming to complete before the timer runs out.  These field events typically give you some kind of special item needed on your journey.  It is just a fun little diversion and I thought they were fairly easy to clear.  (Dragon kicks are your friend!)

As if all the RPG trappings of this game weren’t enough, this game takes it all the way there with the occasional turn-based battle.  Primarily these are boss battles but in some situations you’ll go up against normal strength enemies.  You have pretty much the full complement of moves that you have in the action scenes at your disposal in the turn-based combat.  You can punch, kick, dragon kick, and use items like your sword, throwing stars, surgers, and even the mighty ball.  With two players, both of our heroes get a turn, but in single player you can call your partner to join the battle, which you absolutely should do right away.  This computer-controlled partner mimics many of your choices and will default to an attack otherwise.  The fights are shown animated so you can see which attacks land and which ones miss.

Occasional turn-based battles turn this into a classic RPG.

The progression in this game is straightforward but your journey doesn’t have to be.  The primary objective is to collect seven bells that are used to open up the way to the final boss in order to save Chinaland.  You will most likely go about this in order.  The map is somewhat linear but you do have some freedom to explore.  You can skip towns and caves that are required and save them for later, but you probably won’t want to.  The enemy levels out in the field jump up pretty high if you travel too far, guiding you back to something easier.  Make sure to use all the hints from the townspeople to take the easiest way through by hitting all the major landmarks roughly in order.  This is a pretty tough game as it is, so you don’t want to make it harder on yourself.  There was one place in particular, a dark cave, that I explored way too early and spent a lot of extra time figuring out early.  The only penalty for death is losing half of your money, so if that’s not a big deal to you, feel free to explore as you like.

This was my first time playing Little Ninja Brothers.  As previously mentioned, this was one I was looking forward to trying after not knowing about it before collecting.  This is an uncommon game that has risen in price.  Cart copies sell now for around $50.  I bought mine on eBay for $20 shipped along with Bart Vs. The Space Mutants and Ninja Gaiden, which really was a nice deal looking back on it.

I would say my playthrough of the game was a little rocky.  The first thing I noticed is that gaining levels goes slowly in the game.  You need a lot of experience, the battles can be lengthy, and the reward for winning isn’t that high.  There are other things that slow the game down.  Many battle scenes have water which drains half your health should you fall in.  Losing money on death was a little annoying early on, particularly early in the game when I was grinding for equipment.  It took several failures and losses to earn enough to get what I wanted.  The screen scrolling is a little annoying in the game.  You have to get pretty near the edge to scroll, and there are graphical artifacts on the sides as you scroll before the game engine begins drawing the proper tiles.  You have to go out of your way to reach some dungeon areas that contain items you need.  A few hours in I reached my first turn-based battle and it was a huge upturn in difficulty.  Some bosses have a stun attack that block you from taking turns, and if you have bad luck you can get stuck for a long time.  Once or twice, I got stunned for what felt like a dozen turns, enough to put me in the grave without being able to fight back.  This game is out to get you for sure.

Plenty of sights to see in Chinaland!

With all that said, there were some good things about this playthrough that I am happy about.  The first is minor, but the entire game took me 16 hours to complete, which was fewer hours than I would have expected.  The game has a quirky sense of humor that caused me to legit laugh out loud at least once during my playthrough.  It isn’t common for games of this vintage to not take themselves too seriously.  The best part was at the very end when I beat the final boss.  The last section leading up to the final encounter is a real slog.  Small spoilers ahead.  First you go through a long, winding, dark maze with plenty of tough fights.  Past that you have to go up a mountain path with all new enemy encounters as well as doorways that can send you backward.  Finally, you reach the end, probably depleted of health and items, and have to go up against the hardest boss.  I had to repeat the lead up to this fight a few times, but luck saved me and I only needed one try at the boss.  The start of the fight was rough as both I and my partner got stunned and I took some hits early on.  I didn’t have any healing items left either.  Good thing for me the stunlocks were very short and I put him away when I was one hit away from death.  When I looked up the final boss in an FAQ after I beat him, I saw that he has a healing move that he didn’t use.  He would have beaten me for sure had he healed, so I really got away with one there.

Little Ninja Brothers takes the base game of Kung-Fu Heroes and turns it into an RPG-style adventure, one that I really had a fun time with.  I would say the graphics are average or a bit above.  I like the character portraits during important conversations and some of the enemy designs are cool, some only appearing one time in the game.  The music is upbeat and cheery for the most part, even in the caves.  The controls feel tighter than in the original game and don’t have any touchy controls like unsheathing the sword in Kung-Fu Heroes.  Gameplay has a lot of variety from the field training stages, RPG battles, and top-down action.  The one major knock on this game is that the base fighting gets repetitive and you need to grind out lots of battles to level up.  The difficulty is up there even when you level up a lot, and that may also be a turn-off.  I thought this game was fun and definitely worth playing, living up to the hype I had for it.

#154 – Little Ninja Brothers

 
MAR
20
2020
1

#145 – The Magic of Scheherazade

Come with me on a genre-blending adventure.

Always choose Fast!

To Beat: Reach the Ending
Played: 1/9/20 – 1/26/20
Difficulty: 6/10
My Difficulty: 6/10
My Video: The Magic of Scheherazade Longplay

I think it’s common to form a pre-conceived notion about a piece of media before you experience it yourself.  This feels especially true about movies with all the teaser trailers and YouTube video dissections going on today, but I think it applies to games as well.  The Magic of Scheherazade on NES isn’t often talked about within retro gaming circles.  Before playing it, from what I could tell, it was regarded as a fun game and looks to play similarly to The Legend of Zelda or Crystalis.  That was enough to pique my interest.  As it turns out, this game still had ways to surprise me.

The Magic of Scheherazade was first released on the Famicom as Arabian Dream Scheherazade in September 1987.  The game was both developed and published by Culture Brain.  The NES version was released over two years later in December 1989.  The reason for that is the game was massively overhauled for the NES release, changing everything such as the graphics, music, level design, and progression.  A sequel was planned but never released, nor has this game seen any kind of re-release.

This game is loosely based on the Middle Eastern folklore collection One Thousand and One Nights.  The set of stories in the collection are all framed around a single story featuring a woman named Scheherazade.  In this story, the king Shahryah discovers his wife has been unfaithful, so he has her killed, marries a virgin every day, and has her killed the next day.  This goes on for 1001 days until Scheherazade offers to spend a night with the king.  She tells him a story but stops halfway.  The king wants to know how the story ends, so he spares her until the next night.  She then finishes the story but starts up another more interesting tale, again stopping partway.  This goes on for 1001 nights, at which point the king spares her permanently and makes her the queen.

You’ll get sucked in!

The story of the NES game centers around the great magician Isfa.  He battles and defeats the great demon Goragora, sealing him and other demons away underground.  The evil wizard Sabaron eventually comes around and frees the demons.  You play as a descendant of Isfa who alone holds the power to defeat Sabaron, but unfortunately, his memory has been lost, his powers are gone, his princess Scheherazade has been captured, and he has been sent to a completely different time period.  Talk about a bad day!  He is found by the time spirit Coronya who can help the hero travel through the time door.  To defeat Sabaron and save Scheherazade, the hero goes on a time travelling journey joining up with many different allies to help him regain his powers.  This is a chapter based game and you beat the game once you complete the fifth chapter.

On the title screen, you can adjust the text speed from either Slow, Normal, or Fast, and then select to Start a new game or Continue an existing one.  When starting a new game, first enter in your name up to four characters long.  Then you choose your class from the choices Fighter, Saint, or Magician.  Fighters are good with swords and can get little fireballs firing from swords later in the game, but they are not skilled with the magic rod.  The magician is the inverse; he is good with the rod but not so much with the sword.  He is also best suited to fight the bosses.  The saint is kind of an in-between character.  He is not that great offensively, but he can make use of special items to reflect enemy bullets and be spared from damage when touching certain ground tiles.  Shopkeepers may give discounts to certain classes as well.  Don’t worry too much about making a bad decision upfront because you can change your class later.

This game controls like a normal action game, for the most part.  You move Isfa in four directions with the D-pad.  No diagonal movement here.  The A and B buttons are for your actions.  By default, A jumps and B lets you speak to people you find.  The Start button brings you to what the game calls the Select screen.  Maybe not the best choice of name.  Anyway, the Select screen lets you reassign the action buttons.  There is a list of items for the A button and a separate list for the B button.  The A button list is mostly dedicated to spells, while the B button is for your weapons, speaking, or other consumable items.  The Jump action can be assigned to either button or both.  Go through the list, then press A to assign that item to its button.  When you’re done, press Start to go back.  Pressing Select during the game brings you to the subscreen.  There’s a lot of information here.  You can see your list of allies, a map for some sections, your spell list, your items, and your equipment, among other things.

That guy’s gonna get a face full of magic.

Most of the time you will be on the action screen.  The bottom display shows some stats as you play.  You see your current class as well as your experience level.  You see which actions you have assigned to A and B.  Next are your Hit Points and Magic Points, labeled H and M.  Then you see your total experience points and how much money you have.  Finally, you see counts of some of your consumable items.  The left items are your keys and amulets, and the right items are your bread and mashroob.  Keys are for opening locked doors in the palaces at the end of each chapter.  Amulets keep you from being transformed by an enemy and are used automatically as needed.  Bread heals HP and mashroob restores MP, and they are consumed automatically if you run out of either one.

Each of the game’s chapters is self-contained, and they often follow a similar structure.  You start off in a town and you can gather information from the townspeople about what is bothering them and what to do next.  You venture out of the town going screen by screen.  Many of these screens contain enemies that you can fight for experience points, using either your sword or rod.  Sometimes defeated enemies drop money, or occasionally health and magic pickups.  Eventually you gain experience levels where you gain more max HP, max MP, and sometimes power upgrades to your rod and sword or new spells.  You find other towns to advance the story and recruit allies to join you.  Out and about, sometimes Coronya will alert you to use the magic of Oprin to reveal a staircase.  One of these staircases leads to a time door.  Depending on the situation, taking the door will either put you back in time or send you ahead in time.  You can move between time periods freely through the door.  The maps in both time periods have similarities but have changed a little due to the passage of time.  By visiting towns and following leads, you will eventually make your way to a temple or palace where you square off against a powerful demon at the end of the chapter.

Sometimes between screens outside of town, you can trigger a random RPG battle against a set of enemies.  From the start, you can choose to fight, try and escape, or try and make peace with the enemy via a charitable contribution of your own cash.  If you can’t get away, you’ll have to fight.  You can choose up to two of your allies to join you in battle.  You may also pick from a pre-determined formation, provided you have already learned about the formation outside of battle and have the allies that are part of the formation.  You can also fight alone if you want.  Before the fight, the game distributes your bread and mashroob automatically between you and your allies only for the duration of the fight.  You can adjust the distribution as you desire.  If you have hired troopers, they will also appear for your fight.  Now you are finally ready to battle.

Gather a team for some RPG battles.

The battles themselves play out like standard turn-based RPG battles.  For your and your allies, you choose to attack with one of your weapons or cast a spell.  Troopers only attack, though their attacks are strong.  If you selected a formation for this fight, you can choose to cast combined magic.  These powerful spells are cast as a team and they work best against specific sets of enemies that you’ll learn about when you learn about the formation.  In winning a battle, you are awarded with experience points and money, and occasionally a free item.  I’ve learned these battles are the best way to earn money, so usually they are worth it.

The towns contain some locations that help you in your journey.  Use shops to buy items.  You can try haggling with the shopkeeper to reduce your cost, but he can threaten you out of the shop and take some of your cash in the process, so be wary.  You can also take out loans from the shopkeeper.  I never took advantage of this in the game, but it can be helpful if cash is tight.  You will have to pay interest, and if you borrow too much you can’t borrow any more.  You can also get locked out of buying items and supposedly lose the game entirely if you don’t pay it back.  Hotels in towns restore all HP and MP for you and all your allies.  You can gamble money in the casino, but not if you set your class to Saint.  The troopers’ office lets you hire troopers for the turn-based battles.  The mosque gives you some additional options.  Here you can change your class or revive allies for a fee, or you can get your password for later play.  The last place you can find in the towns is the Magic University.  This is where you learn about the formations and combined magic for the turn-based battles as well as the Grand Magic that you can learn in each chapter.

There are a bunch of spells in this game.  I found this the most confusing part of this game because they have strange names and I found it hard to connect the names with what they do.  The one I used the most was Pampoo, which restores 20 HP during battle or 10 HP in the field.  Bolttor and Flamol are lightning and fire spells that get powered up twice during the game.  Mymy turns enemies during turn-based battles into hamburgers, stopping them for a few turns.  Defenee cuts damage taken in half for the entire turn-based battle.  Sillert is a reflect magic spell.  There are other spells, but this is just an example of how confusing these can be and how the manual really helps sort out what they are.

It’s not nighttime, just the solar eclipse.

There’s another mechanic in the game called the Alalart Solar Eclipse.  This event happens periodically during your adventure, dimming the screen colors a little bit for effect.  There are things you can do only during the eclipse.  In each chapter, you will find a wise man who will give you Grand Magic.  These are single-use spells that can only be cast during the eclipse.  These spells can change the landscape of the map, revive your fallen allies, and other powerful things.  The eclipse is the best time to visit the casino as you will have great luck gambling.  You can also create a money tree.  You need a Rupia’s seed to do this, which you can buy in some shops.  There is a specific place on the map where you need to plant the seed and you need to do so in the past during the eclipse.  When you visit that same place in the future, a money tree will have grown, and you get to collect a bunch of cash when harvesting it.
 
The end of each chapter culminates in a boss battle against one of the demons.  There are a few things to keep in mind.  You will have to explore a palace that is sort of like a Legend of Zelda inspired dungeon.  If you purchased a map this chapter, this is what it’s for.  Some items you buy are used here specifically.  For instance, keys open locked doors (though many can be opened without them), and horns can help you fight some gatekeepers in some of the rooms.  When you make your way to the demon, often you need a specific ally available to help fight with you or even trigger the demon to appear.  You will want to be in the Magician class since the demons are best fought with the rod and the Magician is the best with that.

The game has a lives system, on top of everything else.  It is kind of a weird choice, especially since you auto-heal with bread.  During the action scenes, you can fall or jump into water which is instant death.  In turn-based combat, sometimes an enemy will hit you or your party with an instant-death spell.  You get three lives with no opportunities to gain more.  Running out of lives gives you a password, which happens to be the most convenient way to get one.  If you keep playing, you will resume at the starting town of that chapter with all of your items, experience, and gold intact.

The password system has some interesting quirks to it.  Passwords vary in length depending on where you are in the game.  I’ve had passwords lengths of 35 characters up to 43 characters.  This is a game where the passwords encode exact amounts of stats.  This is the first game I’ve heard of that has a password failsafe built in just in case you fail password entry three times.  From what I’ve read, the game prompts you for your name and class, then puts you at the start of the chapter you are on with minimal equipment.  Much better than starting over, that’s for sure.

Nothing better than a good boss battle.

This was my first time playing through The Magic of Scheherazade.  I read about this game a little bit in old gaming magazines and it looked interesting.  I did not get a copy of the game until my collecting days in adulthood.  I am not sure where I bought my first copy of the game, but I did track down an extra one later that came with the travel map.  The cart and map cost me $10, not a bad deal at all.  Even though I wanted that map specifically, I didn’t use it at all for my playthrough of the game.

I decided for this playthrough that I would record the entire thing and post up a true longplay on YouTube.  I tend to shy away from that because I often play games in short bursts and there’s a lot of overhead when I have to set everything up for video capture.  I don’t have a dedicated recording or streaming setup at my house.  I set my laptop up in the family room to record, then take it all back down later so my kids aren’t tripping over wires.  Despite all that, it is a good idea to try something different. In the long run, it will be better to have full recordings for long games.  This was a good guinea pig since the game isn’t terribly long, but long enough that I would not be able to beat it on one sitting on my second try.

I would say my playthrough of the game for the first time playing is pretty average.  I spent 10 hours playing through this game, fewer than I thought.  There were a few hangups that I remember, mostly minor things.  In Chapter 3, I got stuck for a little while and kind of wandered the map until I realized I needed to change my class to advance the plot.  Some of the demon fights I did not understand the first time through, so I spun my wheels and messed around until I figured it all out.  I got lost in a few of the maps.  Some of the maze areas have hidden holes that take you out of the maze entirely.  It took quite a few tries on some of them to figure out how to get through.  I often backtrack short distances and test out different branching paths just to be sure I’m not missing anything that I would have a hard time coming back to later.  There was also time lost to context switching.  Because I played in shorter sessions, there was more backtracking to the mosque to get my password, and then the next session I needed a little extra time to reorient myself to my current situation.  These kinds of things are bound to happen in a blind playthrough on my schedule.  I don’t expect anyone to actually watch my longplay, but now that I’ve done a full, long game, I’m happy to have the archive of it available.

The Magic of Scheherazade can probably be classified as a hidden gem on the NES.  The graphics and music are mostly well done, just a little on the simpler side.  The controls work well, and I like that you can configure your action buttons, though being able to assign any command to either button would have been a nice improvement.  Jumping can be a little wonky at time, particularly in the towns around townspeople.  Minor issues aside, the gameplay is where this game really shines.  There are so many different systems at play, and once you break through in understanding how it works, the variety of gameplay and the amount of content really drive the experience.  There’s a wide cast of characters so you can configure your party whichever way you want.  You have plenty of options with the different spells and weapons at your disposal.  There’s time travel!  There are mappable dungeons with cool boss battles at the end.  There’s a lot here, almost too much at times.  The game has just the right amount of length and you are almost always making progress, which sure feels good.  This is a neat game and I’m glad I got to experience it all.

#145 – The Magic of Scheherazade

 
AUG
09
2019
0

#127 – Shooting Range

A Zapper game with a strangely accurate title.

The title colors glow until text appears, so lame!

To Beat: Beat the Normal Game
To Complete: Get the best ending in both the Normal Game and Party Game
What I Did: Completed the game
Played: 5/17/19
Difficulty: 4/10
My Difficulty: 4/10
My Video: Shooting Range Longplay

Now that I’ve come upon yet another Zapper game already, I decided to do a little digging trying to piece together my own list of Zapper-compatible licensed NES games for tracking purposes. The unlicensed list is easy, just Baby Boomer and Chiller. For licensed games, most lists I’ve found are incomplete. Complicating things are a few games that use the Zapper partially, or worse, at one random spot in the game. Putting everything together, it looks like there are 16 licensed games that utilize the Zapper with most of them being Zapper only. Shooting Range is already the 5th Zapper game played for this blog.

Shooting Range was developed by TOSE and published by Bandai. It was released in June 1989 in North America only and is an NES exclusive. Really, that’s all the information there is on Shooting Range.

There’s no story to be found here but there are a couple of different modes to play. The Normal Game takes place over four stages where you fire at targets that appear in themed scenes. This is the main mode of the game. The other mode is called Party Game and you try and shoot as many targets as you can within the time limit. In both modes, up to four players can play alternating to see who can get the biggest score. To beat this game, you need to clear all stages in the Normal Game. There are also different ending screens depending on how many points you score in the Party Game.

Just a normal day out west.

I think Shooting Range has a double meaning here. Sure, it’s a shooting range where you fire at targets. The primary mechanic in the game is that you use both the D-pad and the Zapper at the same time, using Left and Right to “range” across a wide view while you also aim and shoot at targets. This is a cumbersome setup for me since I prefer to hold the Zapper with both hands to keep it steady. You will need to constantly pan back and forth looking for targets to shoot so you really need to play this with both Zapper and controller in hand simultaneously.

The goal of the Normal Game is simple enough. Various targets will appear on screen holding up a red and white pinwheel which is what you shoot to earn points. The bottom of the screen shows your level score and total score on the right and the level timer and energy bar on the left. You lose energy when you shoot and miss. You lose the game if you run out of time or energy, so you must be both quick and accurate. Each stage has different criteria to finish the stage and move on to the next. Upon completing each level, you earn some bonus points for any leftover time or energy.

When starting up a new Normal Game, first you select either Level 1, 2, or 3. These are not the stages themselves but more like a difficulty level. To my knowledge, the only change is how much time you have to start each stage. Levels 1, 2, and 3 give you 300, 250, and 200 seconds respectively. Next up is the scoring screen. This shows your scoring breakdown per stage, as well as any bonus points that roll up into your total score. The Stage Clearing Point area is what the point threshold is for certain stages. I confused this for actual points on my score at first. Then you go to a screen displaying all the stages in the game. Shoot anywhere to start playing a level.

During the Normal Game, shooting some targets also reveals an item. The same characters tend to drop the same things. Most of the items are just circles with letters in them. Simply shoot it to collect it. The little E boosts your energy by two bars, while the large E gives you four. A reverse E deducts a couple of energy points, so avoid them. The C gives you 100 points, while the W gives you 1000. The W is different in that it doesn’t get dropped by anyone and you will sometimes just find it. There is also an hourglass item that gives you 50 more seconds on the clock.

That middle creature flips back and forth quickly.

The first level in the game is Western themed. The goal here is to earn 5000 points, at which point the level ends abruptly. There are Native Americans, gun-slinging criminals, and flying birds for targets. Some of the birds are worth 500 points, while others are worth much fewer, depending on how they fly around. The second level is pretty similar to the first. Here you need 7000 points to clear it, but this time it is ghost house themed. There are monsters such as witches, vampires, and ghosts. One monster flips his pinwheel back and forth rapidly and it is hard to hit.

The next level is the bonus game. This one is just a single screen with no controller required. There are two rows of bottles on the wall and random ones will flash all white. Shoot them while they are all white to break them. This level ends when either all bottles are broken or you run out of time. You always get sent to the next level no matter how well you do.

The final stage takes place on the moon. There are various types of aliens to shoot at here. Instead of meeting a point threshold, as soon as the timer hits 100 seconds remaining, a large brain alien appears. It’s a boss battle! The brain floats around the whole screen in a wave-like pattern and only fully reveals its pinwheel every so often. This is a tough fight with the limited time left, but if you can beat it then you win Normal Game. If you fail here or in any other stage, you can continue, but you lose all your points in doing so. I think continues are supposed to be unlimited, but I didn’t always see it happen so I’m not sure how the continue system works. This is a short game, so once you get the last boss down you can play through the game again trying for a high score. You can enter your initials on the high score screen and see your accuracy too.

The Party Game is a much simpler mode than the Normal Game. This is just a single screen with some targets to hit. There are no items or energy, just you and the timer. Lights in the background appear and shooting them causes the pinwheel to pop up along the bottom. Shoot as many of these as you can. If you miss a pinwheel, then you need to shoot another light to restart the sequence. It’s too bad you can’t play this simultaneously with another player because it would be fun to compete for targets. Either way, try to score as high as you can before the timer runs out.

Even the floating brain has caught pinwheel fever.

This was my first time playing Shooting Range. I can’t recall if I played any of the game during cart testing. Usually with the peripheral games I boot them up to see if they run without glitches and then I put them away without trying the gameplay. I know that I watched TMR beat this game for NESMania and it was one of the last games he completed for his project. I had some familiarity with the game though I forgot most of it. This cart isn’t too hard to find and sells for around $8-$10.

This was a short game that I cleared within a couple of hours. I needed more than a few attempts to clear the final boss, but that was all. If you score high enough at the end, you earn a medal. The bronze medal is at 30,000 points, a silver is at 35,000 points, and you need 40,000 to get the gold. Now your score for the first two levels is pretty well set since those stages end by point thresholds. One tactic is to stockpile energy and cash them in for bonus points at the end, but that doesn’t always pan out and doesn’t give you near enough points anyway. The other thing you can do is play on the easiest difficulty since more time means more points at the end of the stage, even if that only adds just a tiny amount to your total. The secret to getting the gold is to earn the bonus points as shown on the scoring screen, and the only way to get them is to play the bonus level perfectly without missing. Doing so is challenging. My strategy was to go at the top row first left to right, then the bottom row. After a few bottles gone, the next ones seem to line up well and you can take them all out quickly. On my run I ended up with over 50,000 points which was above and beyond what I needed. In Party Mode, the score you want to aim for is 35,000, which I accomplished on my second try. All those attempts at To The Earth not long ago sure paid dividends!

Shooting Range is a brief Zapper experience that ultimately doesn’t add up to much. It is interesting that it has different themes for each level. Even the Party Game has a different feel than the Normal Game’s levels. The music is mostly forgettable but not bad. The controls are a little wonky for a Zapper game. They aren’t difficult to comprehend by any means, but I simply didn’t find it that comfortable to have to use both the controller for scrolling and the Zapper for firing at the same time. Thankfully the game was easy and short enough that it wasn’t a huge issue until the end boss. However, the controls combined with the short play time makes Shooting Range not that great of a game.

#127 – Shooting Range (Normal Game)

#127 – Shooting Range (Party Game)

 
DEC
07
2018
0

#103 – Baseball Simulator 1.000

Possibly the most detailed and comprehensive NES baseball game.

Pronounced “one thousand,” not “one dot oh oh oh.”

To Beat: Win a season
What I Did: Went undefeated in a short season in the Ultra League
Played: 10/15/18 – 10/20/18
Difficulty: 1/10
My Difficulty: 3/10
My Video: Baseball Simulator 1.000 Final Game

There are so many baseball games on the NES that each one should have something interesting or unique to offer. At least, I would hope that’s true. R.B.I. Baseball is always the nostalgic choice for all the good memories I’ve had playing games with friends. Bases Loaded emulates the grind of a long season. Baseball Simulator 1.000 hits along both of those lines but dials it up even further in a few different ways. While I did not spend a huge amount of time playing Baseball Simulator 1.000, it is definitely in the running for my new favorite NES baseball game.

Baseball Simulator 1.000 was developed and published by Culture Brain. The Famicom version was first, releasing in October 1989 under the name Choujin Ultra Baseball. The NES version came out in March 1990. There are several other games in this series, all on Super Famicom. The only other game to get a US release was Super Baseball Simulator 1.000 for SNES in 1991. In Japan it is known as Super Ultra Baseball. A direct sequel on Super Famicom was released in 1994. The other three games were Japan-only baseball games named Ultra Baseball Jitsumeiban. These games have the same structure as the others but include licensed rosters from the Japan’s NPB league.

Baseball Simulator 1.000 has several game modes with a wide variety of configuration options. You can play a simple exhibition game by yourself or with a friend, or you can play a full season. There are three leagues of teams to choose from for playing a season, one of which is the Ultra league where players have super skills that can be strategically deployed. You can create your own teams or even your own league. In season play, statistics are calculated for the duration of the season. Things like batting average, home runs, and ERA are tabulated and you can see how your players stack up with the rest of the league. To beat the game, simply be the league champion at the end of a season.

Lots of stats in this one!

The first menu screen presents you with five options that do a pretty good job of outlining what features to expect in the game. Exhibition mode lets you play a simple game. You can play this game with either one or two players. In single player this is just one game, but for two players you can also choose to play a best-of-seven series. Season mode is the primary mode in the game. You can choose the number of games you’ll play in the season from either 5, 30, 60, or a whopping 165 games. Season play is contained in one league of six teams all vying for the best record. Edit mode lets you take an existing team and edit it in many ways to create a brand new team. In the New League option, you can take any six teams you want in the game and combine them together into a new league that you can play in the Season mode. Finally, if you just want to sit back and watch the computer go at it, you can select Watch and just watch a game.

The in-game controls are largely the same as in R.B.I. Baseball, so I recommend reading my review there if you want more detail. I’ll cover the highlights. Batting and baserunning I believe is exactly the game. You can move your batter around the batter’s box with the D-pad and press A to swing the bat, tapping A to bunt. While baserunning, the D-pad points to whichever base you want. Press B with a base direction to advance a runner and use A instead to go back.

On defense, you both pitch and play the field. For pitching, you can move the pitcher left or right prior to starting the pitch with A. You can use the D-pad to influence the direction and movement of the pitch both prior to the pitch and when the pitch is on the way to the plate. A quirk about this game is the “pinch” indicator which sometimes turns on during a crucial plate appearance. The pitcher will start to sweat and can have an effect on his performance, either positively or negatively at random. On defense, you control most of the fielders at the same time, but more specifically the ones closest to where the ball is headed. Move on top of the ball to grab it, then press A and a direction to throw the ball to that base. Press B and a direction to run the ball there yourself. In this game, you can press A to jump or dive for a ball that is just out of reach.

Get a view of some fielding stats and make adjustments.

You can do player substitutions. Before a pitcher winds up, either team can press Start to call time. While batting, you can choose a pinch hitter. He will play the field wherever you sub him, no problem. Well, unless you are hitting for a pitcher, in which case both pinch hitter and pitcher are out of the game and you must choose a new relief pitcher after the half inning. On defense, you can sub out either the pitcher or any fielder. This brings up a view of the entire field with a small table for each player. Select a player, then choose Change from the box on the lower right. One thing you cannot do is swap two fielders already in the lineup; you must sub in a brand new player. If you choose a player and select Move, you can shift the fielder to just about any position on the field you want no matter what position they currently play. So, for example, if you know the batter will probably hit the ball to right field, you can move several fielders out there for a better chance of making a play. The custom fielding positions reset back to default after that batter is finished. There are a few limitations. You cannot move either the pitcher or the catcher, you can’t put a fielder in between the pitcher and catcher, and you can’t put a fielder in foul territory.

The main feature that sets this baseball game apart is included in the Ultra League. In this league, pitchers can use Ultra Pitches, batters can perform Ultra Hitting, and fielders can do Ultra Fielding. These are special, supercharged moves that can really swing the game in an instant. Each team in the Ultra League has a set number of Ultra Points for each game played, and performing an Ultra Play requires spending some of those points. Ultra Pitchers and Ultra Hitting costs 3 points each, while an Ultra Fielding play costs 5 points. To choose an Ultra Pitch, press Up twice before the windup. You will see an icon appear next to the pitcher. Then press Up or Down to choose the Ultra Pitch you want. While batting, press B to show the Ultra Hitting icon, then swing normally with A to use it. To perform an Ultra Fielding move, press B while the fielder is near the ball.

The Ultra moves can be intense

The Ultra moves themselves are fun to use with a wide variety of interesting effects. There are pitches with all sorts of movement, including a snaking pitch and a super fastball. You can throw a stop ball that freezes on the way to the plate by pressing A. You can throw a pitch that splits up into many balls. There’s a pitch that disappears on the way to the batter, and another that is a heavy ball that the batter has to hit just right to put it into play. On the hitting side, you can simply do an Ultra move that hits the ball with more power. There’s a hit that casts multiple shadows on the ground so it’s tougher to see where the ball will land. There’s a hit that spins the ball off in a drastically different direction when it hits the ground. There’s a missile hit that pushes the fielder back far, sometimes even through the outfield wall. For fielding, you can jump super high or do a super dive. You can also throw the ball extra fast to help catch a runner between bases. This isn’t a full list, but a good summary of the kinds of things you can do in the Ultra League.

There are six different stadiums in the game. You can pick which one you want to play in an exhibition game, or in a season you can assign each of the six teams to any stadium you want as their home field. The stadiums have different dimensions and characteristics, just like baseball stadiums in professional leagues. One stadium that stands out from the rest is the space stadium. Graphically it is unique, but here there is less gravity so the ball can really carry. It’s possible to hit some long homeruns, especially in the Ultra League.

Baseball Simulator 1.000 features a full Edit mode where you can build a team. To start, you must pick one of the eighteen built-in teams as a base. When creating an Ultra team, you have to use one of the existing Ultra teams as a base. You also can’t have the original team and the edited version of that team in the same league together. Other than that, there’s a lot you can change. You can rename the team and any of the players. You get to distribute both batting stats and pitching stats. You can a base amount for the entire team in each category and you can distribute those points as you see fit. You can edit things like their contact ability, power, running speed, position on the field, and fielding ability. For pitchers, you can choose if he is left or right handed, pitching speed, stamina, and strength of breaking pitches. Pitchers all have the same, weak hitting stats that cannot be changed. If you are editing an Ultra team, you can also choose and distribute the Ultra moves. You can create up to six new teams altogether.

Good idea to have the ball hit directly to the pitcher.

Season play is also a comprehensive mode. While only one season can be saved at a time, there are many ways you can choose to go through it. For a new season, first select a league. This can be one of the three built-in leagues or the fourth custom league. Then assign home stadiums to each team in the league. Next, choose the season length from either 5, 30, 60, or 165 games. Since there are six teams, each team will play against each of the five other teams the same number of times. For each team, you then select which teams are played automatically by the computer and which ones are played manually by a player. You can play an entire season automatically if you want. The game will generate a schedule of the order of games played and go through them one at a time. If a team is set to Manual, then that game will be played with a player at the helm. If both teams are set to Auto, you can then choose if you want to watch the game or skip it. Skipping a game simulates the contest more quickly than watching the game play out. All stats are kept and calculated from the simulated game.

The season ends whenever a team clinches the league championship. As the season draws to a close, the standings will display the Magic Number. This number is wins by the first place team or losses by the second place team needed to secure the league title. A Magic Number of 0 means that team wins the league no matter how the rest of the games play out. You then see a victory celebration for the winning team. If two or more teams are tied after season play, there will be playoffs to determine the winner. The playoff bracket is set up automatically and are single elimination games. Most likely there will only be two teams tie, so in that case a single game determines league champion.

This was my first time playing through Baseball Simulator 1.000. I do like baseball quite a lot but I’m not so interested in baseball video games, so this has sat on my shelf for some time. This is the first game with a battery backup I’ve played in a little while, and thankfully my battery was still good. I probably picked this game up in a lot of games for next to nothing. A cart-only copy costs around $6, so it’s quite affordable for baseball fans.

This poor fielder is getting knocked into the wall by an Ultra hit.

I figured that if I’m going to play this game, I might as well play in the Ultra League to check out the enhanced features. The ending is the same no matter what. I also decided on a short, five-game season. A friend of mine suggested I play with the team called Heroes, which is the team with the icon of a smiling baseball abbreviated HE. (You can read his review of the game.) This team is likely the best team in the game for a few reasons. The team has the most Ultra points of any team in the league. The starting pitching is very strong and each pitcher can last several innings. This team also has two players that are borderline ludicrous. The leadoff hitter, Boyd, is the fastest player in the game easily. Anything hit on the ground is a guaranteed hit, and usually more. In one game, using an Ultra Hit, I performed an unheard-of infield inside-the-park home run. Yes, he’s that fast. The fifth hitter, Bret, has some of the best power in the game. When combined with Ultra Hitting, you should mostly hit home runs with him. I only hit nine homers with him in five games since I was a bit conservative with spending Ultra points, although he did have one four-homer game.

I went undefeated in a short season and all the games but one were blowouts. This game has the same rule from R.B.I. Baseball where games are called if one team is winning by 10 or more after any inning. The first four games went as follows: A 12-2 win in 5 innings, a 15-1 win in 6 innings, another 12-2 win in 7 innings, and a 14-0 shutout in only 3 innings. I hit nine home runs in both the first and fourth games. Game 2 was the four-homer game by Bret, and Game 4 was played in the space stadium which explains all the home runs there. The fifth and final game of the season was the biggest test by. Both teams were undefeated so it functioned the same as a one-game playoff for the title. I played a full 9 inning game and won 7-4. It got a little scary at the end because I gave up a three-run homer in the bottom of the 9th and they had the tying run at the plate. I just barely held on. That team had really good pitching and they messed up my rhythm. I also played conservatively with the Ultra moves the entire season. I rarely used Ultra Pitches or Ultra Fielding, spending most of my points on Ultra Hitting. Even then, I mostly utilized Ultra Hitting when I had runners on base. The idea was to keep the rally going or go for the big home run. I had an easy time with the game up until that final game, but it still wasn’t too tough.

Sponsored by Kung-Fu Heroes

Baseball Simulator gets a 1/10 difficulty because you can trigger the ending without playing a single game. You are allowed to play a full season with every game played automatically. The winner of the league gets the victory screen no matter who it is. I know this is true because I played out a separate 5-game season automatically, just to make sure. I’m sure you can see the same ending screens if you play a full season and don’t win. The end of my winning season and the end of the simulated season were both completely identical from what I could tell. If you are going to play the game at all, then you might as well try to win it, but here you can lose and just tell people you won, and they would be none the wiser. I try to go about it honestly. The game gets a 3/10 from me because I made the effort to win and it wasn’t too challenging in the Ultra League.

It’s a little early to say, but I think Baseball Simulator 1.000 might well be the best baseball game on the NES. If not, it’s certainly one that is overlooked. The gameplay is rock solid and easy to play. The graphics and music are nice. The controls work well. What sets this game apart is the huge number of features for such a game, such as custom teams, custom league, the Ultra League, statistics tracking, and full season play. I think the Ultra League is the real draw here as you can spice up the gameplay dramatically. Hitting a home run off a tough pitch or spoiling an Ultra Hit with a great play is very satisfying. The only thing I don’t like about the game is how long it takes to simulate unplayed games in a season. Even when skipping a game, it takes about five minutes of real time for it to play out entirely. All you are left to do is watch the scoreboard for updates and twiddle your thumbs. Or look at your phone like I did. I suppose that is the price to pay for tracking every pitch, every hit, and every out, all with cumulative statistics. I did not expect to get all of this out of an NES baseball game, but I’m happy I did.

#103 – Baseball Simulator 1.000

 
AUG
03
2018
0

#86 – Kung-Fu Heroes

Punch, kick, and flip your way through this challenging action game.

The title logo palette changes, I think this color looks best.

To Beat: Reach the ending
To Complete: Reach the ending without warping
What I Did: Completed the game
Played: 5/19/18 – 5/26/18
Difficulty: 9/10
My Difficulty: 9/10
My Video: Kung-Fu Heroes Longplay

As you may know, before I started Take On The NES Library, I generated a randomized list of games and I am clearing games in that order. Once that list was set, I have completely ignored it aside from revealing only the next game in the list as I finish new games. I love the mystery of it all and I’m glad I’m doing it this way. Still, there are a few games that I remember where they fall on that list. For no particular reason, I remembered that Kung-Fu Heroes appeared somewhere in the 80s. Well, here we are! Perhaps this game stuck out to me because I knew that it was a sneaky difficult game. Let’s jump in and see what I was up against.

Kung-Fu Heroes began as an arcade title named Chinese Hero. It was developed by Nihon Game and published by Taiyo System in Japan and Kitcorp in North America. It released in 1984. A Famicom port of the game released in 1986 under the name Super Chinese. That version was published by Namco under the Namcot label. The NES version wouldn’t come out until March 1989. The NES version was also developed by Nihon Game, but by then they had renamed the company to Culture Brain. They also published the game on NES. Kung-Fu Heroes is the first game in the Super Chinese series. There were three Famicom games in the series. Super Chinese 2 would release on the NES as Little Ninja Brothers, and Super Chinese 3 is exclusive to the Famicom.

Kung-Fu Heroes is a top-down action game. You’ve heard this kind of story before. Monsters come and capture Princess Min-Min while also taking away ten treasures. You control either Jacky or Lee to battle the monsters and restore peace. (I wonder where their names came from?) Kung-Fu Heroes has a two-player mode with simultaneous gameplay if you want to tackle the game with a friend. The game takes places over eight castles with four areas each. Your task is to defeat enough monsters in each area so that the door opens to the next area. Once you complete all 32 areas, you save the princess and beat the game.

A nice courtyard becomes a battleground.

The controls to this game are more complicated than they first appear. You walk with the D-pad, moving in the four cardinal directions. Press A to punch. You reach forward by stepping quickly ahead and back when you punch and enemies break apart completely when you defeat them. You can perform the moon sault kick by pressing the B button. This also acts as a jump button. Hold down a direction and press B to jump kick into the air. You can defeat some enemies while airborne, and others you can defeat when you land on top of them with the kick. If you press B while standing still, you will perform a special move called the miracle kick. During the miracle kick, you move really fast and can jump much further than with the moon sault kick. There are a few other things you can do under special circumstances that I’ll cover later.

It’s a little unclear what you have to do in this game when you first start playing the game, so I’ll clear that up first. All the action takes place on a single screen. Enemies will appear one at a time periodically from the sides of the screen. There will be no more than four enemies on the screen at one time. After defeating twelve enemies, the door at the top of the screen will open, accompanied by a loud beeping noise. Unfortunately, there is no indicator for how far you have progressed within a level. Sometimes you don’t need to defeat all twelve enemies. Either way, as soon as the door opens the enemies speed up significantly. You can continue to beat them up if you want. To end the level, walk through the open door.

The top of the screen contains most of the information you need during game play. The first row has a bunch of icons and counters. The first one is of a little face that displays how many lives you have remaining. The next one is a letter K which indicates how many miracle kicks you can use. The second player also has these indicators on the right side of the screen. There are three more counters in the middle that are shared between both players. E indicates the number of E-balls you have, the fist icon indicates your punching power, and the money bag displays how much money you have. The second row on the menu bar contains the score for each player. In the middle of the row is a space reserved for any permanent treasures you acquire.

Punch to collect treasures, for nothing is fist-safe.

As you can see, there are a lot of items and abilities in this game. Most of them are acquired through collecting items within each area. Many levels will contain several rocks or blocks. You can punch these blocks to reveal an item that emerges from the block as a bubble. Then punch the item to collect it. The most common item you will see is a treasure box. This will hold one of many different items or upgrades that may not be immediately apparent. It may upgrade your punching power one level, which caps out at three, and you need certain power levels to defeat certain enemies. It may give you five miracle kicks. It might give you a money bag, which you can hold up to six. It might also contain one of the ten treasures. A new treasure will appear blinking at the top of the screen when you get a new one.

Another item you can find is a key. Collecting this opens up a staircase on the block where the key came from. It will close up after some time, but you can enter the stairs before then to go to one of two areas. The more common area is the bonus room. This is a timed room that generates items for you to collect. Red apples just give you points. The E balls are better in that collecting five of them gives you an extra life. This is also what E balls do in the main levels, however collecting them in the bonus area is separate from collecting them during levels. Also, in the bonus areas are a stream of bullets that you should dodge. Dying in the bonus area just ends it early without losing a life. Besides the bonus room, stairs may also lead to a warp room. In this room there are two holes and you can jump in the one you want to advance either a few levels or several levels ahead.

Some levels contain a gun ball item. This is a ball with the letter G on it. When you collect it, you can fire gun balls when you punch for a short time. Firing horizontally causes the gun balls to bounce on the ground as they move ahead. Firing vertically throws them in a straight line very quickly. There are a few upsides to the gun ball. You can use this to kill enemies that usually require more difficult techniques to defeat. Enemies will run away from you while the gun ball is active, and they are unable to shoot projectiles of their own. A few enemies take several gun balls to defeat, so fighting them may not always be worth it.

Bonus rooms are full of items and bullets.

The final items you can collect are question balls and 1ups. Blocks that do not hold items any more, or blocks that don’t hold items at all, can still be interacted with in a couple of ways. Some blocks go flying when you punch them. You can shove the blocks into other enemies and defeat them for more points than with standard attacks. Otherwise, you can keep punching an empty, stationary block to eventually generate a question ball. This will either contain a money bag or an X ball. The X ball resets your money bag count to zero. These blocks are the easiest ways to collect money bags but it is risky. 1ups are uncommon items that tend to appear on empty spaces and you reveal them by punching the air. Makes sure to take note of these special locations if you happen to find one. Finally, the last thing you can find in the levels is another bonus area called Break Time. This takes you to a separate screen where you gain half a million points and can take a free 30-second break if you desire. You can’t control your character or do anything aside from leave early.

Money bags are used to trigger two special items. Simply collecting five money bags generates an E ball somewhere on screen, and remember, five E balls equals an extra life. If you have six money bags, you can redeem them for a P ball. Press A and B together while standing still to make the P ball appear. Be patient because the controls for this are very rigid and I think you have to press both A and B together on the exact same frame to get the P ball to appear. Collect the P ball to turn invincible to enemies for a little while. Enemies turn blue and will run away from you. You can defeat them by simply running into them. It’s a great way to help when clearing difficult rooms.

The ten treasures you find throughout the game all have various effects. Most of them boil down to making it easier either to defeat or to avoid certain enemies. A couple of them reveal hidden dangers in later levels. If you mysteriously die in some of the later levels, you might be missing a treasure that could help. One treasure is a sword. You unsheathe the sword by pressing both A and B at the same time while you are walking, and you put it away the same way. The trigger is similar to the P ball and it’s important to remember the difference so that you don’t accidentally reveal the P ball when you don’t need it. Our hero will hold the sword out while it is in use. There are a couple of enemies that are only vulnerable to the sword.

Uni-Gon is the closest thing to a boss in the game.

There is a wide variety of enemies in this game. Most of them have different attacks, too. The standard commando enemies can punch and kick just like you. There are spear men and gun men. There’s a coffin enemy that will hold you inside of him briefly. A couple enemies fire medusa beams that freeze you for a bit and leave you vulnerable. One enemy just pushes you around. There are two large enemies that you need to watch out for. Uni-Gon is a huge, mummy-like monster that pursues you alone. All other enemies leave when he shows up. He can also breath fire. You can defeat him by punching him five times, but it is extremely risky. I’ve only done it once and usually I just avoid him until he goes away. If you can defeat him, he will leave an E ball behind. The other large enemy is a dragon. He is only vulnerable to the sword and you also have to hit him five times.

There are other features to some levels. One useful feature is the quick passage. These are doors on the left and right edges of the screen and most levels have them. If you walk through the door you will wrap around to the other side of the screen. Some levels have two pairs of quick passage doors. These are most helpful in evading Uni-Gon, but enemies can use them too so that’s another thing to keep in mind. Some levels have wells in them. These are just like the holes you enter in the warp room, only these kill you if you fall in. Some levels have fireballs streaming out of these wells. They are deadly to the touch, even if you are jumping in the air or are invincible with the P ball. Stay away. Some levels have pools of water or lava, and those kill you too. Finally, a few of the later levels have moving or disappearing blocks within the water or lava. If you can get on top of those blocks for just a brief time you will earn a bunch of points as well as some E balls.

You start the game with five lives. You can earn up to nine through the various methods already described. It’s a little frustrating to get good enough at the game to go beyond nine lives only for them not to count. There are no continues to the game either. There is a continue code I found by holding A and pressing Start at the title screen. It will take you back to the first area of the castle you were on. However, it is not listed in the manual so it is off-limits for me. The only nice thing Kung-Fu Heroes does for you is that you will always start each new level with at least three lives. If you finish a level with one or two lives remaining, you will get three lives to start the next area. I believe this is a holdover from the arcade game. It’s very generous, but it also speaks to the difficulty of the game in that death is so swift and frequent that those extra lives don’t always help.

If you’re playing for score, don’t miss Break Time.

This was my first time beating Kung-Fu Heroes. This is a game I have tinkered with a little bit off and on. Mostly I didn’t get through the first castle before turning off the game, but it was fun to pick up and try out a few times. I also played this game for the NintendoAge contest a few years back, but I didn’t get much beyond the third castle. I remember buying my copy of the game at my local game store several years ago when prices were still cheap. This game is still cheap today if you are looking to buy a copy.

I was able to beat the game in about a week. I sure played the game a lot in that one week, however. I think it took me over thirty attempts to beat the game. I took detailed notes on item locations which I found helpful for learning the game. By the end, I had all the item locations memorized that I needed. The first couple days of attempts didn’t get me very far. This was because I was spending all the time combing levels for items while also properly learning how to fight the enemies. Soon enough I was getting to the 6th, 7th, and final castle somewhat regularly when I hit another wall. Many of the final areas have no items along with difficult sets of enemies. A few areas include enemies that cannot be defeated, so you have to wait for them to leave so they can be replaced with enemies you can attack. I could do the early game really well only for it all to be wiped out in a flash at the end. I resorted to warping just so I could quickly get to the end of the game to practice. I beat the game that way once, and then the next day I beat it again without warping. The game loops continuously after you beat it, but the difficulty does not seem to change and there’s no special ending beyond the first loop.

It gets tough when there are no items late in the game.

Beating this game requires good technique and strategy. I found each enemy has either a specific way to beat them or a preferred way to beat them. Mastering the moon sault kick is important since you can dodge enemy projectiles and even get a nice point bonus for jumping over attacks. Then you land on top of the enemy to defeat it. It’s dangerous to jump on enemies that can also jump since they will evade your attack. For them, I approach them from the side and punch them or slice them with the sword before they go airborne. Defensively, I always keep my finger on the B button to moon sault kick my way out of danger, such as when the lightning obstacle quickly appears. I didn’t have much use for miracle kicks offensively, but they are very helpful as an evasive maneuver since you move so fast. It might not be best practice, but I use miracle kicks sometimes to go straight at the open door when it’s surrounded by enemies. Miracle kicks are also useful in the bonus room and they are unlimited for that room only. I just avoid both Uni-Gon and the Dragon. Shuffling back and forth through the quick passage keeps Uni-Gon away pretty easily. I also came up with a nice strategy for the final area. I saved four E-balls and six money bags for that stage since it’s the hardest one. I spent the money bags on a P ball when there were four enemies on screen, and then I went to town wiping out as many enemies as possible using the quick passages. Uni-Gon appears here and I can beat him with the invincibility, and then he drops the fifth E ball I need for an extra life. This level is still awfully tough after that, but every little bit helps.

I enjoyed my time with Kung-Fu Heroes. It does feel a little out of place for a 1989 NES release. The graphics and aesthetic are nice. The music is catchy at its best, and a bit dull at its worst. The controls are fine aside from trying to press A and B together. The action is very quick. This is an easy game to pick up and play for a few minutes or to sit down and try to dig into it. This game is also part of a trend among early NES games I’ve noticed where there is more internal complexity to the game systems than it first lets on. All the treasures with different effects and all the other things to keep track of like miracle kicks and money bags seem so overwhelming for what looks like a simple action game at first glance. Therefore, this game is easy to start playing but tough to master. This is a game for people who like quick action games and don’t mind a challenge in the endgame, but I think it’s also a great NES game if you don’t take it too seriously and just want to carve up some enemies for a little while.

#86 – Kung-Fu Heroes

 
APR
02
2018
1

#70 – Puss ‘N Boots: Pero’s Great Adventure

You won’t need any cat-like reflexes to get through Puss ‘N Boots.

This static title screen’s theme music has an ending.

To Beat: Reach the ending
Played: 1/7/18
Difficulty: 2/10
My Difficulty: 2/10
Video: Puss ‘N Boots Longplay

Most people familiar with NES games know of the concept “Nintendo Hard.” Things like limited continues, unfair enemy patterns, fragile heroes, and little to no checkpoints are just some of the features of games that have this reputation. In this case, Puss ‘N Boots: Pero’s Great Adventure has virtually none of these issues. That sounds great, but what is left is a game that is super short and way too easy. I’ll spend far more time explaining the game than it took me to play it. Maybe Puss ‘N Boots is the kind of romp that you might be looking for in an NES game, so read on to see if it’s something you might want to try on for size.

You have to go way back to find the roots of this game’s character. Puss in Boots is an old European fairy tale about a cat who tricks others in order to gain power and fame. The oldest known telling of the story was from the Italian author Giovanni Francesco Straparola around the year 1550. The most famous version of this story was later written by French author Charles Perrault in 1697 within a collection of eight fairy tales. There were many adaptations and retellings of this fairy tale, and the one of importance here is the 1969 Japanese animated film The Wonderful World of Puss ‘n Boots by Toei Animation. In this version, the cat was named Pero after Charles Perrault and he would become the mascot for Toei Animation.

Starting off within a ghost town.

There are two games based on The Wonderful World of Puss ‘N Boots. The first is the Famicom exclusive Nagagutsu o Haita Neko: Sekai Isshu 80 Nichi Dai Boken. It was released in November 1986, published by Toei Animation and developed by Shouei System. The developer is mostly known for Fist of the North Star games in addition to Puss ‘N Boots. The NES received the sequel Puss ‘N Boots: Pero’s Great Adventure in June 1990. The games are both loosely based on Jules Verne’s Around the World in Eighty Days and are quite similar in style and structure. The NES game was also developed by Shouei System but published by Electro Brain.

The story is a little bit more interesting than your typical NES game. You play the role of Pero who was ordered by Count Gruemon to get rid of a mouse in his castle. Pero befriended the mouse and helped him escape. This really upset Count Gruemon, so he enlisted the help of Dr. Gari-gari to send Pero in a time machine to the past. To make matters worse, Pero is being pursued by hitmen from the Cat Kingdom because Pero violated Cat Kingdom law by helping a mouse. Pero must travel through seven different areas all over the world in order to track down and defeat Count Gruemon and Dr. Gari-gari and take their time machine to get back home. Do this and you beat the game.

Puss ‘N Boots is a side-scrolling platformer with a typical control scheme. You use the D-Pad to walk around left and right. Press the A button to jump and press B to fire your weapon. The Start button pauses the game. While paused, you can press Left or Right to select one of Pero’s three weapons. Then press B to equip the weapon and unpause the game. Pero can squat by holding Down. If you are standing on top of a ledge, you can squat and press B to fall through the platform. I’m not sure if this even works since I didn’t need to try it.

Pero travels by steamboat in mostly calm waters.

All of Pero’s weapons have unlimited use and you can pick whichever one you want at any time. The default pistol fires a straight bullet ahead. The bomb is thrown in more of an arc. It goes upward a little bit and then falls quickly, exploding when it hits the ground. It’s useful for lower targets. The boomerang is a pretty large weapon that is thrown in a huge loop spanning most of the length and height of the screen. You can have two pistol shots on-screen at once, but only a single bomb or boomerang.

There are a bunch of vehicles you get to ride throughout the game, all with slightly different controls and capabilities. The ship floats on top of the water. All you can do it in is fire missiles straight ahead or move left and right. The underwater submarine can move in all directions and you can also raise it by holding the A button. The B button fires torpedoes that can destroy pieces of land that get in your way. The car has the same missiles as the ship, but you can jump and move similar to how Pero moves on foot. The airplane has the same movement as the submarine but is armed with a machine gun that functions similarly to the missiles, and it only faces to the right so you can’t shoot behind you. The hot air balloon is more like the submarine but uses missiles like the ship and the car.

There are some items you can find along the way. The boot makes Pero invincible briefly and awards 500 points. The hamburger is also worth 500 points and restores some of Pero’s health. The money bag is just for additional points, but you can earn either 1000 or 3000 points each. The Pero face powerup is an extra life. You can see Pero’s remaining lives, health, score, high score, and weapon selection at the bottom of the screen during play.

Just driving through the desert, no big deal.

Puss ‘N Boots has quite the variety of enemies. For the most part, the enemies are suitable for the levels they are found in. There are pirate ships on top of the water, piranhas in the water, and birds and other balloons while airborne. There are weird enemies too, such as flying horseshoes and UFO’s. Perhaps my favorite are the giant lightning bolts that you can blow up with your firepower. Puss ‘N Boots also features a few boss battles at the end of some stages. These are neat but don’t really make much sense. After the ocean stage, for instance, the boss is this giant mechanical frog. You have to hit him in the mouth while he spews out smaller frogs. Bosses have a health bar displayed below yours during these fights.

Pero begins his journey with two extra lives. I don’t think you can earn more lives with your score, just by grabbing 1ups. If you lose all your lives you may continue. There is a Continue option on the title screen that starts you off with three more lives. Either using a continue or resuming after death puts you back at the most recent checkpoint. Some levels don’t have any checkpoints and other stages have more than one part to them with a checkpoint at the start of each section. It’s a generous system. The catch is that you can only continue three times before starting over from scratch.

This was my first time playing Puss ‘N Boots. It’s not the most common game out there, but it is inexpensive. I’m pretty sure I got my copy in one of those eBay bulk lots I bought often while actively collecting. It wasn’t until after that that I learned that it is regarded as one of the easiest NES games. It did seem pretty simple when I tested my cart out but I only played a couple of minutes.

Puss ‘N Boots is also part shooter.

The game’s reputation did not disappoint. I was able to beat Puss ‘N Boots in 20 minutes on my first try. It’s such a simple game and you don’t even have to take your time in the levels to have a decent shot at getting through successfully, at least until the end of the game. Most of the experience is move to the right and defeat any enemies that approach you. The final area is a door maze that also has some sections that scroll upward. There are two bosses in this stage. The first one isn’t too bad, but the final boss is surprisingly tricky and easily the most difficult part of the game. It’s easy to have your health sucked away fast. I used up a bunch of lives here but eventually I got through. I would have given the game a 1/10 difficulty rating up until the final boss.

There is nothing notable about Puss ‘N Boots on the NES. It doesn’t look very good for a 1990 NES game. I don’t recall anything about the music. They tried to introduce some variety with the different vehicles and weapons, but everything feels roughly the same. The physics feel very unpolished. Jumping and throwing projectiles is rigid, and you move forward faster by jumping all the time. Levels are straightforward and end before they get going. It’s the brevity of it all that makes Puss ‘N Boots completely forgettable. If you are in the mood for a short, easy game or get a thrill out of beating something new, then this is definitely the game for you. Games like this are very welcome for my kind of long-term project but aren’t all that interesting otherwise. You aren’t missing anything special if you take a pass on Puss ‘N Boots.

#70 – Puss ‘N Boots: Pero’s Great Adventure

#70 – Puss ‘N Boots: Pero’s Great Adventure

 
DEC
27
2017
0

#61 – Section Z

Even if I never found the real Section Z, this early NES title is an intriguing blend of genres.

Plain screen with good music!

To Beat: Reach the Ending
Played: 10/10/17 – 10/16/17
Difficulty: 5/10
My Difficulty: 5/10
Video: Section Z Longplay

I never realized just how many NES games are arcade conversions until I started this deep dive into the library. Here we have another one with Section Z. This conversion differentiates itself from many other ports by significantly altering the style of the game from the arcade to the NES. The changes in the NES game make Section Z more suitable for home play as opposed to a quarter-munching arcade experience. Reading impressions from other players around the web gives me the consensus that the NES version is the better game. Let’s take a closer look to see if these changes make Section Z on NES fun to play.

Section Z began as an arcade title released in December 1985. It was both developed and published by Capcom. The game was first ported to the Famicom Disk System in Japan in May 1987. This version of Section Z is also developed and published by Capcom. The NES port was released shortly thereafter in July 1987 in North America. Europe had to wait until September 1989 before Section Z on NES was released there. Many years later, the arcade version was re-released in a few different Capcom arcade game compilations, so you can play it on PS2, PS3, PSP, Xbox, or Xbox 360.

Section Z is a side scrolling shoot-em-up. You play the role of Captain Commando and you are tasked with entering the enemy base of Balangool. The mission is to destroy L-Brain, who is located in Section Z of the enemy base. Defeat L-Brain and escape Balangool to beat the game. It’s a shell of a story and premise, but it’s all you really need.

Fly in there and fight!

In the arcade game, you automatically enter the base and begin at Section A. Your character looks like an astronaut with a gun. He can move in all directions but can only fire directly left or right. You use the joystick to move around and you have two action buttons, one to fire your gun and the other to turn around and face the other way. Therefore, you can face one way while moving in another direction. You also drop bombs anytime you fire your gun. Play progresses linearly from Section A alphabetically to Section Z. You find upgrades to increase both your speed and the strength of your gun up to three times each. Every five sections or so you fight a boss, and after that the game scrolls in a different direction for the next set of sections.

The NES version changes things up by having a completely different level structure. For starters, the sections are numbered, meaning there is no Section Z at all in the game! The sections themselves are arranged in a giant maze that you explore via branching paths. The game begins with the approach to the base in what the game calls Section 00. Play scrolls to the right in this and every other section in the game. After this short action sequence, you descend directly into Section 01 for more shoot-em-up action. At the end of this section, you are presented with a pair of teleporters and you decide which way to go. Most sections in the game have these branches at the end, and you don’t know where you’ll end up until you pick one for yourself. Each section is numbered to help you map your way through the maze. Furthermore, the whole base is logically broken down into three areas, each its own self-contained maze.

The controls are almost like the arcade game. You can move your character in all eight directions with the D-pad. Instead of having dedicated fire and turn buttons, pressing B fires to the left and pressing A fires to the right. This is much more intuitive control. You do not drop bombs when you shoot like you do in the arcade version. If you press both A and B together, you will generate special weapons. Start pauses the game, and Select uses a powerup.

It only looks like a standard shooter at first.

The top of the screen displays your score, the current section number, your current energy, maximum energy, and the powerup selection. Section Z utilizes energy in a few different ways, but mostly it acts as your health. You begin the game with 20 energy. Each time you get hit by an enemy bullet, you lose one point of energy. The game is very forgiving when it comes to bullet damage. Also, you may freely touch walls with no issue, and even your character stands on the ground if you land. You die if you get crushed by the screen scrolling, run out of energy, or make direct contact with an enemy. You lose a life and five energy points, but you get to resume at the start of the current section. You get three lives in Section Z, but they are immaterial. At Game Over, you are given the option to continue your game or restart from the very beginning. The only loss from continuing is your score goes back to zero, and Section Z has infinite continues anyway. Dying with no energy remaining is the steepest punishment, sending you all the way back to the start of the current area with 20 energy.

Enemies will occasionally drop powerups when defeated. Regular enemies can drop one of two powerups. One restores three energy points, and the other labeled with the letter S increases your speed. There’s no indication to confirm, but I believe you can increase your speed twice. The weapon powerups come from a specific enemy called a Metal Eater. This looks a metal blob attached to the wall. When defeated, it drops one of three powerups: The Flash Buster, the Megasmasher, and the Barrier Shield.

On the top-right of the screen, you may see up to four letters that indicate which powerups are available. L is for the default laser, and F, M, and B represent the three weapon powerups. Collecting the weapon displays the letter on the status bar and you can arm yourself with whichever one you want at any time. You move the special weapon selector arrow during play by pressing Right on the D-pad, and then press Select to use it. The controls are really bad for equipping weapons on the fly, and you can’t pause the game and select a weapon which seems like an oversight to me. As it is, your best bet is to equip weapons at the end of a section prior to hopping in the teleporter.

Thank you Metal Eater for the gift you will soon give me!

Here’s what the powerup weapons do. The Flash Buster gives you a three-way spread shot, but the bullets themselves are short range. Also, firing another round of shots removes any bullets still on screen. The Megasmasher replaces your normal shot with a large V-shaped bullet. The barrier shield sits in front of you and can absorb 32 bullets before being depleted. You can also get a combination of both the Flash Buster and the Megasmasher, but it’s a bit complicated to acquire. It just seems to happen when you keep grabbing powerups as you play. This is how I believe it works. You must have one of the two base weapons in use, as well as have both weapons in reserve, and then grab a powerup of the other weapon. The combo weapon has the spread and range of the Flash Buster with the bullet type of the Megasmasher. It doesn’t have an official name, but I’ve seen it called the Megabuster in two separate FAQs, so that name seems appropriate to me!

Sometimes the sections have hidden rooms. You have to fire at specific locations to reveal a white warp portal, then fly into it to be taken to the hidden room. There are several kinds of special rooms. You may find a warp room which presents you with two more exits to different sections. An energy refill room looks like the warp room except the teleporters restore some energy. The metal eater room is for finding weapon drops. Finally, you may find permanent upgrades for two additional special weapons in the game. Each of these special weapons is called a Special Transmissions Shell, or STS.

The STS is the special weapon you activate by pressing A and B simultaneously. Pressing the buttons together will display the STS temporarily in the middle of the screen and you must collect it if you want to use it. Collect it first, then press one of the fire buttons to deploy it. Grabbing the STS costs four energy points, so keep that in mind. There are three types of STS. The default one you start with is a Megamissile, which fires a heavy, straight shot. Next is the Flash Bomb which damages all enemies on screen. The last is the Crash Ball that orbits your character for a few seconds and damages everything it touches. You can cycle through available STS by revealing and ignoring the ones you don’t want. I found myself not bothering with STS because of the energy cost and the cumbersome method of equipping them.

Make sure the path you want is unlocked first.

Sometimes at the end of a section, one of the teleporters is a red beam of light instead of the normal white beam. Touching the red beam instantly kills you, so obviously avoid them! There is a generator somewhere in the maze that you destroy to replace the red beam with a normal one so that you can pass. You have to seek out the section that contains the generator and then blow it up. Generators act like a mini-boss battle and halt the screen scrolling when you approach one. They are stationary but fire both aimed shots and tracker bullets that follow you around the screen. With enough firepower, you will destroy the generator, leaving behind an energy capsule that increases your maximum energy when acquired. Backtrack to the previous section with the red teleporter, and if you destroyed the correct generator you will see it transition from red to white and you may now take this new path forward.

The end of each of the three main areas ends in a boss battle. You are awarded with another energy upgrade when you defeat a boss. Exiting this section brings you to a major checkpoint. Here you get a small cutscene which awards you bonus points as well as displays your maximum energy and all STS you have acquired. Unless you turn the game off or reset, you won’t have to go back and replay major areas completed.

Section Z was a game that I rented once as a kid. We had two rental places in my town right across the street from each other, Gentry’s TV and Video and Main Street Video. Gentry’s had moved to the next town over and not long after that Circus Video opened a few blocks further away. I mostly remembered Circus Video for their SNES and N64 games later, but early on they had NES games and I only remember renting just a few of them, including Section Z. I have vague memories of the game, but I know I didn’t understand the game at all and was left unimpressed. It wasn’t until just a few years ago that I discovered Section Z was both a shooter and a maze exploration game. This is really suited to my tastes in gaming, and now I can give the game its proper understanding and appreciation. I was very excited about giving Section Z a try with this fresh perspective.

The boss fights are pretty neat, but they do have issues.

My approach before even starting the game was to map out all the paths. Rather than draw an actual map, I drew up a table that connects each exit in a section to its corresponding section. I made sure to revisit each section and take each exit to make sure I didn’t miss any connections. The idea was that I would completely map out the game and take my time exploring, and then go back and figure out the most straightforward way through the game to complete it efficiently on my final attempt. The sections themselves are short and most are not too challenging. The main problem I had was that I ended up going the right way accidentally and couldn’t go back to trace alternate paths. My only options were either to continue on or to run out of energy intentionally to get sent back. I beat the game twice before I felt I had the game sufficiently mapped out, having all primary branches accounted for and only missing a few optional secret areas.

With my completed chart in hand, I traced my complete route and set up to record my final run. I’m really pleased with how my longplay video turned out. I don’t think it’s obvious from watching the video that I was moving through the maze based on just my notes. I beat Section Z without taking any wrong turns and I even beat it without dying. It’s one of the cleanest runs I’ve captured thus far.

My biggest complaint about the game is that the hitboxes for the bosses are incredibly small. You have to be lined up just right to do damage. This is made more difficult in several ways. It is much more difficult to get the necessary pixel precision with both speed upgrades. Missed shots bounce off bosses to neat effect, but it’s detrimental because you must wait for those repelled shots to vanish before you can fire more. The three-way shot makes this even harder. Also, the hitbox is off-center from what you would expect, so you often miss when it appears you are making direct hits. Switching up weapons while dodging enemies or bosses is very cumbersome, and I often chose the wrong weapon by mistake in those situations.

Sometimes the action can get a little hectic.

Section Z has a reputation for being a difficult game, but I would give it an average difficulty rating. Infinite continues, the energy system, and mild setbacks from death ease the difficulty considerably. Keep a map or a table like I did to streamline exploration. Most of the sections are brief and progress from section to section is consistent. Don’t worry too much about avoiding bullets and focus on avoiding enemy collisions. The boss battles are the most difficult part of the game, and much of the difficulty can be mitigated by stockpiling energy and winning through attrition.

Section Z is a neat mixture of shooter and maze exploration that kept my enjoyment throughout my playthrough. I was right that this would be a fun game for me. However, as an early NES game, it suffers from several issues. The boss fights are problematic as I already mentioned. There are graphical glitches that appear visibly in between screens. Sprite flicker is not handled properly, and in some spots the enemies at the end of a long row are completely invisible. These are not exactly minor issues, but Section Z is better in other aspects. The graphics are good for its time, and the music is catchy in almost all instances. There is just a tiny bit of slowdown, but the game performs well even with many enemies and bullets on screen. The boss battles have clever concepts and would be a highlight of the game with a little tweaking.

It’s hard to say if I would recommend playing Section Z today. The NES got a better shoot-em-up and exploration hybrid in The Guardian Legend just under a year later. I can’t decide which aspect I like more: The gameplay or the act of mapping out everything. I do like that Capcom tried something different with the game instead of a more direct arcade port, and the glimpses of quality here paved the way for Capcom’s later NES efforts. What you will get out of the game depends on both your personal taste and acceptance of common quality issues found within early NES games. If any of this sounds appealing to you, I think you should at least try Section Z.

#61 – Section Z

 
MAY
13
2016
0
Ghoul School Box Cover

#23 – Ghoul School

I’m willing to bet the name of the game was thought of first.

A nicely detailed title screen!

A nicely detailed title screen!

To Beat: Reach the ending
Played: 4/16/16 – 4/22/16
Difficulty: 4/10
My Difficulty: 4/10

With a game library as big as the NES has there are sure to be several interesting games hidden away. Well, interesting is a word that can certainly be used to describe Ghoul School but I’m not sure it’s the best one. There is absolutely an intriguing game here that is pretty creative but ultimately it falls flat in a number of ways. However, just like several other games I’ve covered, it has grown on me and I’m glad to get to share it with you.

Ghoul School was released on the NES in March 1992 and it is exclusive to North America. It was developed by Imagineering and published by Electro Brain. I was surprised to learn that Imagineering developed several games for the NES but having looked at various lists online most if not all of their games are not regarded very well. Their best known games are the three Bart Simpson games on the NES. Electro Brain published six games on the NES and all of them are ones that could be consider obscure.

Ghoul School is a side-scrolling platformer. You play as a high school student Spike who finds a mysterious skull and brings it to school which ends up causing all sorts of nefarious creatures to take over the place. It’s up to you to both rid the school of evil and save the head cheerleader. You start off in the main hallway of the school armed with only a baseball bat, but you can explore the school freely searching for more weapons and items that will help you explore the school. It is very reminiscent of Metroid in this way. Each room is individually numbered and displayed at the top of the screen to help keep track of where you are in the school.

The ghouls look much more terrifying than they actually are.

The ghouls look much more terrifying than they actually are.

There are several weapons to find in the school and you can switch to any collected weapon you want. Everything has unlimited use so fire away. One of the first weapons you will find is the towel which has better range and is also somehow more powerful than the bat. There are also a number of guns that let you attack from a distance though they generally deal less damage. Some weapons fire downward to help you attack enemies on the ground. There is usually one weapon best suited for a particular situation so there will be lots of switching weapons around.

There are also a couple of different pairs of shoes you can equip. You start off with basic sneakers but you will also need to find the spring shoes and suction cup shoes. The spring shoes cause you to jump higher and they also make you taller. These are needed to pass by tall obstacles in order to explore further in the school. The suction cup shoes let you walk along the ceiling provided the ceiling is low enough to reach with a jump.

You will also find apples that restore your health. Green apples restore a quarter of your health and red apples fully restore your health. The best of all is the golden apple. There’s only one of these in the game but it is a permanent upgrade that cuts your damage received by half. Enemies don’t drop any health pickups so you will have to seek out these items as you explore the school. If you play the game for a little while you’ll figure out where you can generally find the healing items.

The school map contains a lot of areas that you would expect to find in a school. There’s a gymnasium, cafeteria, office, library, and so on. These one-off locations are the areas you want to search out because they contain the weapons and shoes you need to progress onward. These areas also feature unique ghouls that are tougher than the standard enemies and they often require specific weapons to take them out. Think of them like bosses. There are several of these unique enemies which is a nice touch.

Other than the deep void of darkness in the background, this does resemble a weight room.

Other than the deep void of darkness in the background, this does resemble a weight room.

Now all of this so far may sound pretty good, but there are a number of things that really hurt the game and make it hard to play. The biggest sticking point is the physics of the character. Spike feels very heavy to control. He takes some time to build momentum and takes even more time to slide to a stop. The jumping is very stiff and doesn’t seem to respect gravity. He falls down just as fast as he jumps, and this makes it very hard to make long-distance jumps. These movement problems are really evident early in the game when you have barely any attack range with the bat. You have to get really close to deal damage and more often than not you will run right into the enemy until you get used to the controls. Some of the early enemies attack really quickly as well leaving you with a small window to get in and hurt them.

The other physics related complication is that colliding with the enemy gives you really severe knockback. Trying to fight enemies with short range attacks is so frustrating in Ghoul School. Either you don’t get close enough to deal any damage or you get too close and get thrown backwards. Now for some reason the developers decided to place enemies right at the entrance to some of the hallways. What happens is that you try to get close enough to attack and if you accidentally touch the enemy then you get thrown back into the previous hallway. Now you have to start all over and try fighting the enemy again. This happens in several locations and it only provides unnecessary frustration. The only solace here is that once an enemy is killed it remains dead. It will only respawn after you travel many rooms away.

I'm pretty sure most of the classrooms are for teaching history.

I’m pretty sure most of the classrooms are for teaching history.

Along the same lines, there are some enemies that are too low for you to properly attack. One little recurring nuisance of an enemy is called Blinky. They scurry around at ankle level and they run super fast. You can’t duck in this game and the majority of the weapons attack too high for you to deal with these critters. The weapons that do reach down don’t shoot downward quickly enough to be effective. For example, the first weapon you will come across that can reach tiny ground enemies is called the Digestaray. It shoots a straight shot that curves toward the ground. To use it against Blinky, you need to have it already equipped and start firing off shots the moment you see it running on screen. If you wait too long you will shoot right over its head and now you have no chance of killing it. Blinky will never leave the screen instead opting to run around you just outside of attack range and it will bounce you all over the place with the knockback. They don’t do much damage at all, but they make it really tough to make any kind of forward progress in the room.

The whole game really boils down to exploring one giant maze. A large portion of the game map consists of similar looking hallways and similar looking classrooms that for the most part don’t hold anything of interest in advancing your quest. The hallways often have doors that lead to isolated classrooms, and the hallways link together via walkways and stairways at the end of the hall. Each end of the hallway can have up to three exits: Forwards, upstairs, or downstairs. Many of the hallways are just empty dead ends. It is very confusing to make sense of the layout. Having every single room in the game numbered is about the only thing that makes rooms distinguishable.

You will see your health bar on the top of the screen as well as the health bar of the enemy you are fighting. There’s also a scoring system that doesn’t really mean anything since there’s no high score keeping. It doesn’t show up during game play, but Spike has five lives in all and you see how many lives are remaining in between lives. There are no extra lives in this game. It’s not obvious but you do continue when you start over. You start back at the school entrance with all of your collected items intact. There’s no saving in this game and no passwords so you will have to beat it all in one shot.

As expected, the science experiment went wrong!

As expected, the science experiment went wrong!

The graphics in this game are more than adequate. It very clearly looks like a school. There are several interesting setpieces that are unique to the areas they are found in. For instance, the weight room has a huge, detailed exercise machine right in the middle. You can walk behind the bookshelves in the library and see yourself peeking behind the gaps in the books. The graphics may not be super great but they are interesting to look at. The character designs are really strange and creepy. Many of the enemy types look like people and they are generally drawn very tall and lanky. Spike changes visibly when switching weapons and shoes for a nice touch. The music isn’t too bad. Perhaps it might be grating to some but I didn’t really mind it.

I bought my copy of Ghoul School on eBay for $10 a couple of years ago. It was selling for around $15 at the time so it was a nice deal, but I missed that the fold on the label was completely torn off so that the end label and front label are split in two. It’s not awful but I’ll want to upgrade it at some point if I ever run into another copy. My local store had one for $10 for a long time but the end label was faded really badly so I kept passing on it. It eventually got bumped up to $18 and since then someone bought it. It’s not a game I’ve seen around much so I’m not surprised someone else snagged it.

Certainly this is punishment for severe misconduct!

Certainly this is punishment for severe misconduct!

This was my first time beating Ghoul School. I had only tried it when I got the cart and I pretty much dismissed the game as weird right away. When I started out this time, I wandered around and almost instantly got lost. I have a good sense of direction overall but this game made me at least question it a little bit! I realized the only way I was going to make sense of this school was to go old school and draw a map. The art of video game map making goes back a very long way but I believe this is the first time I have ever drawn a map for a game. It turned out to be a very good decision since I only had to hit the unnecessary portions of the map once. Each time I played I got a little bit further and it didn’t take that many attempts to complete the game.

Without spoiling a lot of the game, there’s not much more for me to say about Ghoul School. What I will say is that I found the game got more interesting the farther I went. The last quarter of the game in particular did a few things that I thought were really kind of neat. I believe I have almost all of the game mapped out in my notes. After I finished the game I combed over my map and tried to find all the rooms by number and there were some I did not account for. I’m not sure if these are rooms that I missed or rooms that were not used in the game at all. I think I developed a pretty good route through the school and now I can finish the game relatively quickly. I’m toying with the idea of writing up a more thorough walkthrough. If I ever do that, I’ll host it on the blog and link it here. I’ve peeked at a few walkthroughs online and I’m sure I could do a better job.

UPDATE 7/18/16: Indeed, I did create a Ghoul School Walkthrough. Check it out!

It’s hard for me to recommend playing Ghoul School, but after wading through the control difficulties and getting a handle on the map I really enjoyed this game. Metroid-styled platformers are one of my favorite types of games and so now I have a soft spot for this weird little NES adventure. One final thought: It’s too bad that this game didn’t emerge on my list around Halloween as that would have been most fitting.

#23 - Ghoul School

#23 – Ghoul School