Take on the NES Library

An 8-bit Extravaganza!

metal

FEB
07
2020
0

#142 – Metal Gear

Get your cardboard box ready.

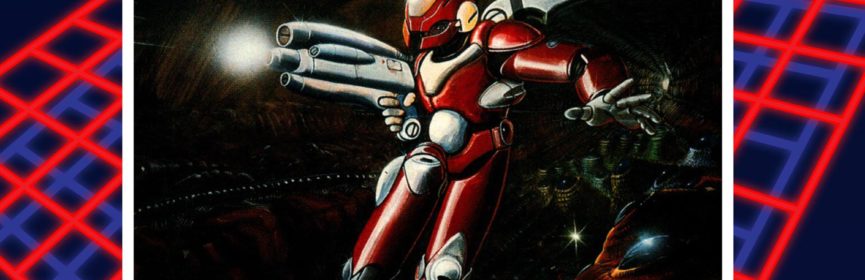
One of the most briefly shown title screens ever.

To Beat: Reach the ending
Played: 12/14/19 – 12/27/19
Difficulty: 7/10
My Difficulty: 7/10
My Video: Metal Gear Longplay

Metal Gear is one of those long beloved series in all of video games.  It didn’t really start out that way though.  It didn’t catch on until Metal Gear Solid came out on PlayStation, which in my opinion was the turning point for the series and elevated creator Hideo Kojima to auteur status.  While not normally my kind of game, I have played some of the Metal Gear Solid series.  Therefore, I came into Metal Gear on NES knowing the sensibilities of the Metal Gear series but not so much how to approach or play this particular entry.  How much of Metal Gear Solid and its ideas originated from earlier titles like this one?  I doubt I’ll be able to answer that question, but I can provide some background information and my thoughts on how this game played.

The first Metal Gear released on the MSX2 in Japan in July 1987.  It was developed and published by Konami and designed and directed by Hideo Kojima.  Metal Gear was quickly ported to Famicom for release in December 1987, and it reached the NES in North America in June 1988 and Europe in 1989.  The North American version was the first NES game Konami published under the Ultra Games label.

The overarching story of Metal Gear is already fairly well known, and the NES version does not differ much from it.  You play the role of Solid Snake, a fresh recruit of the special forces unit called FOXHOUND, who is sent on a special mission codenamed Intrude N313 by his commanding officer Big Boss.  FOXHOUND’s best agent, Gray Fox, was previously sent to a fortress near South Africa called Outer Heaven run by an evil dictator.  Gray Fox was to investigate Outer Heaven and neutralize any imminent threats found within, however, FOXHOUND lost contact of Gray Fox.  Solid Snake has been sent to find out what happened to Gray Fox.  I’m jumping ahead a bit, but a little while into the game you find out Outer Heaven is housing a weapon of mass destruction called Metal Gear, a walking tank capable of firing nuclear weapons from anywhere in the world.  Your mission then is to destroy Metal Gear.

It’s always important to have good communication.

Metal Gear, the game, is a top-down action-adventure game.  Solid Snake is controlled with the D-pad and he can move in four directions.  Press the B button to punch.  The A button fires weapons though you do not start out with any.  The Start button simply pauses the game, while the Select button brings up a selection menu.

The game begins with you being airdropped into the jungle.  Upon arriving you are immediately called via your transmitter as the word “CALL” is flashed at the bottom of the screen.  Press Select to bring up the menu, then choose “TRANS” to use your transmitter.  There you will automatically receive a message from Big Boss.  He gives you the frequency on the transmitter where you can reach him again if needed.  After the message is over you’ll hear this super-annoying horn sound.  At this time, you can tune the transmitter to help you send or receive messages.  Use Left and Right on the D-pad to scan through frequencies 120.00 through 120.99.  If someone is already trying to reach you, simply landing on the proper frequency will deliver the message automatically.  If you want to reach out yourself, tune the frequency and then press Up to switch to Send mode.  Solid Snake will call for help and in the right situation with the right frequency you will make contact and get a message back.  As you can imagine, using the transmitter is good for advancing the story and getting tips on forward progress.  When you are all done, press Select to go back to the action.

Your first task is to proceed through the jungle, moving downward through several screens.  Here you get a taste of using stealth to make your way forward without being noticed.  If you walk in front of a soldier, he sees you and puts the game into an alert state.  Firing a noisy weapon also draws attention to you.  Defeating all the enemies on screen or simply moving to the next screen is enough to escape the alert state and go back to quiet.  Until then, all enemies start moving in on you.  Soldiers have guns and aren’t afraid to use them.  If some enemies are left alone long enough, other enemies may start appearing and make things more difficult.  Of course, you can avoid alert state by staying out of line of sight.  You can punch enemies three times without them seeing you to take them out and stay quiet.  You can also wait for soldiers to leave or fall asleep, giving you an edge.  The third screen of the game introduces you to guard dogs that go alert when you get near, which always happens.  I found it is best to be as quiet as possible and avoid confrontation, but it is helpful to know how to navigate the alert state as it is hard to avoid sometimes.

Sneaking isn’t easy in close quarters.

Getting out of the jungle is not an easy task.  Not only is this first part of the game pretty challenging, it was also a little unclear how to get out of the jungle at all.  Go down far enough and you reach a fence locked off by a gate that you can’t open.  It turns out you need to enter a covered truck simply by approaching it from the back.  If you’re like me and didn’t know about that until the end of the section, it’s a good idea to go back and investigate the other ones you passed as some of them contain items or weapons.  When you have something usable, you can go into the menu and equip it.  There are two screens for this, one for weapon selection and the other for item selection.  The weapon selection screen shows all weapons you’ve collected as well as ammo for each.  Simply point the cursor to the weapon you want, then press Select to leave the menu and equip your new weapon.  Choosing an item from the item selection screen functions in much the same way.  Sometimes items, such as rations, must be used from this screen with the A button.  A few items are equipped permanently without you selecting it, but most items need to be selected to be used outside of the menu.  Anyway, one of the trucks in the jungle transports you in front of the first building.

Most of the game is spent inside of buildings.  These can have pretty large layouts with multiple floors, so creating a map might be helpful, or maybe you can do what I did and memorize the basic structure.  To get inside of the initial building to begin with, you need to locate and equip a keycard.  Many of the rooms inside the buildings are behind locked doors that require some keycard.  These secured rooms hold a majority of the weapons and items in the game.  More commonly you will find ammunition for your weapons or rations for restoring your health.  You can also find captured soldiers, who you can free simply by walking up to them.  They will sometimes give you advice or at the very least a thank you.  For every five captured soldiers you free, you go up in rank.  Increasing your rank increases the size of your health bar as well as letting you hold more ammo.  You can go up to four stars in rank, and you need that rank to finish the game.  If you shoot and kill a hostage, then you go down in rank, so don’t do that.

Be someone’s hero today.

There are several weapons in the game.  You can fire standard bullets with either a handgun or machine gun.  The handgun shoots straight while the machine gun fires bullets one at a time in a spread pattern.  A grenade launcher and a rocket launcher fire their respective shots.  Plastic explosives blow up on a timer, while mines explode on contact with an enemy.  There is a remote-controlled missile.  When firing this weapon, you sit still while you set the rocket’s direction with the D-pad.  You can also pick up a silencer for your handgun and machine gun so that you can use them without causing alerts.

You will acquire roughly a screen full of items of all sorts.  Many of these are the card keys, and some of them are items that open up progress in a part of the game, which makes them just like keys.  I won’t go through all of the items but a few of them have different uses.  The binoculars let you peek into an adjacent room briefly to see its layout.  A mine detector lets you see hidden enemy mines in a few screens.  Infrared goggles allow you to see invisible lasers that alert the enemy when touched.  A gas mask lets you breathe in a gas-filled room so that you don’t suffer any damage.  The antidote is good for curing poison if you get bitten by a spider.  Not everything is required to beat the game, but it’s a good idea to pick up whatever you find.

When you die, you can choose to Continue or End.  Continuing puts you at a checkpoint with all of your stuff intact.  Evidently checkpoints are determined by your rank, not by your equipment or by distance reached.  This means a one-star rank puts you back all the way at the start, which is definitely frustrating when you’ve reached deep into the building.  Choose End to see your password.  Passwords are 25 characters long consisting of all capital letters and numbers 1-6.  This is a game where the passwords store all of your information, such as weapons, items, hostages saved, and even your ammo counts.  Part of the password is a checksum just to ensure you have entered a valid password and aren’t just typing in random stuff on the password screen to try and skip ahead.  This game takes several hours to play through for the first time and so passwords are appreciated.

There are plenty of traps, some often unseen.

This was my first time playing through Metal Gear.  I knew about this game and read about it a lot in old gaming magazines.  I never ran into a copy back then, but then later when I got one I didn’t play it past the first few screens.  I was more intrigued by it conceptually than I was interested in actually playing it.  That was how I felt about the Metal Gear Solid games too.  However, years ago I decided to finally buy Metal Gear Solid: The Essential Collection on PS2 and played through all three games at that time.  I struggled through them but wanted to see them all to the finish.  I suppose that satiated me as I haven’t touched Metal Gear again until now.

Playing through Metal Gear on NES for the first time was an interesting experience.  The first stretch of the game is tough on a new player and the game doesn’t open up until you get through the jungle.  I really got into it once I reached the first building.  At that point, Metal Gear starts to feel like a dungeon crawler.  I explore the building, getting a little bit further each time and picking up new items that make future runs easier.  I caught my groove in the middle part of the game before getting hung up some toward the end.  I have the map that was included with the NES game, and I looked at it once or twice just to make sure I understood the layout of the game.  This wasn’t a spoiler free playthrough because I needed to look up the solutions to the maze zones.  It was frustrating that the game didn’t tell you anywhere what to do there, and I gave up trying to figure it out on my own.  I would say my time with the game was fun with a few annoying parts.

I was able to record a full playthrough of Metal Gear.  My first time through the game took about 8 hours or so.  The second time for my longplay was much faster at around 1 hour and 45 minutes.  The game really isn’t all that big once you know where everything is and how to navigate the buildings.  I wanted to beat the game without dying but I didn’t quite get there.  I died once to the tank by mistake in the middle of the game.  I also died a few times trying to get through the dark rooms with all the holes.  I only cleared that part once in my first playthrough and I don’t think I ever found the right strategy for it.  That section is completely skippable, so after a few deaths, I went the long way around just to get it done.  I’m not completely happy with this run but it is good enough.

Don’t get run over like I did.

It’s hard to play this game without noticing how glitchy and unpolished it is, so I want to list some things I took note of during my time playing.  The most obvious characteristic of the game is its poor English translation.  Some examples are the well-known “I feel asleep!” and “The truck have started to move.”  This lack of grammar and spelling is all over this game, some things more obvious than others.  The card system has a major flaw in that doors require a certain card and only that card can be equipped to open the door.  There’s no indication what card is needed, and there are eight cards total, so you have to go in and out of the menu over and over swapping cards until you find the right one.  It is possible to reach late game sections early in the game and that causes some weird things to happen.  I had my transmitter go off only to pull up the transceiver to nothing.  Something happened to one of the characters and I presumed them dead though you can backtrack and communicate with them as if nothing happened.  There are also hints you can only get once when you rescue prisoners.  If you speed through the text or skip it, then it’s gone, and it might have been a vital clue for what to do next.  All of these things detracted from my enjoyment of the game a little bit.

There’s one more oddball thing about Metal Gear that has nothing to do with the game itself.  I’ve mentioned screw variants before on this blog.  To quickly recap, early NES games had five screws holding both sides of the cartridge together, and sometime in late 1987 the molds changed to a three-screw design for all future licensed NES carts.  Metal Gear was released long after three-screw carts were the standard, but somehow a few copies out there are in the five-screw form factor and I happen to own two of them.  These late five-screw variants are exclusively Konami or Ultra published titles, and all of them are missing the Caution label on the back of the cart.  These carts technically should not exist, but there are a couple of theories.  One is that these are refurbished games that were sent back for repair and they were fixed using leftover five-screw shells.  Another theory is that these were sample carts used for demos or in kiosks.  Whatever the case may be, these are very hard to find, and I am not sure if every Konami game has one of these variants as some have not yet been discovered.  Variant collectors will pay a lot of money for these.  I have a few others in my collection that I’ll mention when I play those games in the future.

Metal Gear is a game that both has a lot going for it and has a lot holding it back.  The graphics are very nice with lots of detail.  Even though the color scheme is a lot of green, brown, and gray, it still looks good to me.  I am not a fan of the font with the empty lines across almost every character.  I think the music is good.  The controls function appropriately with clean design.  The gameplay is fun and engaging, and I enjoyed exploring the buildings and sneaking past the guards.  I can see why this was a popular game for its time.  All the glitches and weird inconsistencies I mentioned before break the immersion a little bit.  Snake only moves and attacks in four directions which feels limiting, though at least the enemies behave the same way.  This is a game that will grab you by its story and its exploration, and it’s safe to say it delivered for me in both those departments.

#142 – Metal Gear

 
DEC
27
2017
0

#61 – Section Z

Even if I never found the real Section Z, this early NES title is an intriguing blend of genres.

Plain screen with good music!

To Beat: Reach the Ending
Played: 10/10/17 – 10/16/17
Difficulty: 5/10
My Difficulty: 5/10
Video: Section Z Longplay

I never realized just how many NES games are arcade conversions until I started this deep dive into the library. Here we have another one with Section Z. This conversion differentiates itself from many other ports by significantly altering the style of the game from the arcade to the NES. The changes in the NES game make Section Z more suitable for home play as opposed to a quarter-munching arcade experience. Reading impressions from other players around the web gives me the consensus that the NES version is the better game. Let’s take a closer look to see if these changes make Section Z on NES fun to play.

Section Z began as an arcade title released in December 1985. It was both developed and published by Capcom. The game was first ported to the Famicom Disk System in Japan in May 1987. This version of Section Z is also developed and published by Capcom. The NES port was released shortly thereafter in July 1987 in North America. Europe had to wait until September 1989 before Section Z on NES was released there. Many years later, the arcade version was re-released in a few different Capcom arcade game compilations, so you can play it on PS2, PS3, PSP, Xbox, or Xbox 360.

Section Z is a side scrolling shoot-em-up. You play the role of Captain Commando and you are tasked with entering the enemy base of Balangool. The mission is to destroy L-Brain, who is located in Section Z of the enemy base. Defeat L-Brain and escape Balangool to beat the game. It’s a shell of a story and premise, but it’s all you really need.

Fly in there and fight!

In the arcade game, you automatically enter the base and begin at Section A. Your character looks like an astronaut with a gun. He can move in all directions but can only fire directly left or right. You use the joystick to move around and you have two action buttons, one to fire your gun and the other to turn around and face the other way. Therefore, you can face one way while moving in another direction. You also drop bombs anytime you fire your gun. Play progresses linearly from Section A alphabetically to Section Z. You find upgrades to increase both your speed and the strength of your gun up to three times each. Every five sections or so you fight a boss, and after that the game scrolls in a different direction for the next set of sections.

The NES version changes things up by having a completely different level structure. For starters, the sections are numbered, meaning there is no Section Z at all in the game! The sections themselves are arranged in a giant maze that you explore via branching paths. The game begins with the approach to the base in what the game calls Section 00. Play scrolls to the right in this and every other section in the game. After this short action sequence, you descend directly into Section 01 for more shoot-em-up action. At the end of this section, you are presented with a pair of teleporters and you decide which way to go. Most sections in the game have these branches at the end, and you don’t know where you’ll end up until you pick one for yourself. Each section is numbered to help you map your way through the maze. Furthermore, the whole base is logically broken down into three areas, each its own self-contained maze.

The controls are almost like the arcade game. You can move your character in all eight directions with the D-pad. Instead of having dedicated fire and turn buttons, pressing B fires to the left and pressing A fires to the right. This is much more intuitive control. You do not drop bombs when you shoot like you do in the arcade version. If you press both A and B together, you will generate special weapons. Start pauses the game, and Select uses a powerup.

It only looks like a standard shooter at first.

The top of the screen displays your score, the current section number, your current energy, maximum energy, and the powerup selection. Section Z utilizes energy in a few different ways, but mostly it acts as your health. You begin the game with 20 energy. Each time you get hit by an enemy bullet, you lose one point of energy. The game is very forgiving when it comes to bullet damage. Also, you may freely touch walls with no issue, and even your character stands on the ground if you land. You die if you get crushed by the screen scrolling, run out of energy, or make direct contact with an enemy. You lose a life and five energy points, but you get to resume at the start of the current section. You get three lives in Section Z, but they are immaterial. At Game Over, you are given the option to continue your game or restart from the very beginning. The only loss from continuing is your score goes back to zero, and Section Z has infinite continues anyway. Dying with no energy remaining is the steepest punishment, sending you all the way back to the start of the current area with 20 energy.

Enemies will occasionally drop powerups when defeated. Regular enemies can drop one of two powerups. One restores three energy points, and the other labeled with the letter S increases your speed. There’s no indication to confirm, but I believe you can increase your speed twice. The weapon powerups come from a specific enemy called a Metal Eater. This looks a metal blob attached to the wall. When defeated, it drops one of three powerups: The Flash Buster, the Megasmasher, and the Barrier Shield.

On the top-right of the screen, you may see up to four letters that indicate which powerups are available. L is for the default laser, and F, M, and B represent the three weapon powerups. Collecting the weapon displays the letter on the status bar and you can arm yourself with whichever one you want at any time. You move the special weapon selector arrow during play by pressing Right on the D-pad, and then press Select to use it. The controls are really bad for equipping weapons on the fly, and you can’t pause the game and select a weapon which seems like an oversight to me. As it is, your best bet is to equip weapons at the end of a section prior to hopping in the teleporter.

Thank you Metal Eater for the gift you will soon give me!

Here’s what the powerup weapons do. The Flash Buster gives you a three-way spread shot, but the bullets themselves are short range. Also, firing another round of shots removes any bullets still on screen. The Megasmasher replaces your normal shot with a large V-shaped bullet. The barrier shield sits in front of you and can absorb 32 bullets before being depleted. You can also get a combination of both the Flash Buster and the Megasmasher, but it’s a bit complicated to acquire. It just seems to happen when you keep grabbing powerups as you play. This is how I believe it works. You must have one of the two base weapons in use, as well as have both weapons in reserve, and then grab a powerup of the other weapon. The combo weapon has the spread and range of the Flash Buster with the bullet type of the Megasmasher. It doesn’t have an official name, but I’ve seen it called the Megabuster in two separate FAQs, so that name seems appropriate to me!

Sometimes the sections have hidden rooms. You have to fire at specific locations to reveal a white warp portal, then fly into it to be taken to the hidden room. There are several kinds of special rooms. You may find a warp room which presents you with two more exits to different sections. An energy refill room looks like the warp room except the teleporters restore some energy. The metal eater room is for finding weapon drops. Finally, you may find permanent upgrades for two additional special weapons in the game. Each of these special weapons is called a Special Transmissions Shell, or STS.

The STS is the special weapon you activate by pressing A and B simultaneously. Pressing the buttons together will display the STS temporarily in the middle of the screen and you must collect it if you want to use it. Collect it first, then press one of the fire buttons to deploy it. Grabbing the STS costs four energy points, so keep that in mind. There are three types of STS. The default one you start with is a Megamissile, which fires a heavy, straight shot. Next is the Flash Bomb which damages all enemies on screen. The last is the Crash Ball that orbits your character for a few seconds and damages everything it touches. You can cycle through available STS by revealing and ignoring the ones you don’t want. I found myself not bothering with STS because of the energy cost and the cumbersome method of equipping them.

Make sure the path you want is unlocked first.

Sometimes at the end of a section, one of the teleporters is a red beam of light instead of the normal white beam. Touching the red beam instantly kills you, so obviously avoid them! There is a generator somewhere in the maze that you destroy to replace the red beam with a normal one so that you can pass. You have to seek out the section that contains the generator and then blow it up. Generators act like a mini-boss battle and halt the screen scrolling when you approach one. They are stationary but fire both aimed shots and tracker bullets that follow you around the screen. With enough firepower, you will destroy the generator, leaving behind an energy capsule that increases your maximum energy when acquired. Backtrack to the previous section with the red teleporter, and if you destroyed the correct generator you will see it transition from red to white and you may now take this new path forward.

The end of each of the three main areas ends in a boss battle. You are awarded with another energy upgrade when you defeat a boss. Exiting this section brings you to a major checkpoint. Here you get a small cutscene which awards you bonus points as well as displays your maximum energy and all STS you have acquired. Unless you turn the game off or reset, you won’t have to go back and replay major areas completed.

Section Z was a game that I rented once as a kid. We had two rental places in my town right across the street from each other, Gentry’s TV and Video and Main Street Video. Gentry’s had moved to the next town over and not long after that Circus Video opened a few blocks further away. I mostly remembered Circus Video for their SNES and N64 games later, but early on they had NES games and I only remember renting just a few of them, including Section Z. I have vague memories of the game, but I know I didn’t understand the game at all and was left unimpressed. It wasn’t until just a few years ago that I discovered Section Z was both a shooter and a maze exploration game. This is really suited to my tastes in gaming, and now I can give the game its proper understanding and appreciation. I was very excited about giving Section Z a try with this fresh perspective.

The boss fights are pretty neat, but they do have issues.

My approach before even starting the game was to map out all the paths. Rather than draw an actual map, I drew up a table that connects each exit in a section to its corresponding section. I made sure to revisit each section and take each exit to make sure I didn’t miss any connections. The idea was that I would completely map out the game and take my time exploring, and then go back and figure out the most straightforward way through the game to complete it efficiently on my final attempt. The sections themselves are short and most are not too challenging. The main problem I had was that I ended up going the right way accidentally and couldn’t go back to trace alternate paths. My only options were either to continue on or to run out of energy intentionally to get sent back. I beat the game twice before I felt I had the game sufficiently mapped out, having all primary branches accounted for and only missing a few optional secret areas.

With my completed chart in hand, I traced my complete route and set up to record my final run. I’m really pleased with how my longplay video turned out. I don’t think it’s obvious from watching the video that I was moving through the maze based on just my notes. I beat Section Z without taking any wrong turns and I even beat it without dying. It’s one of the cleanest runs I’ve captured thus far.

My biggest complaint about the game is that the hitboxes for the bosses are incredibly small. You have to be lined up just right to do damage. This is made more difficult in several ways. It is much more difficult to get the necessary pixel precision with both speed upgrades. Missed shots bounce off bosses to neat effect, but it’s detrimental because you must wait for those repelled shots to vanish before you can fire more. The three-way shot makes this even harder. Also, the hitbox is off-center from what you would expect, so you often miss when it appears you are making direct hits. Switching up weapons while dodging enemies or bosses is very cumbersome, and I often chose the wrong weapon by mistake in those situations.

Sometimes the action can get a little hectic.

Section Z has a reputation for being a difficult game, but I would give it an average difficulty rating. Infinite continues, the energy system, and mild setbacks from death ease the difficulty considerably. Keep a map or a table like I did to streamline exploration. Most of the sections are brief and progress from section to section is consistent. Don’t worry too much about avoiding bullets and focus on avoiding enemy collisions. The boss battles are the most difficult part of the game, and much of the difficulty can be mitigated by stockpiling energy and winning through attrition.

Section Z is a neat mixture of shooter and maze exploration that kept my enjoyment throughout my playthrough. I was right that this would be a fun game for me. However, as an early NES game, it suffers from several issues. The boss fights are problematic as I already mentioned. There are graphical glitches that appear visibly in between screens. Sprite flicker is not handled properly, and in some spots the enemies at the end of a long row are completely invisible. These are not exactly minor issues, but Section Z is better in other aspects. The graphics are good for its time, and the music is catchy in almost all instances. There is just a tiny bit of slowdown, but the game performs well even with many enemies and bullets on screen. The boss battles have clever concepts and would be a highlight of the game with a little tweaking.

It’s hard to say if I would recommend playing Section Z today. The NES got a better shoot-em-up and exploration hybrid in The Guardian Legend just under a year later. I can’t decide which aspect I like more: The gameplay or the act of mapping out everything. I do like that Capcom tried something different with the game instead of a more direct arcade port, and the glimpses of quality here paved the way for Capcom’s later NES efforts. What you will get out of the game depends on both your personal taste and acceptance of common quality issues found within early NES games. If any of this sounds appealing to you, I think you should at least try Section Z.

#61 – Section Z