Take on the NES Library

An 8-bit Extravaganza!

red

AUG
23
2018
0

#90 – Bonk’s Adventure

Bonk here, bonk there, bonk everywhere.

What a happy caveman!

To Beat: Reach the ending
Played: 6/12/18 – 6/13/18
Difficulty: 4/10
My Difficulty: 4/10
My Video: Bonk’s Adventure Longplay

The 1990s in video games were all about the mascot platformer. The success of Super Mario Bros. was a very early frontrunner to this trend, and although mascots wouldn’t really hit their stride until well into the 90s, there are some early examples of games trying to piggyback off the success of Mario. The Sega Master System tried keeping step with Alex Kidd. Sega eventually switched over to Sonic, a formidable rival. You could say Master Higgins of Adventure Island is also a mascot with a platformer. The SNES and Genesis generation brought a lot of one-off type games with mascot platformers like Bubsy, Aero the Acrobat, Sparkster, and Ristar to name a few. The Nintendo 64 and PlayStation era stepped it up even further with big names like Crash Bandicoot, Rayman, Banjo-Kazooie, and Spyro the Dragon. Within the days of Mario vs. Sonic and the Console Wars was Bonk, a humble caveman starring in his own adventure on the Turbografx-16. There wasn’t a whole lot of console crossover in the early days, but for some reason, Bonk’s Adventure did receive a very late NES port.

Bonk’s Adventure was released first on the PC Engine in Japan in December 1989, named PC Genjin. The PC Engine became the Turbografx-16 in the US, and Bonk’s Adventure was brought over in 1990. The game was developed by Red Company and Atlus. A Famicom port called FC Genjin released in July 1993 and the NES version launched in January 1994. Hudson Soft published the NES version, however the developer is not clear. Red is mentioned on the title screen, but development has also been attributed to A.I. Company Ltd. There were three Bonk games on the PC Engine/Turbografx-16 and two on the Super Famicom, as well as some Game Boy ports and spinoffs and mobile games in Japan.

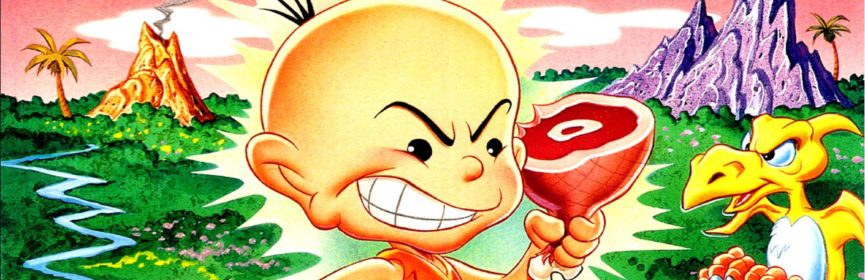
Bonk’s Adventure is a side-scrolling action platformer. You play the role of the caveman Bonk who must save the Moon Princess from King Drool. Just another cliché video game story. Bonk’s journey through Dinosaur Land will take him through many locales over the seven worlds in the game. You beat the game once you clear all the levels and beat all the bosses.

You gotta use your head.

You move Bonk around with the D-pad. Use the A button to jump. Bonk has a very strong head and he can use it to hurt enemies simply by jumping into them from underneath. Bonk will grab onto walls from the side with his teeth. In this state, you can climb the wall by jumping repeatedly. The B button is used to attack in two different ways. Press B while standing to headbutt. You can hit enemies from the side this way. While in the air, you can press B to do a flip. This turns Bonk over so that you can fall onto enemies with your head and hurt them that way. If you press B again while still in midair, he will orient himself upright again. You can do a bunch of midair spins in the air by pressing the B button repeatedly while in the air. This causes Bonk to fall much slower and you can use the increased airtime to make long horizontal jumps.

There isn’t much on-screen information to go by while playing Bonk’s Adventure. The top left corner shows three hearts. This is your health meter. Enemies can knock off your health in quarter-heart increments, but typically you lose health by half or full hearts. You can read a little more information by pausing the game. The pause display shows the current round and stage number, the number of smiley faces you’ve collected, and how many lives you have remaining.

There are several powerups to aid you in your adventure. A recurring enemy in this game is the Bani-Bana flower. They are stationary enemies that you can knock with a headbutt either from the side or above to reveal their contents. There are a few variations of the Bani-Bana flower. There are white ones that don’t give power ups, but instead launch Bonk skyward if he jumps on top of them. There is also an enemy that masquerades as a flower that leaps away when you wake it up. Since you are often left vulnerable while attempting to reveal the flower’s item, this means you will usually get hurt by this enemy if you aren’t careful.

Get powered up and crash through the bad guys.

There are many different pickups you get from the flowers. Fruit that is shaped like a carrot restores a quarter-heart of health, while red hearts give you one full heart and a big heart gives you three hearts back. The rare big white heart adds a heart to your maximum health. You begin the game with three hearts and can earn up to six. Smiling faces are collectibles that are redeemed at the end of each round. There are both small meat and big meat that power up Bonk when you eat them. You can also find little Bonk figures worth an extra life.

The small meat powerups give Bonk a head of steam, changing his form to the Grand Bonk. This is only a temporary transformation that is quite useful. As the Grand Bonk, if you do a midair spin and land on the ground with your head, it shakes the screen and damages all enemies. If you take a hit, you will go back to normal, and the effect eventually wears off anyway. If you collect the big meat, or collect the small meat again while Grand Bonk, you become invincible for a short time. You can really plow through enemies and clear a lot of ground in this state. When the invincibility wears off, you remain Grand Bonk until that wears off or you lose it.

You may see a small flower within a level. Grab it to ascend to a bonus area. There are three different bonus areas that have different rules. In the Jump the Canyons game, simply work your way to the right as far as you can while collecting the carrot-shaped fruits. Falling off or reaching the end completes the bonus game. You can earn smileys or even a 1up by collecting as many fruits as you can. You play the Flip Through the Air game by jumping off a tall ledge and flipping with B as many times as you can. The number of flips are counted up when you land on your feet at the bottom and you can earn smileys or a 1up. You earn nothing if you land on your head. The third game, Beat the Clock to Reach the Top, is the easiest one. Cling to the wall and press A to jump as fast as you can to reach the top. You earn more rewards for every second remaining on the timer.

There are bonus games you can sink your teeth into.

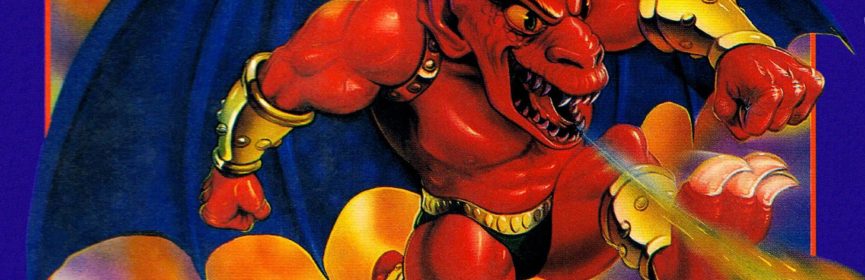
Most of the worlds follow a similar pattern. Many levels begin with a signpost with the round and stage numbers written on it. Levels proceed in one direction and there’s another post with an arrow on it meaning you’ve reach the end of the stage. The final stage within a round ends in an elevator that looks like a skull. Stand in front of it and press Up to take the elevator to the boss. These bosses are all large enemies that need to be bonked many times to defeat. After the bosses are defeated, evidently you knock them back to their senses. They each speak a few words of text after you finish the fight. Then you get health restored depending on how many smileys you picked up within the round.

One nice thing about Bonk’s Adventure is you don’t get set back at all if you lose a life. When you run out of health, you roll around and keel over. You can hang out in the death state for a long time while the game continues around you. Press Start to wake up with a new life and three hearts of health right where you left off. If you run out of lives, you can continue from the start of the round. This is a pretty severe penalty if you happen to lose your lives on the end of round boss. Fortunately, it seems like you can continue as often as you want.

This was my first time playing through Bonk’s Adventure. On the NES, this game is well known as one of the most expensive NES games. It’s the most expensive game I’ve played so far for this project. Here in 2018, loose carts sell for an average of $500 and complete in box copies average $800-$900. Bonk’s Adventure has consistently been in or near the Top 5 most expensive NES carts. I scored my copy in mint condition for $150 in 2014. The value of the cart was around $400 then so it was a killer deal. I just happened to find the listing for it on eBay at the right time within a lot of other NES games. That $150 bought me Bonk’s Adventure and 10 other common games.

The bosses are usually huge like this.

I had an easy time with Bonk’s Adventure. There was a learning curve to the momentum in-air. For the first couple of rounds I often missed my target while attacking from above. Powerups and health pickups were plentiful enough to help mitigate most damage taken from missed attacks. I was also bad at the bonus games at first, aside from the wall climbing one that is virtually impossible to lose. I thought the second round boss was the hardest one. It jumps around a lot and I couldn’t hit it when it jumped up into me, which sadly happened a lot. Those were the main issues I had with playing the game and I didn’t have any significant troubles otherwise. My first time through the game required one continue, but the second game through for my longplay video was a no-continue run. I didn’t check on the pause screen, but I think I ended up with about a dozen lives in reserve by the end.

Bonk’s Adventure is a quality game that is fun to play. The graphics and animation are very well done. The boss fights are really fun, though I feel they take way too many hits to defeat. The gameplay is tight and there are plenty of ways to attack enemies within the simple controls. The game can get a little repetitive, but at the same time there are a few stages where you swim or climb and it’s nice to have something different. I am not a big fan of the music. The soundtrack feels a little moodier and depressing than I would expect out of a game like this. The song during the end credits is something that would have given me nightmares as a kid playing games alone at night. It’s not objectively bad music, it’s just not for me. This is a good NES game all around. I would recommend playing the game, even if it falls short of the Turbografx-16 version like I suspect it does. But there is no reason at all to own this game unless you are a collector, grew up with it and still have your childhood copy, or got lucky and found it for cheap.

#90 – Bonk’s Adventure

 
SEP
11
2017
0

#51 – Dragon Fighter

Don’t just fight a dragon, become one!

You can’t start until you see this title screen twice. Lame!

To Beat: Reach the ending
To Complete: Beat the game in the secret hard mode
What I Did: Completed the game
Played: 5/19/17 – 5/22/17
Difficulty: 6/10
My Difficulty: 6/10
Video: Dragon Fighter Hard Mode

It’s funny. I just finished playing through Dragon Warrior, and then the next game to come up on the list is Dragon Fighter. Don’t let the names fool you, for these two games are really quite different. Dragon Fighter is a side scrolling action game, not an RPG. Dragon Warrior is an early NES game, while Dragon Fighter is a later release. While Nintendo Power gave away Dragon Warrior, Dragon Fighter is a hard to find game that is very expensive now. Finally, Dragon Warrior is really well known, and Dragon Fighter is still pretty obscure. While I can’t get the price down on a cartridge, I can help make this fun game a little more well known.

Dragon Fighter was first released on Famicom in August 1990. The game was developed by Natsume and published by Towa Chika. Natsume developed a few action games on the NES, including S.C.A.T. which I have already completed. Towa Chika did not publish any games outside the US. Perhaps the most infamous game they published is the Famicom platformer A Week of Garfield. Dragon Fighter was brought over to the NES in January 1992. The NES version was published by Sofel, who brought only five games to the NES.

Dragon Fighter is a side-scrolling action game. An evil warlock named Zabbaong attacks the land of Baljing, who are known as a peaceful people with a dragon statue as a symbol of their good nature. The Dragon Spirit had given the people the dragon statue, and now under the enemy attack he brings the statue to life as a fierce warrior. You play as this warrior as you strike back again Zabbaong.

Don’t run away! The green guys aren’t that scary.

This is a relatively straightforward game. In fact, this is a pure horizontal scroller with the playfield only scrolling to the right, just like Super Mario Bros. As the fighter, you wield a sword and can perform basic techniques. Use the D-pad to walk around. You can crouch by holding Down. Press A to jump, and B to swing your sword forward. You can swing your weapon when standing, jumping, or crouching. If you hold down the B button, you will start to flash. Hold it for long enough, and then release the button to perform a charge attack.

The main feature of Dragon Fighter is that you can become a flying dragon. At the top of the screen there are two meters. The top one is your health meter and the bottom one is called the metamorph meter. For each enemy that you defeat with the sword, you will add to the metamorph meter. Enemies beaten by charge attacks do not fill the meter. Once this meter is at least halfway full, then it will start flashing indicating you can morph into a dragon. Hold Up and jump with A, and at the top of your jump you switch over to a flying dragon.

In dragon form, you can fly around in all eight directions and you can fire with B. You always face to the right in this form. Also, the screen begins to scroll forward automatically as your metamorph meter dwindles away. You get more firepower and can avoid attacks much easier as a dragon, so this form is very useful. You can switch back to the fighter at any time by holding Down and pressing A. Keep in mind that you may need to fight more enemies in fighter form to build the metamorph meter back up before you can switch back to a dragon again. If the meter runs out, then you will automatically shift back into the fighter.

Sometimes a defeated enemy will drop a helpful item. There are only a few item drops. The power pearl will restore a couple points of health, while the larger pearl pot will restore eight health units. The power ring wipes out all enemies on the screen. Finally, the dragonweed, shaped like a dragon’s head, will fill up eight points in the metamorph meter.

With the dragon, you can fly over enemies.

In some of the stages, you will find powerups labelled G, R, and B. These are always found in the same location and are not dropped by enemies. Picking up one of these icons will change your fighter into the Green fighter, Red fighter, or Blue fighter. Each color fighter has both a distinct charge attack and dragon attack. The default fighter at the start of the game is the Green fighter. Your charge shot is a green ball that travels to the right, and the dragon form gets a three-way spread fire. The Red fighter’s charge shot is a set of three fireballs that arc in the air and fall down. The Red dragon’s attack is a fireball that spreads out when it hits the ground similar to the holy water in Castlevania. The Blue fighter gets a homing charge shot and the Blue dragon can fire two homing shots.

At the end of each stage is a boss battle. These include a fight with a werewolf, a giant centipede, and a large skeleton with floating hands. The metamorph meter is emptied upon starting the next stage, so don’t be afraid to use the dragon form for the fight. When you defeat the boss, it will drop a staff that you acquire to end the level. Collecting the staff increases the size of your health meter and also restores some health for the next stage. A little spoiler here: The sixth and final stage plays entirely as a horizontal scrolling shooter and you are forced into dragon mode for the whole thing. It culminates in a final boss battle with Zabbaong.

There are no extra lives in Dragon Fighter, so when all your health is depleted it is Game Over. You do have three continues. However, using one sends you back all the way to the start of the stage. Even if you reach the boss and die, you have to replay the entire level. This is the kind of game that you learn over multiple plays.

This was my first time playing through Dragon Fighter. It was among the final 30 games or so I bought for my NES licensed collection, mostly because the game is hard to find and expensive. I bought it in February 2015, and at the time the game was selling for around $100 for a loose cart. I explored many avenues looking for these final games, and for this one I ended up taking a chance on an Amazon listing with no pictures. The cart was only $50, but the game was badly cracked. It was punctured right over the label causing attached shards of plastic to be pushed into the cart shell. I opened the cart up and pushed the damaged part outward to make it flatter. It’s a shame because the cart is in really nice shape otherwise. It does look great on the shelf at least! As of August 2017, a Dragon Fighter loose cart sells in the $250-$300 range, so I’m happy with my choice.

Deploy the dragon strategically during boss battles.

Beating the game wasn’t too much of a challenge for me. I ended up beating the game the first night in over two hours with a few practice runs. A lot of it was figuring out when to deploy the dragon and which color fighter to use. There is a little bit of platforming, but most of the game centers around enemy combat. I think I’m pretty good at seeing the enemy patterns and figuring out how to react. Some fortuitous item drops also came in handy! I gave the game a difficulty rating of 6/10 because of the limited continues and no checkpoints when you use one. I maybe should have rated it higher because I think many players are going to have more of a struggle with it, but I’ll stick with my choice because I figured it out so quickly.

This is not all Dragon Fighter has to offer. The game has an unlockable hard mode. When you beat the game and leave it on the ending screen for a little while, a cheat code is displayed. Correctly inputting it at the title screen changes the copyright text from blue to red, indicating hard mode is activated. There are two major differences in hard mode. First, there are no item drops. This makes health preservation critical as you can only heal once per level after defeating a boss and grabbing the staff. The other difference is that for each enemy you kill in dragon form, a homing bullet fires as the enemy’s death explosion finishes. As far as I recall there were no further changes to the game. It’s a good mode that tweaks how you approach levels. I spent a separate night beating hard mode. For some reason, I was determined to beat the game on hard mode without dying, and I’m happy to report that I accomplished it. It’s one of my better achievements captured on video.

I know the term is overblown to NES fans, but Dragon Fighter is indeed a hidden gem. It’s a straightforward but competent hack and slash action game with the ability to morph into a dragon, so there’s already a lot going for it. The graphics are well done, the music is good, the gameplay is solid, the bosses are fun to fight, the challenge is appropriate, and the optional hard mode is well thought out. Dragon Fighter checks most of the boxes from what you would expect out of one of the most expensive NES games. The price is obviously a major barrier if you want the authentic experience, but if you have a Powerpak or play on an emulator, Dragon Fighter is a game that is worth checking out.

#51 – Dragon Fighter

 
JUL
21
2017
0

#47 – Gargoyle’s Quest II

Every Gargoyle deserves an adventure.

The dark, foreboding music fits perfectly!

To Beat: Reach the Ending
Played: 3/9/17 – 3/17/17
Difficulty: 6/10
My Difficulty: 3/10
Video: Gargoyle’s Quest II Longplay

The concept of a spin-off in media makes a lot of sense. A spin-off can take a supporting character from an existing TV show or movie and give them their own story while giving the storytellers an already established base to work from. Spin-offs have naturally made their way into video games too. One notable example is the Wario Land series which started as a spin-off of the Game Boy game Super Mario Land 2: 6 Golden Coins. Wario was the villain of that game but became the protagonist in his own adventure. On the NES, there aren’t very many examples of spin-offs, but today I am going to cover one. The annoying “red devil” enemy from Ghosts ‘N Goblins gets not only an actual name, but also his own adventure in Gargoyle’s Quest II.

The Gargoyle’s Quest series originated on the Game Boy. All games in the series were developed and published by Capcom. Gargoyle’s Quest was initially released in Japan in May 1990. The US would get the game shortly thereafter in July 1990, and it also saw release in the UK in 1991. The game was popular enough to warrant a sequel that jumped platforms to the NES and Famicom. Gargoyle’s Quest II was named Red Arremer II in Japan, seeing release in July 1992. The US received Gargoyle’s Quest II in October 1992, and the European release was in June 1993. The NES game was also ported to the Game Boy in 1993 under the name Makaimura Gaiden: The Demon Darkness, though only in Japan. The third and final game in the series was named Demon’s Crest in both the US and Europe and Demon Blazer in Japan. This Super Famicom and SNES game was nearly released simultaneously in Japan and the US, coming in late October 1994 in Japan and early November 1994 in the US. The European release was also released last, launching in March 1995.

Gargoyle’s Quest II is a hybrid between a platformer and a top-down RPG. You play as the red devil Firebrand, who upon returning from training, finds his home has been wiped out by the mysterious Black Light. Firebrand sets off on a journey to solve this mystery and save the Ghoul Realm. The game initially looks and feels like an RPG. In this top-down view, you can explore towns, enter buildings, collect items, and talk to other ghouls to gain valuable information for your adventure. These towns and other areas in the game are all connected via a large overworld. However, all the action scenes take place in a side-scrolling view. Here you control Firebrand as you jump and fight your way through various stages of action gameplay.

The overworld ties the action sequences together.

During exploration, you can use the D-pad to travel in four directions. You’ll notice right away that Firebrand moves around very quickly in this view. He goes much quicker than the slow, plodding movement in other NES RPGs around this period. Use the A button to talk to other ghouls and interact with some objects. You will also use A to advance the text when talking. The Start button brings up the menu where you can choose from a few options. The Level menu item lets you view your current status. The Tool option lets you look at and choose certain quest items you will find. The Magic option lets you view and choose which attack you can use during the action sequences.

In the side-scrolling sections, use the Left and Right on the D-pad to walk around. Contrary to the other view, Firebrand moves slowly and deliberately. Press the A button to jump. If you press A again while in the air, Firebrand will flap his wings and hover for a short while. While hovering you can move left and right, allowing you to fly and cover much greater distances than just jumping alone. Press B to attack by spewing a small projectile. The Start button both pauses the action and brings up a sub-menu at the bottom of the screen where you can switch between attacks.

There are two mechanics in the side-scrolling areas that complement each other and form the basis for Firebrand’s movement. First is the hover ability briefly mentioned above. In the game, it is referred to as Wing Level. There is a large bar on screen that indicates how long Firebrand can hover in place, and it depletes quickly. When it runs out, Firebrand will fall, or you can choose to fall before it runs out by pressing A again. This wing stamina will restore to full strength as soon as Firebrand lands on solid ground or clings to the wall. This brings me to the second mechanic which is wall climbing. The Wing Level gives Firebrand extended horizontal movement while wall climbing gives him vertical movement. Thus, the levels extend in all directions to accommodate all his movement capabilities, as well as involving spikes and other such hazards in many places to keep Firebrand on course.

Climbing around spike-laden walls is required often.

There are a few items Firebrand can find during the side-scrolling levels. Hearts restore some of Firebrand’s health. There is a life meter on the status bar indicated by small hearts that show how many hits Firebrand can take. There are also red jars called vials that act as the game’s currency. Every now and then you can find a light-colored jar that will expand the maximum number of hearts.

Firebrand can expand his capabilities by items he acquires on the overworld. These are generally given to Firebrand after completion of certain stages or by talking to creatures. They are pretty weird items that slot into a few different categories. There are nail items that increase his Jump Level so that he can jump higher. There are wing items that increase his Wing Level which lets Firebrand hover for a longer time. There are armor items that increase Firebrand’s Life Level which gives him more hearts on his life meter. There are magic items that provide him new attacks. Finally, there are tools which are passive items that are needed to interact with certain characters to advance the story.

The magic items are the most interesting as they both give Firebrand new attacks as well as expand his capabilities in interesting ways. Firebrand starts with the Fire attack that launches a small projectile for attacking enemies. Next is the Buster attack that is a bit stronger than Fire but also can break blocks. The Tornado attack generates a small temporary platform that Firebrand can land on and restore his wing stamina. The Claw attack can form a protective surface against a wall of spikes, giving Firebrand a way to cling to them temporarily. There is also a final magic ability that is useful at the end of the game.

Creating your own platforms sure comes in handy!

I mentioned the vials earlier as the currency in the game. It turns out they are only used for one thing. There are certain creatures throughout the game that will allow you to exchange your vials for the Power of Maelstrom. It is the game’s fancy way of saying an extra life! They do come in handy for tricky areas. However, they get more expensive later in the game.

One more optional item you can find in the game is the Essence of Soulstream. To get it, you have to find two different items in the world and bring them to a person who can combine them into the Soulstream. This item can be used in the platforming levels from the menu. It can only be used once but it lets you restore your health all the way to the maximum. The best place it comes in handy is during one the boss fights that occurs at the end of some stages.

There are some ghouls on the overworld that will provide you with a password if you talk to them. Not only do you get the password, but you also set a checkpoint here that you will return to if you lose all your lives. The passwords are 16-digits, all 0-9, with a mandatory dash in the middle for readability. The passwords have just the right amount of complexity to save all your items and vials, yet they are not unwieldy to use.

Gargoyle’s Quest II has fun boss fights, including this difficult one.

I have played all the way through Gargoyle’s Quest II a few times before this run. Like many late NES Capcom games, it is pretty expensive at around $75 or so. This was one game I bought long before the prices skyrocketed. I had learned of this game in college and I decided to search it out on eBay. It may well be the game that got me to create my eBay account in the first place, I’m not sure. I found a copy for $6, and I even remember the seller was only 30 minutes away from me. I played through the game when I got it and I went back to it periodically over the years.

I’m not incredibly familiar with the game but I was able to work through it without a lot of trouble. The game takes several hours to play through the first time, and I can get through it in around two hours. I played it over three separate nights just due to time constraints. There was only one spot in the game where I lost all my lives and had to restart, but otherwise I think I played well. This is the kind of game where I normally would not record an entire longplay, but I was good enough at the game that I captured one this time. So, if you would like to see the game in its entirety, you may!

Gargoyle’s Quest II is a quality platformer that is fun to play. When you see the Capcom logo on an NES game, chances are it’s a good one and this game is no exception. It has detailed graphics, sprawling stages with good platforming, a haunting soundtrack, and a large overworld that ties it all together. There are only a few things I don’t like about the game. The overworld can be dull to traverse, and there is a bit of a difficulty spike early in the game where you need to cross over a fiery river. There is also some slowdown when many enemies are on the screen. Frankly those are minor complaints. The game is solid and I find it fun to play through every now and again. I’m glad I had the good sense to seek out this game many years ago!

#47 – Gargoyle’s Quest II

 
MAR
06
2017
0

#37 – The Guardian Legend

Two styles of gameplay collide in this legendary adventure!

A static title screen with some nice music!

To Beat: Reach the ending
To Complete: Beat both the main game and the special mode
What I Did: Completed the game
Played: 11/7/16 – 11/19/16
Difficulty: 4/10
My Difficulty: 4/10
Video: The Guardian Legend Special Mode Longplay

In 2012, Mike Matei of Cinemassacre published a now well-known YouTube video listing his top 10 obscure NES gems. The Guardian Legend is the first game I have covered that made his list. Now I won’t tell you exactly where this slotted in on the top 10, but most of the games on that list became instantly more popular overnight, including The Guardian Legend. So the game has a lot of hype surrounding it now, but does it live up to it?

The Guardian Legend was developed by Compile. They are pretty well known for developing shoot-em-up games. The game was first released on the Famicom in February 1988. There it was named Guardic Gaiden and it was published by Irem. The Guardian Legend was released on the NES in April 1989 and published by Broderbund. The game was later released in Europe in 1990 published by Nintendo. The box and label art are unique among all three versions of the game.

Much to my surprise, my research revealed that The Guardian Legend is actually a sequel. There was a trio of games released by Compile on the MSX computer in Japan. The first game was Final Justice which released in 1985 and plays similarly to Galaga. The second is Guardic released in 1986. In this game, each level is a static screen with enemies to shoot. You go to the next stage by flying upward into a scrolling section where you can decide which path and level you want to take next. The third game is Blaster Burn from 1990 which is a vertical scrolling shoot-em-up. The Guardian Legend is the sequel of the middle game Guardic.

There’s a lot going on even in the very beginning.

The Guardian Legend is a shoot-em-up game comprised of vertically scrolling shoot-em-up sections and top-down adventure sections. You play as the Guardian who can transform between a humanoid form and a spaceship form. The goal of the game is to destroy the planet Naju which is filled with monsters and set on a collision course toward Earth. Your mission is to explore the surface of the planet to locate corridors that are buried deep inside the planet. These corridors contain switches that can activate the self-destruct sequence when all of them are set.

The game begins inside the first corridor. Here the Guardian assumes her spaceship form and you play a vertical scrolling shoot-em-up stage. After clearing the stage, the Guardian switches back to her humanoid form and then you explore the surface of the planet from a top-down perspective searching for the next corridor. The game format resembles The Legend of Zelda in that you explore an overworld while looking for dungeons you need to clear.

The controls are pretty much the same in both perspectives. Use the D-Pad to move the Guardian in eight directions. The B button fires the standard weapon. In the shoot-em-up sections you can only fire upward but in the top-down portions you can shoot in any direction. Hold down the B button for a quite generous auto-fire. The A button is used to fire secondary weapons. You can pause the game by pressing Start and you press Select to open up the subscreen.

Information overload!

There is a lot of information available on the subscreen. The top portion of the subscreen contains the same information shown when you are playing and it is comprised of three rows. The top row shows your current score, the number of power chips you currently have, the number of shots for your secondary weapon, and which secondary weapon you have equipped. The middle row contains your health bar. The bottom row shows which area you are located and the X and Y coordinates of where you are located in the overworld. All of that is just the top part of the subscreen!

The left side of the subscreen shows the map. You can see your current location highlighted as well as the location of any reachable corridor. The right side of the subscreen shows which keys you have, the maximum number of chips you can have, your attack and defense power, the power level of the currently selected subweapon, and how many chips it takes to fire the current subweapon. The bottom of the subscreen shows all of the subweapons you have. Use the cursor to select which subweapon you want to equip.

The power chips are very important to your survival. They are the ammunition for your subweapons. Each subweapon uses up a certain number of chips for each time you fire it and you cannot use your subweapons if you run out of chips. The other important mechanic is that the chips also influence the firepower of your normal weapon. When you reach certain chip amounts your weapon will power up, but spending chips and falling below that amount will cause your weapon to downgrade. There is a balancing act between using your other weapons while also maintaining enough chips in reserve to have a more useful normal weapon.

It’s a tiny swarm of overworld enemies.

There are a ton of upgrades and items that you will encounter in the game. The most important items for making progress are the keys. As you explore you will find black circles on the ground next to walls that have some kind of symbol written on them. If you hold the key that matches the symbol, then you can stand on the circle and teleport to the adjacent room. The keys are found in the corridors and they allow access to new areas of the map. Each new area hides more corridors.

You will also gather subweapons. There are twelve unique subweapons and once you have one you can switch to it anytime you want via the subscreen. If you collect the same subweapon again you can upgrade it to a more powerful form. Each subweapon has three distinct power levels. These get really strong later in the game but they cost more chips to deploy. The subweapons have all kinds of different effects and patterns and they are a lot of fun to use. You can get grenades, a laser sword, circular shots, homing shots, and so on. If one of the enemies or bosses is giving you a lot of trouble, it is probably because you are not using the best subweapon for the job. Experiment to see which one is most useful for your situation.

Some items give you other types of permanent upgrades. The Blue Lander is a little creature that will increase your maximum health, and the Red Lander increases the maximum amount of power chips. The gun item increases your attack power, and the shield item increases your defense power. The item that looks like four upward arrows increases the rate of fire for your normal weapon. You can also find an energy tank that fills up your health to your current maximum. It’s worth pointing out here that you can also upgrade your maximum health by reaching certain score thresholds.

Look, a weapon lying on the ground!

Other items are found by defeating enemies. Sometimes when you kill an enemy a little explosion cloud will appear on the ground for a little while leaving behind a power-up block. Shoot the block to reveal the item. You can find a heart that will restore some of your health. The blue orb gives you 20 power chips and a tiny bit of health, and a red orb restores 500 power chips and a little more health than the blue orb. You can also find full energy tanks but they are more uncommon.

There are quite a few ways to find the upgrades and items. On the surface you can find shops where you can exchange power chips for a weapon or upgrade. Some screens contain mini bosses that hold an upgrades. When you walk into one of these screens an alarm will sound and all the screen exits will be blocked off forming an arena for the fight. These can be challenging but the reward is worth it. Some screens contain a powerup freely for the taking although it takes some maneuvering around the map to find them.

There are ten different areas spread out across the map that branch off of the hub area. Each one has its own theme such as a water area and forest area. Each area contains two corridors and they are numbered based on the current area number. Area 1 contains both Corridor 1 and Corridor 11, for example. Corridors 1-10 are required for clearing the game and each one of them is blocked off from entry. There is some kind of puzzle you need to solve to open up the gate. Exploring the area and talking with some Blue Landers will yield the answer for how to open the gate and access the corridor. The remaining Corridors 11-20 are optional but you get upgrades from clearing them that you probably will want.

One of many huge boss sprites!

The corridor stages can pose a challenge. Often they are teeming with enemies and there can be a lot going on at one time. The scrolling speed varies from crawling to crazy fast which can add to the excitement. Each stage ends in a fight with a huge, detailed boss that takes a lot of firepower to defeat. As mentioned before, choosing the right subweapon is critical to taking out the boss successfully.

All throughout the map you will find rooms with Blue Landers that will give you a password to save your progress. The passwords are really complex, consisting of 32 characters of capital and lowercase letters, numbers, and symbols. The passwords do track all of the items you have acquired as well as your score, but the length and complexity is just too much. Thankfully in the smartphone era a simple picture works wonders for capturing it just right.

This was my first time playing through The Guardian Legend but I have quite a few random memories surrounding this game. Growing up it was one of those games I would often browse at the local video store but never rented. I ended up buying my first copy of the game for $5 during my honeymoon. A couple of years later I got big into NES collecting again and The Guardian Legend kept popping up for me. My local game store chain was slow to update their NES pricing and they sold it for $3 when it was at least a $10 game. I bought several copies of the game just to flip. (Yep, I’m one of those “evil” reseller types.) I even picked up a cheap copy on eBay a couple of years ago when I saw it. Then right before I started playing through the game for my blog, my grandmother came across a lot of NES stuff with yet another copy of The Guardian Legend. This one however was a nice condition complete in box copy that I am keeping!

Such colorful death bubbles!

It took me a little under two weeks to finish playing The Guardian Legend with my normal rate of playing. The game definitely has some meat to it with all the areas and corridors, but I managed to make progress at a good rate every time I played. I didn’t get stuck anywhere for too long and even the most difficult corridors only took a few attempts at most.

The Guardian Legend is extremely generous with powerups. The item drop rate isn’t terribly high, but there are so many enemies around to defeat that you will get powerups on constant rotation. The top-down segments, corridors, and even most boss fights provide you enough to keeping going as long as you are reasonably careful and employ smart subweapon usage. For this reason, I don’t think the game is that difficult overall, but there were a few tricky sections that caused me to give it a 4/10 difficulty rating. One of the recurring minibosses became a war of attrition every time I encountered it, and the final boss was pretty mean and took a few tries to beat. This is the kind of game where you consistently make progress, and you can keep attempting the tough parts until you get it right.

I already spoiled this a little bit, but in case you didn’t pick up on it or don’t want to know, now is the time to skip ahead to the next paragraph! Upon beating the game and sitting through the end credits, you are given a very short password “TGL.” You can use the password to play through a special mode of the game that consists only of the Corridor sections. The levels are identical to the regular game but the big change here is how you are awarded the powerups. After completing each corridor, you are taken to a special screen where you earn powerups for meeting specific score requirements. You can get as many as five powerups after each stage even if you score high enough to be awarded more. This mode shifts the focus on scoring as many points as you can. It is also more difficult than the regular game because the rollout of powerups is slower than in the normal mode. It’s a fun way to play through the game again and a fitting reward for beating the game.

The Guardian Legend handles many enemies pretty well.

There is a very good hack of the game called The Guardian Legend Secret Edition. This is a complete overhaul of the game containing a new overworld, new Corridor stages, new Corridor puzzles, and even some new bosses. The difficulty has also been cranked up quite a lot, but that is to be expected with a hack like this. I started playing through Secret Edition once I completed the game and I got about halfway through before I stopped playing. If you like The Guardian Legend then you will really like Secret Edition. I really need to get back to it and finish it for myself!

The Guardian Legend indeed lives up to the hype. This is a really good NES game that I enjoyed playing a lot. The game controls well, the graphics and music are really nice, the myriad of subweapons gives you a lot of variety and power, the boss fights are well made, and most importantly the game is simply fun to play. I certainly got hooked! The only negative in my mind is the long password system, but if that’s the only thing I can find wrong with the game then Compile did a whole lot more right. I recommended that you give this gem a try!

#37 – The Guardian Legend