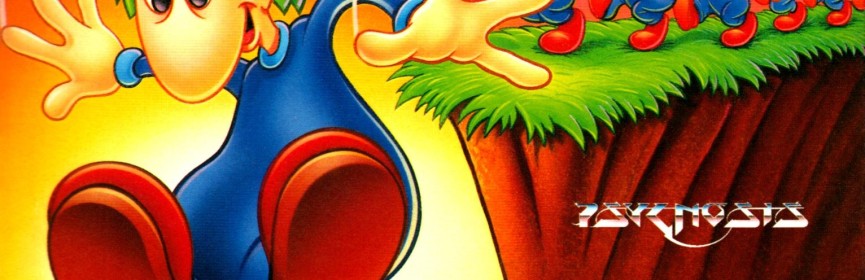
Take on the NES Library

An 8-bit Extravaganza!

mike

JUN
25
2021
3

#167 – StarTropics

Long neglected, but never forgotten.

Those chill nighttime vibes

To Beat: Reach the ending
Played: 10/8/2020 – 10/11/2020
Difficulty: 5/10
My Difficulty: 3/10
My Video: StarTropics Longplay

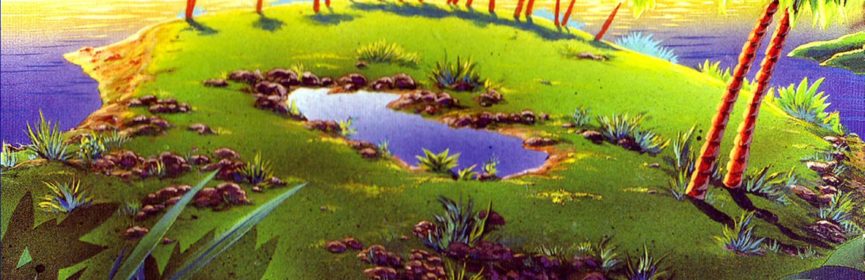
In my quest to beat all the NES games, there are times of great productivity and times of, well, little productivity.  I have started writing this blog post in late May, as the weather is starting to get hot.  As you can see above, I played through this game in early fall.  It feels kind of poetic to have pretty much skipped all the cold weather in between, seeing as StarTropics is very much a tropical game.  Or, on the flip side, it can be seen as a missed opportunity to celebrate some warmth when I could have used it the most.  Either way, there is no bad time of year to play through StarTropics, as it is a delightful game to play whenever you can.

StarTropics is an odd duck in terms of its history.  It was an NES-exclusive game, released in December 1990 in North America and August 1992 in Europe.  Despite being developed completely in Japan, it was never intended for Japanese release and indeed never made it officially to the Famicom.  The game was developed and published by Nintendo, specifically Nintendo’s R&D3 division.  That part of the company primarily developed hardware and peripherals from Nintendo 64 through the Wii U, and was renamed to Nintendo Integrated Research & Development Division, or IRD for short.  IRD has since merged with Nintendo System Development to become Nintendo Platform Technology Department, named PTD, who have been responsible for Nintendo Switch hardware and peripherals.  Anyway, back in the R&D3 days, they did develop a few games, namely both StarTropics games and the Punch-Out!! series, both arcade and home versions of the first two titles.  Locomotive Corporation also has development credits on this game as well its sequel.

StarTropics follows the journey of 15-year-old Mike Jones.  His Uncle Steve is a world famous archaeologist and he sends Mike a letter inviting him to come visit him at his laboratory on C-Island.  Mike arrives and meets the villagers of Coralcola, only to talk with the village elder and discover that Dr. Jones has been abducted.  Naturally, young Mike is best prepared to tackle the dangers of the islands in search of his uncle.  This adventure takes place over eight chapters spanning across multiple locations.  Clear all the chapters to beat this game.

Of course you are!

At the beginning of the game you need to set up your save file.  This file selection screen is quite reminiscent of the loading screen of The Legend of Zelda.  First, Select Register Your Name and press Start.  You then enter your name up to 8 characters, then press Select to move to End and press Start to create your file.  The Elimination Mode allows you to delete save files.  The Review Mode is an interesting feature that I completely forgot about and probably never used.  Select your file and press Up or Down to select from any available chapter, then you can press Start to play the game from the beginning of that chapter.   You can choose from any chapter reached so far.  This does not affect your save file in any way.  Just for the sake of science, I loaded up my completed save game and replayed a full chapter in the Review Mode.  When the chapter is finished you are simply sent back to the title screen.

There are two main modes of play in this game, which the manual calls Travel Mode and Battle Mode.  You start off in Travel Mode.  This is a top-down view where you move similar to an RPG.  You can explore areas, enter towns, and talk to people.  Use the D-pad to move around and press A to speak to people.  You can press Select to bring up a limited status view, displaying your current chapter, health meter, and score.  At the start of the game you are on C-Island.  You can explore the island in a limited fashion, and then proceed into the town where you will need to talk to the townspeople.  The chief in each village is who you need to speak with, but either they or something else is often blocked off until you gather more information in town.  Once you gain an audience with the chief, he explains the abduction and gives you the legendary island yo-yo, which is your default weapon for the journey.  After meeting with the island shaman, you proceed underground for your first challenge.

The other mode in this game where all the action takes place is called the Battle Mode.  This also takes place in a top-down mode but with a much larger character sprite.  Here you battle enemies while proceeding through caves or other areas room by room.  The main gimmick here, if you can call it that, is that your movement in combat is gridlocked.  It helps to think of each room overlaid with an invisible grid.  When you walk in one of the four directions, you keep moving until you lock to the next tile of that grid.  This concept does take shape in the actual game, too.  There are green squares that are raised up and you must jump on top of them.  Then, you can jump from tile to tile with A. You may also leap across water safely to another tile two spaces away.  For battling enemies, you wield your trusty yo-yo with B.  Enemies, by and large, play by the same rules you do as far as movement.  This all may seem restricting, but the game was built around the concept and it works better than you might think.

Yo-yo-ing slugs was not the vacation I had in mind.

In The Legend of Zelda, your heart-shaped life meter could be expanded by collecting Heart Containers.  StarTropics functions a lot in the same way.  Clearing each dungeon area gives you a free health refill.  At some locations, you also earn max health upgrades.  Every once in a while, you will find this game’s version of Heart Containers to extend your life.  Your health is not only important for staying alive, but it also helps you with your weapons.  There are two upgrades to your yo-yo: the Shooting Star and the Super Nova.  These not only increase the power of your attack, but also increase your range for distance attacking.  The catch is that you need a certain heart requirement to use them.  The Shooting Star activates with six hearts, while the Super Nova requires eleven hearts to wield.  At any time, if you don’t have enough health for the weapon, it drops back down to the prior level weapon.  Likewise, as you regain health, your better weapons kick back in.  Having low health once you acquire these weapons is a real double whammy.

There are lots of items along the way.  Basic items that defeated enemies drop are hearts and stars.  Hearts add one to the health meter, while stars function as sort of partial hearts.  Every five stars give you one heart.  Other types of items are available either out in the open or revealed by switches.  Those raised green tiles I mentioned earlier can reveal door switches or items when you step on them.  Better items are revealed in this way.  Clocks either freeze or slow down enemies on the current screen.  The anklet lets you jump over two spaces instead of one.  The vitamin X is an interesting item in that it fills up your health and overflows it to the max the game allows.  Over time, that excess health is eaten away bit by bit until you are back to your current max health.  The try-your-luck sign is another weird one.  In each stage you get three lives.  The try-your-luck sign can give you an extra life, sometimes two lives, but also it can remove a life from your stock.  Running out of lives forces you to restart caves from the very beginning, especially painful in some of the longer stages.

Mike also can acquire a plethora of special weapons.  There are three boxes in the status area to hold any special weapons you pick up, along with their ammo counts.  Switch weapons by pressing Select, or you can make selections while the game is paused.  Weapons are only available for the current area and cannot be transferred to other stages.  Many of these weapons, like the bolas or the flame, are simple projectile weapons.  The baseball bat is swung all around you to clear out enemies in close proximity.  The shurikens are neat.  They are double shurikens that are thrown in a straight line, and you can press B at any time to split them up, launching them sideways in opposite directions.  The spike shoes automatically toss Mike all around the screen, stepping on each enemy on screen for you.  There’s even a mirror to reflect some enemy projectiles.

You even get a submarine to traverse the islands.

There’s another category of items too, called Magic Items.  These are stored when you collect them but are activated only through the pause menu.  Press Up or Down when paused to toggle between the weapons and magic items.  Some examples of magic items are the medicine, snowman, magic rod, and the lantern.  The medicine restores five hearts of health, and there’s even a special counter for the medicine on the main status bar.  The snowman temporarily freezes all enemies.  The magic rod is used to reveal hidden enemies that exist on some screens.  This is important as some screen exits are only activated when all enemies are beaten.  The lantern lights up darkened rooms so you can see!

StarTropics also has a scoring system that isn’t often discussed.  It does not appear on the status bar or on the pause screen in the Battle Mode, but you can see it when you stop in the Travel Mode.  Points are awarded after you finish Battle Mode sections.  This isn’t mentioned in the manual, but I have learned how the scoring system works.  Each level in the game is worth a set amount of points, and behind the scenes, every enemy you kill reduces from that total.  If you are high score chasing this game, you will need to learn how to play pacifist, as much as the game allows.

Finally, I would be remiss if I didn’t mention the letter that comes with this game.  Retail copies of StarTropics came with a rather thick, standard size NES manual that has a folded up letter attached to it.  The letter is from Uncle Steve, inviting Mike to come to his island, beginning the adventure.  However at the bottom of the letter is a rather stern warning from Nintendo that pretty much says “don’t eat this letter, save it until the end of the game.”  That’s weird, but reasonable.  The letter is mentioned in-game as well, and when you reach a certain part of the game you are instructed to dip the letter in water, the actual letter.  If you take your unsoaked letter and do this, a secret message appears.  (I guess the invisible ink is what Nintendo is trying to protect you from.)  There is a frequency given that you must enter or you will not be allowed to complete the game.  That frequency is 747.  I might as well say it without spoiler warnings because I can’t imagine anyone playing this game for the first time with the original letter intact, and there’s no reason to make anyone brute force the answer.

Bosses can put you in hot water, so to speak.

StarTropics was a game that I owned brand new back in the day.  At some point we ordered games directly from Nintendo.  Maybe it was something from Nintendo Power, I can’t be too sure.  We bought StarTropics and Punch-Out!!, the version without Mike Tyson.  Nothing too rare, but certainly good games.  Here’s a little story about my original playthrough.  I got to wet the letter to reveal the code just as intended.  But at the time, I didn’t know the best way to do it.  I ended up running the faucet over the letter, but I did it full blast and it ended up almost destroying the letter.  I don’t think I was able to read the entire message, but I did at least see the code so that I could progress.  Funny thing is, if I had to do it over today, I bet I would end up doing the same thing.  For certain things or situations, I don’t know why, but my brain picks the least effective way to do it and I just run with it.  That drives my wife crazy, but at least it gets done I guess.
 
StarTropics is a game I’ve played many times before.  I never forgot the 747 code, I know the route through the game, and where all the major items are.  Still, I expected this game to take several hours to clear since it always takes me multiple sittings to beat the game.  This time, I finished up the game over two sessions in three hours total, about half the time I expected.  It was nothing special either, just a normal playthrough with plenty of deaths and mostly decent playing.  This is now the kind of game that if I had a block of time with nothing to do, I know I could power through it in one shot and have a pretty good time doing so.

I very much recommend StarTropics as one of the essential NES games that belongs in every collection.  The graphics are simple in spots, but everything is bright and colorful.  There are very detailed character portraits in some of the cutscenes.  The music is catchy and easy to listen to, and the boss theme is good for getting your heart pumping during some difficult fights.  The game controls very well within the constraints of the grid system.  The scenes only have a little bit of graphical variation, but the level design has some good variety with some navigation puzzles and all sorts of traps, enemies, and bosses.  There are plenty of special weapons and items that mix up the formula even more.  The game is not too easy, but not too hard, with a smooth difficulty curve over the entire game.  Best of all, this game is still affordable at around $10.  If you haven’t tried it, go check it out, and I hope you enjoy it as much as I still do.

#167 – StarTropics

 
MAR
06
2017
0

#37 – The Guardian Legend

Two styles of gameplay collide in this legendary adventure!

A static title screen with some nice music!

To Beat: Reach the ending
To Complete: Beat both the main game and the special mode
What I Did: Completed the game
Played: 11/7/16 – 11/19/16
Difficulty: 4/10
My Difficulty: 4/10
Video: The Guardian Legend Special Mode Longplay

In 2012, Mike Matei of Cinemassacre published a now well-known YouTube video listing his top 10 obscure NES gems. The Guardian Legend is the first game I have covered that made his list. Now I won’t tell you exactly where this slotted in on the top 10, but most of the games on that list became instantly more popular overnight, including The Guardian Legend. So the game has a lot of hype surrounding it now, but does it live up to it?

The Guardian Legend was developed by Compile. They are pretty well known for developing shoot-em-up games. The game was first released on the Famicom in February 1988. There it was named Guardic Gaiden and it was published by Irem. The Guardian Legend was released on the NES in April 1989 and published by Broderbund. The game was later released in Europe in 1990 published by Nintendo. The box and label art are unique among all three versions of the game.

Much to my surprise, my research revealed that The Guardian Legend is actually a sequel. There was a trio of games released by Compile on the MSX computer in Japan. The first game was Final Justice which released in 1985 and plays similarly to Galaga. The second is Guardic released in 1986. In this game, each level is a static screen with enemies to shoot. You go to the next stage by flying upward into a scrolling section where you can decide which path and level you want to take next. The third game is Blaster Burn from 1990 which is a vertical scrolling shoot-em-up. The Guardian Legend is the sequel of the middle game Guardic.

There’s a lot going on even in the very beginning.

The Guardian Legend is a shoot-em-up game comprised of vertically scrolling shoot-em-up sections and top-down adventure sections. You play as the Guardian who can transform between a humanoid form and a spaceship form. The goal of the game is to destroy the planet Naju which is filled with monsters and set on a collision course toward Earth. Your mission is to explore the surface of the planet to locate corridors that are buried deep inside the planet. These corridors contain switches that can activate the self-destruct sequence when all of them are set.

The game begins inside the first corridor. Here the Guardian assumes her spaceship form and you play a vertical scrolling shoot-em-up stage. After clearing the stage, the Guardian switches back to her humanoid form and then you explore the surface of the planet from a top-down perspective searching for the next corridor. The game format resembles The Legend of Zelda in that you explore an overworld while looking for dungeons you need to clear.

The controls are pretty much the same in both perspectives. Use the D-Pad to move the Guardian in eight directions. The B button fires the standard weapon. In the shoot-em-up sections you can only fire upward but in the top-down portions you can shoot in any direction. Hold down the B button for a quite generous auto-fire. The A button is used to fire secondary weapons. You can pause the game by pressing Start and you press Select to open up the subscreen.

Information overload!

There is a lot of information available on the subscreen. The top portion of the subscreen contains the same information shown when you are playing and it is comprised of three rows. The top row shows your current score, the number of power chips you currently have, the number of shots for your secondary weapon, and which secondary weapon you have equipped. The middle row contains your health bar. The bottom row shows which area you are located and the X and Y coordinates of where you are located in the overworld. All of that is just the top part of the subscreen!

The left side of the subscreen shows the map. You can see your current location highlighted as well as the location of any reachable corridor. The right side of the subscreen shows which keys you have, the maximum number of chips you can have, your attack and defense power, the power level of the currently selected subweapon, and how many chips it takes to fire the current subweapon. The bottom of the subscreen shows all of the subweapons you have. Use the cursor to select which subweapon you want to equip.

The power chips are very important to your survival. They are the ammunition for your subweapons. Each subweapon uses up a certain number of chips for each time you fire it and you cannot use your subweapons if you run out of chips. The other important mechanic is that the chips also influence the firepower of your normal weapon. When you reach certain chip amounts your weapon will power up, but spending chips and falling below that amount will cause your weapon to downgrade. There is a balancing act between using your other weapons while also maintaining enough chips in reserve to have a more useful normal weapon.

It’s a tiny swarm of overworld enemies.

There are a ton of upgrades and items that you will encounter in the game. The most important items for making progress are the keys. As you explore you will find black circles on the ground next to walls that have some kind of symbol written on them. If you hold the key that matches the symbol, then you can stand on the circle and teleport to the adjacent room. The keys are found in the corridors and they allow access to new areas of the map. Each new area hides more corridors.

You will also gather subweapons. There are twelve unique subweapons and once you have one you can switch to it anytime you want via the subscreen. If you collect the same subweapon again you can upgrade it to a more powerful form. Each subweapon has three distinct power levels. These get really strong later in the game but they cost more chips to deploy. The subweapons have all kinds of different effects and patterns and they are a lot of fun to use. You can get grenades, a laser sword, circular shots, homing shots, and so on. If one of the enemies or bosses is giving you a lot of trouble, it is probably because you are not using the best subweapon for the job. Experiment to see which one is most useful for your situation.

Some items give you other types of permanent upgrades. The Blue Lander is a little creature that will increase your maximum health, and the Red Lander increases the maximum amount of power chips. The gun item increases your attack power, and the shield item increases your defense power. The item that looks like four upward arrows increases the rate of fire for your normal weapon. You can also find an energy tank that fills up your health to your current maximum. It’s worth pointing out here that you can also upgrade your maximum health by reaching certain score thresholds.

Look, a weapon lying on the ground!

Other items are found by defeating enemies. Sometimes when you kill an enemy a little explosion cloud will appear on the ground for a little while leaving behind a power-up block. Shoot the block to reveal the item. You can find a heart that will restore some of your health. The blue orb gives you 20 power chips and a tiny bit of health, and a red orb restores 500 power chips and a little more health than the blue orb. You can also find full energy tanks but they are more uncommon.

There are quite a few ways to find the upgrades and items. On the surface you can find shops where you can exchange power chips for a weapon or upgrade. Some screens contain mini bosses that hold an upgrades. When you walk into one of these screens an alarm will sound and all the screen exits will be blocked off forming an arena for the fight. These can be challenging but the reward is worth it. Some screens contain a powerup freely for the taking although it takes some maneuvering around the map to find them.

There are ten different areas spread out across the map that branch off of the hub area. Each one has its own theme such as a water area and forest area. Each area contains two corridors and they are numbered based on the current area number. Area 1 contains both Corridor 1 and Corridor 11, for example. Corridors 1-10 are required for clearing the game and each one of them is blocked off from entry. There is some kind of puzzle you need to solve to open up the gate. Exploring the area and talking with some Blue Landers will yield the answer for how to open the gate and access the corridor. The remaining Corridors 11-20 are optional but you get upgrades from clearing them that you probably will want.

One of many huge boss sprites!

The corridor stages can pose a challenge. Often they are teeming with enemies and there can be a lot going on at one time. The scrolling speed varies from crawling to crazy fast which can add to the excitement. Each stage ends in a fight with a huge, detailed boss that takes a lot of firepower to defeat. As mentioned before, choosing the right subweapon is critical to taking out the boss successfully.

All throughout the map you will find rooms with Blue Landers that will give you a password to save your progress. The passwords are really complex, consisting of 32 characters of capital and lowercase letters, numbers, and symbols. The passwords do track all of the items you have acquired as well as your score, but the length and complexity is just too much. Thankfully in the smartphone era a simple picture works wonders for capturing it just right.

This was my first time playing through The Guardian Legend but I have quite a few random memories surrounding this game. Growing up it was one of those games I would often browse at the local video store but never rented. I ended up buying my first copy of the game for $5 during my honeymoon. A couple of years later I got big into NES collecting again and The Guardian Legend kept popping up for me. My local game store chain was slow to update their NES pricing and they sold it for $3 when it was at least a $10 game. I bought several copies of the game just to flip. (Yep, I’m one of those “evil” reseller types.) I even picked up a cheap copy on eBay a couple of years ago when I saw it. Then right before I started playing through the game for my blog, my grandmother came across a lot of NES stuff with yet another copy of The Guardian Legend. This one however was a nice condition complete in box copy that I am keeping!

Such colorful death bubbles!

It took me a little under two weeks to finish playing The Guardian Legend with my normal rate of playing. The game definitely has some meat to it with all the areas and corridors, but I managed to make progress at a good rate every time I played. I didn’t get stuck anywhere for too long and even the most difficult corridors only took a few attempts at most.

The Guardian Legend is extremely generous with powerups. The item drop rate isn’t terribly high, but there are so many enemies around to defeat that you will get powerups on constant rotation. The top-down segments, corridors, and even most boss fights provide you enough to keeping going as long as you are reasonably careful and employ smart subweapon usage. For this reason, I don’t think the game is that difficult overall, but there were a few tricky sections that caused me to give it a 4/10 difficulty rating. One of the recurring minibosses became a war of attrition every time I encountered it, and the final boss was pretty mean and took a few tries to beat. This is the kind of game where you consistently make progress, and you can keep attempting the tough parts until you get it right.

I already spoiled this a little bit, but in case you didn’t pick up on it or don’t want to know, now is the time to skip ahead to the next paragraph! Upon beating the game and sitting through the end credits, you are given a very short password “TGL.” You can use the password to play through a special mode of the game that consists only of the Corridor sections. The levels are identical to the regular game but the big change here is how you are awarded the powerups. After completing each corridor, you are taken to a special screen where you earn powerups for meeting specific score requirements. You can get as many as five powerups after each stage even if you score high enough to be awarded more. This mode shifts the focus on scoring as many points as you can. It is also more difficult than the regular game because the rollout of powerups is slower than in the normal mode. It’s a fun way to play through the game again and a fitting reward for beating the game.

The Guardian Legend handles many enemies pretty well.

There is a very good hack of the game called The Guardian Legend Secret Edition. This is a complete overhaul of the game containing a new overworld, new Corridor stages, new Corridor puzzles, and even some new bosses. The difficulty has also been cranked up quite a lot, but that is to be expected with a hack like this. I started playing through Secret Edition once I completed the game and I got about halfway through before I stopped playing. If you like The Guardian Legend then you will really like Secret Edition. I really need to get back to it and finish it for myself!

The Guardian Legend indeed lives up to the hype. This is a really good NES game that I enjoyed playing a lot. The game controls well, the graphics and music are really nice, the myriad of subweapons gives you a lot of variety and power, the boss fights are well made, and most importantly the game is simply fun to play. I certainly got hooked! The only negative in my mind is the long password system, but if that’s the only thing I can find wrong with the game then Compile did a whole lot more right. I recommended that you give this gem a try!

#37 – The Guardian Legend

 
MAR
04
2016
0
Lemmings Box Cover

#17 – Lemmings

Follow the leader to the ends of the earth no matter what the cost.

Let's play a New Level!

Let’s play a New Level!

To Beat: Beat the last level (Mayhem 25) to reach the ending
To Complete: Beat all 100 levels
My Goal: Complete the game
What I Did: Complete the game
Played: 2/5/16 – 2/28/16
Difficulty: 9/10
My Difficulty: 8/10

I haven’t looked ahead at my master game list for Take On The NES Library since I first finalized it many months ago, but I remember Lemmings was on the list early on and I knew it was going to take me a long time to get all the way to the end. That proved to be correct! Despite the long play time and figuratively banging my head against the wall on some of the final levels, I had a lot of fun with Lemmings. The NES port has many limitations but despite that it is a surprisingly faithful version of this classic title.

Lemmings was originally released on the Amiga in February 1991. It was developed by DMA Design and published by Psygnosis. The NES version was developed by Ocean Software and published by Sunsoft. There is an account on the history of the development of Lemmings by Mike Dailly, who is one of the founding members of DMA Design as well as a programmer and artist. Definitely check that link out if you want to read the whole story. The idea for the game all started with an animation of what would become the lemmings in the game. They were mocking up little men as targets for a game they were creating called Walker. The idea was to make very tiny men around 8×8 in pixel size. After some refinement of the animation, one of the team members, Russell Kay, noted that “there’s a game in that!”

Update 5/27/16: There is some confusion around who exactly developed the NES port of Lemmings. The opening scene and most sources I found say that Ocean Software developed the port, but in the credits of the PAL version of the game the developer is listed as Special FX Software. They are not listed in the credits of the NTSC version that I played. It appears that Special FX Software was formed by members of Ocean Software after they left the company, so perhaps they acted as a contractor to Ocean at the point of release. It is also possible that they only worked on some sort of conversion to the PAL release, though from what I can tell the NTSC and PAL versions are the same except for the difference in the credits. My hunch is that Special FX Software was indeed the developer of NES Lemmings, but I cannot say with 100% certainty. Special thanks to Nintendo Age user ruudos for the tip!

The game even has a cute little intro scene when the game is turned on.

The game even has a cute little intro scene when the game is turned on.

There most definitely was a game in that! Lemmings was a big hit for DMA Design and it was easily their most successful game to date. It is also one of the most widely ported games ever. I found a list of Lemmings releases in this article in Hardcore Gaming 101: Amiga, Amiga CD32, Amiga CDTV, IBM PC, Windows 95, Apple IIGS, Macintosh, Atari ST, ZX Spectrum, PC-98, Acorn Archimedes, Amstrad CPC, Commodore 64, SAM Coupé, NES, SNES, Game Boy, Game Boy Color, Turbografx CD, Lynx, Master System, Game Gear, Genesis, 3DO, CD-I, PlayStation, PlayStation 2, PlayStation 3, PSP, and Mobile. As you can see, Lemmings was just about everywhere! There would be a few Lemmings sequels and additional level packs along the way. It may have been DMA Design’s biggest hit, however the company would go on to later launch the first game in an even bigger and more successful franchise. DMA Design created Grand Theft Auto in 1997. After a series of acquisitions, DMA Design became Rockstar North and they are still developing Grand Theft Auto today.

Now, onto the actual game! Lemmings is a puzzle platformer, but it can also be considered as a predecessor to the real-time strategy genre. The object of the game is to guide a group of lemmings to a goal. The lemmings themselves have very basic behavior. They will always walk forward only turning around in the other direction if they collide with a solid object. They will fall off ledges and into traps to their death if you let them. You cannot directly control the lemmings, Instead, you control a cursor by which you can assign specific lemmings a task. There are eight tasks that you can give to the lemmings that aid in creating a path to the end of the level. There is a limit to how many times a task can be given within a level and sometimes a skill is unavailable. The game plays out over 120 levels spread out in groups of 30 levels over four difficulty settings, and there are passwords handed out after every level. Each level dictates how many lemmings appear in the stage, what percentage of lemmings must be saved to win the level, the amount of time given, how fast the lemmings emerge from the entrance, and how many of each skill is available. Early on the game provides more than enough options and leeway to finish a level, but later on you are not given that much to work with so you must be creative and resourceful in determining how to solve a level. In fact, some levels are repeated with a different, more limited mix of skills that greatly changes the way you approach the solution.

The game starts off with a nice safe area.

The game starts off with a nice safe area.

These are the eight tasks at your disposal:

  • Climber: Allows a lemming to climb vertical walls. This skill stays with the lemming for the entire level.
  • Floater: Lets the lemming pull out an umbrella to float down when falling. Lemmings will die if they fall from too high so this skill lets them survive. It is a persistent skill just like the climber.
  • Bomber: Sets a countdown timer from five and when it runs out the lemming explodes! This explosion kills the lemming of course but it puts a hole in the ground where the lemming used to be. Other nearby lemmings are unaffected when he explodes.
  • Blocker: The lemming stands in place holding his arms out so that no lemmings can pass. If a lemming runs into a Blocker he will turn around. Blockers cannot be assigned any further tasks except for the Bomber skill to blow them away. There is one exception. If a blocker has the ground removed out from under him, he will fall down and resume walking as an ordinary unskilled lemming.
  • Builder: Allows the lemming to build a bridge. The lemming will put down the sections of the bridge piece by piece, building upwards around a 30 degree angle. A Builder will need to be reassigned the Builder skill multiple times consecutively to create large bridges.
  • Basher: The lemming will claw horizontally through the ground clearing a path forward. This must be used near a wall or a mound where the dirt is right in front of the lemming. When the path forward is clear, the lemming resumes his walking.
  • Miner: Same as the Basher except the lemming carves a path at a downward diagonal slope.
  • Digger: Same as the Basher and Miner except the lemming digs straight down.
This ledge is too high without some lofty assistance.

This ledge is too high without some lofty assistance.

As the game progresses, you will discover certain behaviors or tricks that are vital to solving later levels when the available skills are much more limited. One example is that if a Builder bumps his head against the ceiling, he will stop building and start walking in the opposite direction. This is one way to get a lemming to turn around. Sometimes you will need a Blocker and you don’t have one. A way to get around that is to have a Miner go partway into the ground to create a wall and then assign him the Builder skill to stop mining and turn him around since he can’t build into a solid wall.

What I have been describing up to this point is how most of the versions of Lemmings play. The NES version of the game has some significant changes that are there primarily because of the limitations of the NES hardware. There are only 100 levels with 25 per each difficulty level. The maximum number of lemmings per level is 14 instead of 100. This is because the NES can only display 8 sprites per scanline at one time. The lemmings themselves are drawn as sprites and they flicker whenever there are more than 8 in a row so that you can see them all. I suppose the development team decided that 14 lemmings was as high as they could go to make the flickering tolerable in the worst case scenario, and this also keeps the game from slowing down too much. Curiously, there is one level that has a maximum of 20 lemmings but only 14 will appear at the same time. The rest of the lemmings will emerge only if a lemming is killed or exits the stage. The level layouts themselves are shrunk down so that they fit in a map exactly two screens wide. This is done because the NES can have two screens worth of level data drawn out side by side with smooth scrolling without having to draw additional columns of tiles on the fly. I’m sure this was done to save memory of map data as well as for avoiding any possible slowdown or display corruption by drawing out the level one time at the start.

None shall pass!

None shall pass!

The change that has the biggest effect on game play has to do with aligning actions to a grid. The NES background layer that holds the level layout consists of a grid of 8×8 pixel tiles. Every action that affects the level map adheres to this grid, while in other versions these same actions can take place on any pixel. It’s hard to explain but video should help. If you look at this footage of the SNES version, whenever a lemming bashes through a wall he shaves off individual pixels, whereas in this video of the NES version the lemming will remove an entire 8×8 pixel tile at one time. In the NES version, whenever Bashers, Miners, or Diggers are assigned, they will not being taking action until they move to the middle of the tile so that they can remove the entire tile ahead of them. Miners actually affect two tiles at once to make the slopes work. Builders will not start building until they move to the seam between two tiles and they build upward at a 45 degree angle. This causes the segments of the newly built bridge to occupy a full tile when they are finished. To pull off the animation of building the bridge, I think the game swaps in a new tile containing the next step of the bridge. The exceptions to this rule are that Blockers and Bombers take effect immediately after the skills are assigned regardless of tile position.

So after that long explanation that probably made no sense, how exactly does this affect gameplay? This gives you a timing window to make moves that are applied to a very specific location. Because the lemmings must walk a bit to align to the tile, there are several frames where that task can be given which affects the same spot. A practical example of this is with building bridges. A Builder will create a bridge spanning exactly two horizontal tiles before he resumes walking. If you need to cross a gap exactly four tiles wide but you only have two Builders remaining, you can pull it off quite easily. You can assign the Builder when he is standing anywhere on the last tile before the gap and he will walk right up to the very edge and start building. Chain two builds together and his finished bridge will end exactly on the other side so that lemmings can cross. Making exact moves like this is very helpful. The downside to this is that in the later levels you get exactly enough skill assignments to complete the level though you will have plenty of opportunity to practice your precision. The levels were tailored from their original versions to fit the NES limitations which shows how much care was put into making the port work despite the differences between other platforms. There was some really nice programming done on this game to really pull everything together and make this a good experience on NES.

Sometimes sacrifices must be made.

Sometimes sacrifices must be made.

One real negative of NES Lemmings that I want to address is that it is almost impossible to give tasks to the lemming you want whenever they are bunched together. There is just not enough precision in the cursor and when lemmings overlap while walking in different directions that doesn’t make a difference anyway. I can’t tell you how many times I wasted tasks and restarted levels because I couldn’t make the assignment I wanted. Unless my solutions were sub-optimal, sometimes I was required to try making an assignment and hope for the best that it was what I wanted. It’s just a limitation of the game as it’s designed but that doesn’t make it any less frustrating to deal with. The pause feature of Lemmings occasionally will make this somewhat easier. You can move the cursor around and scroll the level when paused. A good technique is to frequently pause the game to try and isolate a lemming who is a bit separated from the pack. You can then take your time and put the cursor exactly where you want it so you can unpause and very quickly assign the skill. It’s far from perfect but with some patience it does increase the odds of making a successful move. You cannot assign a task while paused which is consistent among all ports of the games. However, the NES version does not allow switching the skill selection when paused which the original version of the game and many ports allow. This can lead to some frantic switching when the situation calls for giving distinct tasks at the same time, but for most purposes you just need to remember to switch which task you want to use before pausing.

Before this blog, most of my experience with Lemmings was with the SNES version which is said to correlate quite closely to the Amiga version. I have owned the game since the 90’s and I made it maybe three-quarters of the way through before I moved on to some other game. The NES port of Lemmings was among the first games I sought out when I set out to complete my NES licensed cart set just because of my fondness for the SNES version. I ended up buying it at a used game store for $13 in late 2013 which was a solid price. They had it listed for $18 but I had a $5 off coupon that I used. It was the last coupon I have ever seen from that particular chain of game stores but I made sure I put it to good use. I went out with a couple of my friends to make a special trip out to that particular store to get the game. I got a ribbing from one of my friends for buying it because he had no idea why I would want the NES port of Lemmings. I didn’t care because I knew I wanted the game for my collection! I ended up getting a double of the game in an eBay lot for a good price because the game had a ripped label. It turns out the label was fine and it was a sticker over the top of the label that was torn instead. The cart cleaned up really nice and it ended up being the copy I kept for my collection.

You can only bash through arrow walls in the direction of the arrow.

You can only bash through arrow walls in the direction of the arrow.

Even though I spent the most amount of time on Lemmings for any game covered thus far, I don’t have a whole lot to say about my playthrough. I mowed through levels early on and I had to spend some time solving later levels just as one would expect. I didn’t get stuck on any one level for too long. In fact, nearly every time I sat down to play I would complete at least one level and some of those play sessions were only 20-30 minutes long. I’m really thankful for password saves after every level so I could inch my way through to the end. My prior experience with Lemmings helped me remember many of the tricks needed to solve the puzzles. I decided to drop the difficulty down a notch for me because of this. I was very tempted to put this game as the first 10 on the difficulty scale, but for now I will leave it at 9. It is quite challenging but I think it will probably fall just a bit short of the hardest games the NES has to offer.

I found a video solution guide for the NES version of Lemmings for all difficulty levels: Fun, Tricky, Taxing, and Mayhem. I solved all the levels on my own without any outside help but I liked having a solution from someone else to watch. I looked at quite a few of these after I finished the game and most of the solutions differed slightly from how I solved the stage. It’s a testament to good game design here that despite some strict limits there is still more than one way to get to the same place in the end.

Lemmings on NES is an example of a well-done port on a limited platform in spite of some significant changes needed to make it work. If the developers would have tried to shoehorn in all the levels and allow more lemmings on-screen than the NES could handle, it would have bogged the game down into a much worse overall experience. Instead, they tweaked the game just right and made the NES port very playable, even if it is not the best way to experience Lemmings. If you really want to play this game, I would skip the NES version in favor of one that is more true to the original Amiga game. Maybe now I am well prepared to finish off the SNES version that I started long ago.

#17 - Lemmings

#17 – Lemmings

 
NOV
30
2015
0
Mike Tyson's Punch-Out!! Box Cover

#3 – Mike Tyson’s Punch-Out!!

The hits just keep on coming here at Take on the NES Library with Mike Tyson’s Punch-Out!!

Mike Tyson's Punch-Out!! Title Screen

867-5309 doesn’t work since I don’t know the area code

To Beat: Win all matches and reach the credits
My Goal: Beat the game without a single loss
What I Did: Beat the game with one loss
Played: 11/27/15
Difficulty: 9/10
My Difficulty: 5/10

Mike Tyson’s Punch-Out!! is probably the most recognizable sports game on the NES. It’s my personal favorite but it’s not quite honest enough to call Mike Tyson’s Punch-Out!! a sports game. It’s more like a pattern-recognition brawler and even that description is a little bit disingenuous. It may be hard to qualify but nevertheless it is still a beloved classic and still incredibly fun and challenging today.

Mike Tyson’s Punch-Out!! is actually the third game in the series. There were two prior arcade releases, Punch-Out!! and Super Punch-Out!!, that came out in 1983 and 1984 respectively. I have not seen either machine in person so I don’t know too much about those games. Mike Tyson’s Punch-Out!! came out in 1987 and was re-released in 1990 as simply Punch-Out!! without Mike Tyson. When Super-Punch-Out!! was released in 1994 the visuals very closely resembled the arcade versions. That means the NES version is a downgrade visually but even then the game still looks great by NES standards. To cap off the brief history, the Wii got its own version of Punch-Out!! in 2009 as well. I have played all three of the home versions and I am very well acquainted with them except for the Wii Punch-Out!! that I have only played through once when it was released.

I want to spin back around to the NES re-release. In 1990 Nintendo did not extend their licensing agreement with Mike Tyson to put his likeness into the game. That decision coincided with Tyson’s loss of the heavyweight title to James “Buster” Douglas. Evidently the game was still selling well for Nintendo so they re-tooled the game to remove Tyson. The box art was redone and the game replaced Mike Tyson with the character Mr. Dream. Gameplay-wise he is functionally equivalent to Tyson. This version of the game was the one I grew up with. My memory is a little bit fuzzy on this one but at some point I received a catalog from Nintendo Power and my mom ordered a couple of games for me. One was Startropics and the other was Punch-Out!! (Those turned out to be good choices!) It wasn’t until I started collecting NES games in earnest that I obtained a copy of Mike Tyson’s Punch-Out!! Even though the games are the same and the re-release seems to be a bit harder to find, the 1990 variant is cheaper to buy.

Mr. Dream Introduction

Don’t you just want to knock his perfect teeth in?

Even though this game is pretty familiar to NES enthusiasts it’s worth covering the gameplay. You play as Little Mac, an up-and-coming diminutive boxer that starts from the bottom to work his way up to fame and fortune in the World Video Boxing Association. Along the way Little Mac squares off against a colorful cast of characters culminating in a showdown with Kid Dynamite himself. Little Mac can do jabs and bodyblows that do just a tiny bit of damage compared to the damage received when he takes a hit. If Little Mac can find an opening he will sometimes be rewarded with a star that can be used to throw an uppercut, his strongest punch by far. He also has stamina represented by a number of hearts and when Little Mac runs out of stamina he turns purple in color and can’t punch until he briefly rests up by avoiding contact.

Soda Popinski hits pink Little Mac

This is what it looks like to have the wind knocked out of someone.

There are three circuits: The Minor Circuit, Major Circuit, and World Circuit. The Tyson fight stands alone at the end as the ultimate test. Little Mac must work his way up the ranks to knock off the champion of each circuit before proceeding onward to the next fighter. The actual fights play more like puzzles. Little Mac can get basic hits in but this quickly becomes a bad strategy just a few boxers in when they can block nearly everything. The way to victory almost always is to dodge punches and counter with rapid fire punches. The boxers leave themselves vulnerable to quite a few hits after a miss and that is how Little Mac can make up ground in the fight despite his relatively weak strength. Each boxer has his own set of punches to avoid and some have their own special attacks that Little Mac must figure out to dodge or counter. Often it’s these specials that pave the way for Little Mac to take advantage quickly. For example, the first boxer Glass Joe will occasionally back up and give a little taunt before coming forward with a punch. When timed properly, Little Mac can sneak a punch in just as he approaches for an instant knockdown. The game allows these tricks to be exploited while also allowing the player to win just by playing it straight with the dodge-then-counter-attack approach. Victory requires either three knockdowns within the same round (a TKO) or a single knockdown where the opponent cannot stand back up by the end of a 10-count. Each match has three rounds of three minutes each so there is ample time to determine the outcome of the match, and if time expires the judges will decide the winner of the match.

Glass Joe wins by decision

Seriously, don’t let this happen to you!

I played the game just a few months ago and I learned something very important regarding this game. My primary television for playing games is an LCD flatscreen TV which introduces a tiny bit of lag when displaying the picture on screen as opposed to an older model CRT TV. Normally this is a non-issue but Punch-Out!! is very timing sensitive and those few frames of lag make all the difference. I was able to make it through the first half or so of the game without any trouble and then all of a sudden I was getting knocked down all over the place. Despite all that I was able to somehow defeat all of the boxers except Tyson and even then I got awfully close to winning the game a couple of times. It sounds weird but it’s something you have to experience in person to understand. I have had a CRT TV stored away in my house unused for a long time and I knew I needed to get it up and running. The first game I played was Punch-Out!! and I put in the password to put me straight into the fight with Tyson as a test of both the TV and my reflexes. I was able to beat Mike Tyson on the first try but he brought me all the way to the end of the third round. I was on the ropes for almost the entire third round but I just barely made it through and won. Armed with that knowledge and that tiny bit of practice I finally felt good enough to take the game on from the very beginning.

I was very close to going undefeated but I fell just short. I was pretty shaky on both Piston Honda fights and I have no idea why. There is a way to end both of those fights quickly and my timing was off and I missed it. Then both fights went on way longer than they should have but I pulled through. Other than that I was on my game for nearly the entire rest of the run. I beat Soda Popinski without taking a hit and I knocked out Super Macho Man in the first round. But as it could be expected, I didn’t quite make it past Mike Tyson on my first try even though I was awfully close. I was just a sliver of health away from getting a TKO at the end of the second round, and then in the third round I got a little over-eager with dodging and ended up getting knocked down twice and couldn’t recover. Losing to Tyson is an instant Game Over. However, when you go back to the title screen and continue it pre-loads the last password received. That brought me back to Super Macho Man. I beat him again and then in the second round of the Tyson rematch I took him out for the victory. Curiously, I ended up with a 15-0 record on the ending screen even though there are only 14 fights in the game. I figured out why. The password you get from beating Super Macho Man records the win even though it puts you back before that fight to begin with, so it did not count the Tyson loss and double-counted the Super Macho Man win. It looks nice, but don’t be fooled. I wasn’t better than perfect on this run!

Little Mac training with Doc Louis

Training all day and all night eventually pays off

I am so familiar with this game that I know a lot of little minor details that escape most other players. I mean stuff like whenever an opponent is knocked down and gets up at the count of 1 it means an uppercut will instantly knock him down again no matter what his health bar says. During the second Bald Bull fight, whenever he is knocked down he always gets up on 9. Every single time. There are some things though that are not so obvious or easy to find, and there is one particular secret that was revealed a few years ago that was not publicly known for over 20 years. Back to Bald Bull, his signature move is the Bull Charge where he backs up to the ropes, takes three hops forward, and throws an uppercut that means an instant knockdown. The move can be countered by landing a body blow right before he strikes which is an instant knockdown right back. The secret is that there is a member of the audience on the right side that takes a picture with the flash on and if you punch as soon as you see the flash you will have the perfect timing to knock Bald Bull down every time. It does make sense that a player would almost certainly never notice this as all the attention and focus are on making the perfectly timed hit, but it does make me wonder if there are any other secrets like this here or in any other games that are out there clearly in the open that no one has figured out or revealed yet. I really hope that there is!

Punch-Out!! Famicom Gold Cart

This is just as shiny as Bald Bull’s head!

In Japan, the Famicom version also had a release and subsequent re-release although they are backwards. A fancy gold-colored Punch-Out!! cart was given out to winners of a contest and it is quite collectible and expensive as far as Famicom carts go. The game did not include Mike Tyson, ending instead with Super Macho Man. Not long afterwards the standard release of Mike Tyson’s Punch-Out!! was launched in Japan.

I would be remiss if I didn’t mention one of the neatest feats I have ever seen in gaming and that is Mike Tyson’s Punch-Out!! beaten completely blindfolded. It’s a long video but it has to be seen to be believed. The game is so well made that it can be mastered solely with audio cues. I first saw this done live on the stream of Awesome Games Done Quick 2014 but the runner was unable to beat Tyson at that time. Now it has been completely dominated blindfolded and even though I have watched it I still can’t completely wrap my brain around it.

Update 5/27/16: Mike Tyson’s Punch-Out!! is one of the more difficult games to beat on the NES. The game is both short enough to beat in a single sitting, and hard enough where it takes hours and hours of practice on each opponent to learn the patterns and how to effectively win. Then, when you finally get to Mike Tyson, all of your past skills and reflexes are put to the ultimate test and then some. Even a Punch-Out!! veteran can have some trouble in the final fight. I know it happens to me when I play and I’ve beaten Tyson dozens of times. I put it at a 9/10 difficulty rating but I think it’s not that hard to make a case of bumping it up to the elusive 10/10 difficulty.

Mike Tyson’s Punch-Out!! is worthy of its spot high up on my list of games to beat. It has tight simple controls and it is a great exercise in hand-eye coordination and reflexes. It is certainly worthy of digging up a CRT TV just to have a fighting chance at playing effectively. I am also insistent on properly including both exclamation points every time I reference Mike Tyson’s Punch-Out!! because the game is that exciting to play!

Mike Tyson's Punch-Out!! Ending

#3 – Mike Tyson’s Punch-Out!!

by :
comment : 0