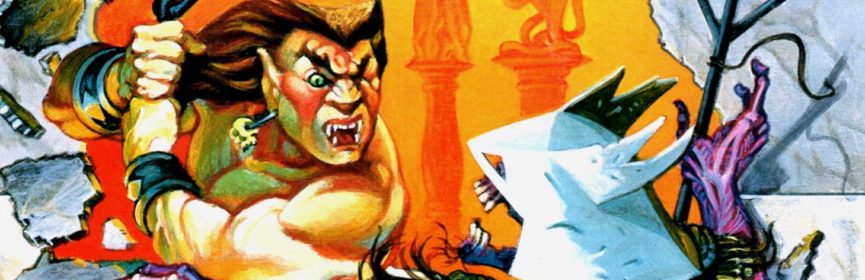
#47 – Gargoyle’s Quest II
Every Gargoyle deserves an adventure.

The dark, foreboding music fits perfectly!
To Beat: Reach the Ending
Played: 3/9/17 – 3/17/17
Difficulty: 6/10
My Difficulty: 3/10
Video: Gargoyle’s Quest II Longplay
The concept of a spin-off in media makes a lot of sense. A spin-off can take a supporting character from an existing TV show or movie and give them their own story while giving the storytellers an already established base to work from. Spin-offs have naturally made their way into video games too. One notable example is the Wario Land series which started as a spin-off of the Game Boy game Super Mario Land 2: 6 Golden Coins. Wario was the villain of that game but became the protagonist in his own adventure. On the NES, there aren’t very many examples of spin-offs, but today I am going to cover one. The annoying “red devil” enemy from Ghosts ‘N Goblins gets not only an actual name, but also his own adventure in Gargoyle’s Quest II.
The Gargoyle’s Quest series originated on the Game Boy. All games in the series were developed and published by Capcom. Gargoyle’s Quest was initially released in Japan in May 1990. The US would get the game shortly thereafter in July 1990, and it also saw release in the UK in 1991. The game was popular enough to warrant a sequel that jumped platforms to the NES and Famicom. Gargoyle’s Quest II was named Red Arremer II in Japan, seeing release in July 1992. The US received Gargoyle’s Quest II in October 1992, and the European release was in June 1993. The NES game was also ported to the Game Boy in 1993 under the name Makaimura Gaiden: The Demon Darkness, though only in Japan. The third and final game in the series was named Demon’s Crest in both the US and Europe and Demon Blazer in Japan. This Super Famicom and SNES game was nearly released simultaneously in Japan and the US, coming in late October 1994 in Japan and early November 1994 in the US. The European release was also released last, launching in March 1995.
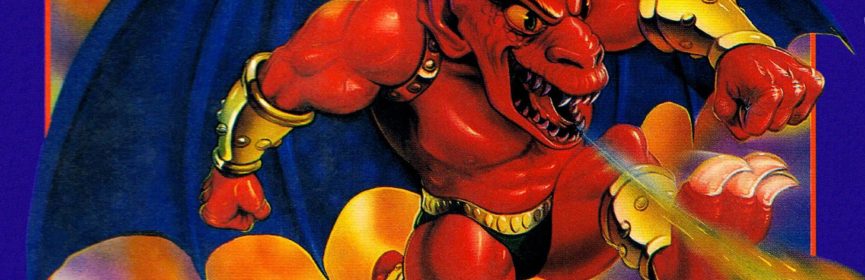
Gargoyle’s Quest II is a hybrid between a platformer and a top-down RPG. You play as the red devil Firebrand, who upon returning from training, finds his home has been wiped out by the mysterious Black Light. Firebrand sets off on a journey to solve this mystery and save the Ghoul Realm. The game initially looks and feels like an RPG. In this top-down view, you can explore towns, enter buildings, collect items, and talk to other ghouls to gain valuable information for your adventure. These towns and other areas in the game are all connected via a large overworld. However, all the action scenes take place in a side-scrolling view. Here you control Firebrand as you jump and fight your way through various stages of action gameplay.

The overworld ties the action sequences together.
During exploration, you can use the D-pad to travel in four directions. You’ll notice right away that Firebrand moves around very quickly in this view. He goes much quicker than the slow, plodding movement in other NES RPGs around this period. Use the A button to talk to other ghouls and interact with some objects. You will also use A to advance the text when talking. The Start button brings up the menu where you can choose from a few options. The Level menu item lets you view your current status. The Tool option lets you look at and choose certain quest items you will find. The Magic option lets you view and choose which attack you can use during the action sequences.
In the side-scrolling sections, use the Left and Right on the D-pad to walk around. Contrary to the other view, Firebrand moves slowly and deliberately. Press the A button to jump. If you press A again while in the air, Firebrand will flap his wings and hover for a short while. While hovering you can move left and right, allowing you to fly and cover much greater distances than just jumping alone. Press B to attack by spewing a small projectile. The Start button both pauses the action and brings up a sub-menu at the bottom of the screen where you can switch between attacks.
There are two mechanics in the side-scrolling areas that complement each other and form the basis for Firebrand’s movement. First is the hover ability briefly mentioned above. In the game, it is referred to as Wing Level. There is a large bar on screen that indicates how long Firebrand can hover in place, and it depletes quickly. When it runs out, Firebrand will fall, or you can choose to fall before it runs out by pressing A again. This wing stamina will restore to full strength as soon as Firebrand lands on solid ground or clings to the wall. This brings me to the second mechanic which is wall climbing. The Wing Level gives Firebrand extended horizontal movement while wall climbing gives him vertical movement. Thus, the levels extend in all directions to accommodate all his movement capabilities, as well as involving spikes and other such hazards in many places to keep Firebrand on course.

Climbing around spike-laden walls is required often.
There are a few items Firebrand can find during the side-scrolling levels. Hearts restore some of Firebrand’s health. There is a life meter on the status bar indicated by small hearts that show how many hits Firebrand can take. There are also red jars called vials that act as the game’s currency. Every now and then you can find a light-colored jar that will expand the maximum number of hearts.
Firebrand can expand his capabilities by items he acquires on the overworld. These are generally given to Firebrand after completion of certain stages or by talking to creatures. They are pretty weird items that slot into a few different categories. There are nail items that increase his Jump Level so that he can jump higher. There are wing items that increase his Wing Level which lets Firebrand hover for a longer time. There are armor items that increase Firebrand’s Life Level which gives him more hearts on his life meter. There are magic items that provide him new attacks. Finally, there are tools which are passive items that are needed to interact with certain characters to advance the story.
The magic items are the most interesting as they both give Firebrand new attacks as well as expand his capabilities in interesting ways. Firebrand starts with the Fire attack that launches a small projectile for attacking enemies. Next is the Buster attack that is a bit stronger than Fire but also can break blocks. The Tornado attack generates a small temporary platform that Firebrand can land on and restore his wing stamina. The Claw attack can form a protective surface against a wall of spikes, giving Firebrand a way to cling to them temporarily. There is also a final magic ability that is useful at the end of the game.

Creating your own platforms sure comes in handy!
I mentioned the vials earlier as the currency in the game. It turns out they are only used for one thing. There are certain creatures throughout the game that will allow you to exchange your vials for the Power of Maelstrom. It is the game’s fancy way of saying an extra life! They do come in handy for tricky areas. However, they get more expensive later in the game.
One more optional item you can find in the game is the Essence of Soulstream. To get it, you have to find two different items in the world and bring them to a person who can combine them into the Soulstream. This item can be used in the platforming levels from the menu. It can only be used once but it lets you restore your health all the way to the maximum. The best place it comes in handy is during one the boss fights that occurs at the end of some stages.
There are some ghouls on the overworld that will provide you with a password if you talk to them. Not only do you get the password, but you also set a checkpoint here that you will return to if you lose all your lives. The passwords are 16-digits, all 0-9, with a mandatory dash in the middle for readability. The passwords have just the right amount of complexity to save all your items and vials, yet they are not unwieldy to use.

Gargoyle’s Quest II has fun boss fights, including this difficult one.
I have played all the way through Gargoyle’s Quest II a few times before this run. Like many late NES Capcom games, it is pretty expensive at around $75 or so. This was one game I bought long before the prices skyrocketed. I had learned of this game in college and I decided to search it out on eBay. It may well be the game that got me to create my eBay account in the first place, I’m not sure. I found a copy for $6, and I even remember the seller was only 30 minutes away from me. I played through the game when I got it and I went back to it periodically over the years.
I’m not incredibly familiar with the game but I was able to work through it without a lot of trouble. The game takes several hours to play through the first time, and I can get through it in around two hours. I played it over three separate nights just due to time constraints. There was only one spot in the game where I lost all my lives and had to restart, but otherwise I think I played well. This is the kind of game where I normally would not record an entire longplay, but I was good enough at the game that I captured one this time. So, if you would like to see the game in its entirety, you may!
Gargoyle’s Quest II is a quality platformer that is fun to play. When you see the Capcom logo on an NES game, chances are it’s a good one and this game is no exception. It has detailed graphics, sprawling stages with good platforming, a haunting soundtrack, and a large overworld that ties it all together. There are only a few things I don’t like about the game. The overworld can be dull to traverse, and there is a bit of a difficulty spike early in the game where you need to cross over a fiery river. There is also some slowdown when many enemies are on the screen. Frankly those are minor complaints. The game is solid and I find it fun to play through every now and again. I’m glad I had the good sense to seek out this game many years ago!

#47 – Gargoyle’s Quest II