Take on the NES Library

An 8-bit Extravaganza!

quest

JUN
18
2018
0

#79 – Dragon Warrior II

A much more expansive adventure awaits in Dragon Warrior II.

The gang’s all here!

To Beat: Reach the ending
Played: 3/16/18 – 4/7/18
Difficulty: 5/10
My Difficulty: 3/10
My Video: Dragon Warrior II Final Area and Ending

I know this is a website about old NES games, but this is also a website about nostalgia. Each of these games I’ve been playing has been enjoyed by someone who will remember them fondly. It’s not necessarily about the games themselves, but about the people you played them with, the friends you shared tips with, or the memories you had playing them and what it was like to live your life back then. Perhaps I’ve always been focused on nostalgia because I have made time to play my old games over the years. Sometimes it takes an older game to drop you back in time in a powerful, almost surreal way. Dragon Warrior II is a game that does this for me. It helps that it is a fun game to play even now.

For more information about the Dragon Quest series of games, check out my Dragon Warrior post.

Dragon Quest II: Akuryo No Kamigami was released on the Famicom in January 1987. The name translates to Dragon Quest II: Gods of the Evil Spirits. It was developed by Chunsoft and published by Enix. All the Dragon Quest games on Famicom were brought over to the NES several years later. The NES version was renamed Dragon Warrior II and was released in September 1990. This game was ported a lot more than I thought. There was an MSX version in Japan in 1988 and a Super Famicom version in 1993. Game Boy Color received a combination cart of Dragon Warrior I and II. There are also mobile versions and a Wii version in the Japanese compilation Dragon Quest 25th Anniversary Collection.

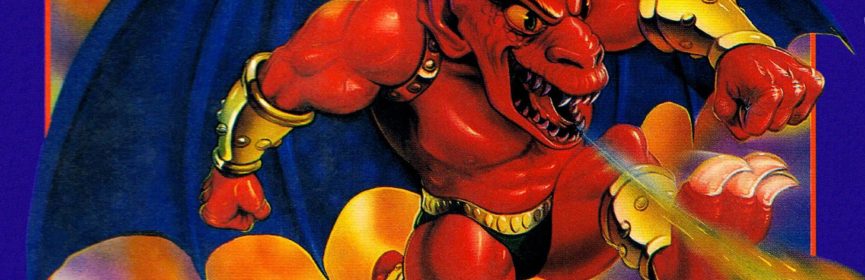
The story of Dragon Warrior II is explained through an introductory cutscene exclusive to the NES version. All is peaceful in the kingdom of Moonbrooke until the forces of the evil sorcerer Hargon appear suddenly. The king fights valiantly but is no match for these creatures. He and the rest of the castle are taken down, but not before a single soldier barely makes his escape. This man somehow makes it all the way to the kingdom of Midenhall to warn the king there before he succumbs to his injuries. As the prince of Midenhall, it is your duty to go on a grand adventure to defeat Hargon. Do so and you win the game.

The situation is pretty dire.

Structurally, Dragon Warrior II is a lot like the original game. You still walk around with the D-Pad, press A to open the command menu and give commands, and press B to undo or go back. You are still adventuring around, fighting enemies, getting stronger, exploring caves and towns, upgrading equipment, collecting items, etc. I will still give my traditional amount of detail, but rather than retread a lot of old ground, I will focus more on the differences added and implemented into Dragon Warrior II from the first game in the series.

The first thing you may notice is the Command Menu is updated. There are six commands here instead of eight. Five of these commands are the same: Talk, Spell, Status, Item, and Search. The displays are a little different, but they function the same way. The new command is Equip which lets you swap your weapon, armor, shield, and helmet for a different one you are holding. You may also choose to unequip something and go without if you choose. Three commands from Dragon Warrior are no longer here: Stairs, Door, and Take. You will automatically go up or down stairs when you stand on them, which is an obvious, much welcome change. Door and Take were both redundant commands. Keys are treated as items so you use them through the Item screen, and Take was rolled into the Search command. The popup Status Menu is also streamlined. It appears at the bottom of the screen this time and only displays the first four characters of your name, your HP, and MP. If you want to see Gold or Experience, pull up the Status menu instead.

Some of the basic structures have been changed. You can see the differences from the opening cutscene. All map objects in the first game were all the size of one tile, but that’s not the case here. Castles are four tiles big and towns are two tiles long. That’s all though; everything else is one tile. There are still caves like in the original game. Monuments are special points of interest and are often friendlier environments than enemy-ridden caves. There is a different kind of grass tile that looks like bushes. These are just cosmetic changes, but they do make the environment more interesting. The size differences also help make you feel smaller and the world around you feel bigger.

Slimes and slugs go well together.

Venture out into your first battle to find that you may have more than just a single enemy to deal with this time. It was a logical next step to have more than just one-on-one battles, right? To handle multiple enemies on screen in a fight, the pretty battle background from Dragon Warrior was replaced with a plain black battle screen. Your Status Menu is displayed at the top, and the lower left contains the Command Menu. These options are Fight, Run, Parry, and Item. Parry is the only new one here, which puts you in a defensive stance. You take half damage but don’t do anything else. The lower right display shows the enemy names and how many of them are still active in the fight. Instead of targeting a single enemy when you fight, you get to choose which enemy group to attack. If there are multiple enemies in a group, you attack one at random. If there are no longer any enemies in the group, you will whiff and not hit anyone. Lame, but it happens. When battles play out, the lower half of the screen describes who is attacking who and for how much damage, same as before.

Caves have received a major overhaul. You no longer need to carry torches or use the Radiant spell to see where you are going, so already that’s a huge improvement. Narrow corridors are no more. Caves have the same tile size as the castles on the overworld, so the normal tunnels are always two tiles wide and they are often much longer as well. There are cave entrances where you cannot see where you are going until you walk through to the next room. Then the newly entered room of the cave is drawn while the room you just left is shrouded in darkness. It helps maintain a bit of mystery since you can already see the entirety of the current room. Later in the game, you explore towers that have the same attributes as caves, just with a different tileset.

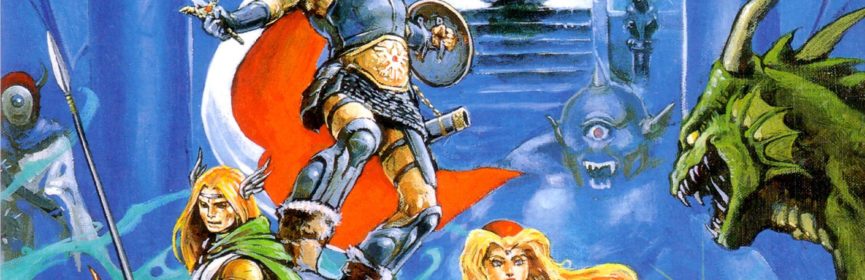
The most significant change in Dragon Warrior II is the addition of two party members. You will have to go solo for a while before eventually meeting up with the Prince of Cannock. He is given a name at random and you don’t get to change it. My companion was named Esgar. He is not as strong as the main character and he cannot equip as many weapons or armor, but unlike our hero he can cast magic spells. Now you get the ability to heal without resorting to medical herbs or going back to the inn, and you get some extra options in battle as well as another attacker. Sometime later you find the Princess of Moonbrooke. She was named Roz in my adventure. She is the weakest physical attacker but has the most powerful magic. It’s a well-balanced party.

Join forces and help each other.

There are many spells in Dragon Warrior II that can be used by the Prince or Princess, or sometimes both. Some spells are only usable in battle, and some are only usable in the field. When you pull up the Status for a spell caster, the last screen will be a list of spells in each of those categories. If a spell can be used anywhere, then it appears in both lists. The spells can be further categorized into healing spells, field spells, attack spells, and effect spells. Let’s go into more detail!

The healing spells are Heal, Healmore, Healall, and Revive. The three “Heal” spells all restore some HP to one party member. It should be clear by the names that Healmore restores more than Heal, and Healall restores all HP to the affected party member. Revive can bring a fallen party member back to life with a single hit point. The Prince gets Heal, Healmore, and Revive, while the Princess gets Healmore and Healall. HP restoring spells can also be used in battle but Revive is only usable on the field.

These are the field spells: Antidote, Repel, Return, Outside, Stepguard, and Open. Antidote cures one member of poison status so that they don’t take damage while walking about. Repel wards off weaker enemies for a while. Return sends you back to the last place you saved the game. Outside takes you back to the entrance of a cave or tower you are exploring. Stepguard protects you from taking damage from certain tiles that normally hurt you when you walk on them. The Open spell opens doors without using a key. The Prince gets Antidote, Return, Outside, and Stepguard. The Princess learns Repel, Antidote, Outside, Stepguard, and Open.

The Prince has attack spells to aid in combat.

The attack spells are Firebal, Infernos, Firebane, Explodet, Defeat, and Sacrifice. Firebal does a relatively small amount of damage to one enemy, though it is useful in the early going. Infernos and Firebane have the same effect, dealing damage to all members of an enemy group. Explodet does a lot of damage to all enemies. Defeat can be used on an enemy group and may defeat an enemy outright if it works. Sacrifice instantly defeats all your enemies as well as the spellcaster. The Prince learns Firebal, Firebane, Defeat, and Sacrifice, while the Princess learns Infernos and Explodet.

The final set of spells are the effect spells. They are Sleep, Surround, Stopspell, Defence, Increase, and Chance, and they can only be used in battle. Sleep may put members of an enemy group to sleep. Surround generates spirits around an enemy group that causes enemy attacks to miss more often. Stopspell is used on an enemy group and can block enemy spells if it is effective. Defence lowers the defensive stat for an enemy group, while Increase adds defensive points to all party members. The Chance spell has many different effects and one is applied at random when it is cast. It’s a risky spell with the potential for a huge payoff. The Prince gets Stopspell and Increase, while the Princess learns Sleep, Surround, Defence, and Chance.

Having three party members mixes up things somewhat. Menus now include an additional option for which member you want to command. Each character has his or her own set of eight items to hold. Party members may trade items or throw them away through the Item menu. This includes your weapons and armor, unlike Dragon Warrior where they don’t go against your total item loadout. When you buy items, weapons, or armor in the shop, you must choose a member to receive it. The shopkeeper will tell you if the recipient is unable to equip the armor or weapon, which is helpful even though you learn by trial and error. Often you have to shuffle items around to make room for something specific, and those item slots fill up pretty quickly. You can also utilize the House of Healing. Here you can curse poison, remove cursed items, and revive a fallen party member. It costs 20 gold for each experience level of the defeated party member to revive, but it’s often better than losing half your gold when everyone falls.

Drag your partner’s corpse to the House of Healing.

Once you recruit the whole party and explore the world more, you eventually find a ship. This is when the game switches from a linear style to an open world adventure. You can dock the ship at any walkable world tile, leading to vast exploration. This is also where the game takes a sharp upturn in difficulty. Since you can go wherever, you may stumble into an area with much stronger monsters. Go directly east from the port town and you might see something familiar. There’s an island which plays the world music from Dragon Warrior, and indeed it is a more compact version of Alefgard. You can go to Tantegel Castle or pay the Dragonlord’s ancestor a visit in Charlock Castle. It’s a nice throwback that shows just how much larger the world is in Dragon Warrior II. From there, you will need to track down some additional keys, as well as five crests required to reach the end of the journey.

There are a few miscellaneous changes I noticed in Dragon Warrior II. In the first game, you could sell old equipment for half of the original purchase price. In this game you get 75% back. That helps offset the extra equipment you need for the other party members. There are many more quest items in this game that take up precious item slots. I’m not sure if you could sell them in the first game, but you can this time. If it was one you still needed, you can go back to where you found it and get another one. Enemies may drop items after battle. I noticed that you can’t earn two of the better item drops, so if an enemy drops something you already have, you get additional gold instead. You can also get poisoned. This only affects you as you walk, and your experience level is temporarily replaced by “PO” to indicate you are poisoned. This is the only effect obvious on screen. I think it would have been nice to know at a glance if a character is asleep or had spells stopped in battle.

I have played Dragon Warrior II a few times before. The first Dragon Warrior was one of those formative games that introduced me to the genre. I knew there were other NES games in this series, but they were always so expensive to buy even used. Dragon Warrior II might have been the first NES game I played on my PC once I discovered emulation in the late 90’s. I remember sitting at the family computer exploring towers and grinding levels while listening to music. Good memories! Eventually I tracked down all four NES Dragon Warrior carts back when you mostly sent money orders in the mail to buy things from eBay. I’m pretty sure I beat the game on emulator, and I had all the save files used up on my cart copy. I don’t remember exactly but I’ve probably beaten the game at least three times before.

Having a full party gives you the most options.

It’s an RPG of course, so Dragon Warrior II took a long time to finish. I believe I spent 30-40 hours beating the game. The game goes along at a reasonable speed until you get the ship. It’s almost overwhelming to have the entire map at your fingertips, and the new enemies you encounter are quite challenging. The first major goal is to track down the Golden Key, and though I remembered where it was it still took a while to track down. I wrapped up the middle part of the game up quickly. The final cave is really tough to both navigate and fight through. I was under leveled, but this was also the best place to gain experience. For as much time as I spent playing from the start of the game up to the final cave, I spent just as much time getting past it and grinding experience levels before the final showdown. The character levels cap at 50, 45, and 35, and I was 6 or 7 levels shy of that before beating the game.

Dragon Warrior II is a challenging RPG. Even early in the game, some large enemy groups can cause trouble. I already mentioned it gets harder once you meet new enemies after adventuring on the water. Some of the locations you need to visit are out on the open water and tough to find for the first time. A couple of the crests are difficult to locate and require a specific hint from someone likely on the other side of the world. Perhaps the worst of all is the combat near the end of the game. The odds are constantly stacked against you. Enemy effects are always more effective against your party. Your attack spells can miss, while the enemy attack spells never miss. Enemies tend to gang up on one party member, and if a critical hit slips in there, you will likely die. The Prince is the only one with the Revive spell, and though there is an item that does the same thing, you can only hold one of them at a time. Some of the final enemies can cast Defeat and Sacrifice against you. While Defeat usually misses, Sacrifice is instant death and there’s nothing you can do about it except try again. Of course, I rated the game a 5/10 in difficulty because you can reduce the difficulty by grinding longer. It’s just unbalanced at the end of the adventure and there’s not much room for improvising if you get in a bad situation.

Dragon Warrior II is a huge step up from the original. Everything is larger: the world, the dungeons, the characters, the items, the spells, the enemies, etc. The graphics are good. Though they are similar to the first game, this game expands the tileset a bit while adding many new, larger, and more detailed enemies. The music is excellent all around with some great themes that are often underappreciated. On the one hand, Dragon Warrior II is several degrees more complex than Dragon Warrior, but on the other hand it’s not so complex that it becomes overwhelming or unmanageable. New elements are introduced at a reasonable rate and it’s not hard to keep track of everything as you go. The downsides are the spike in difficulty in some combat sequences, getting lost trying to locate important items for the end of the game, and all the level grinding needed to stand a decent chance at the final dungeon. This might be my favorite NES RPG as I find it hits the sweet spot between simplicity and complexity, all while both looking and sounding great. If you like RPGs and haven’t tried Dragon Warrior II, I would recommend giving it at least a few hours of your time to see if it grabs you.

#79 – Dragon Warrior II

 
AUG
24
2017
1

#50 – Dragon Warrior

Baby’s first RPG!

Title screen fanfare is nice!

To Beat: Reach the Ending
Played: 4/18/17 – 4/27/17
Difficulty: 2/10
My Difficulty: 1/10
Video: Dragon Warrior Endgame

It took me longer than I expected to get this far, but I have finally reached this milestone of the review of my 50th completed game. I thought I might do special games at milestones like this one, but my current plan is to take games as they come. In this case, it ended up working out to a game that is good enough for the 50th post. Dragon Warrior is an extremely basic role-playing game, or RPG, but it is an important game that eased me to the genre and was a gateway to more complicated and challenging games in this style.

Dragon Quest is the first game is a long running series of RPG games under the same name. Yuji Horii created Dragon Quest in response to other RPGs of the time like Wizardry and Ultima. The driving force behind Dragon Quest was that it would appeal to a much wider audience, even those who are not interested in or familiar with video games at all. The result was a much more simplistic game with a larger focus on story to draw more players in. Dragon Quest was very successful in Japan and it still one of the most popular game series there today. Dragon Quest XI was just recently released in 2017, and there are various spinoff titles and remakes as well as forays into novels, manga, and anime.

Dragon Quest was released on the Famicom in Japan on May 27th, 1986. It was developed by Chunsoft and published by Enix, now known as Square Enix. North America would not receive this game on the NES until all the way in August 1989, just a few months before Dragon Quest IV released in Japan. Here the name was changed to Dragon Warrior due to a naming conflict with the pen and paper RPG DragonQuest. Its success in Japan did not translate over to the US and sales were poor. In 1990, Nintendo Power gave away copies of the game as a subscription bonus for the magazine, and that greatly helped the series gain traction. The NES would eventually receive all four Famicom Dragon Quest titles under the Dragon Warrior name.

Some olde time English here.

The plot of Dragon Warrior is a simple one. In the land of Alefgard, the evil Dragonlord had stolen the Balls of Light from Tantegel Castle under the rule of King Lorik. The hero Erdrick managed to reach the Dragonlord’s castle on an island but was never heard from again. Years later, the Dragonlord attacked Tantegel Castle again, kidnapping Princess Gwaelin in the process. You play as an unnamed hero who seeks to follow in the footsteps of Erdrick by defeating the Dragonlord, retrieving the Ball of Light, and saving the princess.

A lot of what I have to say about Dragon Warrior is not only basic knowledge of this game, but of RPGs in general. If you have played any games of this style, most of the game description will be quite familiar. Dragon Warrior was aimed at newcomers, and so this review is also going to be focused on that same audience. I do think there is still value in Dragon Warrior as a beginner’s RPG, so I’m happy to go into detail that might be more rudimentary for some.

When you begin the game, you choose from one of three save slots. When starting a new game, you will give your hero an eight-character name and set the text speed. The game begins in a top-down view in the king’s throne room in Tantegel Castle. The king will give you an explanation of the task at hand, and from there you are on your own. You will want to visit the king often over the course of your adventure because this is the only place you can save your game. For now, this area serves as a pretty decent tutorial for how you navigate the menu and see all the things you can do.

The game would be over sooner if you could swim.

You use the D-pad to move the hero in the four cardinal directions as well as move the cursor to choose options on the menu. Press A to bring up the Command menu. As a rule, the A button proceeds and the B buttons cancels or goes back. You can also press Start to pause while walking around, but there is never a reason to do so.

There are many options on the Command menu. The first option is Talk which lets you talk or interact with the person you are facing. Status lets you see your statistics such as health, attack power, or which weapons and armor you are using. The Stairs command lets you walk up and down stairs that you are standing on. Most games will assume you want to take the stairs when you stand on them, but here you must use the specific command. Search lets you examine the ground at your feet for anything interesting. Spell brings up a list of spells that you can cast, but at the start of the game you don’t have any available. The Item screen lets you view and use items you are holding. You can only carry eight items, but certain items group together so you can hold several of them while only utilizing a single item slot. Door lets you open a closed door you are facing, but only if you have a key. The Take command lets you open a treasure chest you are standing on.

When you bring up the Command menu or just stand still for a while, you bring up a panel on screen that displays some basic stats. The LV counter is for your experience level. This indicates how powerful you are and it begins at one. HP stands for Hit Points and this is your health. MP stands for Magic Points. You spend magic points to cast spells. G stands for Gold which is the game’s currency. E stands for Experience Points and you earn these by defeating enemies.

I’ll take one of everything, please.

One of the chests in the throne room contains some gold to get you started. One of the first things you will want to do is spend that gold on some equipment. Unfortunately, there are not any shops inside the castle, but you still want to explore and talk to people here. Exiting the castle takes you to the world map. There is a nearby town to the east called Brecconary that should be your next stop. There are more people in town to talk to as well as places to shop.

The shop in the northwest corner of town is the weapon shop. You can only hold one weapon, one armor, and one shield at a time. There are several options and the more expensive options are more effective. An equipped weapon increases your attack power and either an equipped armor or shield increases your defense. When you buy something from this shop that replaces something already equipped, the shop will buy back the old item at half its value.

The shop in the southeast part of town is the item shop. Here you can buy or sell items from your item stock. It might be useful early on to buy an herb that lets you restore some health from anywhere. The inn is located in the southwest corner of the town. You can spend some gold to stay the night which replenishes all your HP and MP. The shops and the inn are the basic features of each town you encounter in the game.

Get used to seeing this screen a lot.

Most of your time in Dragon Warrior will be spent battling enemies. As you explore the world map or caves, an enemy may appear on screen that you must engage one on one. This bring up a smaller Command menu. Both Spell and Item appear on this menu and they act the same as in the standard menu. Fight lets you attack the enemy. Run gives you the chance to run from the fight and keep exploring, although the enemy may not let you escape. You and the enemy alternate turns until one either wins the fight or runs away. There is a text box at the bottom of the screen that describes what is going on, such as whose turn it is and how much damage is inflicted.

When you win a fight, you are awarded both gold and experience points. If your HP is running low, the text boxes all change color from white to red to show that you are getting close to death. If you succumb to the enemy, then you are returned to the castle in front of the king. Not only does he lecture you on dying, but you lose half of your gold. The good news is you do not lose any experience points or equipment when you die, so even if you lose many fights you will continue to get stronger as long as you keep playing.

When you meet certain thresholds of experience points, you will gain a level. This is noted after a battle with some fanfare. Going up a level gives you stat boosts. You can gain strength, agility, maximum HP, maximum MP, and sometimes even learn a new spell. The strength stat translates into additional points in the attack power stat, and agility translates into additional defense points.

A warrior and a wizard!

At certain levels, you will also learn a new magic spell. Each spell requires a certain amount of MP to cast. You will learn ten spells in all and they have various uses either in combat, while adventuring, or both. The Heal spell restores some of your HP. Hurt is a combat spell that deals damage to the enemy. Sleep is a combat spell that sometimes lulls your enemy to sleep, preventing them from taking their attack turns until they wake up. Radiant is used in dark caves to see as many as three tiles ahead of you in all directions. Stopspell is a combat spell that may prevent the enemy from casting their own spells. Outside lets you leave a cave automatically, and the Return spell sends you back to the castle from anywhere in the overworld. Repel is used on the world map to keep weak enemies from engaging you in battle. There is also a stronger healing spell called Healmore and a final attack spell called Hurtmore.

As you venture further out into the world, you will come across stronger enemies. Not only do later enemies have more health, attack, and defense, but some can cast spells of their own or do alternate attacks. You will need to spend a lot of time fighting weaker enemies and testing yourself to see if you can take on stronger enemies that bestow more gold and experience. You will encounter other towns throughout Alefgard that have new shops with better equipment, as well as different tips about the world to point you in the right direction for story progress. But most of Dragon Warrior is spent fighting enemies to strengthen yourself for tougher enemies.

I have beaten Dragon Warrior several times over the years and I am very familiar with the game even now. I remember finding the game while going out to yard sales with my grandparents as a kid. It was out of place for sure, laying on a table complete in box amidst random knick-knacks. It cost only $5 and they were happy to buy it for me. I didn’t know anything about the game from Nintendo Power because I wasn’t subscribing then, and it may well have been one of the subscription incentive copies. Happy to find a new NES game that day, I gave it a play that night and I got sucked in. The simplicity of the game combined with an abundance of childhood free time was the perfect recipe for a new RPG addiction.

You are the Dragon Warrior after all.

Aside from tracking down a few items, Dragon Warrior is a very easy game. For me, the challenge lies in making the time to play through it. I estimate it took me 15-20 hours to complete the game, though I insisted on leveling up to the highest possible level. I already knew the areas that were best for gaining experience points more rapidly. That helped keep the game shorter, as well as reaching towns as early as possible to buy better equipment. The more time I could spend fighting tough enemies, the faster I could max out experience points. Another time saving tip is that Dragon Warrior is just about a perfect game to grind while doing something else, such as watching TV. I’m not ashamed to admit I grinded out a few levels while listening and participating on conference calls while working from home.

The speedrunning community has managed to achieve seemingly impossible times in completing Dragon Warrior. What took me over 15 hours to accomplish has been done in a world record speedrun that runs a little over 25 minutes. There are certain timings to inputting commands that lets the hero do things like make higher damage attacks, dodge enemy attacks, and avoid random encounters. By using these timings combined with a heavy dose of luck, Dragon Warrior can be beaten at a very low experience level. It’s all very impressive!

Dragon Warrior was a formative game for me. It was my entry point into the Japanese RPG genre at a time when I could give a lot of energy into the experience. From there I sought out the NES sequels, and I eventually moved that interest over to the SNES and some of its top-class RPGs. Therefore, I have much appreciation for Dragon Warrior. Outside of that context, it’s not a game I see myself playing again unless I get bit hard by the nostalgia bug. It’s too simple, too plain, and too grindy. But if you are looking to get into the genre while not getting too deep into the weeds, Dragon Warrior is a fine place to start.

#50 – Dragon Warrior

 
JUL
21
2017
0

#47 – Gargoyle’s Quest II

Every Gargoyle deserves an adventure.

The dark, foreboding music fits perfectly!

To Beat: Reach the Ending
Played: 3/9/17 – 3/17/17
Difficulty: 6/10
My Difficulty: 3/10
Video: Gargoyle’s Quest II Longplay

The concept of a spin-off in media makes a lot of sense. A spin-off can take a supporting character from an existing TV show or movie and give them their own story while giving the storytellers an already established base to work from. Spin-offs have naturally made their way into video games too. One notable example is the Wario Land series which started as a spin-off of the Game Boy game Super Mario Land 2: 6 Golden Coins. Wario was the villain of that game but became the protagonist in his own adventure. On the NES, there aren’t very many examples of spin-offs, but today I am going to cover one. The annoying “red devil” enemy from Ghosts ‘N Goblins gets not only an actual name, but also his own adventure in Gargoyle’s Quest II.

The Gargoyle’s Quest series originated on the Game Boy. All games in the series were developed and published by Capcom. Gargoyle’s Quest was initially released in Japan in May 1990. The US would get the game shortly thereafter in July 1990, and it also saw release in the UK in 1991. The game was popular enough to warrant a sequel that jumped platforms to the NES and Famicom. Gargoyle’s Quest II was named Red Arremer II in Japan, seeing release in July 1992. The US received Gargoyle’s Quest II in October 1992, and the European release was in June 1993. The NES game was also ported to the Game Boy in 1993 under the name Makaimura Gaiden: The Demon Darkness, though only in Japan. The third and final game in the series was named Demon’s Crest in both the US and Europe and Demon Blazer in Japan. This Super Famicom and SNES game was nearly released simultaneously in Japan and the US, coming in late October 1994 in Japan and early November 1994 in the US. The European release was also released last, launching in March 1995.

Gargoyle’s Quest II is a hybrid between a platformer and a top-down RPG. You play as the red devil Firebrand, who upon returning from training, finds his home has been wiped out by the mysterious Black Light. Firebrand sets off on a journey to solve this mystery and save the Ghoul Realm. The game initially looks and feels like an RPG. In this top-down view, you can explore towns, enter buildings, collect items, and talk to other ghouls to gain valuable information for your adventure. These towns and other areas in the game are all connected via a large overworld. However, all the action scenes take place in a side-scrolling view. Here you control Firebrand as you jump and fight your way through various stages of action gameplay.

The overworld ties the action sequences together.

During exploration, you can use the D-pad to travel in four directions. You’ll notice right away that Firebrand moves around very quickly in this view. He goes much quicker than the slow, plodding movement in other NES RPGs around this period. Use the A button to talk to other ghouls and interact with some objects. You will also use A to advance the text when talking. The Start button brings up the menu where you can choose from a few options. The Level menu item lets you view your current status. The Tool option lets you look at and choose certain quest items you will find. The Magic option lets you view and choose which attack you can use during the action sequences.

In the side-scrolling sections, use the Left and Right on the D-pad to walk around. Contrary to the other view, Firebrand moves slowly and deliberately. Press the A button to jump. If you press A again while in the air, Firebrand will flap his wings and hover for a short while. While hovering you can move left and right, allowing you to fly and cover much greater distances than just jumping alone. Press B to attack by spewing a small projectile. The Start button both pauses the action and brings up a sub-menu at the bottom of the screen where you can switch between attacks.

There are two mechanics in the side-scrolling areas that complement each other and form the basis for Firebrand’s movement. First is the hover ability briefly mentioned above. In the game, it is referred to as Wing Level. There is a large bar on screen that indicates how long Firebrand can hover in place, and it depletes quickly. When it runs out, Firebrand will fall, or you can choose to fall before it runs out by pressing A again. This wing stamina will restore to full strength as soon as Firebrand lands on solid ground or clings to the wall. This brings me to the second mechanic which is wall climbing. The Wing Level gives Firebrand extended horizontal movement while wall climbing gives him vertical movement. Thus, the levels extend in all directions to accommodate all his movement capabilities, as well as involving spikes and other such hazards in many places to keep Firebrand on course.

Climbing around spike-laden walls is required often.

There are a few items Firebrand can find during the side-scrolling levels. Hearts restore some of Firebrand’s health. There is a life meter on the status bar indicated by small hearts that show how many hits Firebrand can take. There are also red jars called vials that act as the game’s currency. Every now and then you can find a light-colored jar that will expand the maximum number of hearts.

Firebrand can expand his capabilities by items he acquires on the overworld. These are generally given to Firebrand after completion of certain stages or by talking to creatures. They are pretty weird items that slot into a few different categories. There are nail items that increase his Jump Level so that he can jump higher. There are wing items that increase his Wing Level which lets Firebrand hover for a longer time. There are armor items that increase Firebrand’s Life Level which gives him more hearts on his life meter. There are magic items that provide him new attacks. Finally, there are tools which are passive items that are needed to interact with certain characters to advance the story.

The magic items are the most interesting as they both give Firebrand new attacks as well as expand his capabilities in interesting ways. Firebrand starts with the Fire attack that launches a small projectile for attacking enemies. Next is the Buster attack that is a bit stronger than Fire but also can break blocks. The Tornado attack generates a small temporary platform that Firebrand can land on and restore his wing stamina. The Claw attack can form a protective surface against a wall of spikes, giving Firebrand a way to cling to them temporarily. There is also a final magic ability that is useful at the end of the game.

Creating your own platforms sure comes in handy!

I mentioned the vials earlier as the currency in the game. It turns out they are only used for one thing. There are certain creatures throughout the game that will allow you to exchange your vials for the Power of Maelstrom. It is the game’s fancy way of saying an extra life! They do come in handy for tricky areas. However, they get more expensive later in the game.

One more optional item you can find in the game is the Essence of Soulstream. To get it, you have to find two different items in the world and bring them to a person who can combine them into the Soulstream. This item can be used in the platforming levels from the menu. It can only be used once but it lets you restore your health all the way to the maximum. The best place it comes in handy is during one the boss fights that occurs at the end of some stages.

There are some ghouls on the overworld that will provide you with a password if you talk to them. Not only do you get the password, but you also set a checkpoint here that you will return to if you lose all your lives. The passwords are 16-digits, all 0-9, with a mandatory dash in the middle for readability. The passwords have just the right amount of complexity to save all your items and vials, yet they are not unwieldy to use.

Gargoyle’s Quest II has fun boss fights, including this difficult one.

I have played all the way through Gargoyle’s Quest II a few times before this run. Like many late NES Capcom games, it is pretty expensive at around $75 or so. This was one game I bought long before the prices skyrocketed. I had learned of this game in college and I decided to search it out on eBay. It may well be the game that got me to create my eBay account in the first place, I’m not sure. I found a copy for $6, and I even remember the seller was only 30 minutes away from me. I played through the game when I got it and I went back to it periodically over the years.

I’m not incredibly familiar with the game but I was able to work through it without a lot of trouble. The game takes several hours to play through the first time, and I can get through it in around two hours. I played it over three separate nights just due to time constraints. There was only one spot in the game where I lost all my lives and had to restart, but otherwise I think I played well. This is the kind of game where I normally would not record an entire longplay, but I was good enough at the game that I captured one this time. So, if you would like to see the game in its entirety, you may!

Gargoyle’s Quest II is a quality platformer that is fun to play. When you see the Capcom logo on an NES game, chances are it’s a good one and this game is no exception. It has detailed graphics, sprawling stages with good platforming, a haunting soundtrack, and a large overworld that ties it all together. There are only a few things I don’t like about the game. The overworld can be dull to traverse, and there is a bit of a difficulty spike early in the game where you need to cross over a fiery river. There is also some slowdown when many enemies are on the screen. Frankly those are minor complaints. The game is solid and I find it fun to play through every now and again. I’m glad I had the good sense to seek out this game many years ago!

#47 – Gargoyle’s Quest II

 
JUL
01
2016
0
Crystal Quest Box Cover

Game Boy #2 – Crystal Quest

I thought I was getting some kind of RPG, but I ended up with an arcade game instead!

The title screen is misleading too, but it works!

The title screen is misleading too, but it works!

To Beat: Set the high score
To Complete: Beat Wave 99
My Goal: Complete the game
What I Did: Completed the game
Played: 6/28/16
Difficulty: 3/10
My Difficulty: 3/10

Crystal Quest caught me a bit by surprise in a number of ways. I was not expecting to be writing a Game Boy post right now, but circumstances can be a funny thing sometimes and so here we are. I didn’t know anything about the game until just last week, but when I saw the cart I figured it would be something I would want to have for my collection. When I ended up with was not the game I was guessing I would get, but it turned out to be a fun little diversion that took me almost no time at all to complete.

It all started last week while looking at game lots for sale on eBay. I am always keeping an eye out for good deals as well as games to add to my ever growing collection. One listing I found was for a small Game Boy lot that included Crystal Quest. This was the first time I had ever seen the game while looking at Game Boy games over the last several months. It looked intriguing just based on the cover art alone. I put it in my watch list and hemmed and hawed about buying it before deciding to let the auction end without placing a bit.

I still wanted to know more about the game so I did a little bit of research about the gameplay. Surprising to me, this game with the word Quest in the title was actually an arcade shooter. I hopped on over to eBay and found a copy for under $7 shipped, and when researching prices it seemed to be worth around $10, so that was enough for me to take the plunge and pick up a new game for the collection.

Yep, definitely not an RPG!

Yep, definitely not an RPG!

I received the cart earlier in the week along with a few other games I had ordered. I opened up and cleaned the carts like I always do, and then later on I fired the games up to test them out. When I got to Crystal Quest, I played through a few levels only to lose all of my lives rather quickly. Rather than putting it away, I decided to go for one more try. All of a sudden, I had that beautiful moment where the game clicked with me. I played and played and I got to the point where I could play indefinitely, which is about as good as it gets for an endless game like Crystal Quest. It started with cart testing time, and it ended up with the base for a new blog post!

Crystal Quest was originally released in 1987 for the Apple Macintosh and the Apple IIgs. It was developed by Patrick Buckland and published by Casady & Greene. The game is notable for being the first game in color for the Macintosh. Crystal Quest is loosely based on the Atari 800 XL game Crystal Raider, which is a platformer instead of a shooter style game but with a similar premise. There would later be a sequel released in 1993 named Crystal Crazy, and much later in 2006 Crystal Quest was ported to the Xbox 360 on the Xbox Live Arcade. A Kickstarter was launched in 2015 to create a new version of the game, but unfortunately it did not meet its funding goal. The Game Boy version I played was released in September 1991, published by Data East, and developed by Novalogic.

Crystal Quest is a top down arcade shooter with a very simple goal. You pilot a spaceship inside an arena that is scattered with crystals. The goal is to collect all the crystals and escape through the hatch that opens at the bottom of the screen. That sounds simple, but of course there are obstacles designed to prevent you from easily clearing the room. Randomly strewn on the screen are mines that will explode the ship if touched. There are also two hatches. One is on the left side of the screen and the other on the right side, and they spawn various types of enemies. Each wave consists of a single screen of randomly placed crystals and mines, and the enemies will keep flowing until you escape to the next wave.

Death is pretty common in this game.

Death is pretty common in this game.

The controls are really simple. Use the D-pad to move in any direction. Press the A button to fire a bullet, and press the B button to use a bomb. The movement in the game is very inertia heavy so it is pretty easy to slide around all over the place. Pressing in the opposite direction to slow down is an essential skill. The shooting in this game is unique in that the bullets go in exactly the same direction as the ship is moving. For instance, to fire right means having to move to the right. That makes it challenging to attack enemies coming directly toward you. Even more strange is that shooting without moving at all will place a stationary bullet as sort of a makeshift mine.

The bombs are very powerful weapons that wipe out all of the enemies on the screen. Of course bombs like this can only be used a limited number of times so they must be used conservatively. There are bomb icons in the levels that can be collected to add a bomb to the supply. These turn out to be crucial in keeping alive through as many waves as possible.

There are several different enemy types that will stand in the way of completing the level. They are very tiny sprites and it is typically difficult to distinguish exactly how they will move and attack by sight alone. I just observed them for a second to see how they would attack instead. Some enemies shoot, some enemies home in on you, some enemies drop mines, some randomly bounce around the screen, and so on.

Ride the wave!

Ride the wave!

Crystal Quest is primarily a score attack game and as a result there are several ways to earn points. Collecting crystals and killing enemies give a small amount of points. There are diamonds sometimes dispersed in the level that are there to provide a nice point boost. Occasionally a large diamond will appear that appears to be an enemy at first, but it can be collected and it is worth a lot of points. After the wave is completed, there is a time bonus that depends on how long it takes to complete the wave. The score starts out adding up slowly but it really ramps up after about a dozen stages or so.

There are 99 Waves total in Crystal Quest. I know that because I got to Wave 99 and after beating it the game just loops Wave 99 over and over until you quit or run out of lives. Every 15 waves or so there is a small cutscene where a bug gets shot and explodes, and you are rewarded with a one-word attaboy like “Radical” or “Awesome.” Eventually these cutscenes cease once the Wave 99 loop starts. At some point, the escape hatch start moving back and forth along the bottom of the screen which adds a little extra challenge to slipping out of the arena at the end.

I found that the game takes a little bit of practice to get used to, but after that the Waves become really short. It doesn’t take long to start making good progress into the game. Crystal Quest is also very generous with extra lives doled out at a regular pace. I couldn’t discern any sort of pattern of when I would get an extra life but I would earn one at least every other level, and so I could earn lives faster than I could spend them. At the very least I could maintain roughly the same number of lives. The bombs worked the same way so I never ran out of them or even got particularly low.

The high scores may seem out of reach but they are managable.

The high scores may seem out of reach but they are managable.

I developed a good strategy for playing Crystal Quest. I would sweep each level counter-clockwise starting with the right side of the screen. Early on I stopped shooting altogether in favor of collecting the crystals and exiting the stage as quickly as possible. If I got into any trouble I dropped a bomb and kept moving. This was tricky when collecting crystals around the side enemy hatches. Usually activating a single bomb as I approached the left hatch and quickly flying through seemed to do the trick most of the time.

With repeating that strategy, I reached Wave 99 in a little over a half hour with about 5 million points. I figured that the score would either cap or loop at 9,999,999 so I kept going until then. As it turns out the score keeps tallying above 10 million points, so I called it quits shortly after that. There’s no way I wanted to spend several more hours in an attempt to max out the score just to see what happens!

Endless games are always a challenge to pin on a winning condition. There are several options and there’s a good argument for every one of them, but I had to choose something so this is what I decided. I like to choose the point where all the levels are completed, but that does fit well here since the level layouts are completely random. Beating Wave 99 seems a little excessive to me, so I opted to use that as the Completed winning condition. The next option is either setting the high score or finding where the difficulty maxes out. I decided upon setting the high score as the winning condition since Crystal Quest looks to be all about getting a high score. The high score on the hall of fame screen is 1,750,000, so exceeding that score is the minimum to consider the game beaten in my opinion.

Crystal Quest is a fine option to pick up and play for a few minutes every now and then, but there’s not really enough to the game to want to play it any more than that. It’s a competent game for sure, but I feel that it’s not worth seeking out unless it’s really cheap. I had a fun time with it however so it was worth the cost to me!

Game Boy #2 - Crystal Quest

Game Boy #2 – Crystal Quest

Game Boy #2 - Crystal Quest (High Score)

Game Boy #2 – Crystal Quest (High Score)