Take on the NES Library

An 8-bit Extravaganza!

indy

MAY
22
2020
1

#151 – Indiana Jones and the Last Crusade (Taito)

A somewhat more pleasant Indiana Jones game this time.

I remember the color gradient is a special programming trick.

To Beat: Reach the ending
To Complete: Finish all levels and get the best ending
What I Did: Completed the game
Played: 2/29/20 – 3/7/20
Difficulty: 5/10
My Difficulty: 5/10
My Video: Indiana Jones and the Last Crusade (Taito) Longplay

I have seen all of the Indiana Jones movies, even the fourth one that everyone seems to want to forget ever happened.  I watched them all just once, all in a row, probably 10 years ago or more by now.  It was so long ago that I forgot pretty much everything from any of the movies, but not so long ago that I remembered that I enjoyed this one the most.  That seems to fall in line with the consensus of the series.  This movie had to have been well loved because the NES ended up with two video game adaptations of the movie, both bearing the name of the film.  These aren’t just label variants, but two completely different games.  They are distinguished by the publisher, so this game is considered the Taito version and the other is the Ubisoft version.  While the comparison between those two may be more interesting, I can safely say I enjoyed this one more than Temple of Doom, at least.

Indiana Jones and the Last Crusade is the third movie in the Indiana Jones saga, releasing in May 1989.  It was a huge success, grossing nearly $500 million.  The film was directed by Steven Spielberg and was co-written by George Lucas.  There were three games based on the film.  One was a graphical adventure game by LucasArts for home computers.  Another was a more action based game that launched the same year for home computers.  This was the version that was eventually ported to the NES as the Ubisoft version.  The third game, the one I played for this review, was an NES-exclusive game that released in March 1991.  It was developed by Software Creations and published by Taito Corporation.

Indiana Jones and the Last Crusade, the Taito version, is a side-scrolling platformer that loosely follows the plot of the film.  You play the role of Indiana Jones in his quest to find the holy grail.  The game is played out via multiple scenes, leading up to the final scene in the lost temple where Indy chooses the holy grail.  There are cutscenes in between the levels to advance the story and set up future events.  What makes this game interesting is that you can choose which stages you want to play.  Furthermore, the more stages you complete, the more difficult later stages will become.  You can opt to play the minimum amount and skip straight ahead to the final stage.  A regular ending done that way will do for this game, but I achieved the best ending for beating all the stages.

Kick the ship out of these guys.

Considering that there are different stages made available at different times, I’ll cover the stages in the same order I chose for my playthrough, beginning with the search for the Cross of Coronado.  This stage takes place on a ship with a bunch of enemy sailors that you’ll need to fight off.  The captain of the ship carries the cross and you need to make your way over to the left side of the ship to reach him, fighting off the other baddies along the way.  At the top of the screen you’ll see your health bar, number of lives remaining represented as grail icons, and a number of sailors left to defeat before the captain shows up.  Even though the captain may be outside ready for a fight, you might have to beat up extra sailors to reach him.  This mission goes away for good if you complete two other missions ahead of it, so I like to do this one first.  At the start you have to fight 15 sailors, but if you choose this mission second then you have to fight through 30 sailors.  The game is over if you lose this mission.

The controls for Indy on this ship are shared with some other missions.  They are also the most complex out of all the missions.  You move Indy around with the D-pad.  You can double tap either Left or Right to run in that direction, holding down the directional button on the second press to continue running.  When standing or walking, the A button does a kick attack while the B button punches.  Run and press A to perform a flying kick.  Indy can get his whip out or put it away with Select, which replaces his punch attack.  Indy can duck by holding Down, and you can do low punches, whips, or kicks.  You can climb Up and Down ladders, and even kick enemies from ladders, but this leaves you vulnerable to being knocked off the ship entirely.  Indy has two more attacks.  He can throw a haymaker by holding Up and pressing B and do a jump kick by holding Up and pressing A.  The fighting in this game does not feel very good.  It seems random how you fare when fighting enemies.  Sometimes you land a good hit and knock the bad guys out right away, other times you land a bunch of hits that don’t seem to do anything.  I had the most success with the flying kick, which the manual itself mentions is best.

Hooray a door maze…

The next thing that happens in the story is Indy gets a telegraph stating that both his father is being held captive and his family friend Marcus is missing, so now you have three options for your next stage. I picked going to Castle Brunwald to save Indy’s father.  Indy is controlled in this area the same as on the ship, identical moves and all.  Only this time, you are in a giant maze.  This is a really cumbersome area to figure out.  There are doorways all over this place, some leading into other layers of the castle and some leading to staircases to bring you up and down.  The castle is three floors high and five layers deep, but you only see one layer and two floors at one time.  There are notches on the floors in groups of one through five that indicate which layer you are on, and every floor has its own shield displayed on the wall.  But essentially you are navigating in 3D space, and so this area is pretty difficult to clear.  Making matters worse is that in later difficulty levels some doors are locked.  In that case, there are some hidden passageways revealed by whipping torches on the wall.  The route through the castle is very different per difficulty level.  I had a tough time getting the hang of it on later levels, so I opted to do this one earlier.

From here you have found about where the grail is located, so now you can skip ahead to the final area if you want, but you will have a hard time without knowing what the grail looks like.  So next I went to Venice to the catacombs where a scrambled photo of the grail is found.  However, fire is raging through so you must put the pieces together and get out in time.  This stage is a sliding puzzle level.  There is a 5×5 set of tiles and you move a hand cursor with the D-pad.  Press A or B to slide either a single piece or part of a row or column toward the empty square across from the hand.  While you are constructing the grail photo, a scene below shows the fire catching up to you.  You need to complete the puzzle as best as you can, then escape by pressing Select.  In the following cutscene you will see either a full or partial picture of the grail depending on how much of it you pieced together.  You need this information to pick the proper grail at the end of the game.  You still survive if you don’t leave in time, but you lose the picture and will have to remember what the grail will look like when you make it to the end.  In later difficulties, the puzzle time is shorter and the puzzle gets more scrambled.

The final stage before the end is in the Desert of Iskenderun.  This time you are on top of a tank fighting off enemy soldiers one at a time to save Marcus.  The tank is heading for the edge of a cliff as displayed at the bottom of the screen, so that’s your time limit to complete the stage.  The controls and combat are the same as in the other side-scrolling segments.  This time, if you get knocked off the tank, you lose a life, your health bar isn’t restored, and you lose time while waiting for Indy to climb back up.  In this stage the flying kick is essential to both survival and clearing the stage in time.  There are more enemies to fight in the higher difficulties.

Solve the puzzle while also remembering the picture.

At the very beginning of the game you are entrusted with Indy’s father’s grail diary.  As a result, the enemies are out to get it at all costs.  Aside from the Coronado, if you lose in a level the diary is taken by the bad guys.  You can keep playing stages but if you lose one, it is Game Over.  An alternative is to go to Berlin to take the diary back and make your escape.  The Road to Berlin is a top-down motorcycle driving level.  You’ll have to avoid all kinds of stuff like mines, gun turrets, ravines, and enemy motorcycles as you make your way up the road.  You use the D-pad to move Left and Right as well as speed Up or slow Down.  You can jump with A or whip to the side with B.  Every time you crash, you’ll restart from a checkpoint with a little health loss.  The goal is to make your way to the end before running out of health.  This is not an easy level, but the good thing is you can keep trying as many times as you want without penalty.  For reasons I’ll explain shortly, it is best if you keep the diary for the end of the game.

The final scene in the game is The Lost Temple.  This has a few different parts to it.  First off, you’ll see a map showing a path or two through the temple.  There is an icon at the top if you have the diary, and you’ll want to make a mental note of that.  You move across the floor of the temple one step at a time with the D-pad.  Tiles on the ground have the letters in JEHOVAH and you need to walk the path of God by spelling out JEHOVAH step-by-step several times.  If you step on the wrong letter, you’ll fall and that’s Game Over.  If you happen to go the wrong way you can backtrack.  You are also racing the torch you are carrying.  When it goes out, you can’t see the letters on the floor and you’ll have to guess.  Once you make it to the other side, the next part is to walk across the invisible path as noted by the symbol that was written on the diary.  If you didn’t bring the diary with you, you can guess.  If you pass that, then your final task is to choose the Holy Grail out of a lineup.  Before choosing, you will see your note of what the grail looks like that you put together earlier.  If you choose right, you beat the game, otherwise you lose completely.  No pressure!

This was my first time playing this game.  I remember testing my cart and playing a little bit of the ship, and I didn’t do so well.  While this cart is the cheaper of the two, it is not that easy to find and costs in the $30-$40 range, which is more than I remembered when I was actively collecting.  I bought a copy of this game for about $10 in 2014, only for the seller to cancel the order because it sold too low.  A few months later I bought a different cart for $12 which is in my collection now.

Walk the path of God.

This game started out like a normal playthrough, just testing levels out and figuring the best way through.  The castle gave me the most trouble as I couldn’t find the exit.  After exploring multiple times for a few days, I gave into an FAQ and found that what I was looking for was in a room I had visited a bunch and didn’t recognize the exit.  (Perhaps this is a direct reference to the movie that I didn’t notice?) I also had some struggles with the Road to Berlin.  I could clear it on the easiest difficulties but not on the higher settings.  That became a moot point because I stopped going there when I played well elsewhere.  On either the 2nd or 3rd day I beat the game.  When you know what to do, the game is pretty short.

My next step was to beat the game while recording before moving on to the next.  In theory this should have been easy, but goodness gracious did it go poorly.  I could do the entire game fine up to choosing the grail, and then I failed over and over and over again.  It took nine tries before beating the game again.  In pretty much all attempts, I had it nailed down to two or three grails and I just kept picking the wrong one.  Re-reading the manual finally helped bail me out.  There are, at least, five attributes of the grail to examine: The lip, the handle, the cup shape, the stem, and the base.  It was the shape of the cup that I wasn’t paying close attention to that messed me up the most, though it was a few tries in before I realized I wasn’t noticing the lip of the cup also.  That first time I won I must have really been lucky.  I get that the developers were trying to do something interesting for the end of the game, and the randomized nature of it is a good idea.  It was just so frustrating and maddening to fail completely at the very end of the game to something that doesn’t at all reflect the ending of the film anyway.

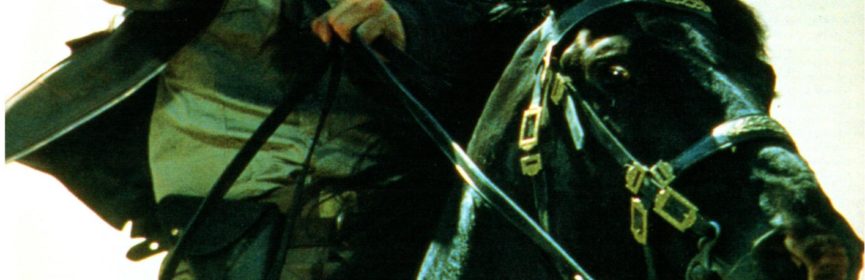
Indiana Jones and the Last Crusade, the Taito version, is a pretty good game that has some issues.  Presentation-wise, this is very well made.  The gameplay graphics are decent enough, but the cutscenes are digitized images from the movie that look nice in a sepia-tone.  The music is pretty good and includes the iconic theme from the film series.  The gameplay provides plenty of variety, including side-scrolling platforming, top-down action, and even a sliding block puzzle.  The controls and feel of the side-scrolling action is rough and is the most obvious issue with the game.  Combat feels clunky and random.  I can swing away at enemies, not sure if I’m doing damage, and sometimes I beat them right away and other times I get knocked around a bunch.  There’s a lot going on with the controls, making things more cumbersome when things don’t go well.  Another thing is the maze design in the castle is brutal at the higher levels.  Once you get used to things, this is a short game, and you can get skilled enough that the combat issues don’t really matter.  Just make sure that if you play this game that you are more observant with the grail than I was.

#151 – Indiana Jones and the Last Crusade (Taito)

 
JUL
31
2018
0

#85 – Danny Sullivan’s Indy Heat

Bringing the heat!

Even the logo is heating up!

To Beat: Finish 9 races
My Goal: Get the high score
What I Did: Finished three loops with a score of 544
Played: 5/17/18 – 5/18/18
Difficulty: 1/10
My Difficulty: 1/10
My Video: Danny Sullivan’s Indy Heat Longplay

As evidenced by my review of Bill Elliott’s NASCAR Challenge, I am not a fan of racing video games. Danny Sullivan’s Indy Heat is a bit of an outlier in that I find it mostly enjoyable. The differences between the two games are clear. Bill Elliott’s NASCAR Challenge focuses on realism and the grind of a full season. Danny Sullivan’s Indy Heat is a pick-up-and-play arcade style game. If I have to play a racing game, I’d rather do it the Danny Sullivan way. It helps too that this game is unbelievably easy.

Danny Sullivan is a former racer who primarily competed in open-wheel car racing. His career began overseas competing in Formula Three and Formula Two racing. In 1982 he debuted in the PPG Indycar series in the US, and the next year he was recruited by a team in Formula One, which is the highest level of open-wheel auto racing in the world. He only competed there in 1983 before returning to the US and the PPG Indycar series in 1984. He won the Indianapolis 500 in 1985, the premier race in North American auto racing, and he also won the PPG Indycar series championship in 1988. Danny Sullivan briefly dabbled in NASCAR in 1994 before retiring from auto racing for good in 1995.

Danny Sullivan was well known enough to star in his own game, Danny Sullivan’s Indy Heat. It was originally a 1991 arcade release, developed and published by Leland Corporation. The game was ported to the Commodore Amiga, Atari ST, and Commodore 64 in 1992 in Europe. Those versions were developed and published by Sales Curve. The NES version was released in August 1992 in North America, and also appeared in Europe in 1992. This port was developed by Rare and published by Tradewest.

Is that a Transformer in his glasses?

Danny Sullivan’s Indy Heat is a top-down single-screen racing game. You compete with four other racers, including Danny Sullivan in the yellow car, across multiple laps of nine different tracks. In single player mode you control a red car. The game continues to loop over all nine tracks again until you lose too many races, and sadly there is no real ending to the game.

The controls are simple. While driving, you hold A to accelerate and release A to brake. The B button uses a turbo for a quick speed boost. You steer with Left and Right on the D-pad. Up and Down have no function in the game so there’s no need to worry about shifting gears. You also use Left and Right to enter your initials at the beginning of the game or to select any upgrades later on. Both the A button and B button are used to confirm selections. The Start button starts the game and pauses the action during a race. That’s all there is to it!

The first thing you’ll do in the game is press Start on the name entry screen. Danny Sullivan’s Indy Heat supports up to four players at the same time with the NES Four Score accessory. First player gets the red car, second player blue, third player green, and fourth player white. Danny Sullivan is always the yellow car for a total of five players. Each race has five drivers going at once and computer opponents fill in all remaining slots. You will first enter your initials and then the driver you want. The driver selection is just cosmetic so pick the one that looks the neatest or most like you or whatever. The game proceeds once all players have made their selections.

Make Danny do all the work.

From here the game shows the location of the next race, but before you get to the action you can select upgrades for your car. You begin with $100,000 to spend on your vehicle any way you want and you win more money the more you play. The easiest way to jump into the action is to let Danny choose your upgrades for you. Danny’s Choice is pre-selected, so press A or B if you want him to choose. He will spend as much available money as possible on what he considers the best upgrades automatically. Then you can press A to begin the race.

Here are the upgrades you can pick from if you want to decide yourself. Turbos cost $30K for a pack of 10. These are quick bursts of speed you can engage at any time during a race by pressing the B button. You begin with 60 of them and can hold up to 200. All remaining options are permanent upgrades for your car. Brakes cost $30K and let you stop faster when you let go of A. Tire upgrades cost $40K each and better tires let you reduce skidding on the track and give you better turning speed. The Crew option costs $40K and lowers the amount of time you will spend in pit lane. MPG costs $50K per upgrade and gives you better gas mileage so you don’t have to make pit stops as often. Finally, the Engine upgrade increases your acceleration for $50K each. You start at level one across the board and can upgrade each option as high as level ten over many races.

Now it’s time to race! Gameplay is in the top-down view and you can see the entire race all at once. The action is very straightforward, simply drive along the track in the direction everyone else is going. Left always turns your car left and Right always turns your car right relative to the direction you are driving. It might be a little disorienting to turn your car while heading downward, but with a little experience it becomes second nature. If you need a little burst of speed for any reason, simply tap B to use a turbo.

I don’t know why the highway runs across the track.

The bottom of the screen displays specific information color-coded within a small box for each player. The left side of the box is the condition indicator of the car. This lets you know if you are okay or if you need to make a pit stop. The middle contains an indicator for your RPMs and what gear you are driving in. The right side displays a bar on top for fuel and a bar on bottom for your turbos. Fuel decreases as you drive, and turbos decrease as you use them. Even though you can purchase many turbos, your car can only hold 25 at a time, so the bar indicates how many you have while in the car.

Somewhere on the track is a large sign that displays other information common to all drivers. The top part of the sign shows who is winning the race. The sign displays which lap each driver is on, color-coded to match the race car, as well as the position order. If your color is on top, you are leading the race. The final lap is displayed as F. Below that shows how many total laps are in the race along with the time elapsed for the current race.

You will need to make pit stops in the game. The indicator on the bottom of the screen lets you know if you need to pit, and also a member of your pit crew in your matching color will hold up a sign on the race track letting you know that way. To pit, simply drive onto the spot in pit lane of your color. You don’t have to let go of the gas or anything. You will stop automatically and your pit crew will go to work, repairing any damage to your car, refueling the car, and maxing you out on turbos. Keep in mind that the race is still going on while you make your pit stops, so make them count.

Pit stops allow you to refuel, repair, and replenish turbos.

Danny Sullivan’s Indy Heat has a damage system as well. If you collide with a wall too hard or another racer rams into your car, you will see small pieces fly off. If this happens too many times, either the front or back of your car will catch on fire, reducing your driving performance dramatically. You can make a pit stop to fix the damage, but this will set you behind a lot if you need to make an extra unscheduled pit stop because of this. This can also work to your advantage because you can intentionally damage Danny or any of the other drivers, putting them in the same predicament and giving you the upper hand.

There are nine tracks in all. They are Western Canada, New Jersey, Southern California, Michigan, Illinois, Ohio, Eastern Canada, Colorado, and the Tradewest Speed Bowl. All tracks are five laps long except for eight laps in Illinois and twelve laps in the Tradewest Speed Bowl. The two longer races are simple, round tracks, while the other ones can have several twists and turns.

At the end of each race, you earn both points and money depending on how well you do. First through fifth place earns you 20 points and $100,000, 16 points and $90,000, 14 points and $85,000, 12 points and $80,000, or 10 points and $75,000 respectively. You will see the standings for the current season of nine races. Then you have the opportunity to spend the money you just earned on more upgrades for your car. For the Tradewest Speed Bowl, both the points and dollar amounts are doubled. In addition, there is a bonus dollar award after this race depending on the final standings from the entire season of nine races. This award money is also double the purse for any individual race. You end up with a huge influx of cash for finishing the season that you can put toward the first race of the next season.

Get knocked around too much and your car catches fire.

If you are unable to win a race, you lose a life. You get three lives to start the game. You can’t earn any more of them, and there’s no way to see how many you have remaining. If you lose all three lives, you can continue up to three times. Losing a life always puts you at the next race no matter how badly you do. When all lives and continues are exhausted, your final score is shown and ranked against the high score chart.

I have played Danny Sullivan’s Indy Heat before as part of the NintendoAge weekly contests. I only played a couple of times that week and performed reasonably well for a new player. I bought my copy at a game store for $8 sometime in 2014. I had never been to this game store about an hour away from home, so I made the most of it and bought a small handful of games for solid prices. This is an uncommon game, so I was happy to snag a copy the first time I saw it for sale. The game sells for around $20 now, mostly due to relative rarity.

I knew I could beat the game again since I did it once before during those contests. I decided I would play through the game twice, once to warm up, and again to record. I set a soft goal for myself of reaching the top score on the high score list, so I had to earn over 500 points to do that. I had not reached that score when I played the game for the contests, and on my first attempt this time I still fell short. Lucky for me, during my longplay video I earned 544 points over exactly three seasons of racing. I lost the Tradewest Speed Bowl on my last life, meaning I earned a bunch of bonus money that I wasn’t able to put to use. That didn’t matter anyway since I had maxed out on upgrades late in the third season. I was happy getting that far in the game with a nice score.

Danny becomes too much to deal with at the end.

One aspect of the game that can be really annoying is Danny’s aggressiveness level. If you are behind in the race, Danny eases up and goes slowly. He gets more aggressive if you start closing in on him, and if he is behind you he goes all out. This is often referred to as rubberbanding, as if you and Danny are connected by an invisible rubber band and he is easily able to close the gap between you two if he is behind. There is a tricky balance when making games to build this kind of effect into the game without making it visibly appear to be unfair. In this game, the developers didn’t come up with a good way to balance the difficulty other than to give Danny impossibly high speed when he is trailing. The rubberbanding here is one of the more severe cases I’ve seen. Losing a race because Danny drives faster than you possibly can is both frustrating and unfun. The best technique I found was to stay just ahead of Danny at all costs so that he will at least keep pace with you. Earlier in the game I could skip a pit stop late in the race and just turbo my way through the course if I ran out of fuel. Later on, Danny will become too much to handle unless you can play perfectly for a long time.

Having said all of that, you might be wondering why on earth I could rate Danny Sullivan’s Indy Heat a 1/10 in difficulty. If you have been paying close attention and done the math, you may have figured it out already. You can see all the races and effectively beat the game without doing much of anything at all. The key is that you don’t have to repeat levels in this game if you lose a race. With three continues of three lives each, plus the three lives you start with, you can have up to twelve lives total. With only nine races, you can lose every race and still go partway into the second season. I tried it for myself and it works. Start each race and put the controller down. Coming in last each race still gets you 10 points and a trip to the next race. Make sure to continue when given the option. You don’t even have to buy upgrades. With the bonus points from the final race, you can earn 130 points and 8th place on the high score list by barely lifting a finger. I’m not saying you should play the game this way, but if you wanna stick it to that rubberbanding cheat I can’t say I blame you.

Danny Sullivan’s Indy Heat is a fun racing game. For a single screen game, there is plenty of variety in the race tracks and there’s enough room to get around them. The tiny car sprites are well detailed and animated. I didn’t notice much flickering where I might have expected to see some. The track details are also well drawn. The music is solid as well. Four player games don’t come around often, and I imagine this would be a fun one to try with a group of people. The only real downside is the frustrating rubberbanding AI of Danny Sullivan. In the long run of this NES completion project, this game will only be memorable for how simple it is to see everything in the game without actually needing to play the game. That only affects me, and I certainly don’t mind an easy clear on occasion. For everyone else, this game is worth at least one try.

#85 – Danny Sullivan’s Indy Heat

#85 – Danny Sullivan’s Indy Heat (High Score)