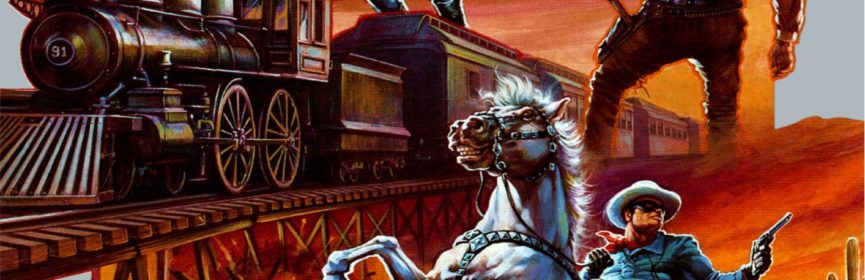
#163 – The Lone Ranger
Hi-Yoooooooooo Silver!

With a silver bullet!
To Beat: Reach the ending
Played: 7/20/20 – 8/1/20
Difficulty: 8/10
My Difficulty: 8/10
My Video: The Lone Ranger Longplay
Konami is at it again. This time, they are reviving an old, mostly forgotten property into an NES game. Normally, I would be reminded right away of similar adaptations such as The Adventures of Gilligan’s Island or Dirty Harry, taking a pretty much dormant property and turning it into a Nintendo game, with little success. Instead, after exploring this game a bit, my mind went quickly to Laser Invasion. Both games switch between genres during gameplay. I liked Laser Invasion quite a lot. On the other hand, The Adventures of Gilligan’s Island and Dirty Harry did not fare as well. Let’s see which way The Lone Ranger goes.
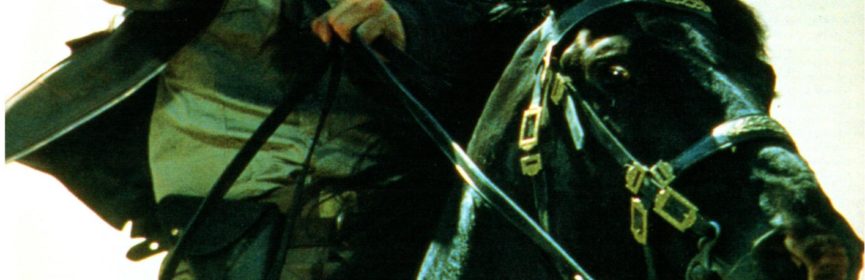
The Lone Ranger first appeared on a radio program out of WXYZ in Detroit in 1933, created by station manager George Trendle and writer Fran Striker. The show blew up in popularity, running until 1954 and surviving the death of the voice of The Lone Ranger, Earle Graser, who died in a car accident in 1941. The television series, The Lone Ranger, ran for 8 seasons and 221 episodes from 1949 to 1957, starring Clayton Moore for most of the series run. There were a slew of other media properties starring The Lone Ranger, including 6 films, 18 novels, a long running comic strip, comic books, and some animated adaptations. The NES game, The Lone Ranger, was released in August 1991 in North America only. It was developed and published by Konami.
The story is based off of the 1981 film The Legend of the Lone Ranger. In the Old West, the Texas Rangers were the law enforcement of the day, led by Dan Reid. His son, John Reid, was also a Texas Ranger. During a shootout with the Texas Rangers, Butch Cavendish, a bank robber, lost his father to a bullet, and from then on he held a grudge against the Texas Rangers. Butch and his outlaw gang set up an ambush against the Texas Rangers and had them all killed. Only they thought they were all killed, as John Reid survived. A Native American named Tonto found John and got him back to health. John formed a mask out of his father’s vest and did away with the rules of the Texas Rangers, going at it alone as The Lone Ranger with Tonto as his partner. Now Butch Cavendish has kidnapped the President and it is up to The Lone Ranger to both rescue the President and get his revenge against the man who killed his father.

Walk on the path, engage enemies, and enter towns
After the initial text scrawl of the story, you start off in the overworld. Simply use the D-pad to walk around here. You are forced to stay on the dirt trails but otherwise you can explore the map as you please. There are several buildings around the map that you can enter that take you into town. Here you will switch to a more zoomed-in overhead view, where much of the game is played. You can walk around in all eight directions with the D-pad. Press A to talk to people, and press B to use your weapons. Select changes weapons and Start pauses the game. The towns contain women that you can talk to for information, or bad guys in cowboy hats that you’ll have to shoot before they get you. Generally, you explore the towns for information to advance the story, or to restock on supplies, typically of many games.
The bottom of your screen shows all the info you need during play. First up is your life bar, pretty self-explanatory. You can recover health with the uncommon heart item drop or top it off by paying a doctor in town. Below that is your money. Coins are dropped by almost every defeated enemy. Money is most commonly used to buy more bullets for your revolver, other weapons, and gun upgrades. The square box with the X in the middle is used in the 3D sections that I will describe later. Next is your currently selected weapon. You can fight bare-handed, use a revolver, or TNT. When weapons require ammo, that is displayed directly above. Finally, the cylinder of your gun shows how many bullets are loaded and ready to fire. When empty, you will reload with one of your supply.
There are some special locations inside many towns. The sheriff’s office is usually a point of interest for gathering critical information on what to do next. At the gunshop, you can buy normal bullets, silver bullets, and TNT. You can hold up to 50 clips each of normal and silver bullets, and up to 10 TNT sticks. Silver bullets cost more but they do twice the damage and pierce enemies so you can hit multiple bad guys with one bullet. TNT is thrown in an arc and blows up after a short time. You can also buy upgrades to your gun that let your bullets fly farther across the screen. The doctor’s office is where you want to go to restore your health bar, at a cost. A few places in the game even let you play poker for money. There are other unmarked buildings you can enter, as long as the front door is open.

Even towns aren’t a safe haven from gunslingers.
As teased earlier, there are several types of gameplay in The Lone Ranger. Aside from the top-down exploring and fighting, there are side scrolling platformer sections. These parts have standard controls. You use the A button to jump. The jumping in this game is reminiscent of Castlevania. It is a very heavy jump and once you commit to a moving jump you will keep going in that direction, though you are able to slow down a little by pressing the opposite direction on the D-pad. Another thing I noticed is that you have to be real close to the edge of a platform to make the leap across to another one. If you press Down while pressing A, you will jump down through some ledges. The B button attacks with any of your weapons similar to the top-down sections. With the gun, you can fire in all directions and diagonals except for straight down. Movement is normal stuff with the D-pad. You can navigate stairs with Up and Down.
This game also features 3D mazes. Much like in Laser Invasion, these are Zapper-compatible sections. At the very start of the game you can choose if you want to use the standard controller or the Zapper for these parts. You will use the D-pad to navigate the maze. Press Up to walk forward, Left or Right to turn in that direction, and Down to turn around. You move in increments through the maze, and at some of these steps you will run into a group of enemies. You can only fight with your guns in these parts so you better have enough bullets handy. Use the Zapper to shoot the enemies and collect powerups, including hearts to restore health, packs of bullets, and of course money bags for cash. Here the X mark in your status bar tells you from which direction the enemies are approaching. You also get to see the compass direction you are facing to assist in navigation. You will use the D-pad to turn in the appropriate direction and then shoot with the Zapper. I had to hold both the controller and Zapper at the same time to play this. If you are in controller-only mode, instead you move a targeting reticle with the D-pad. Press B to fire a shot. Holding a direction and pressing A will turn you in that direction.

Bad guys, money, and Castlevania stairs, oh my!
Early on in the game you will reunite with your trusty horse Silver. There are a few minor sections in the game where you will ride on horseback. There are side scrolling sections where Silver runs forward automatically, functioning as an auto-scroller. You can jump between ledges and fire your gun. It is different but plays a lot like you are already used to. You also get into gunfights while on horseback. These encounters take place in first person similar to the mazes, only you don’t have to wander around, just fight off the bad guys with your Zapper.
To beat this game, you must clear all 8 stages. Each new level begins at a new subsection of the map and all your money and weapons carry over from one stage to the next. You typically get an explanation from Tonto on what you need to accomplish next. This game has a password system to retain your progress, and all your money and weapons carry over through the passwords as well. Passwords in The Lone Ranger are 16 characters long, comprised of a weird subset of capital letters and the digits 0-9. In this game there are no lives, and when you die you return back to the start of the current stage. Some of the stages have several parts and can go on pretty long, so it’s a steep penalty.
This was my first time playing The Lone Ranger. I was only sort of familiar with the premise and I never knew anything of substance about the character or series. I bought my copy of the game on eBay for only $6 shipped back in the summer of 2014. I remember religiously checking new eBay listings for NES games to fill out my collection back then and this one was an instant purchase. The game was selling for around $10-$15 in 2014, and when I checked the current pricing I was shocked. The Lone Ranger is now close to a $60 game. It was averaging around $30 from 2017-2019 and just about doubled in 2020 alone.

Shooty shooty bang bang
This game was a bit more challenging than I would have guessed going in. Most levels comprise of walking around to get a sense of what to do, and then working through the setpiece parts in that stage. The difficulty varies throughout the game depending on how many special segments there are and what kinds. There was only one area that I completed the first time through. A few times I got lost in identifying the intended route. When I played this I streamed fairly often, and it took me 8 nights of playing to beat the game. I made progress every night except one, only to beat that stage the first time the next night. This was almost a 10-hour playthrough from start to finish, condensed into a video lasting a little over 2 hours. The last couple of stages were pretty tough, with long segments that really try and whittle away your life. I want to specifically mention the final boss fight. When I reviewed my video of it, I had forgotten just how close I was to failing that attempt. I had sort of found a way to trap the boss but he very nearly took me out on several occasions. I’m proud to have clutched out victory there!
The Lone Ranger is a game that does a lot of things but does them all well. This is a very nice looking game, from the character sprites to the detailed portraits at the end of each stage. The music is all very well done, but to me it is mostly music that could fit any game. The William Tell Overture certainly is evocative of the time, and the rest of it sounds good, but I am not sure it really fits the game. The controls are responsive and work well, particularly the Zapper and top-down play. Konami seems to have a handle on games with multiple genres, and this one is no exception in the gameplay department. There are only a few things about it that I don’t care about. The platforming and jumping are a little too stiff for my tastes. That to me is the least polished bit of this game. The forced reloading every 7th shot is a pain to handle too. The difficulty and setback on dying would be turnoffs to some, though I relish the challenge. This is a very good game that is mostly forgotten or unheard of. I would suggest checking it out!

#163 – The Lone Ranger