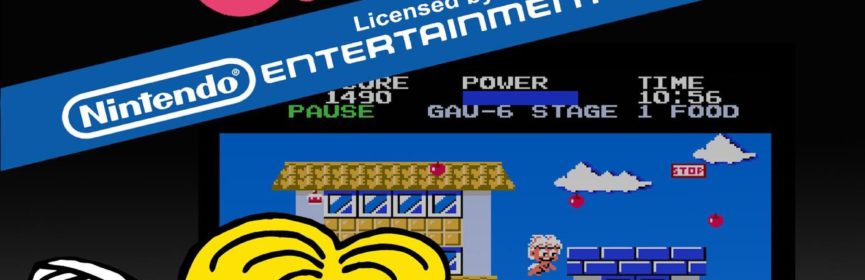
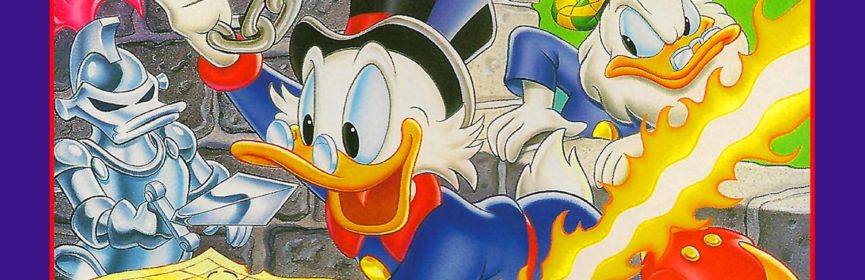
Take on the NES Library

An 8-bit Extravaganza!

Finished

JUN
08
2018
0

#78 – DuckTales 2

Scrooge McDuck decided he didn’t have enough money after all.

Look at that shiny gold!

To Beat: Reach the ending
To Complete: Beat the game with the best ending
What I Did: Completed the game with all endings
Played: 3/12/18 – 3/15/18
Difficulty: 3/10
My Difficulty: 3/10
My Video: DuckTales 2 Longplay with Best Ending

It’s another milestone of my Take On The NES Library project, sort of. DuckTales 2 is not the first sequel on my list. That goes to Super Mario Bros. 2. However, DuckTales 2 is the first direct sequel, in the sense that it is basically the same game. Milestones are going to be harder to find the longer I go into the project, so I like pointing them out and celebrating the ones we have. DuckTales 2 doesn’t do a whole lot in changing the formula of the original game, but I think that’s okay. NES DuckTales is quite good, and more of the same shouldn’t necessarily be a bad thing.

For more information on the background of this series, check out my DuckTales review.

DuckTales 2 was first released on the Famicom in April 1993. The NES release in North America followed in June 1993, and a PAL release followed later in the year. It was published by Capcom. Make Software is credited as the developer, although from what I can find, they may have only been responsible for the sound engine in the game. My belief is that Capcom and Make Software co-developed the game. That is pure speculation on my part just because of how similar this game is to the original DuckTales which was developed by Capcom. A Game Boy port followed in November 1993 in North America and December 1993 in Japan.

Travel the world in search of treasure again!

DuckTales 2 is a side-scrolling platformer where you control Scrooge McDuck. The story begins with Huey running to Scrooge with a torn piece of paper. They figure out that it is a portion of a treasure map left by the late Fergus McDuck. Naturally, they want to try and rebuild the map so they can locate the lost treasure of McDuck. Scrooge and company start an expedition to five different locations both to find the remaining portions of the map and to collect highly guarded treasures along the way.

The game controls the same as the first game. You walk around with the D-pad and you can duck by holding Down. The A button jumps. While jumping, if you hold Down and B you use your cane as a pogo stick. You bounce high off the ground, and this is how you defeat enemies and pass over spikes. If you walk into a wall or solid block for a little bit, you will see Scrooge stand in place for as long as you hold the direction button. If you press B in this state, he will swing his cane like a golf club and whack the object next to him. You can also jump with A in this state and then swing your cane to hit objects off the ground. You can press Start to pause.

A few features were added to DuckTales 2. Scrooge’s cane is used to hook certain objects. Perform the golf swing on these things to grab onto them with the cane instead of hitting them. You can then hold the opposite direction on the D-pad to pull on them. You can drag certain blocks on the ground, as well as pull switches and activate objects. Release the B button to let go of your hooked object. There are hooks above the ground that you can grab onto simply by jumping to them. Press A again while hooked to jump off or press Down to fall.

Scrooge’s cane is more versatile.

At the start of the game, you see a map of the game world. There are five levels and you can play them in any order you like. Simply use the D-pad to move a cursor to the different stages. The icon next to a stage will show Scrooge’s face if you have already completed the level once. Otherwise, it shows the treasure you can find guarded by the boss at the end of the stage. Launchpad will read some information about the level you selected. You can choose to play that stage or switch to a different one.

There are three equipment upgrades you can find. You can speak with characters by walking up to them. Normally they give you some advice about the level you are in. In certain levels, you can find and talk to Gyro and he will give you an adaptor upgrade for your cane. The hammer adaptor gives you a more powerful golf swing, the iron adaptor gives you a stronger pogo jump, and the power adaptor lets you pull heavier things. They are applied automatically when you get them and they are permanent. Now you can break or pull certain blocks that hide treasure or other paths you can explore.

Like in the original game, you can find different items in the stages. Sometimes enemies will drop jewels that add to your money total at the top of the screen. Small diamonds are worth $1000, large diamonds give you $10,000, and red diamonds yield $50,000. Items mostly come out of treasure boxes, both small and large, that you can open by bopping them with your cane, either by pogo jump or golf swing. Boxes may also hide ice cream cones that restore one point of health and cakes that refill your entire health meter. Extra lives in the shape of a small Scrooge also appear occasionally inside a treasure box. A couple large treasure boxes hide special treasures that are worth a million dollars each. Also, each stage has one large treasure box containing a piece of the treasure map. The difficulty level chosen on the title screen influences the items you’ll find. The harder difficulties have fewer health recovery items, replacing them with jewels.

Check every nook and cranny for the map pieces.

DuckTales 2 features an item shop. Like in the first game, each level ends in a boss fight and you earn a treasure worth a million dollars. Combine that with your earnings from the stage, and then you get a chance to spend it in the item shop. Two items in the shop are ones you can bring into the stages. The cake acts just like the cake item from the treasure chests, but this one you can use anytime. Pause the game, then use the D-pad to scroll through your items to select the cake. The other item is the safe, but unlike the cake you don’t have to use it through the menu. The safe lets you keep your money earned if you lose a life within a stage. Normally you lose your accrued cash when you die. You can buy extra lives and a continue globe that lets you continue if you run out of lives. The extra energy item adds a point to your maximum health. You begin with three points and can buy two of these items to get up to five health. You can also buy a piece of the treasure map, but this isn’t always for sale.

Here are the five stages in the game:

Niagara Falls: This is the first level in the list and not a bad one to start off with. This level has water in it that you can cross on a life raft. Knock the raft into the water and smack the wall while standing on the raft to push it to the other side. There are logs falling down the falls that you must cross, as well as a crumbling bridge.

Bermuda Triangle: This stage takes place on a ship near the Bermuda triangle. This level has barrels that you can smack with your cane that sometimes give diamonds. One neat object is a cannon that you can fire by hooking with your cane and pulling a cannonball loose. There are also conveyor belts that you can drive by pulling them with the cane.

Behold the rare spring blossom!

Mu: This level takes you below ground passing through the ruins of past civilization. There is an ancient city here that can give you something special if you can find it. There is a flower that you can tug on with your cane to springboard you across a large gap. It’s the only one in the game but it’s neat.

Egypt: This pyramid level is the most maze-like stage of all. It has several looping paths and hidden floors. There’s a lot of treasure for the taking if you are willing to look for it.

Scotland: This stage is a large castle, and there are plenty of knights and spikes to contend with. One enemy here is a floating hand carrying a lantern. It shows up a lot and sometimes you can bounce off it to reach treasures.

There’s a bit more to play past these five stages. Scrooge’s rival, Flintheart Glomgold, appears on the pirate ship. You have to go there and deal with him to beat the game. If you can find all seven pieces of the map, you get to play one additional level containing the lost treasure of McDuck before the final showdown.

Snakes and quicksand are a dangerous combination.

This was my first time playing DuckTales 2. It’s one of those late lifespan NES games that is both fun to play and very expensive to buy. A loose cart sells around $125 these days. It has been near that amount for several years now. The first DuckTales game was popular enough that DuckTales 2 seems to have sold decently well for a 1993 NES game. I say that because it is easier to find than many of the other expensive NES games. I have seen a few copies for sale in stores since I’ve been looking for games, and I can’t say that for other games this costly. It’s also the most expensive NES game I’ve owned more than one copy of. I bought my first one for $100 on eBay, and the other I found in an eBay lot of six games that I bought for $60 total.

I struggled a little bit more playing DuckTales 2 than I would have expected. I got Game Over a couple of times while I was l learning the levels and looking around for secrets. I suppose it’s easy to be careless when you aren’t focusing solely on surviving and beating levels. Once I committed to buying the health upgrades and whatever else I needed, I didn’t have any problems beating the game after that. I got the normal ending of the game with plenty of lives to spare.

Getting the best ending like I wanted took a little more effort. Through normal play and exploration, I found all of the map pieces but two. The one in Niagara Falls I thought was very well hidden. I found that one last though I found it on my own. The map piece in Egypt gave me real trouble. To get it, you have to solve a puzzle that opens a gate leading to the map segment. There’s a clue before the area that gives you the hint needed to solve it, but I just couldn’t figure it out. I tried everything I could think of and got nowhere. I had to look up the solution to that one online. I gave it my best try so I have no issues with looking up the answer, even if I prefer not to.

These lantern hands show up in tricky spots.

Just like in the first DuckTales game, there is a third, bad ending if you finish the game with no money remaining. There’s a clearer path to the ending in DuckTales 2 because you can spend extra money in the shop, and you spend in smaller amounts than in the first game. If you need some extra money to balance it out, or simply more chances to buy in the shop, you can leave a level through Launchpad. This lets you keep the money you have earned in the stage plus lets you shop again. You can do this as many times as you want. I was able to get the bad ending on my second try. This means I got all three endings in DuckTales 2.

I think DuckTales 2 is a little bit easier than the first game. I rated DuckTales a 4/10 and gave DuckTales 2 a 3/10. Most of that difference is due to the ability to purchase additional lives and continues. Another difference is that I believe you can earn unlimited money in DuckTales 2. In the original, you could only leave with Launchpad once per stage. Here you can revisit a level you are good at, take the money or any extra lives you can find, and leave with Launchpad as many times as you want. It’s grinding made easy. The difficulty of the levels themselves are roughly the same in my mind. It’s not a complete pushover of a game but it shouldn’t take experienced players very long to beat.

DuckTales 2 is a great NES game, but doesn’t offer as much as you might expect from a sequel. The graphics, music, controls, and gameplay are all top notch. It’s the kind of quality you would expect from a Capcom-published NES game from the 90s. The upgrades are nice and help add a bit of exploration to the game even though it can be a little tedious replaying stages. The levels all have a good amount of secrets to find, as well as branching paths and some neat obstacles to interact with. It’s a fine game, but it does feel just like the first DuckTales game. I appreciate games like DuckTales 2 that give you more of what you want. I know not everyone feels that way. Plus, it’s hard to recommend buying the game when it’s so expensive and is over so quickly. It’s worth a play any way you can manage it if you like DuckTales.

#78 – DuckTales 2 (Best Ending)

#78 – DuckTales 2

 
JUN
04
2018
0

#77 – Roundball: 2-on-2 Challenge

The name pretty well sums it up, save the “challenge.”

Another very highly detailed title screen!

To Beat: Win the Tournament (3 rounds)
Played: 3/6/18
Difficulty: 2/10
My Difficulty: 2/10
My Video: Roundball: 2-on-2 Challenge Tournament Longplay

It has been some time since I played a sports game! Roundball 2-on-2 Challenge is the first basketball game covered on this site. I don’t care for most sports video games and the NES is just littered with them. Maybe you like basketball more than I do, and if so you might know the answer to this question. How many NES basketball games are there? I spent five minutes thinking about it and I came up with six games. There are ten basketball games on the console, and I’m surprised I didn’t think of so many of them. I guess we are going to find out which ones are good and which ones are truly forgettable. For now, Roundball may have been a decent introduction to the genre on NES, but let’s reach in and see how it stacks up.

Roundball: 2-on-2 Challenge was developed by Park Place Productions and published by Mindscape. It was released in North America in May 1992 and was also brought to Europe in 1992. It’s an NES exclusive. Park Place Productions was a short-lived company that primarily developed sports games. This was their only NES release. Mindscape, on the other hand, is one of the bigger publishers on the NES with 24 titles. This is their second release that I have beaten for this project.

Roundball is a basketball game played on a half-court. As the title suggests, games are meant to be played two-on-two. You can choose to play one-on-one instead if you want and there are a bunch of customization options for structuring a match the way you want. There is also a roster of 24 fictitious players to choose from, each with his own stats and named after one of the developers. The two main modes are Exhibition and Tournament. To beat the game, you must win the tournament. Rounds of the tournament are the Semi-Finals, Finals, and Championship. You only have to win three total matches to win the tournament.

Look at all the options!

The main menu contains several different options for customization. You will see a box on the left containing the options, and then the box on the right will display the choices for that option. Press Up or Down to scroll through the options. Pick an option and press Right to point to the choices panel. Press Up or Down to select your choice and then press A to lock in it. This moves the cursor back over to the options window and also writes down your selection at the bottom of the screen. When you are done, press Start to advance to player selection.

Here are the options you can pick from. Team Size lets you pick between either a one-on-one or two-on-two game. Players lets you pick from one to four human players. This game supports the NES Four Score for a full four-player game. The Teammates option is for a two-player game only to decide if you want the two players on the same team or on different teams. Mode is for selecting either Exhibition or Tournament modes. Steals lets you decide both your effectiveness at stealing the ball and the opponent’s effectiveness at stealing from you. You can pick from Easy, Normal, or Hard. Time lets you choose how long each quarter of the game is. You can pick from 4, 8, 12, or 16 minute quarters. Outs means who gets the ball after a basket, either the team the made it or the other team. The Control option is for single player only with a two-on-two team size. Primary means on offense you always control the teammate holding the ball. Same Guy means you always control the same player the entire game.

The player selection menu differs if you are playing either Exhibition or Tournament mode. For Exhibition mode, you can pick from any of the 24 players. Highlight the player you want and he will appear on the left side of the screen. You see the player’s portrait and his associated statistics. The first three stats are percentages. 3PT is for three-points shots, FG means field goals, and FT is for free throws. The remaining five stats are all per-game average numbers. RBD are rebounds, STL are steals, BLK are blocks, AST are assists, and PF are personal fouls. The bottom part of the screen shows already chosen players as well as which person is making their selection currently. You may pick a player with A or assume the default player with Start.

Hanson is a great player in this game.

If you chose Tournament mode, first you have to pick if you want to start a new tournament with A or resume a previous tournament with B. If you press B, you go to the password screen. Passwords are only three characters, nice and short. It also seems a little unnecessary since there are only three tournament matches anyway. You can also cancel out of the screen if you don’t have a valid password. Then you proceed to the team selection screen. There are eight preset teams to choose from. You may also highlight an individual player in the menu and view his stats. The same rules for selecting players also apply here.

Before starting a game, you have to shoot for outs. Each team has one player stand behind the three-point line and take a shot. To shoot the ball, hold down A to jump and let go to release the ball. You want to shoot the ball at the top of the jump to get the best chance of scoring. Then the opposing player makes his shot. The player who makes a shot while the other misses gets the ball first. If there are too many ties eventually the computer decides who gets the ball. I didn’t win outs in any of the games I played.

Now the game starts for real. On the gameplay screen, the score for each side is displayed at the top. Standard NBA scoring applies here, so two points are scored on a shot from the field, three points if made beyond the three-point line, and one point for a successful free throw. The bottom of the screen shows the rest of the details. First is the shot clock, which is how many seconds you can maintain possession. Next to that is the time remaining in the period. The period indicator shows which quarter of the game you are playing, and the ball handler is the name of the player currently holding the ball.

I don’t understand why I missed this shot.

There are several things you can do while on offense. Use the D-pad to run around the court. Press A to shoot the ball, just like when shooting for outs. If you are moving near the basket and press A, you’ll do a layup. You will actually perform one of several kinds of dunks or layups automatically just for show. Press the B button to pass the ball to your teammate in a two-on-two game. You can pass the ball while taking a shot if you press B while you are still holding the ball. The Start button pauses the game. When paused you can press Select to toggle the music on and off. There are also pre-set plays you can use during the action by holding Select and pressing a direction on the D-pad. Up clears the forward away from the defender, Right sets up a pick play, Down puts both players under the basket, and Left puts both players in three-point range.

There are fewer actions for playing defense. The most common action is attempting to steal. Rapidly tap the A button when you are near the ball and you might steal it away. If you press the A button and hold it a bit, you will jump and try to block the ball. You can block a shot from the field or underneath the basket. Press the B button to switch control to the other defender. You can also try and rebound the ball if the opponent misses a shot. When you get the ball back, you aren’t allowed to score until you first take the ball past the top of the key. If you fail to do this and try and shoot anyway, the game yells at you to “take it back!” It’s considered time out until you take the ball out.

The referee may call fouls in this game and a player will go to the line to shoot free throws. This takes place from the perspective of behind the backboard. There will be a white cursor that jiggles around near the basket and you want to press A to shoot when the cursor is over the basket. After free throws are completed, play resumes as normal.

The free throw perspective is quite nice.

At the end of each quarter, a detailed stats screen is displayed. It shows stats for every player both for the last quarter and the full game thus far. You’ll see number of field goals made, number of steals, number of rebounds, and so on. It’s a nice touch, but it’s a little bit of information overload and the stats don’t persist after the game is over.

This was my first time playing Roundball. I don’t even remember trying it. Maybe I didn’t make it through the menu. It’s not a rare game, but it’s not one I see around often. I’m pretty sure I bought my copy from a nearby game store. It sells for around $8 to $10 now, which sounds about right for this kind of game.

Just like I did with my last game, The Rocketeer, I tried this one out very early in the morning and went ahead and beat it later that night. I started by playing an exhibition match with the default settings, and I ended up winning by something like 90 points. I imagined I wouldn’t have too much trouble with the tournament, and I was right. I did notice that the competition got better in the later rounds of the tournament, but I was never close to losing any of the three rounds. I won 180-82, 195-116, and 177-134 and got the simple ending screen I wanted.

Rinse and repeat.

I don’t think that Roundball is necessarily an easy game, but it sure is exploitable. The first thing I decided was that I wanted to find the player with the best three-point shooting. I also wanted a player good at stealing. This is because it’s one of the few defensive moves you can do and there’s even a setting controlling stealing success, which leads me to believe it’s one of the more important features in the game. The best players between those two stats are Hanson and Lyndon. In the tournament, you can’t have them on the same team, so I went with the team Hanson and Belanger, a solid player in his own right. On offense, I only shot threes. On defense, I tried stealing every chance I got and tried to rebound any missed shots. That strategy alone gave me comfortable wins in each match. It makes me wonder if the other basketball games have similar strategies, at least offensively.

The rest of the game isn’t all that thrilling. It’s a slow-paced game, especially the timer. When it says four-minute quarters, that’s a reasonably accurate time in the real world. When playing it feels even longer. I can’t imagine sitting through sixteen-minute quarters, so I didn’t. I’m confident I would have been successful no matter how long the games took. The other things slow are layups. Each opponent almost exclusively did layups and I had to wait for him to take his time making each shot. Fouls slowed the game down too, but that’s part of the game and they didn’t happen too often anyway. Aside from the timer, my other major issue was defense. When stealing didn’t work, my opponent could drive to the basket and there was nothing I could do about it besides sit back and watch. Roundball has its problems, but I can look past them because I had little trouble beating it.

For my first basketball game, I think I did okay with Roundball. A four-player basketball game makes sense with managing NES sprite limitations, and four player games are few and far between on the NES anyway. The graphics aren’t too bad, and the voice samples are very clear to hear. I got tired of hearing “take it back!” all the time though. The music is decent but unmemorable. The game controls fine, except for maybe having to hold down A to block. Most importantly, the game was easy to beat with a sensible approach that was simple to pull off. That’s the kind of game I can get behind for this project. I wouldn’t recommend playing it otherwise. I’m willing to bet I will play some better NES basketball games before this is all said and done.

#77 – Roundball: 2-on-2 Challenge

 
MAY
22
2018
1

#76 – The Rocketeer

A game based on a movie about a guy and a jetpack sounds about right.

One of the nicest looking NES title screens so far!

To Beat: Reach the ending
Played: 3/4/18
Difficulty: 4/10
My Difficulty: 4/10
My Video: The Rocketeer Longplay

It’s already starting to become difficult writing introductions for some of these games. In this case, I don’t have any connection to The Rocketeer. I haven’t read the comics the character came from, nor did I even know they existed until today. I have heard of the movie but haven’t seen it. The NES game doesn’t do anything new when compared to games I’ve already covered. I’m sure the comics and film are enjoyable. I thought the game was enjoyable. Lacking any connection, it’s hard to know exactly what to say. Maybe The Rocketeer is something you have fond memories of. If I can help you stir up some nostalgia and say some good words about this game, that will make it all worth it.

The Rocketeer is a superhero created by Dave Stevens. He first appeared in Starslayer by Pacific Comics in 1982. Stevens sold the film rights for The Rocketeer the next year, but creative differences and rights changes kept any sort of movie dormant for a long time. Eventually, Walt Disney Pictures decided to take on The Rocketeer, though they insisted on making several changes and the ensuing negotiations delayed the film even further. After many script revisions, The Rocketeer released in theaters in June 1991. It received mixed reviews and was viewed as a financial disappointment. There have been rumors of a reboot as recently as 2017, and a Disney animated series inspired by The Rocketeer is currently in production and slated for a 2019 release.

There were two video games based on and called The Rocketeer. The NES game was released in May 1991, surprisingly one month ahead of the movie release. It was developed and published by Bandai. It is exclusive to North America only. The developer NovaLogic released a PC game in December 1991 which was later ported to the Super Nintendo in May 1992. The PC/SNES game is a collection of minigames based on the Rocketeer and is a different game than the NES version.

I’d say the cutscene graphics are shockingly good.

The Rocketeer on NES is a side-scrolling platformer with its story based on the movie. You play the role of stunt pilot Cliff Secord in 1930’s Los Angeles. He discovers a rocket pack hidden inside the cockpit of a biplane. With the help of his mechanic Peevy, they fashion a helmet to go along with the rocket with the intent to keep and use it. However, mobsters sent by movie star Neville Sinclair pursue both Cliff and Peevy in order to steal the rocket pack. Sinclair captures Cliff’s girlfriend Jenny to help convince Cliff to return the rocket pack. The six chapters of the NES game follow this and the rest of the story.

The controls are typical of this kind of game. Use the D-pad to walk left and right and press Down to duck. Cliff can jump with the A button and attack with the B button. The basic attack is a punch, but there are other weapons he can use. Press Select to switch weapons. Start pauses the game. If Cliff has enough fuel, he can also fly. To do this, press A to jump and then press A again before he reaches the top of his jump. This engages the rocket pack and now you can move Cliff in all directions with the D-pad alone. Cliff falls if he runs out of fuel, but you can drop early by holding Down and pressing A.

The top left corner of the screen contains a small status bar. On top you see your ammo count. Underneath that is a picture of your currently selected weapon. At the bottom of the bar there is a red meter on the left and a gray meter on the right. The red meter is Cliff’s health, and the gray meter is his fuel level. You can have up to eight bars of health and eleven bars of fuel. Pretty simple.

Cliff has several weapons already equipped and they all share from the same pool of bullets. You can press Select to cycle through each weapon, skipping the ones where you don’t have enough ammo. The default punch attack doesn’t require any ammo. The pistol uses one bullet and fires a slow, straight projectile. The rifle requires two bullets, and although it is just as powerful as the pistol, the shots travel farther and much faster. The spray gun costs three bullets and shoots a three-way shot. Grenades cost five bullets and are thrown forward in an arc. Finally, the bazooka costs a whopping fifteen bullets. You won’t use it often, but it is very effective against large bosses.

There’s plenty of walking, punching, and shooting to go around.

There are item pickups to help Cliff in his journey. Red hearts restore one point of health, and purple hearts give a full health refill. A pack of bullets adds ten to your ammo count, and a pack of silver bullets adds twenty ammo. Finally, the gas can restores four units of fuel. All of these items can be found lying on the ground. Sometimes, defeated enemies will drop a red heart, a bullet pack, or a fuel can.

There are several different enemies that get in your way. Standard black enemies just run at Cliff. They often come out of doorways in the background and they just keep coming out one at a time if you stick around. Red soldiers stand in place and fire bullets. You can duck underneath his fire, but usually he stands behind a crate or something and you have to get close to take him out. Purple soldiers are annoying. They kneel on the ground and fire fast shots, so they are tricky to defeat without getting hit. Some enemies have rocket packs of their own. There are other types of traps and devices such as cannons, mines, and even tiny tanks.

The whole game is structured by a chapter system that feels a lot like Ninja Gaiden. Between chapters or major sections of the game, there are cutscenes that drive the story. You can speed up the text by holding A, or just press Start to skip them entirely. Each level may contain sublevels and sometimes there are story segments between these scenes within a chapter. Some chapters end in a boss fight. Of the four bosses in the game, two of them are large encounters with your full complement of weaponry. The other two are smaller scale encounters and you are limited in what you can use to fight. The game does a decent job of explaining these forced limitations through the story segments.

You can fight a 1930’s helicopter.

Cliff only gets one life, and if you die, you get to see a cutscene of his death. You will probably see that a lot in the game. The Rocketeer has unlimited continues and you get sent back to either the start of the chapter or sometimes to a scene in the middle of a chapter. Not only that, but there is a password system too. You get a password between every chapter. The passwords are nine digits long, broken up into three groups of three digits. Maybe they are a little too long for this kind of game, but not too bad.

This was my first time playing The Rocketeer. I remember when I tried out this game after I bought it. I missed a jump in the first chapter that sent me back a distance and that’s when I stopped playing. I don’t see this game around much, but I’d still say it’s a common NES title. I own a complete copy of The Rocketeer that I acquired piecemeal. Several years ago, I purchased a nice lot of boxed NES games which included The Rocketeer. All of the games in that lot were missing the manual so I must have acquired one separately.

I ended up beating the entire game on my first attempt. I have gotten back into the habit of waking up in the middle of the night to do some chores and play NES before going back to bed. This night I fell asleep early, so I had more time to work with than normal without feeling like a zombie the next day. It took me right around two hours to beat the game blind. I knew there were only six chapters in the game but I didn’t think I’d get through it all right away. The next evening, I recorded my longplay which took over an hour. I got it done before midnight, so I managed to beat The Rocketeer within one calendar day.

There’s not as much flying around as you might expect.

I rated The Rocketeer a 4/10 in difficulty, but the game is a bit more challenging than the score would let on. Some of these areas run on for a while and it doesn’t take much to run out of health and have to start all over. You will need to memorize the levels and enemy points, but lucky item drops can be the difference in surviving to the next chapter. There were a couple of areas where I survived for long stretches with almost no extra health. There is a gradual increase in difficulty as the game progresses, though I had more trouble with Chapter 5 than the final level. Of course, all these issues are heavily mitigated with infinite continues and passwords. Also, if I could beat the game in one night without having played it past the first area before, it can’t be that hard.

Here are some techniques I came up with while playing The Rocketeer. I tend to use only punches until I reach about 50 bullets. Then I switch over to the pistol. It’s cheap to use and gives you much longer range, and if enough enemies continue dropping bullets, you can keep using it for a long time. I used the Bazooka for a couple of the boss battles. Other than that, I didn’t bother with any of the other weapons because they simply weren’t as cost efficient. The standard runner enemies are timed to pop out of doorways just as you cross their spawn point if you always run full speed. I learned that the hard way. Whenever I see a doorway or somewhere I think an enemy will appear, I pause for a bit. Another thing I learned is that enemies that shoot at you will stop briefly whenever they get hit. If you can get near an enemy and hit them, you should be able to keep shooting or punching and they won’t retaliate. Finally, I was not able to consistently get the hang of beating the purple enemies out in the open without getting hit at least once. What seemed to work the most often is jump the first two bullets, immediately crouch and fire, and then jump the third bullet. That stuns the enemy and you can beat him quickly after that. I started figuring that out near the end of my second playthrough. It’s tough to do, but I don’t have a simpler way other than using heavier firepower.

I think The Rocketeer is a pretty decent game. The graphics and cutscenes are all nicely detailed and look really good on the NES. The music is good, although not super memorable. The controls are simple but effective. There are a few issues. One complaint I have is that jetpack movement feels very slippery. I had a hard time lining up with targets while airborne. Some of the jumps are a little too long and they are easy to misjudge and miss. Enemies spawning right on top of you is mean design, and it happens all the time if you aren’t paying attention. This game can be fun, but it feels ordinary. This is one of the best examples of an average game I can think of. If you like most NES games, you’ll probably like this one too.

#76 – The Rocketeer

 
MAY
14
2018
0

#75 – Laser Invasion

Ward off the invasion in several different ways!

It’s not every day you see a white title screen on NES.

To Beat: Reach the ending
Played: 2/24/18 – 2/28/18
Difficulty: 8/10
My Difficulty: 8/10
My Video: Laser Invasion Longplay

I been plugging away at Take On The NES Library for over two years now, and I only have a little over 10% of the library completed. That is still a significant number of games with a wide variety of titles since I insist of having the bulk of these games chosen randomly. Laser Invasion at its core is a multi-genre game, but it just so happens that I’ve already beaten and written about enough games to make some comparisons and approximate what you get out of this game. Laser Invasion is part Top Gun, part Operation Wolf, and part Golgo 13. It’s even one of the few titles to support the Zapper. Let’s jump in and see what this game is all about.

The Famicom game Gun Sight was released in Japan in March 1991. The NES version was localized to Laser Invasion and was released in June 1991 in North America. It was developed and published by Konami in both regions. Laser Invasion was not released in PAL territories and is an exclusive game to the NES and Famicom. The name change for the NES version was likely done to tie this game to Konami’s Laserscope peripheral that launched at the same time.

I had no idea before starting this game that Laser Invasion is the only NES game to fully support the Laserscope peripheral. The Laserscope is a headset controller that functions like the NES Zapper. You start by plugging the Laserscope into the second controller port, and then you plug the attached audio cable into the audio port on the NES itself. The headset has speakers so that you can hear the game audio while wearing it, and the audio cable also powers the Laserscope so you don’t need batteries. It also comes equipped with a microphone. While playing a game, you use the attached sight to line up a target and then yell “Fire!” into the microphone to shoot. Basically, this is a set of headphones with a built-in voice-activated Zapper. It sounds neat, but in practice it doesn’t work too well. The Laserscope fires whenever the microphone picks up any sound so it can misfire often. I bet it has the speaker built in so that the game audio through the TV doesn’t accidentally trigger a misfire. This is just hearsay; I don’t own a Laserscope. Thankfully it is not required to play this game.

See the mission you are forced to accept.

Laser Invasion is a multiple-genre shooter game. The Sheik Toxic Moron (yes, that’s that bad guy’s name taken straight from the manual) is set on world domination with his all-powerful weapon the TechnoScorch Missile. It is up to you, of course, to infiltrate the Sand Storm Command Center and stop these events from happening. To do this, you must take to the skies in air combat as well as engage in gun fights on the ground and search enemy bases to advance your mission. Complete all four missions to beat Laser Invasion.

On the title screen, you can start the game right away or set some options. Press Select to choose and then press Start. Within the option menu, you can turn the music off and on. You can either enable or disable reverse controls for your aircraft. You can also choose the input method. Control Pad is for using the controller only, LaserScope is for using both the LaserScope and controller, and Zapper is for the Zapper and controller. You can also choose if you want to have three, four, or five lives. There is also an option for LaserScope practice. I never tried this, but I think it is a calibration screen for positioning your LaserScope properly. Use the D-pad to toggle all these options to your liking, then press Start to go back to the title screen.

Laser Invasion has three different genres of gameplay, and since all of them are included in the first mission alone, I’ll step you through what that first mission is like. All missions begin with a cutscene providing you with the mission briefing. Then you will go flying in your helijet aircraft, but first you need to choose which missiles you want and which secondary item you want. For missiles, you can choose from either 40 weaker missiles, 20 medium missiles, or 10 strong missiles. The stronger missiles have wider targeting ranges than the weaker ones. For secondary weapons, you can choose one tank of extra fuel, five ground bombs for destroying ground targets, or ten chaff dispenses to temporarily protect you from enemy homing missiles. After everything is set, it’s time for takeoff.

The Top Gun vibe is strong here.

Aerial combat in the helijet is just like it is in Top Gun. This mode is always controller only. Use the D-pad to steer the helijet. Up or Down may be reversed if you chose that option. The B button fires your weapons. Your default is a vulcan cannon with unlimited, although weak, firepower. Hold down B to fire. If you get an enemy in your sights, there will be an arrow pointing at it. Then you can double tap the B button to launch one of your guided missiles at the enemy. You may press Select to toggle between your missiles and your secondary item, and you use your secondary item by also double tapping B. The A button reduces your speed. The default is automatic full speed ahead and the A button acts like your brakes.

The top half of this screen contains all the action and the lower half is your control panel with lots of useful information. On the left is your fuel meter. In the middle there are two kinds of radar. The left one is wide radar that covers the entire playfield and shows points of interest as well as the position and orientation of your helijet. The right radar is local radar which shows where enemies are around you, including from behind and the sides. Below the radar is a long bar that indicates the health of your helijet. The right side shows your missiles, secondary items, ammo for each, and your current flying speed.

As you fly, you are approached by enemy aircraft that you can take out with your weapons. Many enemies fire guided missiles that you need to either dodge or blow up with your own shots. There are also stationary objects that you just dodge. You can also steer left or right and fly in any direction. Each flying area is its own contained open world and you can fly anywhere within the radar screen. On the wide radar, you will see a white circle in the upper left of the first mission. These mark enemy bases and you want to visit them to complete your mission. There is a plus mark around the middle of the map and this is your allied heliport, where you can refill your fuel and weapons if you want.

Hope you like missiles in your boss fights!

In the first mission, when you approach the enemy base you are greeted with an enemy helicopter. This is one of several challenging boss battles. The parts you can shoot are highlighted by the targeting arrow, so you can either use missiles or your cannon on those spots while also avoiding or shooting the enemy’s missiles. Destroy the enemy helicopter to move on to the next part. In this case, you go right back to flying. You want to center yourself over the enemy base and land there. If you fly over a place where you can land, and all enemies are out of the way, you will approach the heliport. Here you want to slam on the brakes and stop above the heliport to switch to the landing sequence. The view switches to looking down over the helipad. Use the D-pad to center yourself and press and hold A to ascend if you need it. You want to land close to the large plus in the center of the helipad, but cross winds don’t always make that easy. Just take your time. It doesn’t matter how fast you are falling because you can’t crash. If you make a poor landing, you get sent back to the skies and you have to try docking with the heliport again. When you land properly, you exit the helijet and move on to the next phase.

Now that you’ve landed, you hop out of the cockpit and get your gun ready. This next playstyle puts you in first person view and you shoot your way on foot to the enemy base. This part of the game is very similar to Operation Wolf. The playfield scrolls slowly to the right and as enemies pop up you shoot them with the controller you chose on the options screen. If you are playing with a controller only, you control a crosshair and can fire with the B button. With either the LaserScope or the Zapper, just aim and shoot. You will see your health meter, ammo count, and any items from the bases on the lower part of the screen. Aside from the different kinds of enemies, there are a few items to help. Crates appear periodically and you can shoot them to reveal either a heart or more ammo. Then shoot the icon to collect it. Hearts refill your entire health meter, and the ammo puts you back at the max of 99 shots. I found out that ammo drops always appear when you have 15 bullets or fewer. You are never in danger of running out of bullets unless you somehow skip the refill. There are also red barrels that destroy all enemies when shot. At the end of this section, you reach the enemy base. The door opens and you automatically enter.

Just blast away!

The enemy base is where the third gameplay style takes place. This is what the manual refers to as the 3-D Confusion Maze. If you remember the mazes from Golgo 13, this is what I’d consider an improved version of them. Press Up on the D-pad to take a step forward, or press Left or Right to turn in that direction. Press A to open doors right in front of you. The top half of the screen shows the corridors in the base from a first-person perspective. The lower left of the screen contains a mini map of the entire base. Each base segment is uncovered on the map as you step from screen to screen. That’s an incredibly helpful feature. The lower right of the screen displays your health, ammo count, items collected, and any messages you might come across.

Occasionally the music changes when you reach certain rooms, which is the trigger for an enemy encounter. Battles are gunfights also using the LaserScope, Zapper, or standard controller, just like in the Operation Wolf style segments. The Zapper is quite cumbersome to use since you have to drop the controller and pick up the gun quickly to transition from exploration to gunfight. Like in the other sections, there are items found in the maze to help you. Some rooms have a crate in them and all you have to do it move next to it to grab the item. You can find more ammo for your gun or rations to restore your health. There are also special quest items such as keys. One difference with maze combat is that you can get in situations where you run out of ammo. If that happens, mash the A button to retreat to the room you came from. Enemy encounters always appear in the same places and the enemies are gone when you clear them out. There is enough ammo within the base to get you through. I never got stuck in a spot where I couldn’t locate extra ammo to proceed.

At one juncture of the maze in the first mission, a time bomb is set and you have to hurry out of the maze. You can’t go back the way you came in, so you have to find a new way. Once you do, you go back into the helijet and take off as the base explodes beneath you. This marks the end of the first mission. But in other missions, sometimes this puts you back in the sky because there are other mission objectives to finish. This means the pacing of the game is a bit inconsistent. The first mission seems lengthy enough, but it is short compared to some of the later missions.

The minimap makes these sections much more enjoyable.

Depending on your option setting, you have either three, four, or five lives to work with in Laser Invasion. If you run out of lives, you can continue up to five times. Where you restart largely depends on where you last died. Continuing within a base is the worst from what I recall since it sends you all the way back to the helijet before even approaching the base. Then it takes several minutes to get back to where you were. You can gain extra lives to help a bit, but these are tough to earn. Laser Invasion has a scoring system and points appear on screen before each mission or after you take a death. Every 100,000 points earns you an extra life, but it takes so long to score that high that you may never get one. I think the highest I scored was 150,000 points.

This was my first time playing Laser Invasion. This is a game I originally took off my main list and pulled back in here. I don’t like flight games and my first impression was that was all Laser Invasion had to offer. I did decide to leave Top Gun in my main list for some reason, and I figured if I could beat that then I could figure out Laser Invasion. I didn’t realize it was also a Zapper game plus had all these other play modes, so consider me pleasantly surprised. It’s not a common game, but it’s not super expensive, selling for around $10 to $15 for a loose cart.

I beat Laser Invasion in only five days. That surprised me. I decided early on that I would play this with the Zapper since I don’t own a LaserScope. There are only 16 licensed NES games that are compatible with the Zapper and it feels wrong to not use it. I did a few attempts with the controller just for practice. I think the controller by itself is the easiest way to play Laser Invasion. Zapper play was a bit more challenging, and I bet the LaserScope works well since you don’t have to keep switching between controller and Zapper on the fly. However, the parts with the Zapper were much easier for me than the flying. The same homing missiles that bogged me down in Top Gun are here again, but they are not as bad this time because they are larger in size and thus easier to shoot down. The boss battles and areas leading up to them ate up the most lives during the learning phase of the game.

I’m happy that landing isn’t that stressful.

Once I got some practice near the end of the game, I fully switched over to Zapper control and the three default lives. I was very close to beating the game on my penultimate attempt, reaching the final boss for the first time on my last life and then immediately dying. In my longplay video, I used two continues to beat the game. I was used to using up all five, so this was a good run. This was my first time recording footage of a Zapper game off my CRT and I think it turned out well.

I have a few tips to share for Laser Invasion. There are three options for the secondary item and the one you want is the extra fuel. The ground bombs were completely useless to me. The chaff can be helpful since it takes homing missiles out of play when you use it, but for the rest of the game you learn to deal with them anyway. The extra fuel is the most important because a couple sections in the game are so long they require the extra fuel to make it all the way through without dying. This is an awful design decision that you normally have to learn the hard way. Outside of those sections, the extra fuel is a good safeguard if you are having trouble lining up on the map to land at a base and need some extra time. I liked using the twenty medium missiles. They are powerful enough to be useful against bosses and there are enough of them that you can get away with wasting a few. To stop above the heliport, all you have to do is hold down A as soon as you begin making the approach. This should stop you early enough so that you can do a release and hold pattern with the A button to inch your way into position. Those tips should get you started with the flying, and the rest of the game falls into place from there.

Laser Invasion is a game that surprised me and I’m glad I played it. It’s a Konami game and they almost always make quality games, including this one. The graphics are excellent and so is the music. The game controls well with the controller, and performs well enough with the Zapper. I found the shooting hitboxes pretty generous to help keep up with the action. It’s a tough task to cover multiple play styles. I think the quality is there, but the pacing and difficulty are unbalanced. The Zapper stages are easy compared to the rest, and yet they drag on much longer than I would like. You can traverse mazes quickly until you get blocked by a lengthy shooting match. The flying is so much more difficult than the rest of the game with things like one-hit kills and boss fights. Trying to trigger a heliport can also be frustrating when enemies just don’t get out of the way. These are valid complaints that hamper the overall experience, but Laser Invasion is still a pretty neat game.

#75 – Laser Invasion

 
MAY
07
2018
0

#74 – Sqoon

Who needs a yellow submarine when you can pilot a pink one?

One of the busiest title screens ever.

To Beat: Finish Phase 8
What I Did: Completed two loops
Played: 2/19/18 – 2/23/18
Difficulty: 6/10
My Difficulty: 6/10
My Video: Sqoon Longplay

This is not the first case in this project where I play a game that is linked to something else that I recently finished. However, this particular connection might be the most esoteric. What could Chubby Cherub and Sqoon have in common? After all, they are in different genres and created by different developers. I mentioned in my Chubby Cherub review that it is one of the few NES games that is exclusively in the 5-screw form factor, and Sqoon is another one. There’s only a handful of games like that, and here we have two of them nearly back to back. I find these nearby relationships fascinating even if it is purely meaningless. Allow me then to make another comparison. Even though Chubby Cherub is an early platformer and Sqoon is an early shoot-em-up, both games have some interesting ideas for their respective genres that don’t resurface very often.

Sqoon, pronounced “skoon,” is an original Famicom game released in Japan in June 1986. It was developed by Home Data and published by Irem. The NES version came out in North America in September 1987. It was not released elsewhere. Most of Home Data’s games stayed in Japan and therefore they are not well known outside of their home country. They made several Mahjong games as well as a baseball series named Koshien. Irem has a surprisingly small presence on NES, publishing only four games on the console.

Sqoon is a side-scrolling underwater shoot-em-up with a deeper back story than I expected. The inhabitants of Neptune, aptly named the Neptunians, are facing a planetary crisis. They are an underwater race, but meteorites are destroying their land and they are losing their food, Man-ham livestock. That’s their name for humans, I suppose. (I know it’s weird but it’s in the manual!) They hatched a plan to invade Earth where they will be able to find plenty of food. When they arrived, they melted the ice caps and flooded the world. Earth’s only hope for survival is the pirate Narikeen and his trusty submarine named Sqoon. A desperate plea was just barely enough to entice Narikeen to defeat all the Neptunians and save the Earth.

The shrill warning noises add to the story for sure.

To beat the game, you must pilot the submarine through eight phases. Each one represents a location on Earth that you must secure from the Neptunians. You begin in New York and kind of circumnavigate the globe, ending at the North Pole. Unfortunately, Sqoon doesn’t have an ending, but if you can complete all eight phases and loop back to the beginning, that is good enough.

Sqoon has simple controls. You use the D-pad to move in all eight directions. You are limited to traveling underwater only, but this takes up most of the screen so you have a lot of room to work with. The A button fires your missiles. This is the default, straight-shooting weapon, and you can have several missiles on screen at once. The B button fires your ice ball gun. This shot arcs downward and is useful for taking out ground targets. You have unlimited shots of both weapons and you will be doing a whole lot of button mashing in Sqoon. The ice ball gun is a little harder to use and you can only have one ice ball on screen at a time, but some enemies can only be destroyed by it. The Start button pauses the action. When paused, the game plays a different song instead of silence like in most other games.

The primary mechanic to Sqoon is the fuel system. You begin with 60 units of fuel as indicated on the lower left of the screen. Fuel is consumed quickly, but there are a couple of ways to refuel. The main method is to get a fuel drop from the motorized island that can appear on the surface. You have to exchange either nine humans or one human plus a piece of gold to get a drop. There are pods on the ocean floor that hold humans and you can release them if you strike it with an ice ball. The people will spread out and you can collect them into your submarine. An indicator will briefly appear next to your sub showing how many people you have inside. Gold comes from the recurring crab also on the ocean floor. Bop him with an ice ball, and he will jump backward and turn into a gold piece. You can then grab it but you must be quick. He will turn back into a crab if you leave him alone too long and he is deadly to the touch. Once you meet either requirement, the island will appear above you. Navigate to the surface and mash the B button to drop off gold or people and get your reward. The other way to refuel is to take a death, either by colliding with an enemy or running out of fuel. Naturally, you want to avoid this if you want to get far in this game.

Save the helpless people!

By taking nine people to the motorized island, your fuel drop also doubles as a weapon powerup for your missiles. The default missile is the horizon missile. Grab one weapon powerup to turn that into the Bow-wow missile, and grab another one to turn that into the Adenoid missile. The horizon missile is consumed whenever it hits an enemy. The Bow-wow missile has the same straight trajectory but a single missile can defeat many enemies in a row. The Adenoid missile is a narrow three-way shot that has piercing bullets like the Bow-wow missile. The one bad thing with the Adenoid missile is that you can only fire one shot at a time, though it is powerful enough to still be useful under that limitation. If you lose a life, you go back one weapon, as well as lose any people you have saved up to that point.

There are a bunch of different underwater enemies in this game. There are fish, snails, shrimp, shells, and frogs, just to name a few. Despite the graphical variety, they use just a few distinct movement patterns. The most common movement is a loop-de-loop. It’s really an annoying pattern to deal with, but since you see it so often you eventually get used to it. Other patterns are more typical like a zig-zag or coming at you in a straight line. A few enemy types stand out. Sharks are non-lethal to Sqoon, but they will eat people floating around. Tall, pointy shells emerge from the ground and move straight up. These are indestructible and just get in the way. There are also minefields of little bobbing mines that you can take out with the ice ball gun for 1000 points each.

The levels themselves are quite plain. Each Phase begins with a cityscape in the back. It’s not super nice looking but pretty well detailed for such an early title. You will regularly pass by factories. These are large structures that have a lot of moving parts to them. Those parts can be destroyed with a direct hit of your ice ball gun. They also have at least one pod that releases humans. Near the end of the phase, you pass through a minefield as mentioned above. Then, unless you are in Phase 1, you reach the enemy base. Here the scrolling stops for a little while and you have to fend off swarms of enemies. It’s not mandatory to take out parts of the base but I always do. Other than these events, the rest of the levels are just plain backgrounds and are only distinguished by enemy patterns and the layout of the occasional ground factories.

The cities are about the only background decoration.

The very first enemy in each stage is a special one. It’s a sea slug sitting on the ocean floor. You can hit it with an ice ball for 200 points, but it doesn’t die. You have to hit it on the back of the slug for this to work, but if you hit it exactly ten times it will transform into a necklace. Grab this necklace to get an extra life. If you hit the necklace with the ice ball gun it turns back into the slug. It’s nice to find this extra life every stage. There are also extra lives of various shapes that you can find in the game. Usually they are near the city at the start of the phase but sometimes appear elsewhere. What is special about the necklace is that you can trigger a weird event with it. If you have the necklace and can defeat an entire factory without dying, it turns the whole background to one solid, bright color. Play continues as normal except you don’t use any fuel during this time. It all feels like a glitch but it appears to be intentional. The screen eventually goes back to normal and you start consuming fuel again.

This was my first time beating Sqoon. I had played it once before in 2015 as part of the Nintendo Age contest. Looking back, I must not have had time to play that week because I didn’t get past Phase 2. Sqoon is an uncommon cart, but I have had two copies. I bought one at a nearby game store for either $10 or $12 sometime in 2014, and then I bought another copy online for around $30 in early 2015. Sqoon has an unusually fragile label. I picked up the second copy sight unseen in hope of a label upgrade and it wasn’t any better. The one I kept has a large rip in one of the corners. Either way, it was a good value buy. Sqoon has similar selling characteristics as Chubby Cherub. A loose cart sells for around $75 now, but the box and manual are even more hard to come by and are much more expensive. While values can be fluid, expect to pay $250 or higher for a complete copy. If I really want a label upgrade down the road, then I’ll have to pay for it.

These shelled enemies are awful.

It took me just a few days to beat Sqoon. It’s a tough game, but it seems like it gets easier more quickly than other games like this. The hurdles are coping with the enemy patterns, acquiring the items, and constantly staying refueled. A lot of enemies can simply be avoided, and once you get the hang of adding fuel you will always be prepared for your next drop well ahead of time. The middle levels seem to pose the biggest threat. There is a shelled enemy that shows up here which takes many hits to beat and has that curly movement pattern. There are enough extra lives in the game to keep afloat (sorry) and I can survive a few deaths in the harder sections and still be okay. The fuel recovery loop clicked with me at the same time I figured out the secret to getting the pendant from the slug.

Once you get the hang of the game, seeing it through to the end is a slog. It’s a slow scrolling game and some of the levels drag on a lot longer than they should. There’s not much variety throughout the game. It’s fun for a little while, but it grows old. The only other thing out of the ordinary in Sqoon appears at the end of the seventh phase. After passing the base, the screen switches over to a message from the Neptunians indicating that reinforcements are on their way. It’s jarring when it shows up so unexpectedly, but then you don’t get any other message when you finish the final phase.

When I first beat the game, I wasn’t recording anything. I left my NES on throughout the day and chipped away at the game. I played through the second loop, which only consisted of a few minor graphical changes. I took a peek at the NES Ending FAQ and the author indicated you get a special message near the end of the third loop. I completed that, but I didn’t see anything different. I went as far as to examine the ROM on my computer and look for text to see there were any other messages in-game. I was able to locate all the main text within the game, but nothing else. Perhaps this secret message is embedded into the background tiles somehow, instead of using the normal letter tiles that are used for all other text. I couldn’t find any other evidence online of anything in Sqoon past the second loop. In my opinion, completing one loop of Sqoon is good enough. I played through two loops in my longplay video just to show off the minor differences.

You want to collect the necklace at every opportunity.

There’s one more bit of trivia about the Famicom version of Sqoon. Famicom carts are interesting in that they come in various shapes, sizes, and colors. One notable trait of Irem’s early games is the inclusion of a red LED light on the front of the cart that lights up when the game is turned on. The Famicom is a top-loading console and lacks any power light like the NES has, so this was a neat little feature. I assume it became too expensive to include the LED on the carts, so later printings of Irem’s games do not have the LED. The non-LED Sqoon variant is harder to come by and therefore more valuable to collectors. I bet you thought I couldn’t come up with anything more obscure than NES cart variants.

Sqoon is a pretty good NES game for its time. It has many enemies with complicated patterns, and some interesting mechanics that don’t appear often in shooters. The graphics aren’t great by today’s standards, but they are suitable and have some nice detail under the early limitations of NES carts. The music is nice. The gameplay does suffer a bit in its hit detection with the ice balls, but it is something you can compensate for with some experience. I’d say it is one of the weaker NES shooters overall. It’s okay to pass on it, especially if you insist on having an expensive hard copy.

#74 – Sqoon

 
APR
24
2018
0

#73 – Q*bert

Our hero teaches you to swear early and often!

Boring screen, but the next one tells you the rules at least.

To Beat: Finish Level 9 Round 4
Played: 2/1/18 – 2/18/18
Difficulty:10/10
My Difficulty:10/10
My Video: Q*bert Longplay

If you’re like me, your eyes got wide seeing another 10/10 difficulty rating appear. Indeed, Q*bert on NES is one of those games that doesn’t come up often. We have already seen a previous arcade port, the infamous Ikari Warriors, receive the only prior 10/10 rating. Ikari Warriors was a different case because it is a much more expansive game on NES than in the arcade. NES Q*bert on the other hand is close to the arcade experience. I think it’s neat to see how two arcade ports on NES go in different directions but still retain a very high level of difficulty compared with other NES games. Beating Q*bert is something you can feel proud of if you are one of the few that can conquer it.

Q*bert started as an arcade game that was both developed and published by Gottlieb in 1982. Jeff Lee is credited with both designing the character Q*bert as well as the initial ideas of gameplay. Warren Davis stepped in later as a programmer and further contributed to the game. David Theil was the audio engineer, and his trouble in finding enough time to properly add clear voices to the game led to the idea of having the sound synthesizer read random data, producing gibberish that composes Q*bert’s somewhat iconic swearing noises. The development team also included a pinball device inside the arcade cabinet that slams into the side of it whenever Q*bert falls off the board. Another risky idea was turning the game joystick 45 degrees for diagonal-only movement. All of the above pieces combined to make Q*bert a success for Gottlieb, so the game was widely ported to many home consoles and computers throughout 1983 and 1984.

Q*bert on NES was released in February 1989. It was developed and published by Ultra Games, the alternate publishing label of Konami. It wasn’t released on the Famicom nor outside of the US. This version is closely aligned to the original arcade game, but some later titles expanded on the idea. A unique sequel, Q*bert’s Qubes, was released in arcades in 1984. It is a more complex game and wasn’t as widely distributed. Q*bert on MSX was released in 1986. This version doesn’t feature Q*bert at all, but does include 50 different stage layouts. The Game Boy port of Q*bert in 1992 goes back to starring the original character while also introducing new stage layouts. Q*bert 3 on SNES in 1992 also has different levels. Q*bert also had different versions on Windows, mobile, and other platforms more recently.

Most of what you need to know is evident from the start.

Q*bert is a single screen action game with puzzle elements. You play as Q*bert on a triangular pyramid of cubes. It holds seven rows of cubes containing 28 total cubes. You hop along the top faces of these cubes changing the color of any one you step on. To complete each level, you must switch all the tiles to a specified target color while avoiding other enemies that try to get in your way or disrupt your progress. There are nine levels of four rounds each, so you have to complete 36 pyramids to beat the game.

The controls are simple and can even be customized, which is great because by nature of the game Q*bert’s hops are always diagonal. On the title screen, first select one or two players. Multiplayer is alternating play so this might as well be a single player game. The first thing you get to see is the control customization screen. It includes a demonstration of Q*bert hopping so you can see clearly which direction you are setting, and there is also an image of the NES controller. First you choose what direction on the D-pad you want to press to make Q*bert jump up and right, then down and right, down and left, and finally up and left. The initial setting is Up on the D-pad to move Q*bert up and right. You can press A to lock that in or press B to turn 45 degrees clockwise. You can keep pressing B to pivot this selection around to any direction you want. If you want inverted controls or something really bizarre, you can do it. After you make selections for all four directions, you must press A one more time to confirm. If you press B instead, then you have to re-enter all four directions again from the start. My recommendation is setting the default controls by mashing the A button right away. This locks controls to the main cardinal directions of the D-pad, so visually if you were to turn the controller 45 degrees clockwise the D-pad perfectly aligns with Q*bert’s movement on screen. The other common control scheme is locking in all diagonal D-pad inputs, but I didn’t bother with this because pressing diagonals isn’t always precise enough.

When you are playing the game, just use the D-pad. Press the direction you set to hop in the desired direction. Q*bert’s jumps are always deliberate and take time to finish. You may tap the direction you want to move when you are standing still. If you hold a direction while Q*bert is in mid jump, he will go ahead and jump in that direction after he lands. This acts as an input buffer so you can hold the direction you next intend to go early and Q*bert will transition as quickly as possible. Finally, the Start button pauses the game if you need a break in the action.

Q*bert’s biggest fan helps out with control customization.

There are several enemies that stand in your color changing ways. The rule of thumb is you can safely come in contact with green enemies, but any other color enemy kills you when touched. The one enemy that appears in every stage is Coily. He first appears as a purple ball falling from the sky and landing in the second row. He hops randomly downward until he reaches the bottom row and comes alive as a snake. Now he will follow you around in hot pursuit. The only safe way to deal with Coily is to use disks that can appear on either the left or right side of the pyramid. Q*bert is allowed to jump completely off the pyramid to his death if you aren’t careful, in which case you lose a life and he respawns on the topmost tile, just as he starts every level. Hop off the pyramid onto one of those disks, and it will carry Q*bert to the top of the pyramid. During this transport, if Coily was close enough to you he will also jump off the pyramid, and as a bonus this also removes all enemies from play, plus you get 500 points. You may only use a disk once and there are only a handful per level.

Ugg and Wrong Way are two similar enemies that have a strange movement pattern. Unlike other enemies, they appear from the bottom of the screen and hop on the sides of the cubes instead of on the top. Wrong Way begins on the bottom left and will either jump up or right. Ugg begins on the bottom right and only jumps up or left. Maybe it’s the opposite, I don’t know. Either way, when they reach the side of the pyramid, they jump completely off and go away. Because they don’t land on the top tiles, it takes a while to completely understand how to safely move around them.

The remaining enemies all move like Coily’s purple ball and they all jump off the bottom of the board. However, each one has other characteristics. Red balls are called Whammy Balls. They are simple, common enemies that hurt when you collide with them. The remaining enemies are green and can be touched safely. The green ball is a powerup. Grab the green ball to both freeze all enemies on screen and make Q*bert invincible. This lasts for several seconds which is perfect for flipping a bunch of tiles the way you want them. You also get 100 points from the green ball. The final two enemies are Sam and Slick. I can’t tell the two of them apart mid-game, but Slick wears sunglasses and Sam doesn’t. Like Q*bert, they change tile colors every step they take, and so they have a bad habit of undoing all your hard work. You can take them out of play if you grab them and you get 300 points for your efforts. I believe Sam advances each square one color ahead and Slick always turns tiles one of the non-target colors. Maybe their characteristics are level dependent and not character dependent. Either way, these are very annoying non-lethal enemies.

Early levels already have a lot going on.

Other than the enemies, there are some other ways to earn points. Flipping a tile earns you 30 points. You also get a bonus after each round. Any remaining disks give you 50 points, and then you earn the main round bonus. This begins at 1000 points for completing Level 1-1, and it steps up an additional 250 points for subsequent rounds. Around Level 5-1 it stops at 5000 points per round but then goes up to 6000 points for Level 8 and 8000 points for each round in the final level. Points let you earn extra lives. You get your first extra life at 6000 points, and then you get another one for every 12,000 points after that.

The main objective is coloring tiles, and this gradually gets more complex. Each level begins with a demonstration of how colors change when Q*bert hops on tiles. Levels can feature up to three colors which I’ll call Colors A, B, and C. The colors themselves vary just for aesthetic reasons. All levels begin with all Color A tiles, and the target color is B for two-color levels and C for three-color levels. Level 1 just has two colors with only A flipping to B. Color B is locked in for the round unless Sam or Slick get involved. Essentially, step on every tile once. Level 2 goes to three colors, with A flipping to B, B flipping to C, and C stays locked. Just step on every tile twice. Level 3 is only two colors, however, A goes to B and B goes back to A. Uh-oh. The puzzle element shows up here, but it’s gets better with experience. Level 4 goes A to B, B to C, and C to B. It’s more hopping, but eventually boils down to the same as Level 3. Level 5 and onward is just nasty, and I bet you can already guess where this is going. Here, A flips to B, B flips to C, and C flips back to A. This is the last pattern, but you have to suffer through 20 rounds of this if you are set on beating NES Q*bert. Each subsequent level gets faster too.

Now it all starts to come together why Q*bert is one of the hardest games to beat on the NES. The game does provide a bit of extra assistance. Each game of Q*bert begins with four additional lives. You can continue when you run out of lives, but only three times. The extra credits help tremendously, but this is still a steep mountain to climb.

I always like these stages with the black cube sides.

I had a little previous experience with Q*bert. I believe I mentioned this in my Snow Brothers review, but I originally played that game at a babysitter’s house long ago as a rental. The other rented game that day was Q*bert, and I remember getting as far as Level 3. I sought it out specifically when I got back into game collecting. I ended up buying a nice, clean copy with manual on eBay for $6 shipped. This is a silly reason, but I wanted to get it early on because one of my collection milestones was collecting all NES games that start with each letter of the alphabet. Q is the easiest to finish since it’s only Q*bert and Qix, at least for licensed NES. I do like the game though, so I was happy to own it. Nowadays a cart copy costs around $8-$10, same as it did around 2014 when I bought my own.

I’ve done a lot of research into the NES library and I already know several games that project to be among the most difficult. Q*bert was absolutely on my radar as a Top 10 candidate. Because of this, I kept track of my attempts including milestones anytime I reached a new stage for the first time. I was looser with this than my Ikari Warriors tracking, so I neglected to note exactly which attempts reached which stages. I also didn’t keep track of how many hours I spent playing. The stats I did collect are interesting enough. I beat Q*bert on my 67th attempt over 18 days of playing. I’d say I reset early on maybe a dozen or more attempts, especially toward the end of my grind when I knew I needed to play well early to have a better shot at the end. Later attempts took as long as 45 minutes, and earlier attempts were at least 20-30 minutes long. I’m pretty comfortable guessing that I played 30 hours of Q*bert before I won.

The road getting there was pretty long, despite what I consider a condensed timeframe. I started out very strong, reaching Level 5 on my first day playing. This is no small feat. The first two levels are challenging to start, but straightforward. Level 3 is the first big step up where you have to contend with pathfinding and Sam and Slick really hindering progress. It gets a little worse in Level 4, but Level 5 is where the gloves truly come off. I think it was huge for me to do well enough reaching Level 5 so early in the process. Who knows how long I would have spent playing Q*bert if I struggled earlier, like I’m sure many players do. But that’s where things stalled out for quite some time. I reached Level 6 on my third day and then got stuck for a few days. I was getting angry about losing in those later levels, and solving them more felt like I was lucky than I was skilled. After the first week of attempts, I had something of a breakthrough, reaching 8-4 in one of those magical runs. Following that were three days of heavy playing over the weekend where I didn’t come all that close. My Level 5+ technique was gradually coming together, and by the next weekend I was routinely reaching Levels 7 and 8, and even Level 9. Finally it all came together and I beat Q*bert!

Getting the jump on the green ball is huge.

My winning run was an attempt that I nearly threw away. I was gauging attempts based on how many lives I had entering 5-1. I had gotten there a couple of times with ten lives, but usually I had six to eight lives. This time I broke even and only had the starting four. I decided to try anyway and things were really clicking for me, at least until Level 8. From 5-3 on, both the disk layout and Sam’s tile flipping behavior are always the same. Later levels do speed up, but aside from that there’s no reason why Level 8 would be unique in its difficulty. Anyway, that’s where things looked bleak. I used all three continues here: One in 8-1, another in 8-2, and my last in 8-4. I wanted to at least get to Level 9, but I ended up playing very well and beat 9-4 with several lives to spare. I didn’t have any notes for 9-4 but I didn’t need them. It was a huge relief to mark Q*bert off the list!

The best advice I can give for beating Q*bert is this: The enemy movements are random, but the order in which enemies appear is fixed for each level. Armed with this knowledge, it is possible to map out exactly when certain enemies appear, especially the green ball. I had a few notes for the first three levels that I didn’t really use, but from Level 4 on I wrote down about when I expected the ball to show up. My strategy for those levels was to start clearing out the lower left corner, particularly the three corner tiles. Wait there for Coily to approach you and then take the disk in that corner. Repeat that step for the other corner. After that, try and work the board from the bottom on up. If you can stop Sam, by all means do it, but it’s not absolutely critical. Occasionally, Sam will hug one side of the board and mess up the corner, so when that happens I fix that as soon as possible. My notes indicated about how many times I could bait Coily off the edge with a disk before the green ball appears. I had to improvise somewhat since Coily can end up too far away from where I’m waiting, but for the most part I made it work. The green ball often follows a Whammy Ball in the sequencing, so I tried using that sometimes as a visual cue.

One super annoying thing from Level 5 on is that sometimes the board gets caught in an unwinnable state temporarily. This happens when all squares are the target color except the one you are standing on, which is one hop away. There are a few things that you can do to fix it. What I like to do is massage that final square up to the very top of the pyramid. This is generally a safe tile aside from Coily and, in rare cases, Ugg and Wrong Way. If Coily isn’t an eminent threat, wait here for Sam or Slick to show up. When he does, immediately land on his square before he gets away. His landing shuffles the corner enough so that you can finish it. You can also use a disk to flip the top tile and fix it, but this has to be one of the disks in an odd-numbered row for it to work. Finally, if you can work the final square to one of the tiles adjacent to the topmost tile, simply jump off the board. This method costs you a life, so keep that in mind. Q*bert respawns on the top tile but doesn’t shuffle it, so then you can hop directly to the last square and clear the board.

Even in the final levels, the same tricks apply.

There’s one last tidbit I have on NES Q*bert. After you beat the game and view the ending sequence, you start all over at Level 1. Q*bert gets even harder during the second loop, if you can believe that. The speed overall is increased, and if I’m not mistaken, the speed can fluctuate mid-level. If that’s not true, it sure seemed that way while I was playing. That adds a little extra unpredictability to a game that does not need to be any more complicated. Considering this is a Konami game, many of their games that repeat have three distinct difficulty loops. It would not surprise me if Q*bert also does this, although good luck finding out. I captured video of my winning run, and when it looped I decided to play it through to the end, reaching 5-1 on the second loop before biting the dust. I’m really happy I have video proof of this achievement to share.

I’m going to address the difficulty here, because I know I’m going to be asked about it. Q*bert is the second game I’ve given a 10/10 rating. Out of the entire NES licensed set, I expect to hand this out to around 20 games. Q*bert is deserving of the 10/10, no doubt in my mind. This should be reserved for the cream of the crop, the ones that take an extraordinary amount of effort to beat. The question I’m sure I’ll be asked is “How does Q*bert compare to Ikari Warriors?” That answer is crystal clear. Ikari Warriors is much, much harder than Q*bert. Within the timeframe it took me to beat Q*bert, I had not yet beat the first level in Ikari Warriors. I think it’s okay to have two games far apart in difficulty within this space, and I don’t want to get into half-ratings or anything like that. What I will do is rank the 10/10’s relative to each other as I beat new ones. This will be a glacially slow list to compile, but I think this is something people want to know. Maybe it will be worth the wait.

Q*bert is a game that, despite its rage-inducing difficulty, I had a good time with. Action games with puzzle elements are right up my alley. Now this is not a flashy game. The visuals are basic, but colorful aside from the plain black background. The soundtrack is almost non-existent. The developers opted for having sound effects as the main audio driver instead, but it is pretty helpful to have audio cues for enemies when your eyes are busy keeping Q*bert alive elsewhere. Considering this is based on an early arcade title, this is all to be expected. The controls are great, both responsive and accurate, within the limitation of Q*bert’s deliberately designed movement, at least. Q*bert is a well-designed game and the NES version hits all the right notes. It’s a fun game to pick up and play, and if that’s all you want out of it, you will have some fun. Beating it, however, is grueling and unforgiving. That will have you swearing more than Q*bert does.

#73 – Q*bert

 
APR
17
2018
0

#72 – Chubby Cherub

An early third-party NES game featuring a fat angel? Why not?

Nice melody here!

To Beat: Finish Stage 12
Played: 1/21/18 – 1/30/18
Difficulty: 8/10
My Difficulty: 8/10
Video: Chubby Cherub Longplay

I know this is just me, but when people refer to an NES game as a bad game, it piques my curiosity. It’s tough to be objective about this sort of thing. I would guess most gamers out there don’t care about the NES and that most games on the console to them are bad aside from a few well known titles. Think Super Mario or Mega Man. I’m far on the other end of the spectrum where I believe most NES games are good and worth looking at, with only a small handful of games that I don’t enjoy. Chubby Cherub has the reputation of a bad game from my view of things, and look, I totally get it. I’m not going to go to bat for Chubby Cherub and defend it as some misunderstood masterpiece, far from it. What I will try to outline here is both some context and gameplay ideas that are at least interesting.

The history of this game begins with Obake no Q-taro, a defunct Japanese manga written by Fujiko Fujio. Originally running from 1964-1973, it features an obake named Q-taro who likes to fly around and cause mischief. An obake is like a ghost in Japanese culture. I’m not well versed in all of this, but I think this is enough to carry the idea. There were three separate anime series all roughly two years in length beginning in 1965 with the first series and ending in 1987 with the last. There was also a full-length anime film in 1986, and a much shorter film the following year. Unless there is some future reboot in store, that’s the last the world has seen of Q-taro.

Obake no Q Tarou: Wanwan Panic is the Famicom game based on the manga. The game was developed by TOSE and published by Bandai. It was released in Japan in December 1985. The NES version of the game was renamed to Chubby Cherub, also published by Bandai in October 1986. Gameplay is identical between the two versions, but the localized version replaced Q-taro with a flying angel.

A weird choice for a protagonist.

This is a good time to talk about the difference between 3-screw and 5-screw NES carts. Early cartridges were held together by five screws, one in each corner and one in the middle. These are small, flathead screws so you can take the game apart easily if you really want to. Sometime in 1987, Nintendo redesigned the cartridge shells to have interlocking tabs on the top of each cartridge beside the end label, removing the need for two of the corner screws. Some early 3-screw carts still have flathead screws before they were replaced with the hexagonal security screws used in Nintendo cartridges for many years. The reason I bring this up now is that Chubby Cherub is one of earliest NES games so it is a 5-screw cart. In fact, Chubby Cherub was not reprinted after the switch to 3-screw cartridges so it is only available as a 5-screw cart. There are only a few NES games like this.

Chubby Cherub is a side-scrolling action game. Our hero is but a simple angel who just wants to eat delicious food and help his friends. Alas, this cruel, evil world stands in the way of helping his friends. They are trapped in buildings or held hostage by a burglar and only Chubby Cherub can save them. To get to them, simply work your way from left to right to reach the end of each level while avoiding all kinds of dangers like smoke, birds, and barking dogs. You must complete all twelve levels to beat Chubby Cherub.

The controls take a little getting used to. Walking is easy enough. Just press Left or Right to move. You can tell right away that this is an early NES game because the B button is used for jumping. Yuck. Jumps are loopy and slow, and he always jumps the same height. You have full horizontal control while jumping. However, if either you walk off a ledge or are positioned inside a floor tile at the apex of your jump, you will be locked into place horizontally as you slowly fall to solid ground. Hold Down and press B when standing to fall in this same manner through high walkways. If you are holding B at the top of your jump, you begin flying in place. Now you can move in all eight directions. While flying you can travel freely through everything except completely solid blocks, and you move faster to boot. However, you can’t fly forever so you need to keep that in mind. The A button fires what the game manual calls the Gau-Gau cannon. I have no idea what that is supposed to be, but it looks to me like a heart-shaped vomit attack. You have to collect ammo before you can shoot and it is only effective against a few enemy types.

This is way too mischievous.

There is a lot of information on the status bar at the top of the screen. On the left side, you see your score at the top and hearts underneath it which denote your extra lives. In the middle is your power meter followed by how much Gau you have and the current stage number. On the right side is the level timer and the condition for earning bonus points.

The most important facet of Chubby Cherub is managing your power meter. It decreases as you play, acting as its own timer. Run out of power and you lose a life. You can restore a portion of the power meter by eating food that is strewn throughout the stages. This mechanic is better known from Adventure Island. Flying uses up power more quickly, and you have to maintain a certain amount of power to remain airborne. Now flying is the preferred way to get around in Chubby Cherub, so the pacing in the game is dictated by how often you can find food in order to keep flying. It turns out you can get through a lot of the game just by flying.

Dogs are the most dangerous enemy in the game. Q-taro in the manga is deathly afraid of dogs, so they pose the largest threat in Chubby Cherub by design. There are two different sizes of dogs and their movement patterns and aggression vary mostly by color. Recognizing these patterns and learning by experience are crucial to survival. The worst kind of dogs are the ones that bark. Dog barks are represented as icons with letters inside of them. Small dogs launch B’s for “bark” while big bulldogs fire two W’s for “wan-wan,” the Japanese onomatopoeia for dog barking. It’s a clever touch, and I’m proud to be able to use the word onomatopoeia in this blog in the proper context! Anyway, dog barks are aimed shots that move faster than you, and they are deadly to the touch. Certain groupings of dogs are among the most difficult parts of the game.

Why does the food float so high?

There are some items to help you in Chubby Cherub. The aforementioned food is all over the place, refilling your power meter and giving you between 10 and 50 points per piece depending on type. Lollipops are a much larger food item that gives you 100 points and four shots of the Gau-Gau cannon. You can only hold up to 9 Gau in reserve, but this is your one weapon to fight back against the dogs since they are the only enemy hurt by Gau. Sometimes collecting a food item generates a P icon above it. Collecting it not only gives you 200 points, but it also restores power and makes you invincible for several seconds. The angel blinks during this period and you can move through any enemy freely with one catch. Getting hit by a dog bark causes it to bounce off you harmlessly but you lose any remaining invincibility. A good strategy is to use your invincibility frames to get right up in a dog’s face to hit it with Gau.

There are other enemies present that are not affected by Gau. There are crows, birds, smoke, and balloons that defeat you with a simple touch. Balloons are the weirdest enemy concept I’ve seen in a while. What did Chubby Cherub ever do to them? There are also Chow Chow dogs but they aren’t affected by Gau and don’t bark at you. I don’t get that either! These enemies have their own patterns to deal with, some with multiple patterns. It’s a dangerous world out there.

All levels share a similar structure. About halfway through each stage you will encounter a rectangular stop sign. This freezes the scrolling and the objective is to collect all food on screen to make a special item appear on the left. Collect that item to get 500 points and then you can continue through the rest of the stage. Your friend needs to be rescued at the end of the level, and this is accomplished in one of two ways. Most stages end with a building or two and a large amount of food in front. Each piece of food opens the window above it when you grab it. Your friend is randomly hidden behind one of these windows and finding him or her ends the stage. But beware, there are also two aggressive dogs hidden behind these windows too. The manual gives good advice not to collect the food while moving upward because if there’s a dog hidden there you will run into it right away and lose a life. Every third stage ends in a simple boss fight with a burglar. He walks in from the right to the center of the screen and begins tossing bombs all over the place. The burglar drops a dog bone on his walk to the middle of the screen, and you need to grab this and throw it at the burglar with A. This causes dogs to appear from the left that scare the burglar away, saving your friend.

People should not be allowed to have all these bombs.

The boss battle with the burglar also indicates a change to the bonus point incentive. Every group of three levels out of the twelve has a unique way to earn bonus points at the end of the level. In stages 1-3, you earn 40 points for every piece of food eaten. You get a bonus for time remaining in stages 4-6. Levels 7-9 give you 200 points for each dog you knock out with Gau. Stages 10-12 give you 200 points for every hidden jewel you find, which is a special item unique to those stages. I think it’s a nice way to switch up your secondary objective.

The stage timer is also worth mentioning. Unlike a standard counter, it represents time on a clock. Stages start at 8:00am and you lose a life if you don’t finish the level by 8:00pm. The minutes tick by quickly, which is unrealistic given how slow you move in the game. The one neat thing about the clock is that every hour the background color palette changes a little bit to help indicate the passing of time. It’s something you might not recognize right away while playing. I think it’s clever given the age of this game.

There are some special areas in the game. Later levels have factories in them with smoke stacks. The puffs of smoke that rise out of these are deadly. Sometimes a ring of smoke will come out instead of a puff. Be very careful because this is still deadly if you touch the top of it, but if you touch the bottom of it instead, it will carry you with it up into heaven. This area is littered with cakes that give you a whopping 500 points each as well as crows that try to knock you down. This is typically a single screen bonus area, but every now and then heaven scrolls to the right. There are more cakes and you can really rack up points here, but even better is that you can bypass much or all of the stage below if you can keep going. It’s not clear to me what triggers the scrolling heaven, but it’s super useful. I have read you can get it to scroll if you collect the cakes from left to right, but that didn’t seem to work when I tried it. I think the trick is that you have to go into heaven before 9:00am, but I couldn’t trigger it enough times to narrow it down.

Up, up, and away!

On the flip side, there is also a hell area. Falling down a pit sends you to hell instead of dying like you would in most games, but I’m not exactly sure you’re better off this way. Hell is a single screen level completely shrouded in darkness. You begin on the left side stripped of both your power meter and any Gau you brought in. There are two chow chows above you, a regular dog on the bottom, and a bulldog blocking the white exit door on the upper right. There’s a lollipop in the middle to give you some Gau. You can’t fly here so you have to jump on invisible blocks in order to knock out the bulldog and reach the exit. Of course, the bulldog barks at you when you get close, but at least the small dog keeps quiet. Dying in hell simply resets the room with no loss of life, so you are forced to keep trying until you can make it out of there. Or reset the console, I guess. It’s a tough room but the layout is consistent. Eventually the enemies will cooperate and let you through. If you play well enough, you shouldn’t ever see hell anyway.

Chubby Cherub is a tough game. You begin the game with three lives and there are no continues. You earn an extra life at 10,000 points and again for every 20,000 points scored after that. The twelve stages are pretty short but they are full of enemies that kill you in one hit. You earn points at a slow rate and therefore earn lives slowly too. This is a game that takes a lot of practice and a fair amount of luck to beat.

This was my first time playing Chubby Cherub. I collect Famicom a little bit and I had a cart of Obake no Q Tarou: Wanwan Panic before I recently sold it. The Famicom title is very cheap, even for international buyers, but Chubby Cherub is much more expensive. Today it sells for around $70 cart only, and you have to spend a few hundred dollars if you want a complete in box copy. I bought my cart on eBay in 2014 for $30 plus shipping, which was a little under market value then. It’s costly because it was a low print run released before the NES really exploded in popularity.

Seriously, how are you supposed to get through?

It felt like I really struggled to beat this game when it only took me a little over a week to get it done. There’s a high level of difficulty right off the bat. On the very first screen, there is a highly active dog roaming around and you move so slow that death is likely for the first time player. Barking dogs are challenging to avoid anyway let alone the first few times you encounter them. Even with flying all the time, the first few levels are still hard. I found the difficulty decreased in the middle stages before ramping back up again at the end. Heaven shows up in those middle stages which is a great way to get some extra lives. At least then you get more of a chance at the later levels. It might have taken me 20-30 tries to beat the game. My longplay video was the first time I beat it. I had a few unrecorded runs that reached the final level, including one where I lost my last life to the burglar at the end. Sadly, there is no true ending to the game. It continues on to Stage 13, but the later levels are identical to the earlier ones. Chubby Cherub will loop for as long as you can keep going, but clearing only one loop is enough to consider it finished.

Chubby Cherub has a flow to it that I can appreciate. This is getting into spoiler territory here, both this and the next paragraph, so even if you don’t care (and why would you?) you’ve been warned. The game is broken up nicely into the groups of three stages. The first three stages are the introductory levels where you learn all about the dogs and basics of flying and all that. You may even get your first taste of hell in Stage 3. The next three levels give you no Gau at all, but also there are no barking dogs to deal with either. This was the breather I really needed and I beat all these levels on my first try. Stages 7-9 is like the advanced version of Stages 1-3. There are plenty of dogs here to deal with, including several in a row that bark. There are fewer food items here so you also need to cope with not flying in some spots. It’s a big jump in difficulty and Stage 8 was a hurdle for a few days. The designers had one last nasty trick for the final set of stages. I mentioned in the bonus section that these levels have jewels that give you bonus points. The jewels are hidden and you need to touch invisible spots to make them appear. Then you collect the jewels to make the food appear. This is the only way to get food in these levels, and what’s worse is that some jewels don’t reveal any food at all. At least the jewels and their triggers are always in the same places. It’s just mean because you are used to flying all over and now you have to switch gears and play it more like a platformer with worse movement just to survive.

Pray you never have to experience this screen.

I developed a few techniques in order to beat the game. One annoying thing I noticed right away is that any dog knocked out with Gau will fall off the screen but you can still get hurt by them in this state. At first I thought this was a programming bug, but it turns out this has a big benefit. Defeated dogs technically stay active and you can get hit them again with Gau for 1000 extra points. If I lined up with the bottom of the dog, I could sometimes hit it twice while falling. Now you do have to be careful not to use up all your Gau for when you need it to survive, but using excess Gau can net you a lot of points and extra lives that are a big help. I also figured out a consistent way of taking out barking dogs. Their AI is set up so that they won’t bark at you if you are directly above or below them. The trick is that you come at them from above and line up so that you hit the top of the dog with Gau. If you come at them from below, this trick does not work. You can also bait a moving, barking dog above you to fall off a ledge so that you can take them out quickly before they land and bark directly into your face. The last bit of advice is that you should always quick kill the burglar. As soon as he enters the screen, you should be flying already. Swoop around behind him and pick up the bone, and then let it loose as soon as he stops walking. You will still have to dodge some bombs, but this fight is a lot worse if you play it safe.

Chubby Cherub is an aged platformer that doesn’t hold up well today. It’s slow paced, for one. The controls are not intuitive. The graphics are basic and don’t vary much over the course of the game, and you need experience to tell which parts are solid blocks and which ones are passthrough ledges. You are at a major disadvantage against the most prevalent enemy type in the game. That hell area is just plain evil. Now it’s not all terrible. There are only a few simple songs in the game, but I must admit, they are catchier than they should be. I will give Chubby Cherub credit for introducing some hidden complexity to some of its systems that I wasn’t expecting, including the special ways to boost your score. Both discovering and exploiting these morsels of assistance was rewarding and breathed some life into this otherwise lackluster title. I’m not saying you should play this game, but even primitive games by NES standards can have some good ideas worth illuminating.

#72 – Chubby Cherub

 
APR
11
2018
0

#71 – Prince of Persia

This classic PC game does okay on the NES hardware.

Both the look and music are almost calming.

To Beat: Reach the ending
Played: 1/8/18 – 1/19/18
Difficulty: 7/10
My Difficulty: 7/10
Video: Prince of Persia Longplay

When you play as many video games as I do, there are bound to be some games that seem like a perfect fit but you just never seem to get around to them. One such game is Prince of Persia: The Sands of Time, or any of the other games in that series. I get it. I really like 3D platformers, action games, and charting my way through these kinds of spaces. I’m sure I would love it, but at the same time I feel that ship has sailed. I haven’t played any of the Prince of Persia games until now. At least I can right one of my gaming wrongs. Prince of Persia is a carefully crafted experience that plays well enough on the NES.

Prince of Persia was created and developed by Jordan Mechner. To fully understand and appreciate the history, let’s back up a bit and talk about his first game. Karateka is an action and fighting game originally released for the Apple II in 1984. You play an unnamed hero and want to rescue a princess from a mountain fortress. Enemy encounters play out like an early one-on-one fighting game and you punch, kick, and dodge your way to victory. It is notable for its animation by rotoscoping, which is a technique where drawing is done over top of video. In this case, Mechner used footage of his karate instructor to draw the characters in Karateka. It was a huge success and one of the best-selling games on the Apple II. It was also widely ported to many computers and consoles, including the Famicom version from 1985.

Prince of Persia was Mechner’s next game, released on the Apple II in 1989. It also contains rotoscoped animations and hand-to-hand combat, but is a much more expansive game than Karateka. Despite critical acclaim, it did not sell well at the start. This is likely because the Apple II was not a viable platform for game development anymore. Sales really took off after its various ports. The original version was both published and developed by Broderbund. The NES version was released in November 1992, published by Virgin Games and developed by Motivetime Ltd.

The game looks even better in motion.

The game went on to spawn sequels and a new series. Prince of Persia 2: The Shadow and the Flame was released for MS-DOS in 1993. It was also a big success. The next game, Prince of Persia 3D in 1999, was not. The Prince of Persia franchise was soon sold to Ubisoft, who went on to develop many games in a new series and several spinoffs. The aforementioned Prince of Persia: The Sands of Time was released in 2003 for PS2, Gamecube, Xbox, and Windows. It brought the series firmly back into the limelight. Sands of Time was quickly followed by Warrior Within and The Two Thrones over the next two years, and a fourth game The Forgotten Sands came out in 2010. There was also the film Prince of Persia: The Sands of Time released the same year.

The story for Prince of Persia takes place in a faraway land. While the Sultan is away fighting in war, his Grand Vizier Jaffar has taken power. Meanwhile, the Sultan’s daughter has fallen in love with an adventurer. Jaffar has this adventurer arrested and thrown into prison, while giving the Sultan’s daughter an ultimatum. She can marry Jaffar or be killed, and she is given an hour to decide her fate. You play the role of the adventurer as you seek to recover your sword and battle your way out of the dungeons within the hour to save the Sultan’s daughter.

Prince of Persia is a side-scrolling action-adventure game. Each level of the dungeon is its own maze with possible branching paths. The objective is to find the staircase to the next level which is hidden behind a locked door. Some of the floor tiles contain switches that open or close gates within the dungeon, and one of these switches opens the exit stairs. Find the switch and reach the exit while avoiding traps and enemies. There are twelve levels in the dungeon and when you reach the Sultan’s daughter you win the game.

Floor switches aren’t always this obvious.

The controls are a bit complex for a side-scrolling game. Use the D-Pad to walk left and right. You can tap one of those directions to turn yourself around and face the other way, and you can hold Left or Right to run in that direction. Press the A button to jump. You can do a running jump while you are moving. If you are standing still and press A, you will do a large leap forward a couple of tiles. The B button is used to tiptoe. While standing still, press B and he will take a small step forward. You can use the tiptoe method to walk right up to the edge of the platform. Position yourself underneath the edge of a ledge and hold Up to jump, grab onto the ledge, and pull yourself up. You can also press Up to jump in place. If you are standing beneath a breakable tile, you can bonk it from underneath which causes it to fall and gives you a new path to climb. You can descend from the edge of a ledge. Tiptoe up to the edge of a ledge, turn around, and hold Down to lower yourself gently. Hold either the A or B button to dangle off the ledge if there’s no floor underneath. If you want to jump across a large pit, hold the A or B button after leaping to grab the far ledge if you come up short. You can cross gaps three tiles wide by tiptoeing to the edge, jumping with A, holding either A or B to grab the ledge, and pulling yourself up. Enter the exit door at the end of each level by pressing Up. You can also press Start to pause the game. As you can see there is nuance to the controls that give you a lot of versatility when you learn it.

Your health is represented by red triangles in the lower left corner. You start out with three health points. Most traps in the game kill you outright. There are trap tiles where spikes pop out if you step on them and that instantly kills you. Spiked gates open and close and you die if you are caught in between when it closes. Falling down three or more tiles is also instant death. Falling two tiles knocks off one health point. Some floor tiles crumble away when you walk over them, which often leads to plunging to your death.

There are potions within the dungeons that can have several different effects. Most potions will restore one health point. There are some of these potions that look the same but reduce your health by one instead. Another potion, one that looks slightly different from the health potion, fills your health entirely and increases your maximum health by one. If you can survive to the end of the level, the max health carries over to the next stage. One quirky thing about the health is that you can get up to six total health points, but then it always goes back to five if you die or finish the level. There is one other potion in a later stage that has a level-specific effect.

Ah yes, a sword! This should help!

Another feature of the game is the sword combat. You begin the game without a sword and have to find it within the first stage. When you enter a screen with an enemy, his health is shown with purple triangles in the lower right of the screen. Approach the enemy to automatically draw your sword. You can inch either left or right with the D-Pad. The A button lets you strike with your sword, and the B button lets you parry and deflect an enemy strike. The manual says you can also parry with Up and put your sword away with Down, but I don’t think they work in this port. Each hit reduces one health point for either side. I found swordplay to be awfully tricky and inconsistent. Sometimes I could rally several consecutive hits, and other times every move I made got countered.

Besides the control scheme, the other major gimmick to Prince of Persia is the timer. You are indeed given an hour to finish the game. The bottom of the screen will occasionally display the number of minutes remaining. You can press Select to force the time to appear and see how well you are doing. Dying sends you back to the start of the current level and you don’t get any of that time back. Once time has expired you have to start all over again.

Prince of Persia has a password system that helps alleviate the time constraint. Each level gives you an eight-digit password once completed. This saves which level you are on and the total amount of time remaining. You can use this to help you work through the game. First, take your time and figure out how to solve the level. Then, start over with your last password and try to finish it on the first try. That way you will have more time left for the later stages. I gotta say, I think the password screen in this game is clever. You enter in the password with the D-Pad and press Start when finished. Your guy will then drink a potion on the ground in front of him. If you get the password right he goes ahead through the door to the proper level. Type in the wrong password and he immediately dies from the potion.

Sword combat is randomly tricky.

As I mentioned above, this was my first time playing Prince of Persia. The NES port is a later release and not common. It runs close to $20 for a loose cart but it is readily available online. At one point I had two copies of the game. One I remember buying in a small lot where The Krion Conquest was the highlight, but I don’t recall where I got the other one. My double sold quickly when I listed it for sale.

I took a different approach than what I outlined above for beating the game because I knew I wanted to try and beat the whole game in one shot. I approached each level casually with no real regard to the overall timer, recording my passwords each time and noting how much time was remaining. Once I ran the timer out, I used the latest password to learn that level before starting over entirely. On each subsequent playthrough I updated my passwords if I had more time remaining. This way I could make overall progress, improve my passwords, and keep sharp on already completed levels all at once. I think it was a good strategy for my overall goal. I started over five or six times before beating the game the first time on my final minute. My recorded longplay went really poorly but I managed to beat the game just barely.

The good thing about passwords is that I also used them to practice certain levels I would have trouble with. If a level involved multiple swordfights, it was probably one that gave me a lot of trouble. I was just too inconsistent. There were a few difficult jumps that necessitated a running start and these gave me the most trouble. The last jump in the game was by far the hardest. I finally figured it out by standing in a very specific position before taking the running start and jumping at the last possible moment. I was pulling my hair out trying to make that jump, but I did it.

The graphics don’t vary much further from this.

I noticed the controls and movement of Prince of Persia are in direct conflict with the goal at hand. This game is all about battling the timer. To minimize the amount of time spent, you have to move as quickly as possible. However, moving too quickly is sure to get you killed. Some ledges end immediately when moving to the next screen, which seems like a major design issue but might be a screen-size issue only appearing in the NES port. This makes running quite dangerous unless you know exactly what is on the next screen. Once you know where you are going, there is more than enough time to beat the game. You just have to learn to be fast while also making precise movements. There are some buttons that activate timed gates where the timing is very tight, and you have to map out exactly where to stand, when to run, when to stop, when to jump, how to dodge traps or unwanted switches, and so on. This war with the timer is always present, but for some reason it just works. By the end of the game you know exactly how to move and how to put yourself in position to clear just about any trap or jump. These difficult sequences are very rewarding to clear and most of the time there is a consistent strategy by using all the types of movement and climbing available to you.

Two things stand out to me that really annoyed me in this version of Prince of Persia. The first is that there is a problem with the font and the digits 6 and 8. The best I could tell, there are only two pixels different between the two numbers. This is a problem because the passwords are all numbers and it’s easy to cross them up if you aren’t paying close attention. I didn’t make any mistakes writing passwords down but I can see where it might be a problem. The other issue I had with the game is inconsistent ledge grabbing. There are at least a couple of places in the game I could recall where you make a jump and your foot just catches the ledge enough so that you stumble off it but somehow bypass the ledge grab. Sometimes you just miss altogether for no apparent reason. I can’t prove it but I suspect that this is an issue with just the NES port of the game. Free running seems like it puts you in pixel positions where edge cases don’t give you expected results. If you do careful steps and jumps you can usually put yourself in position for more consistent success. It’s a minor quibble that occasionally becomes a major problem when time is most precious and setbacks are most costly.

Prince of Persia is a beautifully rendered, timeless game in its own right. The NES port is reduced in quality but it still fun to play. The controls work well for the most part. The music is repetitive but is okay and doesn’t really get in the way. The graphics look good though there are only two kinds of tilesets and two enemy types used throughout the game. Thankfully the animation is excellent because the graphical variety just isn’t there. While I haven’t played any other versions of the game, I do know that both the in-game story and level layouts were compromised in the conversion to the NES. Some screen transitions are poor enough that you will easily die if you don’t know or remember what’s ahead. This is not the ideal way to play Prince of Persia. But if the NES version is all you’ve got, it’s still worth playing.

#71 – Prince of Persia

 
APR
02
2018
1

#70 – Puss ‘N Boots: Pero’s Great Adventure

You won’t need any cat-like reflexes to get through Puss ‘N Boots.

This static title screen’s theme music has an ending.

To Beat: Reach the ending
Played: 1/7/18
Difficulty: 2/10
My Difficulty: 2/10
Video: Puss ‘N Boots Longplay

Most people familiar with NES games know of the concept “Nintendo Hard.” Things like limited continues, unfair enemy patterns, fragile heroes, and little to no checkpoints are just some of the features of games that have this reputation. In this case, Puss ‘N Boots: Pero’s Great Adventure has virtually none of these issues. That sounds great, but what is left is a game that is super short and way too easy. I’ll spend far more time explaining the game than it took me to play it. Maybe Puss ‘N Boots is the kind of romp that you might be looking for in an NES game, so read on to see if it’s something you might want to try on for size.

You have to go way back to find the roots of this game’s character. Puss in Boots is an old European fairy tale about a cat who tricks others in order to gain power and fame. The oldest known telling of the story was from the Italian author Giovanni Francesco Straparola around the year 1550. The most famous version of this story was later written by French author Charles Perrault in 1697 within a collection of eight fairy tales. There were many adaptations and retellings of this fairy tale, and the one of importance here is the 1969 Japanese animated film The Wonderful World of Puss ‘n Boots by Toei Animation. In this version, the cat was named Pero after Charles Perrault and he would become the mascot for Toei Animation.

Starting off within a ghost town.

There are two games based on The Wonderful World of Puss ‘N Boots. The first is the Famicom exclusive Nagagutsu o Haita Neko: Sekai Isshu 80 Nichi Dai Boken. It was released in November 1986, published by Toei Animation and developed by Shouei System. The developer is mostly known for Fist of the North Star games in addition to Puss ‘N Boots. The NES received the sequel Puss ‘N Boots: Pero’s Great Adventure in June 1990. The games are both loosely based on Jules Verne’s Around the World in Eighty Days and are quite similar in style and structure. The NES game was also developed by Shouei System but published by Electro Brain.

The story is a little bit more interesting than your typical NES game. You play the role of Pero who was ordered by Count Gruemon to get rid of a mouse in his castle. Pero befriended the mouse and helped him escape. This really upset Count Gruemon, so he enlisted the help of Dr. Gari-gari to send Pero in a time machine to the past. To make matters worse, Pero is being pursued by hitmen from the Cat Kingdom because Pero violated Cat Kingdom law by helping a mouse. Pero must travel through seven different areas all over the world in order to track down and defeat Count Gruemon and Dr. Gari-gari and take their time machine to get back home. Do this and you beat the game.

Puss ‘N Boots is a side-scrolling platformer with a typical control scheme. You use the D-Pad to walk around left and right. Press the A button to jump and press B to fire your weapon. The Start button pauses the game. While paused, you can press Left or Right to select one of Pero’s three weapons. Then press B to equip the weapon and unpause the game. Pero can squat by holding Down. If you are standing on top of a ledge, you can squat and press B to fall through the platform. I’m not sure if this even works since I didn’t need to try it.

Pero travels by steamboat in mostly calm waters.

All of Pero’s weapons have unlimited use and you can pick whichever one you want at any time. The default pistol fires a straight bullet ahead. The bomb is thrown in more of an arc. It goes upward a little bit and then falls quickly, exploding when it hits the ground. It’s useful for lower targets. The boomerang is a pretty large weapon that is thrown in a huge loop spanning most of the length and height of the screen. You can have two pistol shots on-screen at once, but only a single bomb or boomerang.

There are a bunch of vehicles you get to ride throughout the game, all with slightly different controls and capabilities. The ship floats on top of the water. All you can do it in is fire missiles straight ahead or move left and right. The underwater submarine can move in all directions and you can also raise it by holding the A button. The B button fires torpedoes that can destroy pieces of land that get in your way. The car has the same missiles as the ship, but you can jump and move similar to how Pero moves on foot. The airplane has the same movement as the submarine but is armed with a machine gun that functions similarly to the missiles, and it only faces to the right so you can’t shoot behind you. The hot air balloon is more like the submarine but uses missiles like the ship and the car.

There are some items you can find along the way. The boot makes Pero invincible briefly and awards 500 points. The hamburger is also worth 500 points and restores some of Pero’s health. The money bag is just for additional points, but you can earn either 1000 or 3000 points each. The Pero face powerup is an extra life. You can see Pero’s remaining lives, health, score, high score, and weapon selection at the bottom of the screen during play.

Just driving through the desert, no big deal.

Puss ‘N Boots has quite the variety of enemies. For the most part, the enemies are suitable for the levels they are found in. There are pirate ships on top of the water, piranhas in the water, and birds and other balloons while airborne. There are weird enemies too, such as flying horseshoes and UFO’s. Perhaps my favorite are the giant lightning bolts that you can blow up with your firepower. Puss ‘N Boots also features a few boss battles at the end of some stages. These are neat but don’t really make much sense. After the ocean stage, for instance, the boss is this giant mechanical frog. You have to hit him in the mouth while he spews out smaller frogs. Bosses have a health bar displayed below yours during these fights.

Pero begins his journey with two extra lives. I don’t think you can earn more lives with your score, just by grabbing 1ups. If you lose all your lives you may continue. There is a Continue option on the title screen that starts you off with three more lives. Either using a continue or resuming after death puts you back at the most recent checkpoint. Some levels don’t have any checkpoints and other stages have more than one part to them with a checkpoint at the start of each section. It’s a generous system. The catch is that you can only continue three times before starting over from scratch.

This was my first time playing Puss ‘N Boots. It’s not the most common game out there, but it is inexpensive. I’m pretty sure I got my copy in one of those eBay bulk lots I bought often while actively collecting. It wasn’t until after that that I learned that it is regarded as one of the easiest NES games. It did seem pretty simple when I tested my cart out but I only played a couple of minutes.

Puss ‘N Boots is also part shooter.

The game’s reputation did not disappoint. I was able to beat Puss ‘N Boots in 20 minutes on my first try. It’s such a simple game and you don’t even have to take your time in the levels to have a decent shot at getting through successfully, at least until the end of the game. Most of the experience is move to the right and defeat any enemies that approach you. The final area is a door maze that also has some sections that scroll upward. There are two bosses in this stage. The first one isn’t too bad, but the final boss is surprisingly tricky and easily the most difficult part of the game. It’s easy to have your health sucked away fast. I used up a bunch of lives here but eventually I got through. I would have given the game a 1/10 difficulty rating up until the final boss.

There is nothing notable about Puss ‘N Boots on the NES. It doesn’t look very good for a 1990 NES game. I don’t recall anything about the music. They tried to introduce some variety with the different vehicles and weapons, but everything feels roughly the same. The physics feel very unpolished. Jumping and throwing projectiles is rigid, and you move forward faster by jumping all the time. Levels are straightforward and end before they get going. It’s the brevity of it all that makes Puss ‘N Boots completely forgettable. If you are in the mood for a short, easy game or get a thrill out of beating something new, then this is definitely the game for you. Games like this are very welcome for my kind of long-term project but aren’t all that interesting otherwise. You aren’t missing anything special if you take a pass on Puss ‘N Boots.

#70 – Puss ‘N Boots: Pero’s Great Adventure

#70 – Puss ‘N Boots: Pero’s Great Adventure

 
MAR
26
2018
0

#69 – Desert Commander

A nice introduction to turn-based strategy on the NES.

Not pictured is the tank that blew up.

To Beat: Win any scenario
To Complete: Win all scenarios
What I Did: Completed the game
Played: 12/30/17 – 1/4/18
Difficulty: 2/10
My Difficulty: 5/10
Video: Desert Commander Final Scenario

Hot off the heels of the Power Pad running game Super Team Games, I completely switched gears and played a relaxing, low-key NES strategy game. Desert Commander and other similar strategy titles were once relegated to the end of my game list. Here I thought it was fitting to go from a physical game straight into a more cerebral experience, and Desert Commander slots in perfectly. I wrote off Desert Commander as not for me almost instantly. I do like puzzle games and the occasional RPG, but strategy games are just different enough from those to dissuade me from playing. Once I gave it a chance, I actually had fun. Without anything else to compare it to, I believe Desert Commander was the right choice for my first NES strategy title.

Desert Commander was first released in Japan under the name Sensha Senryaku: Sabaku no Kitsune. There it was released in late April 1988, both published and developed by Kemco. The setting for the game is World War II and is based on the North African Campaign. In the Famicom version, you can choose either the Axis or Allied side, but that was removed in the US release in favor of a more generic setting. The NES release of Desert Commander was in June 1989, also by Kemco.

Desert Commander is a turn-based strategy game for one or two players. Each side gets a specific amount of units and an initial setup on one of several maps. On your turn, you may assign up to one command for each available unit. For instance, you may move units to a different space on the map or engage a nearby enemy unit in combat. When you command each unit or decide to end your turn, your opponent may do the same. Each player has a special unit called Headquarters, and if you can defeat the enemy headquarters you win the battle. There are five scenarios to choose from and winning any one of them is good enough to get the ending.

It’s a hot day at the battlefield.

The controls are straightforward. Use the D-pad to move a cursor around the screen when it is your turn in the battle. Move the cursor toward any edge of the screen to scroll in the desired direction. Press A when the cursor is above one of your units to bring up a unit status display and menu. Use the D-pad to choose an item from the menu, press A to make your selection, or press B to go back. You cannot view the enemy units, only yours. Press the B button to automatically move the cursor on top of the next available unit. This is especially handy if you have many units spread out on the map. The Select button brings up a screen showing how many units of each kind both you and the enemy still have available on the battlefield. The Start button brings up a map of the entire battlefield.

Before starting the game, each side may determine which units they want to deploy for the battle. The screen shows all possible units and how many of them are allocated to each player. Next to the number of units are plus and minus buttons. Move the cursor to a button and press A to add or subtract to the number of units. Each battle has a maximum number of units already preconfigured, so if you want to add units of one type, you must first remove units of another type. For example, if you want more fighter jets, you might decide to reduce the number of tanks. You can make as many of these swaps as you want. The counter at the bottom labeled Units Left shows how many units are unassigned. The second controller modifies the units for the second player, and you can also use this in single player to redistribute the opponent’s side if you want.

There are several different types of units, and they can most easily be grouped together as air units or ground units. The two types of air units are fighters and bombers. The remaining units are ground units: tanks, armored cars, troop transports, infantry, field cannons, anti-aircraft guns, supply trucks, and the headquarters. For the most part, ground units are more effective in combat against ground units, and the same goes for air units. The exceptions are bombers and anti-aircraft guns which are more effective against the opposite types. The different unit types vary by how many spaces they can move per turn and how much ammo they can hold. There is a handy chart in the manual for these figures and you can also pull up this information directly in a game.

You can customize both your army and your opponent’s army.

When you choose a unit, you get both a status display and a small command menu. The status display shows ammo, fuel, the unit number, and the type of terrain it is currently occupying. Ammo dictates how many times you may attack the enemy. Each combat reduces this amount by one and if you run out you can’t deal any damage. Each space you move on the map reduces your fuel by one and every unit begins with one hundred fuel points. The unit number represents both the health of the unit and its attack power. For example, if your unit number is ten, you get to attack ten times on your turn in combat. You lose units when you get attacked, and the unit is destroyed when the unit number goes down to zero. I’ll explain more about terrain shortly.

The command menu has four options: Movement, Attack, Power, and Change. Movement, naturally, lets you move the unit to a new space. For ground units, the terrain determines how far you can move in one turn. It makes sense that you can move better on easier terrain. You can move the furthest on roads, less so in the desert, and the least in the wilds such as mountains or the oasis. You can press B to cancel movement anytime until you move the maximum amount of spaces. If you move a unit adjacent to an enemy unit, your movement stops immediately and the game asks if you want to attack the enemy. Say yes to fight, or say no to end movement. Attack lets you engage in combat with an adjacent enemy. Most units may only attack ones directly next to them, but field cannons and anti-aircraft cannons have a wider radius to attack more distant targets. Choose Power to bring up a box that shows how many spaces you can move on each terrain, the maximum ammo and fuel, and its attack range. The Change option lets you end your turn manually. You will end your turn automatically if you move or attack with all your units.

Combat is really simple and plays out automatically. During the attack phase, a new screen appears showing your unit on the left and the enemy unit on the right. You will see individual attackers on each side corresponding with the unit number. The side initiating combat strikes first, and then the other side counterattacks with the number they have remaining. You need one ammo to either attack or counterattack. Certain units are more effective against other types of units, even within air and ground units. I think it’s difficult to tell exactly which units are best suited for a situation. Combat is like a hidden dice roll and the amount of damage you either deal or receive is luck-based after strengths and weaknesses are considered.

Lots of combat in this game.

There are some spaces on the map that have effects on the battle. Towns replenish ammo and fuel when ground units occupy the space. You see a special screen and animation when someone moves onto the space. In fact, all of these special spaces have their own screen like this. It gets annoying after the first time but you can get out of them quickly. Aircraft can refill fuel and ammo by landing on an air strip. A palm tree is an oasis and it gives occupying ground unit a boost in defense. There is also a wall that provides greater defensive help.

Two units provide additional capabilities. The supply truck replenishes both fuel and ammo for other units when it is placed next to them. You can arrange your units in a way where two or three of them can be filled up at the same time. Curiously, the supply truck cannot refill its own ammo or fuel. The troop transport can load up infantry to greatly increase their range. First, place an infantry unit next to the troop transport to bring up a dialog box asking if you want to load them into the troop transport. Then both units combine into one unit with a different color to indicate they are combined. Later when you move the troop transport, you get the option to unload your infantry and then they can have a turn.

There are five scenarios in single player mode to choose from. Later scenarios increase in difficulty but maybe not in the way you would expect. The AI almost always performs the same way, but they get more units than you do in later scenarios. All things are even in the First Battle scenario, but by the last one the computer has more than double the number of units you get. Speaking of the map, it turns out it is one gigantic map and each scenario focuses on some subset of this global map. You will see some map overlap between scenarios. I know at least once I saw a town on the edge of the map that I couldn’t get to because the game prevents you from utilizing the fringes of the scenario map.

Nice looking scenes, but they show up all the time.

This was my first time playing Desert Commander. I have some vague memories of seeing someone play the game back when it was released. I do think it was somewhat popular back then. I had a couple of people tell me that they used to play a lot of Desert Commander. I did not buy the game myself until I started actively collecting. I got another copy in a lot not that long ago and it came with the manual, so that was nice to have for this playthrough.

I decided that I would complete all scenarios with the default unit deployment. I wasn’t sure if there was some kind of special ending for beating harder scenarios, plus I like playing all the levels a game has to offer anyway. It turns out you get the same ending no matter which scenario you win. You even get a similar ending if you lose. The first scenario was very easy and I won with little difficulty while I barely knew what I was doing. You will get a scoring screen at the end that shows how many turns you took, along with damage and results numbers. I don’t understand what they mean or how they are calculated. I was happy with beating the game no matter how I scored.

I would say for a first time player that the game has a smooth difficulty curve. I coped well with the increase in enemy forces by using better tactics I came up with through the mistakes and experimentation of past attempts. Both the third and fourth missions took two attempts to beat and I just barely lost the initial attempts on those scenarios. The final scenario is quite the challenge and you are severely outnumbered. I got lucky enough to pick off the enemy headquarters before things got really bad for me. I’m glad for that because the scenarios take a long time when each side issues commands to every unit on the battlefield on every turn.

The default armies leave you vastly outnumbered.

I’m no expert at these kinds of games and there may be a better strategy, but these are the techniques I came up with. The computer tends to send a chunk of their force directly at you, leaving some units behind with the headquarters. Some of the ones left behind will join the offensive as others get defeated. Eventually this leaves an opening to engage the headquarters. I put infantry in troop transports and broke that group off separately, moving them near the enemy headquarters so that they could strike as soon as they got a good opening. In the last scenario, I sent a couple extra units with the transports for protection since the enemy may spread out their advance and start attacking this group. I put my headquarters on a wall to give them the greatest defense and surrounded it with my remaining units. I put my cannons in the back because they can attack anything trying to breach my tightly packed wall of defense. I just tried to survive as long as I could to give my small attack group the opportunity to knock out the enemy headquarters.

Desert Commander has a few quirks that I find annoying. I would like there to be a way to cancel your movement once you hit your max, just in case you come up a little short. You can cancel your movement at any time up to that, so why does your max automatically lock you in? Another similar gripe is that you cannot move past another unit without being forced to stop and ask if you want to battle. This one at least makes logical sense since you would not be able to skip past your enemy like that, but it doesn’t make it any less annoying. Enemy turns are also ridiculously slow. You have to wait for their cursor to slowly scroll across the map to each and every unit, and the order the computer chooses units seems awfully inefficient. You also have to sit through each and every combat screen, and there are also the little cutscenes every time a unit gets placed on a special space. The last scenario takes a long time with the high number of computer units.

I’ve knocked Desert Commander a bit, but it’s a pretty good game. I like the music quite a bit. You can change the background music in one of the menus and all four tracks are pretty good. I liked the first one well enough to keep it playing over all scenarios. The graphics are well defined and I really like the Kemco font. A few of the units look similar enough that it does take some time to distinguish them, but that’s a minor issue. I bet this game is really fun against another human player where you can’t exploit the AI and need to form different strategies. Single player is fun enough, but the way they decided to increase the difficulty is cheap. There aren’t too many NES strategy games, but Desert Commander is a good example of how to do one on the console. I think that’s high praise for a genre I don’t care about much.

#69 – Desert Commander