Take on the NES Library

An 8-bit Extravaganza!

war

OCT
09
2020
0

#157 – Guerrilla War

Ikari Warriors can be really good if you give it a different name.

Reset the NES to see this screen longer than a frame or two.

To Beat: Reach the ending
Played: 5/14/20 – 5/17/20
Difficulty: 1/10
My Difficulty: 1/10
My Video: Guerrilla War Longplay

Ikari Warriors is still a game I think about often.  It’s hard not to when you spend 100 hours of mostly frustrating attempts trying to beat the game once.  I have yet to play either of the two NES sequels, but I got something better here with Guerrilla War.  The similarities in the two games are obvious just by looking at them.  We will cover all of that below, but I want to draw attention to the one major difference between the two games.  Ikari Warriors might be the hardest NES game to beat straight up, while Guerrilla War is close to the easiest game on the system.  How could things have changed so drastically?  It’s time to dig deeper and find out.

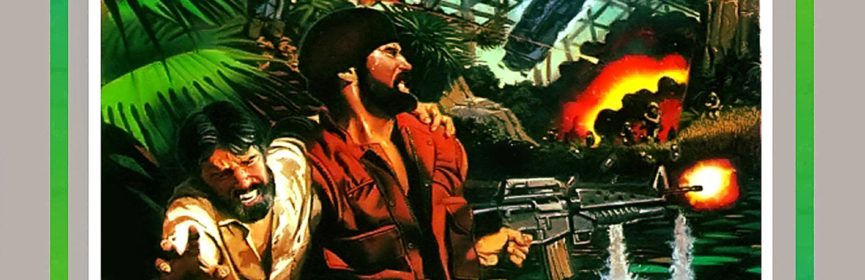
Guerrilla War was both developed and published by SNK.  It was first released in arcades in 1987, following the same game format and same rotary joystick controls as Ikari Warriors.  The game was ported to various home computers, as well as this NES version.  Japan receive the game first on Famicom in December 1988, then the NES got its version in June 1989.  In Japan this game is called Guevara, where you play the role of Che Guevara and second player Fidel Castro in their overthrow of the Cuban government in the 1950s.  That hits a little too close to home for the North American market, so the game was renamed to Guerrilla War with all historical references removed during the localization.

Guerrilla War is a top-down run-and-gun shooting game.  While the story was very clearly related to the Cuban revolution in Japan, it was watered down so much that it becomes a generic story for the US release.  A small island is under rule by an evil dictator.  You, and optionally your partner, must sneak onto the shore of the island and make your way across the island to the dictator’s headquarters so that you can overthrow him.  He has the full weight of his military behind him in an attempt to stop you.  There are ten areas in this game, culminating in the final battle against the dictator.  Beat the final boss to beat this game.

This evil dictator means business.

On powering on the game, you get an introductory cutscene briefly covering the story and your approach to the island.  The game goes right into the attract mode showing off the gameplay, or you can press Start to go to the title screen.  Here you’ll press Start and then choose from either a single-player or two-player game.  This has simultaneous play, so grab a friend and get to blasting.  If you hold either A or B on the screen before pressing Start, you then go to another options menu.  Here you’ll set the difficulty level from either Easy, Normal, or Hard, and you can even set your starting level anywhere from Stage 1 through Stage 9.  The default settings start you off from the beginning on Easy difficulty.

This game has simple controls.  You can walk in all eight directions with the D-pad.  Play typically moves from the bottom to the top, though the playfield can scroll left and right during some portions of the game as needed to follow the level layout.  The B button fires your standard machine gun, while the A button throws grenades.  You have infinite ammo, plus you can hold the buttons down for autofire.  You have two different pause buttons in the game, for some reason.  The Start button is the standard pause feature, while Select brings up the score and lives for both players and the high score.  Each button has a different pause sound effect as well.  It’s quite the luxury!

You’ll come across different waves and formations of enemies.  Similar to Ikari Warriors, soldiers all look the same but have different behaviors at times.  Green soldiers are the most common.  They can defend one location, they can emerge from the sides of the screen running across, they can run while occasionally stopping to shoot, they can lay on the ground and lob grenades, and so on.  Red and yellow soldiers are similar but they drop powerups for you when defeated.  You will also have to deal with enemies in tanks that can absorb several hits before going down.  Every now and then there are mini-bosses to fight, and there is some kind of boss encounter at the end of each stage.

Enemies blocking you? Blast your way through.

There are quite a few upgrades and powerups to use.  They are almost all indicated with a square icon with a letter inside.  The L item is a missile launcher that replaces your default weapon with a rocket launcher.  Rockets reach all the way across the screen, only stopping for either an enemy or a solid object.  The F is a flamethrower, which fires a wide band of flame ripping through anything in its path.  B is an upgrade for your standard grenades, making the explosion a little bit wider.  The S weapon is a simple 3-way spread shot using your standard bullets.  The T weapon is a cross between the L and S.  It fires rockets that explode on contact into a spray of three bullets, but it does not have the long range the L powerup does.  All these weapon upgrades above last until you die or collect a new powerup.  The C powerup is a clearing grenade that you hold until you press A to throw it.  It flashes the screen white and destroys all enemies.  The K is another smart bomb that detonates immediately when you collect it.  The N is just for bonus points, while the icon with a face on it gives you an extra life.  Also, there are plenty of prisoners to free.  Every prisoner you set free gives you 1000 points, but if you accidentally kill the prisoner then you lose 500 points.  They really don’t want you to be careless with your weaponry.

This game includes rideable tanks.  These are essentially temporary upgrades.  The tanks are clearly marked with the flashing word IN written on them, inviting you in to wreak some havoc.  Press A while standing over the tank to climb inside, and press A again to exit.  Because the tanks remove the use of the A button for grenades, you can only use your B button weapons.  The good news is that weapons are upgraded while inside the tank.  The rockets appear normal, but the standard bullets are much larger and more powerful, making the spread shot an ideal weapon for tank combat.  While inside the tank you can absorb smaller enemy bullets and run over soldiers with ease, but larger shots or grenades will send the tank into self-destruct mode.  This also happens normally over time.  Good things don’t last forever!  Make sure to exit the tank with A before it explodes and takes you down with it.

Now we come to the reason why this game is so easy.  You start the game with four extra lives, not counting the one you start with.  When you run out of lives you can continue.  In Guerrilla War, not only do you get infinite continues, but you get to continue from exactly where you left off.  When you resume play on a new life, you get a generous amount of invincibility time as well.  There is nothing stopping you from forcing your way through the game as fast as you can, abusing deaths at every turn through all the levels and bosses.  All you need is the time to sit through it.

Can’t have clean shirts in the middle of a fight.

This was not my first time playing through the game.  I did not own it as a kid but I played through it several times at a babysitter’s house.  When I completed my final collection push, I remembered the game and wanted to pick it up early on in that stretch.  I thought maybe I had bought the cart individually, perhaps at my local store, but I am not sure.  I know I have sold at least one copy of the game that I probably picked up in a lot.  This is roughly a $10 game today and I am pretty sure I paid around $5 for my copy.

My playthrough of Guerrilla War marks what may be an important inflection point in my completion journey.  Occasionally I have streamed attempts of games on Twitch, but my capture card software does not let me record and stream at the same time without a compromise in quality that I can’t accept.  When streaming I can only record locally at 30 fps, instead of the 60 fps rate I desire.  I did some digging and, using OBS for streaming, I was able to both stream and get my local recording at 60 fps.  Guerrilla War was my inaugural stream with my new setup.  As it turns out, the recording I got and the streaming quality itself was a disaster.  I needed some additional tuning to get the stream to not be choppy garbage while having the local recording at the proper framerate and quality.  I recorded a later playthrough with my old capture setup and no streaming while I worked out the kinks.  The next game and the several to follow that I’ve already beaten have all been streamed to Twitch.  Streaming has become a lot of fun and it’s another way to help validate my completions, so I intend for this to be the way I tackle the rest of the project going forward.

Rope as many prisoners as you can.

My recorded playthrough of the game was nothing exciting.  I started out on the first stage on hard difficulty, playing through the game that way.  My intent was a low-continue run, not really focusing on a pure single credit clear, but also not spamming death abuse as a way to press through the game.  The result was a slower, more careful playthrough, giving the game the respect it deserves.  I counted using six continues, mostly near the end of the game and especially the final boss.  This game would have been quite the challenge without continues, but instead it was a delightful romp.  Of note, in my longplay video I cut out about five minutes of dead time in the second to last stage.  I had to pause the game because my wife needed some help with the kids who were supposed to be sleeping.  Though this project is important to me, family comes first.

By implementing continuous play through the continue system, Guerrilla War is an excellent game for players of all skill levels to blast through alone or with a friend.  The graphics in this game are very nice.  Sure, there are lots of green, brown, and gray, but the environments are all varied and objects are clear and easy to see.  The soundtrack to the game is excellent as well, with music to suit the theme of each stage and lots of snappy snare drums.  The controls are responsive and handle the game well in the midst of constant attack.  The gameplay is really fast and frenzied a lot of the time with so many enemies of different behaviors around every turn.  This is a top tier NES game in every respect.  The only knock against it I can think of is that there is major sprite flicker.  Between all of the enemies, bullets flying, and large explosions, it is just something to be expected underneath the constraints of the NES.  For what it’s worth, the game runs fast with virtually no slowdown that I experienced.  Definitely check this game out.

#157 – Guerrilla War

by :
comment : 0
 
OCT
28
2019
0

#131 – Werewolf: The Last Warrior

Ripping straight out of your NES!

Didn’t even realize this game had a 2-player mode!

To Beat: Reach the ending
Played: 7/25/19 – 8/1/19
Difficulty: 8/10
My Difficulty: 8/10
My Video: Werewolf: The Last Warrior Longplay

I’m just going to say this right away.  I think Werewolf: The Last Warrior is gonna be my favorite NES Box Art of 2019. The obvious element is the giant werewolf ripping out of the cover, but look closely and you will see that he bursts right out of an NES cart.  You can make out the gray lines and the chips on the green circuit board inside.  At this time, very few people took the carts apart to see what was inside because new carts didn’t need to have the pins cleaned. I bet this aspect of the cover was underappreciated.  Some other parts of the cover I like are the red text on yellow background for contrast and the huge claws on the werewolf.  With a box cover so awesome, the game inside has to be equally good, right?

Werewolf: The Last Warrior debuted on the NES in November 1990.  The game was developed and published by Data East, with development credit given to Sakata SAS.  The Famicom release came later in June 1991, published by Takara.  There the game was called Cho Jinro Senki Wourufu, translating to Super Werewolf Chronicle Warwolf.  Europe also saw an NES release in September 1991.

In this game, you play as Chief WarWolf.  The evil Dr. Faryan has created a bunch of bio-monsters that have imprisoned nearly everyone in the world.  Guess who is the only hope for civilization?  With the help and powers of the Great Spirit, you can become Werewolf which will give you the abilities needed to defeat Faryan and save humanity from his evil schemes.  There are five stages in the game, culminating in the final battle with Faryan. Beat all the levels to beat this game.

Most of the cutscenes involve this guy.

This is your typical platforming game with a mostly familiar control scheme. An obvious downside right off the bat is that you attack with A and jump with B.  I have no idea why developers did this as the convention of using A to jump and B to attack was the de facto standard.  I’ve played games long enough to be able to handle it no problem, but otherwise there is this artificial learning curve added for no real reason other than to be different.  The rest of the controls are fine.  Press the D-pad directions to move around.  You can duck with Down and climb ladders with Up.  The A button does a simple punch and you can punch high while standing or punch low while ducking.  You also wield a Power Ray as a charge attack by holding A to charge and letting go to unleash the attack.  Pressing B jumps normally, but you can do a higher jump if you hold Up while pressing B.  Start pauses the game.  While paused, you can press Select to show your score and number of lives remaining. 

At the start of the game, you meet the Great Spirit.  The game switches over to a brief cutscene where the Great Spirit gives you some advice.  Immediately after this you are thrown into a fight with one of Faryan’s death slaves. This enemy has a health bar displayed at the bottom and is a recurring mini-boss throughout the game.  Defeat him and he will leave behind a red W.  Collecting this item turns you into Werewolf.  Then you get another cutscene where you see his transformation.  Don’t worry, this scene only happens the first time you transform.

In Werewolf form, you have several new options available.  You maintain this form until you are at about a quarter of health remaining.  By default, your attacks are twice as strong as normal.  Your Power Ray now attacks everything on screen via a shock wave, but this deals you a lot of damage just to perform the move.  You also get four new movement abilities.  You can crawl into tunnels too big for you to enter normally. Simply walk into the tunnel to start crawling.  You can perform a backflip that makes you invincible to all attacks by pressing both A and B together.  You can climb walls in Werewolf form.  Simply jump into a wall to cling to it.  Now you can climb the wall by pressing either Up or Down.  To get off, you press the direction opposite the wall and press B to jump off.  Lastly, you can cling and hand-walk along ceilings with your claws.  Jump up to the ceiling, then hold Up and press A to dig your claws in.  Then you can use Left or Right to move across the ceiling and press Down to disembark. Getting hooked is tough.  You have to connect just as you are falling from the top of your jump so that you touch the ceiling with the tip of your claws.

This early spot is tough when you don’t know how to ceiling walk.

There is an anger meter at the bottom of the screen.  You collect these tiny, white bubbles that add a notch to your anger meter.  When the meter hits five bubbles, then you transform into Super Werewolf.  In this mode, you have all the same powers and abilities as Werewolf, but your attacks double in strength, you move faster, and you jump incredibly high.  The downside is that this mode is temporary as the bubbles gradually decrease.  (I guess they pop?)  Once you run out of bubbles, you switch back to Werewolf mode until you collect enough bubbles for another transformation.

There are several other items you can collect in this game.  Finding items is weird.  Some of them are dropped by enemies, and others you find by striking objects in the levels.  Sometimes these locations are obvious, like posts or boxes.  Other times you find items by hitting ledges or other places you might not expect.  It doesn’t hurt to attack random things just in case.  Anyway, here are the other items to look out for.  Small hearts heal one health point while large hearts are full health refills.  Little red bubbles defeat all enemies onscreen.  Big red bubbles make you invincible for a little while.  Why bubbles are so powerful in this game, I have no idea.  Hourglasses give you more time, dollar signs add points, and 1ups are obvious. Some enemies drop a bullet behind that gives you a single shot attack of your own with A.

The final item you need to watch out for are the blue W’s.  While red W’s upgrade you to Werewolf, the blue ones downgrade you.  They take you from Super Werewolf back to Werewolf, or from Werewolf back to plain War Wolf form.  If you grab one as War Wolf, it deals a significant amount of damage.  Therefore, you want to avoid these at all costs.  The game puts you in some situations where if you reveal a blue W, you are forced to pick it up to proceed.  Just be careful.  The manual suggests there is a way to somehow use both a blue W and a red W to go directly to Super Werewolf.  I have no idea how or if that works, and I didn’t find any information about that mechanic.

Knock stuff around until you find the good items.

The levels in this game are usually laid out a specific way.  Stages move from Left to Right with a few exceptions. Stages also typically have a high section and a low section.  You can find ladders to climb between sections and sometimes you can choose between the upper path or lower path all the way through the stage.  This can add some replay value if you want to try a different path and it lets you experiment to find the best way through a level.  All levels end in a boss fight with one of Faryan’s stronger creatures.

This game treats lives as continues.  When you fall into a pit or run out of health, it is Game Over.  If you have any lives remaining, then you can Continue from the Game Over screen or select End to start over.  When you run out of lives, the game puts you at the same screen only you are forced to choose End.  You start the game with three lives.  You can earn more by collecting 1up items or for every 50,000 points earned.  Every time you die your score goes back to 0, so you are incentivized to play well enough early to earn more lives for later.

This was my first time beating Werewolf: The Last Warrior.  I sort of remember testing this game out one time and playing until I died, which didn’t take too long that time.   I might have went further if I knew the controls.  I bought my cart copy of the game at a game store about an hour away from home that I have only visited one time.  I think I paid either $7 or $8 for it.  The game sells now for around $10 which I believe is the same as the going rate was when I bought mine.

Boss fights are much better as Super Werewolf

Beating this game was yet another installment in the series of “making incremental progress each playthrough.”  The first stage has at least a couple of spots that are tough to pass until you get a grip of the controls and all the moves you have available. The worst stopping point was the waterfall stage.  This is one of those two-tiered horizontal levels where the lower section is all water. Evidently, in this universe, werewolves cannot swim, so once you fall in you have to watch yourself drown.  There are leaping fish that can easily knock you in the drink, in part because you have a tough time hitting enemies in the air. Their placements are not quite consistent either.  It makes for a tough section and you can bleed your remaining lives away in a flash. Some other parts of the game aren’t much easier, but the waterfall was the worst I experienced.  I could have knocked the difficulty down a point or two if that stage were easier.  Still, completing the game in a week isn’t all that bad and it was a straightforward game to boot.

What I will remember most about Werewolf: The Last Warrior is how janky the game is.  I’ve already mentioned a few of these instances of jankiness, such as B button jumping, tricky ceiling clinging, and the seemingly random locations of hidden items. There are plenty more.  The backflip maneuver is very helpful in crossing some parts where taking damage is eminent, since you are invincible during the flip.  One downside of that is that there are two forced jumps associated with the move, and if you didn’t plan carefully, you could leap right into a pit.  Another quirk is that during a backflip, the screen does not scroll ahead.  You can backflip all the way to the right and then walk against the right side of the screen, leaving you completely defenseless to the dangers right in front of you.  Bosses soak up a lot of damage before going down and end up being very repetitive as a result.  Super Werewolf status makes them pretty manageable, but you may only build up to that state once or twice in the whole game.  If you are plain War Wolf, forget even trying to fight a boss.  Your attacks have one-fourth the power of Super Werewolf, and even if you play the fight perfectly you will probably run out of time before winning anyway.  There are still other minor nuisances that don’t even make a blip compared to these issues.

Werewolf: The Last Warrior is a game that falls short of most other NES platformers. I would say the graphics are just average.  Most of the sprites are large and detailed.  The Werewolf character has a lot of different poses and such for all the moves available. The music is pretty decent.  My favorite song is the one that plays when you are normal War Wolf, but unfortunately the more you hear that song the worse you are playing.  The controls take some getting used to with the B button jumping and handling specific moves like backflips and wall climbing.  The gameplay has some notable flaws.  The jumping is rather stiff and favors more vertical leaping than horizontal, which is tough considering most of the game is horizontal scrolling. Bosses and some enemies take way too many hits to defeat, leaving the timer as more of a threat here than in other games. You can tell that Ninja Gaiden was an inspiration for this game with things like its interstitial cutscenes and wall climbing moves.  Those are some huge shoes to fill, and in my opinion, Werewolf isn’t half as good as Ninja Gaiden.  It’s not terrible and there are sure to be some people that will go to bat for the game, but I’d rather play something else.

#131 – Werewolf: The Last Warrior

 
MAR
29
2019
0

#114 – Dirty Harry

Go ahead, make my day.

There’s another title screen but this is clearly the better one.

To Beat: Reach the ending
Played: 2/8/19 – 2/23/19
Difficulty: 8/10
My Difficulty: 8/10
My Video: Dirty Harry Longplay

Dirty Harry shares something in common with Gilligan’s Island. Trust me, these are comparisons I never in my wildest dreams thought I would be making on this blog. Nevertheless, this is a trivial one at best. One of the dates on Dirty Harry’s copyright screen is 1971, the year the film came out. It is the second earliest year displayed on an NES game that I’ve seen so far, several years after Gilligan’s Island’s 1964 debut. While Gilligan’s Island is still a weird choice for an NES game, Dirty Harry was timelier at least and would seem to make for a decent game. In reality, the game is at best passable.

Clint Eastwood stars in the film Dirty Harry. It was released in 1971 and was produced and directed by Don Siegel. It follows the story of inspector “Dirty” Harry Callahan of the San Francisco Police Department as he tracks down a killer named Scorpio. The movie was both a critical and financial success and is regarded as one of the best movies of 1971. There were four Dirty Harry sequels: Magnum Force, The Enforcer, Sudden Impact, and The Dead Pool. The final film released in 1988, which is inside the NES life span and could explain why an NES Dirty Harry game was made.

Dirty Harry on NES was released in December 1990 in North America only. It is sometimes referred to as Dirty Harry: The War Against Drugs though I cannot figure out where that subtitle originated from. It is not listed in any of the packaging, manual, or screens within the game. Dirty Harry was developed by Gray Matter and published by Mindscape.

Punching thugs in the streets like a boss

The game has a unique story from any of the other Dirty Harry films, though there are scenes borrowed from some of the movies for this game. The Anaconda is a new drug kingpin hailing from Colombia who has taken out The Dealmaker, the most successful criminal in the San Francisco Bay Area. The Anaconda is also taking over all the drug gangs in the city and killing anyone else who stands in his way. Not to be deterred by the police chief, Harry Callahan sets off on a mission to find and capture the Anaconda. The game takes place over three stages: The city streets, the waterfront docks, and Alcatraz Island. If you can capture The Anaconda on Alcatraz, you win the game.

Dirty Harry is a side-scrolling platformer. The controls for this one are a little clumsy. Use the D-pad to move around as usual. Up lets you climb ladders, enter doors, and walk up alleyways. Down does the same thing under or in front of you, otherwise you use Down to crouch. The B button punches. If you hold Up and press B, you kick instead. The A button is used for your gun. First press A to hold out and aim your gun, then press A again to shoot. Firing only work if you have both feet on the ground. You can press Up and Down to adjust the angle of your gun prior to firing. To jump you have to press A and B together. It sounds bad, and it’s not the best control, but jumping is surprisingly responsive. You can either jump straight up and down or jump forward at a fixed distance.

Press Start to pause the game and bring up the inventory screen. The top row of items are selectable with Left and Right. Put the cursor over the item you want and unpause to equip that item. Some items can only be used in certain situations and you default to the gun if that item can’t be used. If you run out of bullets, you can still hold out the gun but cannot fire. The second row of items cannot be selected and are used automatically as needed. Following the items are your score, health meter, and number of lives remaining.

Cops stroll on fire escapes in alleyways all the time.

You will spend most of your time in the first level if you are playing this game. The game starts out in the city streets. The layout here is parallel city streets connected by alleyways or sometimes doorways. For example, you start on one street, then you can go down the alley to another screen, and finally go out the alleyway on the other side onto a different street. All of these sections are side scrolling and there’s no map or compass to guide you. You must also enter buildings. Inside buildings, there are doorways and hallways you move through. Sometimes you can exit a building from the opposite side onto a different street. Other times there might be side doors that lead back into an alley. There is also a sewer system. These are side-scrolling sections with several different entry points on the streets. Passageways are typically blocked off by sewer grates and you have to locate switches to open them up so you can pass. The description here doesn’t really do justice on how tough this level is to navigate.

The buildings are where you find most of the items in this game. Once you enter through a hallway door, the rooms within are purely side-scrolling with no depth or other exits aside from the opposite end of the room. Some rooms have boxes in the background or on the floor. Kick the boxes in the background to break them and collect their contents. You can open boxes on the floor by jumping on top of them. There are also safes that can only be busted by blowing them up with explosives.

There are many items to collect. You can find bullets for your gun, either a small pack of 10 bullets or a large pack of 25 bullets, which is the max Dirty Harry can hold. Plastic explosives blow up safes. Select the explosive and then press A to set one up that explodes shortly after. You can also hurt enemies with these. Chili dogs restore half of your health meter and you get a little eating animation to go with it. The harpoon gun and missile launcher are powerful firing weapons that have limited ammo. Grappling hooks are used for swinging over treacherous areas. Bulletproof vests absorb enemy bullets for a while. The gas mask lets you survive in poisonous rooms. The flashlight lets you see while exploring the sewers. Crowbars are used to open locked doors within the buildings. You can find money bags or stashes of drugs that you confiscate for points. You can also find badges for extra lives that are sure to come in handy.

Sewers are merely door mazes with poison, shocks, and death water.

With all the ways you can go, the first stage is one gigantic maze. The city streets often have large walls that are too high to jump over. Sometimes you can do some platforming across ledges high enough where you can cross over the walls. There is some honest-to-goodness level design here where you need to plan out your movements so that you don’t fall. Since jump distance is fixed, you can get a feel for what you can do and it will always be consistent. The problem is there are some sections of forced high ground traversal where if you fall, you have to backtrack through the city to get back to where you were. It’s laughably easy to get lost when everything kind of looks the same.

There are many enemies in this game and they are all out to get you. Gang members run the streets and roam the halls. Some bad guys hang out on the rooftops and throw out grenades, bricks, or nets that trap you. Some just go straight to shooting. Enemies pour out of windows and bash you with punches or pipes. There can only be I think two enemies on the ground at once, but when you defeat them they will keep appearing. Buildings have huge snakes that guard drugs and money. You can jump on them to either stun them or kill them; the outcome seems to be random. Some rooms have lasers sliding across the floor. The sewers also have traps such as dripping sewer sludge, electric shocks, giant rats and cockroaches, and even remote-controlled cars. Falling into sewer water is instant death. All of these dangers are just in the first stage alone, though you will see other similar threats in the other two stages.

Dirty Harry faces several bosses in this game. Many of them are really large people that pack a lot of firepower. Usually you need to use your best weapons to take them out most effectively. Some of them require different tactics where you need to either trap them somehow or figure out how to pierce their defenses. There can be more than one boss in a level, so you can’t really tell from those encounters that you are at the end of the level. A good thing is that many defeated bosses give you three lives for winning.

This is one large guy!

Levels 2 and 3 are, thankfully, more straightforward affairs. There’s little exploration but more challenging enemies and tricky platforming. In the first level, you get nearly all your items from inside the buildings. After that, you don’t go into buildings any more, so sometimes defeated enemies will give you items. The item drops appear to be scripted and sometimes you can use that to your advantage.

Dirty Harry includes a password feature and continues. The passwords are five characters long A-Z. In this game you only receive two passwords that are simple words that are easy to remember. There is a third password I’ve found online that I believe gives you unlimited lives. I didn’t use it, but I found it easily just by doing some basic research on this game. If you’re not into passwords, some continues might help. The system in this game is a little weird. In the first stage only, you can continue up to three times with a fresh set of lives. You continue exactly from where you died if you ran out of health. In the other two levels, you are only given one continue. It doesn’t matter if you survive the first level with all continues intact or use them all up. Continues do refresh your gun ammo back to the maximum.

This was my first time playing Dirty Harry. Surprise, surprise, I haven’t seen any of the movies either. I’m sure I would like them if I ever gave them the chance. This is not an expensive game but is not commonly found either. It costs around $6-$8. I believe my collection copy is the only one I’ve owned, though I have seen it in stores on occasion.

As you could imagine, I spent most of my time figuring out the first stage. It is truly a nightmarish level. There are loops in the map that I had to take several times before I realized I was just retracing my steps. It’s not clear right away that you have to do platforming without falling on some streets to reach new areas. The sewer system is confusing and complicated with all the traps and switches you need to find. I couldn’t figure out one of the bosses and had to look up the solution online. I normally hate doing that but I’m glad I did here. I spent maybe a week and a half of playing before I learned how to clear the level. Things proceeded much more quickly after that. I beat the second level in about 30 minutes. The last level was pretty challenging but I beat it in a couple of days anyway.

Other levels are straightforward, except for this part.

There are some really bad design choices in the first level alone that are sure to turn people off of the game. Some people will hate the forced platforming sections, but I like them. I think it is one of the few elements of the game that has real design to it. They are a lot like jumping puzzles and you have to reason your way through the jumps. What I don’t like is falling down and having to backtrack because those sections always lock you away so that you just can’t go back directly and retry. You also get to cope with enemies that are trying to knock you down. A particularly egregious example of this is at the end of the first stage. There is a large expanse you must cross by hand-walking your way across a power line. Enemies are shooting at you and one bullet knocks you down. For a large portion of that section, if you fall the only way out is through the sewers. There you are led down into a one-way section that puts you all the way back to the start of the level. It takes at least five minutes of real time to backtrack to where you can try again, plus you will likely lose several lives along the way. It’s complete trash, but not as trash as the “ha ha ha” room. One building contains a room with the words “ha ha ha” written on the side. The room doesn’t contain an exit door so once you go in you are stuck. The only way out is to reset the console and start over. This room is deep in the level too. I can’t tell if maybe this was a default room and the developers neglected to link the door to an actual room, or if the developers left this in as a dumb joke. I tend to believe the latter, but who knows?

I ended up beating Dirty Harry four times. I realize this is way too many times to beat this game, but I have my reasons. The first time was playing normally, and right after that I beat the game from the start just to see how I would fare in a complete run. I started doing a little research and discovered a claim about a secret ending that was eluded to in both this FAQ and the game manual. From what I gathered, the idea is that if you recover all the items in the game, you will receive a special medal from the police chief at the end. I haven’t found any further evidence and didn’t find a video of said ending, but I had to give it a try for myself. My third time through the game was a failed attempt at the best ending. I used a map I found to make sure I didn’t miss any of the buildings in the first stage, which did lead to some rooms I missed on my own, but it wasn’t enough. I even tried poking at the game on an emulator with a debugger to see if I could discover anything and got nowhere. Chalk this one up to a rumor I suppose. The fourth time through was for finally recording a proper longplay video. I thought I would try cutting straight to the chase in the first level and that was a bad idea. I skipped a bunch of items and lives, and then due to some bad mistakes in the run I ran out of lives. I needed to start the final level over a few times before I could beat it with the password. It’s not my best effort, but it’s a documented completion at least which is always my goal.

I’m sure the Dirty Harry movies are great, but this game is not very good. The graphics are passable with a lot of samey-looking buildings. Some of the building residents are interesting looking, and I dig the security lasers in the buildings, so it’s not all bad. The music has some decent depth to it, though the base sounds are so low that I barely heard them while playing with a relatively low volume. The controls work okay. I’m not a fan of two-button jumping but it works fine. I found the controls a little bit sluggish at times, like when pointing and firing weapons. The gameplay is challenging but not in a good way. The forced backtracking when making mistakes is bad, you can easily get trapped between two enemies and get knocked around, and the navigation around the city is both confusing and frustrating. I sort of appreciate the jumping puzzles centered around Dirty Harry’s fixed jump length, but I reckon it is more of an inconvenience for many players. For all the warts this game has, the ending is unique and was one of the neatest parts of the entire game. Even then, it’s not exactly a suitable award for putting up with the difficulties of playing Dirty Harry.

#114 – Dirty Harry

 
MAR
26
2018
0

#69 – Desert Commander

A nice introduction to turn-based strategy on the NES.

Not pictured is the tank that blew up.

To Beat: Win any scenario
To Complete: Win all scenarios
What I Did: Completed the game
Played: 12/30/17 – 1/4/18
Difficulty: 2/10
My Difficulty: 5/10
Video: Desert Commander Final Scenario

Hot off the heels of the Power Pad running game Super Team Games, I completely switched gears and played a relaxing, low-key NES strategy game. Desert Commander and other similar strategy titles were once relegated to the end of my game list. Here I thought it was fitting to go from a physical game straight into a more cerebral experience, and Desert Commander slots in perfectly. I wrote off Desert Commander as not for me almost instantly. I do like puzzle games and the occasional RPG, but strategy games are just different enough from those to dissuade me from playing. Once I gave it a chance, I actually had fun. Without anything else to compare it to, I believe Desert Commander was the right choice for my first NES strategy title.

Desert Commander was first released in Japan under the name Sensha Senryaku: Sabaku no Kitsune. There it was released in late April 1988, both published and developed by Kemco. The setting for the game is World War II and is based on the North African Campaign. In the Famicom version, you can choose either the Axis or Allied side, but that was removed in the US release in favor of a more generic setting. The NES release of Desert Commander was in June 1989, also by Kemco.

Desert Commander is a turn-based strategy game for one or two players. Each side gets a specific amount of units and an initial setup on one of several maps. On your turn, you may assign up to one command for each available unit. For instance, you may move units to a different space on the map or engage a nearby enemy unit in combat. When you command each unit or decide to end your turn, your opponent may do the same. Each player has a special unit called Headquarters, and if you can defeat the enemy headquarters you win the battle. There are five scenarios to choose from and winning any one of them is good enough to get the ending.

It’s a hot day at the battlefield.

The controls are straightforward. Use the D-pad to move a cursor around the screen when it is your turn in the battle. Move the cursor toward any edge of the screen to scroll in the desired direction. Press A when the cursor is above one of your units to bring up a unit status display and menu. Use the D-pad to choose an item from the menu, press A to make your selection, or press B to go back. You cannot view the enemy units, only yours. Press the B button to automatically move the cursor on top of the next available unit. This is especially handy if you have many units spread out on the map. The Select button brings up a screen showing how many units of each kind both you and the enemy still have available on the battlefield. The Start button brings up a map of the entire battlefield.

Before starting the game, each side may determine which units they want to deploy for the battle. The screen shows all possible units and how many of them are allocated to each player. Next to the number of units are plus and minus buttons. Move the cursor to a button and press A to add or subtract to the number of units. Each battle has a maximum number of units already preconfigured, so if you want to add units of one type, you must first remove units of another type. For example, if you want more fighter jets, you might decide to reduce the number of tanks. You can make as many of these swaps as you want. The counter at the bottom labeled Units Left shows how many units are unassigned. The second controller modifies the units for the second player, and you can also use this in single player to redistribute the opponent’s side if you want.

There are several different types of units, and they can most easily be grouped together as air units or ground units. The two types of air units are fighters and bombers. The remaining units are ground units: tanks, armored cars, troop transports, infantry, field cannons, anti-aircraft guns, supply trucks, and the headquarters. For the most part, ground units are more effective in combat against ground units, and the same goes for air units. The exceptions are bombers and anti-aircraft guns which are more effective against the opposite types. The different unit types vary by how many spaces they can move per turn and how much ammo they can hold. There is a handy chart in the manual for these figures and you can also pull up this information directly in a game.

You can customize both your army and your opponent’s army.

When you choose a unit, you get both a status display and a small command menu. The status display shows ammo, fuel, the unit number, and the type of terrain it is currently occupying. Ammo dictates how many times you may attack the enemy. Each combat reduces this amount by one and if you run out you can’t deal any damage. Each space you move on the map reduces your fuel by one and every unit begins with one hundred fuel points. The unit number represents both the health of the unit and its attack power. For example, if your unit number is ten, you get to attack ten times on your turn in combat. You lose units when you get attacked, and the unit is destroyed when the unit number goes down to zero. I’ll explain more about terrain shortly.

The command menu has four options: Movement, Attack, Power, and Change. Movement, naturally, lets you move the unit to a new space. For ground units, the terrain determines how far you can move in one turn. It makes sense that you can move better on easier terrain. You can move the furthest on roads, less so in the desert, and the least in the wilds such as mountains or the oasis. You can press B to cancel movement anytime until you move the maximum amount of spaces. If you move a unit adjacent to an enemy unit, your movement stops immediately and the game asks if you want to attack the enemy. Say yes to fight, or say no to end movement. Attack lets you engage in combat with an adjacent enemy. Most units may only attack ones directly next to them, but field cannons and anti-aircraft cannons have a wider radius to attack more distant targets. Choose Power to bring up a box that shows how many spaces you can move on each terrain, the maximum ammo and fuel, and its attack range. The Change option lets you end your turn manually. You will end your turn automatically if you move or attack with all your units.

Combat is really simple and plays out automatically. During the attack phase, a new screen appears showing your unit on the left and the enemy unit on the right. You will see individual attackers on each side corresponding with the unit number. The side initiating combat strikes first, and then the other side counterattacks with the number they have remaining. You need one ammo to either attack or counterattack. Certain units are more effective against other types of units, even within air and ground units. I think it’s difficult to tell exactly which units are best suited for a situation. Combat is like a hidden dice roll and the amount of damage you either deal or receive is luck-based after strengths and weaknesses are considered.

Lots of combat in this game.

There are some spaces on the map that have effects on the battle. Towns replenish ammo and fuel when ground units occupy the space. You see a special screen and animation when someone moves onto the space. In fact, all of these special spaces have their own screen like this. It gets annoying after the first time but you can get out of them quickly. Aircraft can refill fuel and ammo by landing on an air strip. A palm tree is an oasis and it gives occupying ground unit a boost in defense. There is also a wall that provides greater defensive help.

Two units provide additional capabilities. The supply truck replenishes both fuel and ammo for other units when it is placed next to them. You can arrange your units in a way where two or three of them can be filled up at the same time. Curiously, the supply truck cannot refill its own ammo or fuel. The troop transport can load up infantry to greatly increase their range. First, place an infantry unit next to the troop transport to bring up a dialog box asking if you want to load them into the troop transport. Then both units combine into one unit with a different color to indicate they are combined. Later when you move the troop transport, you get the option to unload your infantry and then they can have a turn.

There are five scenarios in single player mode to choose from. Later scenarios increase in difficulty but maybe not in the way you would expect. The AI almost always performs the same way, but they get more units than you do in later scenarios. All things are even in the First Battle scenario, but by the last one the computer has more than double the number of units you get. Speaking of the map, it turns out it is one gigantic map and each scenario focuses on some subset of this global map. You will see some map overlap between scenarios. I know at least once I saw a town on the edge of the map that I couldn’t get to because the game prevents you from utilizing the fringes of the scenario map.

Nice looking scenes, but they show up all the time.

This was my first time playing Desert Commander. I have some vague memories of seeing someone play the game back when it was released. I do think it was somewhat popular back then. I had a couple of people tell me that they used to play a lot of Desert Commander. I did not buy the game myself until I started actively collecting. I got another copy in a lot not that long ago and it came with the manual, so that was nice to have for this playthrough.

I decided that I would complete all scenarios with the default unit deployment. I wasn’t sure if there was some kind of special ending for beating harder scenarios, plus I like playing all the levels a game has to offer anyway. It turns out you get the same ending no matter which scenario you win. You even get a similar ending if you lose. The first scenario was very easy and I won with little difficulty while I barely knew what I was doing. You will get a scoring screen at the end that shows how many turns you took, along with damage and results numbers. I don’t understand what they mean or how they are calculated. I was happy with beating the game no matter how I scored.

I would say for a first time player that the game has a smooth difficulty curve. I coped well with the increase in enemy forces by using better tactics I came up with through the mistakes and experimentation of past attempts. Both the third and fourth missions took two attempts to beat and I just barely lost the initial attempts on those scenarios. The final scenario is quite the challenge and you are severely outnumbered. I got lucky enough to pick off the enemy headquarters before things got really bad for me. I’m glad for that because the scenarios take a long time when each side issues commands to every unit on the battlefield on every turn.

The default armies leave you vastly outnumbered.

I’m no expert at these kinds of games and there may be a better strategy, but these are the techniques I came up with. The computer tends to send a chunk of their force directly at you, leaving some units behind with the headquarters. Some of the ones left behind will join the offensive as others get defeated. Eventually this leaves an opening to engage the headquarters. I put infantry in troop transports and broke that group off separately, moving them near the enemy headquarters so that they could strike as soon as they got a good opening. In the last scenario, I sent a couple extra units with the transports for protection since the enemy may spread out their advance and start attacking this group. I put my headquarters on a wall to give them the greatest defense and surrounded it with my remaining units. I put my cannons in the back because they can attack anything trying to breach my tightly packed wall of defense. I just tried to survive as long as I could to give my small attack group the opportunity to knock out the enemy headquarters.

Desert Commander has a few quirks that I find annoying. I would like there to be a way to cancel your movement once you hit your max, just in case you come up a little short. You can cancel your movement at any time up to that, so why does your max automatically lock you in? Another similar gripe is that you cannot move past another unit without being forced to stop and ask if you want to battle. This one at least makes logical sense since you would not be able to skip past your enemy like that, but it doesn’t make it any less annoying. Enemy turns are also ridiculously slow. You have to wait for their cursor to slowly scroll across the map to each and every unit, and the order the computer chooses units seems awfully inefficient. You also have to sit through each and every combat screen, and there are also the little cutscenes every time a unit gets placed on a special space. The last scenario takes a long time with the high number of computer units.

I’ve knocked Desert Commander a bit, but it’s a pretty good game. I like the music quite a bit. You can change the background music in one of the menus and all four tracks are pretty good. I liked the first one well enough to keep it playing over all scenarios. The graphics are well defined and I really like the Kemco font. A few of the units look similar enough that it does take some time to distinguish them, but that’s a minor issue. I bet this game is really fun against another human player where you can’t exploit the AI and need to form different strategies. Single player is fun enough, but the way they decided to increase the difficulty is cheap. There aren’t too many NES strategy games, but Desert Commander is a good example of how to do one on the console. I think that’s high praise for a genre I don’t care about much.

#69 – Desert Commander

 
MAR
09
2018
0

#68 – Super Team Games

Great, another exhausting Power Pad game!

Some balloons burst to get you started.

To Beat: Win all four events in single player
To Complete: Win all events on the highest difficulty
What I Did: Beat all events on the lowest difficulty
Played: 12/21/17 – 12/28/17
Difficulty: 7/10
My Difficulty: 7/10
Video: Super Team Games – All Events

Another Power Pad game already? I just finished World Class Track Meet not even a week before this. There are only a handful of Power Pad games that reached the NES, and it is just dumb luck that we get two such games almost back to back. This may have been a good thing here since my Power Pad muscle memory from the previous game carried over to this one. I needed that because Super Team Games is significantly more challenging than World Class Track Meet.

Super Team Games was developed by Sonata (who would later become Human Entertainment) for release in Japan in November 1987. It was originally published by Bandai, and it was the seventh game in their Family Trainer series. Nintendo published the NES release in November 1988, branded as a Power Pad game. It did not include any Family Trainer or Family Fun Fitness branding, just like World Class Track Meet. This was the final game of the Famicom’s Family Trainer series to reach North America.

Super Team Games is a running race game where you compete in different types of events and try to beat your opponent. There are several smaller events that are arranged into larger obstacle courses. There are several different modes for single player, two players, and two teams of players. Since multiplayer modes are competitions against each other, only the single player modes count for beating Super Team Games. There are four different obstacle courses in single player mode, and when you win all of them you have won the game.

You gotta start jumping pretty early.

This Power Pad game uses Side B, which contains blue buttons on the left and red buttons on the right, all individually numbered from 1 to 12. In single player, we are only concerned with the blue buttons. The top row buttons are 1 and 2, the middle row buttons are 5 and 6, and the bottom row buttons are 9 and 10. Multiplayer games use the red buttons, so just add two to each button number to get the same mappings for the second player.

The menu controls are the same as World Class Track Meet. On the title screen, press Select to move the cursor and press Start to go to name entry. In the tournament mode, you first select how many teams you want between three and six. Use the D-Pad to move the cursor at the bottom and press Select to lock in your choice. You then move to name entry which is identical for all modes. The blinking cursor at the top part of the screen determines which character in the name you want to choose, and you move that cursor by pressing B to move it left and A to move it right. Use the D-Pad to move the letter selection cursor at the bottom part of the screen. Press Select to write the selected character in the name field. When all names have been entered, press Start to begin.

Now you move to the event screen. There are flags displayed with the names of all the events. Press Select to choose the event and press Start. In 1 Player and 2 Player modes, the events are Super Obstacle Course, Obstacle Course A, Obstacle Course B, and Skateboard Race. The 2 Team Play and Tournament mode events are 6 Legged Race, Tug of War, and Relay Race. More on these modes later. The next screen is the versus screen showing who is competing in the race. If you are playing Tournament mode, you will see a screen in between showing the bracket setup. In single player, the versus screen lets you decide which computer character you want to race against. Press Select to choose from either Ollie, Jimmy, or Jack, and press Start to go to the race. Ollie is easy mode, Jimmy is medium difficulty, and Jack is the fastest.

What lovely flags!

The gameplay screen has the same structure in all events. The left runner, designed as the White team, is displayed on the top part of the screen and the right runner, or Red team, is below. At the bottom of the screen is a minimap that shows how far each player or team has reached in the current race. You also see times for each runner. This timer freezes briefly during checkpoints so you get a better glimpse of how you are doing as you compete. To begin the race, all active participants must be standing on the Power Pad in their designated spots. For single player, stand on 5 and 6. A whistle is blown and soon the referee fires the starting gun.

Let’s look at each of the events first. Then I will explain how they combine into the different courses.

The Log Hop is exactly how it sounds; you run and jump over stationary logs. This introduces the standard controls that apply to many events in the game. Run on 5 and 6 in the middle row to move forward. Take a step back and run on 9 and 10 to back up a little bit if you need to. You can run right up to the log and then jump in the air so that your character jumps as well. The logs are medium height so they aren’t too tough to jump over. You can even land on top of the log and run right off.

No, you can’t run around the ball.

The Belly Bump Ball has the same controls as the Log Hop. Here a giant beach ball is in the middle of the track and you have to bump it forward by running into it. The faster you run into it, the farther down the track it goes. Ideally you want to get into a good rhythm of bouncing it far ahead and then running fast to knock the ball ahead again. If you come at it slow, the ball won’t go very far and then you don’t have the distance necessary to build up speed unless you take a few steps back and give yourself some running room.

Water Cross is similar to the Log Hop. There are pools of water on the track that you want to jump completely over if you can. Run up to the edge and jump to hopefully get across. More than likely you will fall into the water. You can swim by running on 5 and 6, but you will cross very slowly and use up a lot of time.

In the Crab Walk, I guess you wear a crab outfit? It’s weird. You want to put your left foot on the 1 and your right foot on the 9 and then run in place to inch ahead. It’s different than the other events since your feet are much further apart. I could move forward but really couldn’t get the hang of this one like I should have.

The Wall Jump is exactly like the Log Hop. The walls are thin and much taller than the logs. You really need to jump high to get to the top of the wall. Not only that, but there are two different heights of walls just to make things more exhausting.

This is a very sturdy bubble.

In Bubble Run, you first approach an air pump and must blow up your bubble. Hit 1 and 2 in the first row to inflate your balloon. The manual says to hit the buttons with your hands, which makes sense since you are working an air pump. You can run on it if you want, but my legs needed a break! Once the bubble is filled, then run on 5 and 6 and take the bubble to the end.

These are all the basic events that combine to form the larger events that you choose from the menu before play. In the Super Obstacle Course, you run all six of the above events in that exact order. In Obstacle Course A, you do the Log Hop, Water Cross, and Wall Jump, and in Obstacle Course B you do the Belly Bump Ball, Crab Walk, and Bubble Run. The Relay Race in the team play modes is the same as the Super Obstacle Course. Instead of running the whole thing alone, you pass the baton and substitute team members after each pair of events.

That’s not all! There are also three other unique special events:

The Skateboard Race is for one or two players. In this mode you don’t have to run, which is quite the relief! Your front foot position will either be on the 5 or 6, and your back foot position is either 9 or 10. First, stand on 5 and 6 to start with the whistle blow, then put your front foot on 5 and your back foot on 9. I like to face right while on the mat. This will position you in the top row in your course. Move your front foot to the 6 and then move your back foot to the 10 to move your character to the bottom row in the course. You can switch positions one step at a time to slide your skateboarder. You may rhythmically step between positions to slalom and that lets you move faster down the course. You also need to sidestep to dodge obstacles on the course. Some obstacles block both lanes and you must jump to get past them. If it sounds complicated, I’m sure you will get it once you finish the course once or twice.

Try to weave around the obstacles.

The 6 Legged Race is a team event only. You need six players for this event! Each team of three stands back to back on the respective spaces on the Power Pad so that there is a foot on every button. Each team must take left and right steps together as if their feet are tied together. If someone is out of step the racers will fall over and make it harder for the team to continue to walk. There’s no feasible way for me to play this event, but I bet it would be hilarious!

The Tug of War is another team event that can be done with either two, four, or six players against each other. Within a team, the first player stands on 5 and 6, the second player stands on 1 and 2, and the third player stands on 9 and 10. The other team takes the respective positions on the right side of the Power Pad. When the firing gun starts, everyone runs as fast as they can. Whichever side has pulled more of the rope after 30 seconds wins the Tug of War.

I’ve never been a Power Pad player, so this was my first time playing through Super Team Games. All of the Power Pad games tend to teeter between common and uncommon, but they are neither difficult nor expensive to track down if you really want them. Well, aside from Stadium Events that is. I got my original copy in a lot on eBay early on when I had made my big push to collect the other half of the NES licensed set. I remember seeing it and getting pretty excited since I had never seen the game before and thought it might have been worth something. I quickly found out that it was cheap because no one wants it. I’ve had a few different copies come through my possession.

This was a really bad jump attempt.

Super Team Games is a significant step up in difficulty from World Class Track Meet. Naturally, I learned this the hard way. My first time playing I picked the Super Obstacle Course against the fastest computer runner Jack. He completely blew me away. He completed the entire course in under three minutes while I hadn’t even reached the halfway point yet. I had to stop and step away in the middle of the race for a little while to catch my breath. I kept at it just to get through it, but I never did finish the race. After 10 minutes have elapsed, the race just ends. I was at the very end of the course with the finish line in sight when this happened. So annoying. I’m calling it impossible for me to beat this on the hardest difficulty and immediately accepted the idea of beating it on Easy and stopping there.

I moved on to the Skateboard Race next which is the easiest mode and much less strenuous. It still took me two attempts to beat easy difficulty Ollie. The first attempt was learning the course and the controls, and then the second try was enough to win the race. I then switched over to trying Obstacle Course A and managed to win that race too. The only problem is I forgot to hit the record button on my PC. That really upset me and I knew I wouldn’t be happy unless I completed it again. I was completely spent from playing this game to the point where I had to rest for a couple of days before trying again.

I finished all of the modes over the next three play sessions. The Super Obstacle Course took me two tries to win against Ollie. He finishes the race in around six minutes. I was about twenty seconds behind the first try and then I won by more than that the next try. It also took me two tries to beat the Obstacle Course A again. The first try I quit part way because I was too far behind and exhausted from winning the Super Obstacle Course just before. The next try I won the race by just barely passing Ollie on the final stretch. That was way too close for comfort. Obstacle Course B is quite a bit easier than the other two obstacle courses, but I think that took a couple of tries as well. I used the Skateboard Race as a warm up exercise and finished it a couple more times for good measure. I learned from my mistakes and recorded everything the way I wanted.

That’s how close I was to losing Obstacle Course A.

I think Super Team Games requires more consistency and better form than World Class Track Meet. You can be successful by stepping on the Power Pad as quickly as possible, since that’s more or less what I did. However, it does seem that you are rewarded for having proper form in your steps and jumps. I will caution that I cannot be entirely sure about this. The manual tells you what to do, but not how to do it well. It’s not really feasible for me to test any hypotheses either because I can only play a little bit at a time before wearing out. My theories will have to do. I was able to do a really long jump a few times and I never understood how it happened. I’m sure it has to do with the timing of my jump while running with some speed, maybe even by jumping off of one foot and landing on the other. I also noticed that I accelerated sometimes while jogging for some distance. There does seem to be some momentum inherent in the game physics as long as you keep going without slowing down too much or missing any steps on the buttons. Again, these are just theories. I assume there has to be some kind of technique that I didn’t understand that could help me perform at a higher level.

I do have a few observations about racing Ollie that might be helpful if you want to play this game single player. I found that I was about on par with Ollie in all events but two. Ollie does the Crab Walk well, but does the Belly Bump Ball terribly. I have no idea what the secret is to crab walking and I always lost ground during that event. The Belly Bump Ball is best way to take a big lead. Ollie gets no momentum at all and only pushes the ball a short distance while never backing up to get a better shot at it. If you run fast, pause briefly just after you bump the ball, and repeat, you should clear the event quickly. This was the key for me completing the Super Obstacle Course and Obstacle Course B, leaving only Obstacle Course A without an easy exploit. The sad thing is that the game manual tries to make you feel bad for even coming close in a match with Ollie. From the manual: “Ollie: A push over. Shame on you if you lose!” Let me tell you, there is no shame in losing to Ollie. This really is a tough game.

Super Team Games is not fun to play in my opinion, but it is a competent title. The graphics are simple and clean. The music, while not notable, is decent. The controls work well once you learn how to navigate the menu. There is a wide variety of events, especially when you include many players. The real fun of Super Team Games lies in playing this game with someone else. Racing against another player or coordinating large groups for team events are the kind of activities that form memories and build bonds, even in the heart of strenuous competition. Super Team Games is also a good exercise tool for Power Pad owners, so long as you take it easy and don’t worry about trying to outrun the computer players. Trying to beat the game in single player mode is too tedious and exhausting to be fun, and I missed out on everything in the other modes that would have made it enjoyable. I think the best part of Super Team Games was the feeling of relief to check it off the list and move on to the next game.

#68 – Super Team Games (Super Obstacle Course)

#68 – Super Team Games (Obstacle Course A)

#68 – Super Team Games (Obstacle Course B)

#68 – Super Team Games (Skateboard Race)