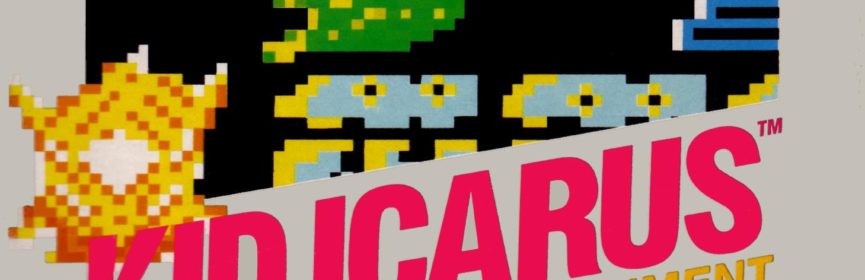
Take on the NES Library

An 8-bit Extravaganza!

angel

APR
17
2018
0

#72 – Chubby Cherub

An early third-party NES game featuring a fat angel? Why not?

Nice melody here!

To Beat: Finish Stage 12
Played: 1/21/18 – 1/30/18
Difficulty: 8/10
My Difficulty: 8/10
Video: Chubby Cherub Longplay

I know this is just me, but when people refer to an NES game as a bad game, it piques my curiosity. It’s tough to be objective about this sort of thing. I would guess most gamers out there don’t care about the NES and that most games on the console to them are bad aside from a few well known titles. Think Super Mario or Mega Man. I’m far on the other end of the spectrum where I believe most NES games are good and worth looking at, with only a small handful of games that I don’t enjoy. Chubby Cherub has the reputation of a bad game from my view of things, and look, I totally get it. I’m not going to go to bat for Chubby Cherub and defend it as some misunderstood masterpiece, far from it. What I will try to outline here is both some context and gameplay ideas that are at least interesting.

The history of this game begins with Obake no Q-taro, a defunct Japanese manga written by Fujiko Fujio. Originally running from 1964-1973, it features an obake named Q-taro who likes to fly around and cause mischief. An obake is like a ghost in Japanese culture. I’m not well versed in all of this, but I think this is enough to carry the idea. There were three separate anime series all roughly two years in length beginning in 1965 with the first series and ending in 1987 with the last. There was also a full-length anime film in 1986, and a much shorter film the following year. Unless there is some future reboot in store, that’s the last the world has seen of Q-taro.

Obake no Q Tarou: Wanwan Panic is the Famicom game based on the manga. The game was developed by TOSE and published by Bandai. It was released in Japan in December 1985. The NES version of the game was renamed to Chubby Cherub, also published by Bandai in October 1986. Gameplay is identical between the two versions, but the localized version replaced Q-taro with a flying angel.

A weird choice for a protagonist.

This is a good time to talk about the difference between 3-screw and 5-screw NES carts. Early cartridges were held together by five screws, one in each corner and one in the middle. These are small, flathead screws so you can take the game apart easily if you really want to. Sometime in 1987, Nintendo redesigned the cartridge shells to have interlocking tabs on the top of each cartridge beside the end label, removing the need for two of the corner screws. Some early 3-screw carts still have flathead screws before they were replaced with the hexagonal security screws used in Nintendo cartridges for many years. The reason I bring this up now is that Chubby Cherub is one of earliest NES games so it is a 5-screw cart. In fact, Chubby Cherub was not reprinted after the switch to 3-screw cartridges so it is only available as a 5-screw cart. There are only a few NES games like this.

Chubby Cherub is a side-scrolling action game. Our hero is but a simple angel who just wants to eat delicious food and help his friends. Alas, this cruel, evil world stands in the way of helping his friends. They are trapped in buildings or held hostage by a burglar and only Chubby Cherub can save them. To get to them, simply work your way from left to right to reach the end of each level while avoiding all kinds of dangers like smoke, birds, and barking dogs. You must complete all twelve levels to beat Chubby Cherub.

The controls take a little getting used to. Walking is easy enough. Just press Left or Right to move. You can tell right away that this is an early NES game because the B button is used for jumping. Yuck. Jumps are loopy and slow, and he always jumps the same height. You have full horizontal control while jumping. However, if either you walk off a ledge or are positioned inside a floor tile at the apex of your jump, you will be locked into place horizontally as you slowly fall to solid ground. Hold Down and press B when standing to fall in this same manner through high walkways. If you are holding B at the top of your jump, you begin flying in place. Now you can move in all eight directions. While flying you can travel freely through everything except completely solid blocks, and you move faster to boot. However, you can’t fly forever so you need to keep that in mind. The A button fires what the game manual calls the Gau-Gau cannon. I have no idea what that is supposed to be, but it looks to me like a heart-shaped vomit attack. You have to collect ammo before you can shoot and it is only effective against a few enemy types.

This is way too mischievous.

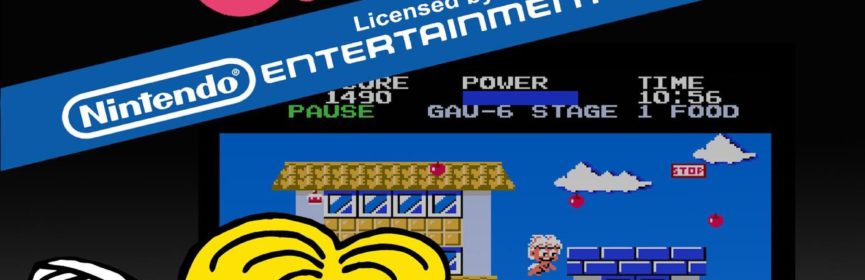
There is a lot of information on the status bar at the top of the screen. On the left side, you see your score at the top and hearts underneath it which denote your extra lives. In the middle is your power meter followed by how much Gau you have and the current stage number. On the right side is the level timer and the condition for earning bonus points.

The most important facet of Chubby Cherub is managing your power meter. It decreases as you play, acting as its own timer. Run out of power and you lose a life. You can restore a portion of the power meter by eating food that is strewn throughout the stages. This mechanic is better known from Adventure Island. Flying uses up power more quickly, and you have to maintain a certain amount of power to remain airborne. Now flying is the preferred way to get around in Chubby Cherub, so the pacing in the game is dictated by how often you can find food in order to keep flying. It turns out you can get through a lot of the game just by flying.

Dogs are the most dangerous enemy in the game. Q-taro in the manga is deathly afraid of dogs, so they pose the largest threat in Chubby Cherub by design. There are two different sizes of dogs and their movement patterns and aggression vary mostly by color. Recognizing these patterns and learning by experience are crucial to survival. The worst kind of dogs are the ones that bark. Dog barks are represented as icons with letters inside of them. Small dogs launch B’s for “bark” while big bulldogs fire two W’s for “wan-wan,” the Japanese onomatopoeia for dog barking. It’s a clever touch, and I’m proud to be able to use the word onomatopoeia in this blog in the proper context! Anyway, dog barks are aimed shots that move faster than you, and they are deadly to the touch. Certain groupings of dogs are among the most difficult parts of the game.

Why does the food float so high?

There are some items to help you in Chubby Cherub. The aforementioned food is all over the place, refilling your power meter and giving you between 10 and 50 points per piece depending on type. Lollipops are a much larger food item that gives you 100 points and four shots of the Gau-Gau cannon. You can only hold up to 9 Gau in reserve, but this is your one weapon to fight back against the dogs since they are the only enemy hurt by Gau. Sometimes collecting a food item generates a P icon above it. Collecting it not only gives you 200 points, but it also restores power and makes you invincible for several seconds. The angel blinks during this period and you can move through any enemy freely with one catch. Getting hit by a dog bark causes it to bounce off you harmlessly but you lose any remaining invincibility. A good strategy is to use your invincibility frames to get right up in a dog’s face to hit it with Gau.

There are other enemies present that are not affected by Gau. There are crows, birds, smoke, and balloons that defeat you with a simple touch. Balloons are the weirdest enemy concept I’ve seen in a while. What did Chubby Cherub ever do to them? There are also Chow Chow dogs but they aren’t affected by Gau and don’t bark at you. I don’t get that either! These enemies have their own patterns to deal with, some with multiple patterns. It’s a dangerous world out there.

All levels share a similar structure. About halfway through each stage you will encounter a rectangular stop sign. This freezes the scrolling and the objective is to collect all food on screen to make a special item appear on the left. Collect that item to get 500 points and then you can continue through the rest of the stage. Your friend needs to be rescued at the end of the level, and this is accomplished in one of two ways. Most stages end with a building or two and a large amount of food in front. Each piece of food opens the window above it when you grab it. Your friend is randomly hidden behind one of these windows and finding him or her ends the stage. But beware, there are also two aggressive dogs hidden behind these windows too. The manual gives good advice not to collect the food while moving upward because if there’s a dog hidden there you will run into it right away and lose a life. Every third stage ends in a simple boss fight with a burglar. He walks in from the right to the center of the screen and begins tossing bombs all over the place. The burglar drops a dog bone on his walk to the middle of the screen, and you need to grab this and throw it at the burglar with A. This causes dogs to appear from the left that scare the burglar away, saving your friend.

People should not be allowed to have all these bombs.

The boss battle with the burglar also indicates a change to the bonus point incentive. Every group of three levels out of the twelve has a unique way to earn bonus points at the end of the level. In stages 1-3, you earn 40 points for every piece of food eaten. You get a bonus for time remaining in stages 4-6. Levels 7-9 give you 200 points for each dog you knock out with Gau. Stages 10-12 give you 200 points for every hidden jewel you find, which is a special item unique to those stages. I think it’s a nice way to switch up your secondary objective.

The stage timer is also worth mentioning. Unlike a standard counter, it represents time on a clock. Stages start at 8:00am and you lose a life if you don’t finish the level by 8:00pm. The minutes tick by quickly, which is unrealistic given how slow you move in the game. The one neat thing about the clock is that every hour the background color palette changes a little bit to help indicate the passing of time. It’s something you might not recognize right away while playing. I think it’s clever given the age of this game.

There are some special areas in the game. Later levels have factories in them with smoke stacks. The puffs of smoke that rise out of these are deadly. Sometimes a ring of smoke will come out instead of a puff. Be very careful because this is still deadly if you touch the top of it, but if you touch the bottom of it instead, it will carry you with it up into heaven. This area is littered with cakes that give you a whopping 500 points each as well as crows that try to knock you down. This is typically a single screen bonus area, but every now and then heaven scrolls to the right. There are more cakes and you can really rack up points here, but even better is that you can bypass much or all of the stage below if you can keep going. It’s not clear to me what triggers the scrolling heaven, but it’s super useful. I have read you can get it to scroll if you collect the cakes from left to right, but that didn’t seem to work when I tried it. I think the trick is that you have to go into heaven before 9:00am, but I couldn’t trigger it enough times to narrow it down.

Up, up, and away!

On the flip side, there is also a hell area. Falling down a pit sends you to hell instead of dying like you would in most games, but I’m not exactly sure you’re better off this way. Hell is a single screen level completely shrouded in darkness. You begin on the left side stripped of both your power meter and any Gau you brought in. There are two chow chows above you, a regular dog on the bottom, and a bulldog blocking the white exit door on the upper right. There’s a lollipop in the middle to give you some Gau. You can’t fly here so you have to jump on invisible blocks in order to knock out the bulldog and reach the exit. Of course, the bulldog barks at you when you get close, but at least the small dog keeps quiet. Dying in hell simply resets the room with no loss of life, so you are forced to keep trying until you can make it out of there. Or reset the console, I guess. It’s a tough room but the layout is consistent. Eventually the enemies will cooperate and let you through. If you play well enough, you shouldn’t ever see hell anyway.

Chubby Cherub is a tough game. You begin the game with three lives and there are no continues. You earn an extra life at 10,000 points and again for every 20,000 points scored after that. The twelve stages are pretty short but they are full of enemies that kill you in one hit. You earn points at a slow rate and therefore earn lives slowly too. This is a game that takes a lot of practice and a fair amount of luck to beat.

This was my first time playing Chubby Cherub. I collect Famicom a little bit and I had a cart of Obake no Q Tarou: Wanwan Panic before I recently sold it. The Famicom title is very cheap, even for international buyers, but Chubby Cherub is much more expensive. Today it sells for around $70 cart only, and you have to spend a few hundred dollars if you want a complete in box copy. I bought my cart on eBay in 2014 for $30 plus shipping, which was a little under market value then. It’s costly because it was a low print run released before the NES really exploded in popularity.

Seriously, how are you supposed to get through?

It felt like I really struggled to beat this game when it only took me a little over a week to get it done. There’s a high level of difficulty right off the bat. On the very first screen, there is a highly active dog roaming around and you move so slow that death is likely for the first time player. Barking dogs are challenging to avoid anyway let alone the first few times you encounter them. Even with flying all the time, the first few levels are still hard. I found the difficulty decreased in the middle stages before ramping back up again at the end. Heaven shows up in those middle stages which is a great way to get some extra lives. At least then you get more of a chance at the later levels. It might have taken me 20-30 tries to beat the game. My longplay video was the first time I beat it. I had a few unrecorded runs that reached the final level, including one where I lost my last life to the burglar at the end. Sadly, there is no true ending to the game. It continues on to Stage 13, but the later levels are identical to the earlier ones. Chubby Cherub will loop for as long as you can keep going, but clearing only one loop is enough to consider it finished.

Chubby Cherub has a flow to it that I can appreciate. This is getting into spoiler territory here, both this and the next paragraph, so even if you don’t care (and why would you?) you’ve been warned. The game is broken up nicely into the groups of three stages. The first three stages are the introductory levels where you learn all about the dogs and basics of flying and all that. You may even get your first taste of hell in Stage 3. The next three levels give you no Gau at all, but also there are no barking dogs to deal with either. This was the breather I really needed and I beat all these levels on my first try. Stages 7-9 is like the advanced version of Stages 1-3. There are plenty of dogs here to deal with, including several in a row that bark. There are fewer food items here so you also need to cope with not flying in some spots. It’s a big jump in difficulty and Stage 8 was a hurdle for a few days. The designers had one last nasty trick for the final set of stages. I mentioned in the bonus section that these levels have jewels that give you bonus points. The jewels are hidden and you need to touch invisible spots to make them appear. Then you collect the jewels to make the food appear. This is the only way to get food in these levels, and what’s worse is that some jewels don’t reveal any food at all. At least the jewels and their triggers are always in the same places. It’s just mean because you are used to flying all over and now you have to switch gears and play it more like a platformer with worse movement just to survive.

Pray you never have to experience this screen.

I developed a few techniques in order to beat the game. One annoying thing I noticed right away is that any dog knocked out with Gau will fall off the screen but you can still get hurt by them in this state. At first I thought this was a programming bug, but it turns out this has a big benefit. Defeated dogs technically stay active and you can get hit them again with Gau for 1000 extra points. If I lined up with the bottom of the dog, I could sometimes hit it twice while falling. Now you do have to be careful not to use up all your Gau for when you need it to survive, but using excess Gau can net you a lot of points and extra lives that are a big help. I also figured out a consistent way of taking out barking dogs. Their AI is set up so that they won’t bark at you if you are directly above or below them. The trick is that you come at them from above and line up so that you hit the top of the dog with Gau. If you come at them from below, this trick does not work. You can also bait a moving, barking dog above you to fall off a ledge so that you can take them out quickly before they land and bark directly into your face. The last bit of advice is that you should always quick kill the burglar. As soon as he enters the screen, you should be flying already. Swoop around behind him and pick up the bone, and then let it loose as soon as he stops walking. You will still have to dodge some bombs, but this fight is a lot worse if you play it safe.

Chubby Cherub is an aged platformer that doesn’t hold up well today. It’s slow paced, for one. The controls are not intuitive. The graphics are basic and don’t vary much over the course of the game, and you need experience to tell which parts are solid blocks and which ones are passthrough ledges. You are at a major disadvantage against the most prevalent enemy type in the game. That hell area is just plain evil. Now it’s not all terrible. There are only a few simple songs in the game, but I must admit, they are catchier than they should be. I will give Chubby Cherub credit for introducing some hidden complexity to some of its systems that I wasn’t expecting, including the special ways to boost your score. Both discovering and exploiting these morsels of assistance was rewarding and breathed some life into this otherwise lackluster title. I’m not saying you should play this game, but even primitive games by NES standards can have some good ideas worth illuminating.

#72 – Chubby Cherub

 
SEP
20
2016
0
Kid Icarus Box Cover

#26 – Kid Icarus

As long as you don’t fly into the sun, you will probably enjoy this game!

Nice cheery title screen music is an excellent way to start!

Nice cheery title screen music is an excellent way to start!

To Beat: Reach the ending
To Complete: Get the best ending
My Goal: Complete the game
What I Did: Got the best ending
Played: 8/22/16 – 8/29/16
Difficulty: 7/10
My Difficulty: 6/10

It’s always a good day whenever one of the classic NES titles comes up in my list! It can be a little rough around the edges at times, but Kid Icarus has a lot of neat ideas that come together well for a game this early in the library.

Kid Icarus was first released on the Famicom Disk System in Japan on December 19, 1986 under the name Hikari Shinwa Parutena no Kagami which translates to Myth of Light: The Mirror of Palutena. It was co-developed by Nintendo R&D1 and Tose with R&D1 handling the design and Tose handling the development work. The game took advantage of the expanded capabilities of the FDS by including more game content than what was previously done on cartridge, a save game feature, and enhanced audio. Kid Icarus was later ported to a cartridge for release in Europe in February 1987 and a few months later in North America in July 1987.

Kid Icarus received a sequel on Game Boy in North America in November 1991 and Europe in May 1992. Curiously it was not released in Japan until appearing on the Japanese 3DS Virtual Console. The gameplay is very similar to the NES version but it is an all new game. The series would then go into hibernation for over 20 years aside from seeing a Virtual Console release in 2007. The newest title in the series is named Kid Icarus Uprising released in 2012. In that same year the original game received a 3D Classics remake on the Nintendo 3DS.

Kid Icarus is a side-scrolling platform action game. You play as the angel Pit in his quest to save the goddess Palutena and Angel Land from the evil Medusa. The game takes place over four main areas: Underworld, Overworld, Skyworld, and the Palace in the Sky. The first three areas are comprised of four sections each and the final section is a fortress that plays differently than the rest of the game. The object is to recover one of the sacred treasures in each of the three fortresses and use all three of them for the final battle against Medusa.

Thus begins the long ascent...

Thus begins the long ascent…

The first thing you’ll notice when playing Kid Icarus is that play advances upward with vertical scrolling. This is one of the few early NES games to employ vertical scrolling like this as a main component of the game right from the start. Unfortunately the game only handles one-way scrolling upward, and if you happen to fall back down you will die regardless of what platforms you left behind. This is why Kid Icarus seems to be regarded as a difficult game because the early game platforming must be completed with minimal mistakes. The reasoning behind the vertical level is symbolic as Pit begins at the bottom of the Underworld and must ascend upward to reach the Overworld. Stage 2 switches to more traditional horizontal scrolling before going vertical again in the Skyworld. The overall idea here makes sense from a storytelling perspective but it tarnishes the initial impression of the gameplay experience.

One neat aspect about the vertical levels is that Pit can loop around the screen horizontally. You can leave the screen on the left and reappear on the right, and vice versa. This leads to some interesting level design in a few places where you will need to take advantage of the looping mechanic to overcome some obstacles.

Pit can walk left and right and jump typical of a normal platformer game. He can fall through some thin flooring by pressing Down, which can sometimes lead to unintentional falling to your death. He can also shoot arrows from his bow to the left, right, and upward. Pit also has a health bar and he can take a few hits from enemies before defeat. The enemies tend to appear in groups though there are stray single enemies every once in awhile. When they are defeated they leave hearts behind and these are used as currency. Small hearts are worth one, large half hearts are worth five, and large full hearts are worth ten. Pit can hold up to 999 hearts and there are many items that can be found or purchased with these hearts. You can track just about all of the items on the subscreen that is displayed when the game is paused with the Start button.

Kid Icarus sure doesn't pull punches early on.

Kid Icarus sure doesn’t pull punches early on.

There are several types of chambers that appear throughout the levels by way of open doors. Among the most common rooms are two different kinds of shops. The basic shop has items that are fairly priced. The mallet is the cheapest item and is a limited use subweapon that can be equipped by pressing Select during play. It is very strong but each mallet acquired only allows for a single swing before it is depleted. They have a special use in the end of level fortresses that I will cover later. The Water of Life chalice restores some health, and the Water of Life in a bottle will automatically deploy its health boost as soon as Pit runs out of energy. The Angel Feather lets Pit survive a fall off the bottom of the screen by initiating a brief period of flight to recover onto a ledge. These are very useful but are pretty expensive and therefore are not as easy to acquire when you really need one early in the game.

The other kind of shop is the Black Market. This shop is overpriced compared to the normal shop, but these are worth visiting in some situations. The Water Barrel item can only be purchased on the Black Market and it allows Pit to hold more than one Water of Life bottle at a time. If you don’t already have a Water of Life it gives you one for free, otherwise the one you are carrying gets saved in the barrel. There are also some other special items that show up here under special circumstances that I will also mention later.

There is a treasure room that contains eight pots each with a question mark on them. You can destroy a pot to reveal an item but it costs five hearts per pot. You may destroy as many pots as you want. Collecting a revealed treasure removes all the remaining pots but you can grab all the items you found. However one of the pots contains the God of Poverty and if you find him you lose all of the items and are booted from the chamber empty handed. If you break all the pots and leave the God of Poverty for last, the final pot instead contains a more substantial treasure. The bonus treasure can be an Angel Feather, a Water of Life Bottle, a Water Barrel, or the Credit Card. This is the only way in the game to obtain the Credit Card. You can use it in the Black Market to buy items that you cannot afford. Of course if you do so you will be in his debt and are unable to buy any more items until you pay off what you owe him.

Decisions, decisions!

Decisions, decisions!

Another type of room is the Sacred Training Chamber. A God in this room will summon a bunch of randomly moving enemies that look like floor tiles. The object here is simply to survive, and if you do so you are rewarded with your choice of one of three special weapons. The Fire Arrow adds a little fireball to the standard arrow that deals extra damage to an enemy. The Sacred Bow increases the range of Pit’s arrows. The Protective Crystal spawns two crystals that spin quickly around Pit and give him a way to easily defeat weak enemies up close. Over the course of the game you can acquire all three at once, however you cannot use them until you have enough health. There are some enemies in the game that will steal one of these weapons if they collide with Pit. You can recover the stolen weapons by buying them for very inflated prices in the Black Market, or you can earn it back by completing the training again in a later chamber.

The other three chambers you can encounter are more straightforward. The enemy lair contains a swarm of enemies that all drop big hearts for a quick money boost. The Strength Upgrade chamber contains a God that will give you a stronger arrow. There are five levels of arrow strength and you increase it by one for each God you find in this chamber. However, there are some special hidden requirements defined by how well you play that determine if you qualify for the upgrade at all. Finally there are hot springs that restore your health slowly just by relaxing inside!

To cap off the normal item list, sometimes in the levels you will find a harp that turns all of the enemies into mallets for a brief period. This is the easiest way to collect lots of mallets. You can also find the chalices here that restore health.

There is a scoring system in place as well. The score for the current level and the total cumulative score appear on the subscreen. You get points for defeating enemies, although the enemies inside the enemy lairs do not give any points at all. After each section is completed your points are added to the total score. Reaching specific point intervals here will trigger the message Power Up and Pit is awarded an increase to his maximum health. You begin the game with one segment of health and can get up to a maximum of five.

More health makes the journey more manageable.

More health makes the journey more manageable.

As mentioned above, the last section of the first three levels is a fortress that mixes up the formula of the game. The fortress is a non-linear maze that contains a boss hidden within. There are even more items here that assist in exploring the fortress. The check sheet is a blank map of the fortress that draws a grid on the subscreen. It must be found in a specific location in the fortress. The pencil can be bought in a shop and marks off each room on the check sheet that you enter for the first time. The torch must also be bought in a shop and it highlights the current room Pit is in. These items are helpful to show both where you are and where you have been so that you can narrow down where the boss is located.

There are a couple of interesting elements in the fortresses. There are statues scattered all around the fortress that can be broken with the mallet revealing a centurion. Each centurion saved here flies away for now but shows up later during the boss fight to aid Pit in the battle. On the flip side, there is an awful enemy type unique to the fortress called the eggplant wizard. They toss eggplants around that turn Pit into an eggplant himself should he be struck by one. While in eggplant form Pit is unable to fire arrows at all and it is a permanent state that leaves Pit defenseless. The goal from here is to find a nurse inside the fortress who will restore Pit back to normal at no cost. The eggplant wizards are often placed along the critical path to the boss and it is a huge hassle to go back and find the nurse.

When each fortress boss is defeated, one of the sacred treasures is left behind inside a treasure chest. When all three chests are collected all treasures are revealed and equipped for the final level and showdown against Medusa. Here the game switches play to an auto-scrolling shooter that is unique to this last area.

A nightmare scenario...

A nightmare scenario…

Just like Metroid before it, Kid Icarus was updated to include a password system for its NES cart release. The passwords are 24 characters long and comprised of many different characters. The long passwords allow a lot of information to be stored within them. When you continue your game with a password, it saves the level you last played, your heart balance, and all your items, weapons, and upgrades. Even though they are tedious to document and input, it works just as good as a save game and makes it much easier to slowly work though the game a stage or two at a time.

Kid Icarus was one of the titles I have held onto since childhood. I know that I spent some time with it growing up but I could never quite remember if I had played the game all the way through for myself. I definitely beat the game with a password taking me straight to the final level, but I imagine I pulled that out of Nintendo Power or a guidebook. As an adult I have picked it up casually a number of times and I always would stall out prior to the first fortress. The first level is quite difficult with the vertical layout combined with a lack of powerups and abilities for starting out. It took me a dedicated effort this time to finally mark it off as complete.

During my playthrough I really struggled to get through Level 1-3. I did not earn enough points in the first two levels to increase my health bar which really made things harder on myself. I also insisted on clearing the first Sacred Training Chamber since I didn’t how many opportunities I would have later on in the game. It was tough but I made it through after nearly a dozen attempts.

Of course there also has to be fire pits to deal with while you climb.

Of course there also has to be fire pits to deal with while you climb.

From the first fortress onward, the game eased up in difficulty considerably. In the fortresses all the enemies respawn any time you leave the room. I found an area near the boss that had a hot spring a few rooms away from a room full of enemies that left behind big hearts. Between those two rooms I maxed out on hearts plus I managed to earn enough points to max out the health bar at the end of Level 1. Having full health allowed the weapon I earned prior to kick in which also helped. I focused more on the platforming and I was able to beat the game without too much trouble. I would say the third fortress was the hardest challenge remaining and that took some practice with some of the eggplant wizard placements.

Once I completed the game, I decided to investigate how to get the best ending. I had collected everything except for the credit card and I was missing two strength upgrades. I figured that had something to do with it and it turns out my suspicions were mostly correct. Here is how the endings work. There are four separate goals to complete: Have the maximum health bar, have maximum strength, have all three special weapons, and have the maximum number of hearts. You get a different ending for how many of those goals are completed at the end of the game. I got the middle of the road ending by having all the health and all three special weapons. I would have had enough hearts had I not spent some on a Water of Life right before the third fortress boss, but I missed out on two of the strength upgrades and I couldn’t understand why I missed them.

The easiest way to get the best ending is to start a new game immediately after winning. You will restart at Level 1-1 with everything carried over from the end of the previous game. Since I already had found two of the strength upgrades the first time through I earned those again which put me at maximum strength. Then it was only a matter of making sure I had enough hearts before the final level to meet all the requirements.

The boss encounters were among the highlights of the game for me.

The boss encounters were among the highlights of the game for me.

Now this replay wasn’t exactly smooth sailing. Upon beating the game the first time, I killed myself off in Level 1-1 and saved my password to play later on. When I started up the next day and input my password, I began at Level 1-1 but I had lost all of my progress. It was the same as starting a brand new game. I thought that I had either messed up my password or the passwords don’t work on subsequent playthroughs. I found out there is a glitch in the game where it does not save your data on any password starting in Level 1-1. If I had gone on to at least Level 1-2 and took my password there, then the data would carry over. I suspect that when the game loads the first stage it always runs the code to initialize the game state even if the game is loaded from a saved password. I had actually started to replay the game from scratch for a little while before using my old password to resume at the start of the final level.

There are some interesting technical tidbits I think are fun to examine for a little while. Some fine folks have deconstructed the system by which you qualify to earn the strength upgrades. It really is based on how well you play. There is a hidden scoring system calculated behind the scenes in each stage and you need to earn a certain number of these “skill” points to trigger the god to appear in the Strength Upgrade Chamber. Some actions add skill points and others take away points. I won’t go into all of them. You earn points for things like defeating enemies, collecting hearts (but not when you are maxed out), buying an item, or just entering any chamber. You lose points for taking damage, shooting arrows, or breaking pots in the Treasure chamber. Typically all you need to do is take your time and kill many enemies and that will be enough to earn the upgrade.

The password system retains all of the data associated with a playthrough, but it also contains information that determines if the password is legitimate or not. The first 22 characters of the password translate to all of the data the game tracks between sessions. For instance, some of the characters relate to the saved score, some of the characters track how many hearts you have, and so on. The final two characters are called the checksum. Basically the game runs some kind of formula against the password and generates the checksum and adds it to the end of the password. Upon submitting a password on the continue screen, the game runs the same calculation and sees if the last two characters of the submitted password matches the checksum. The password is accepted if it matches and rejected if it doesn’t. Many of the more well-known passwords are not hard coded in the game but are just a byproduct of how the password system works.

The final area mixes up the gameplay one last time.

The final area mixes up the gameplay one last time.

The final tidbit I want to share is that the endings differ between the Japanese release and the US release. Not only are the endings a bit different but the way to get them is completely different. The ending calculation in the Japanese version is the number of health bar segments plus the number of strength upgrades minus the number of deaths in the game. This number determines which of the five endings is received. The best ending in the NES version is not present in the Japanese version. Instead of that ending, there is an even worse version of the bad ending that takes its place. The Japanese version does not allow you to replay the game with item carryover, so instead you would have to play near perfectly in one try to qualify for the best ending. The save system in the Disk System version was likely the driver behind the ending criteria. The method in the US version works better for me anyway!

Kid Icarus is one of those classic NES titles that I think belongs in any library. The graphics are not too bad and the music is pretty catchy. The controls are a little slippery at times but they perform well enough. The major thing going against it is the uneven difficulty curve. The game starts out challenging and gets easier the further you go. Too bad many people would likely give up before getting to some of the later parts of the game that are a lot of fun to play. I enjoyed the game a lot and I am glad that I can finally claim for certain that I have beaten this game!

Kid Icarus Ending Screen

#26 – Kid Icarus