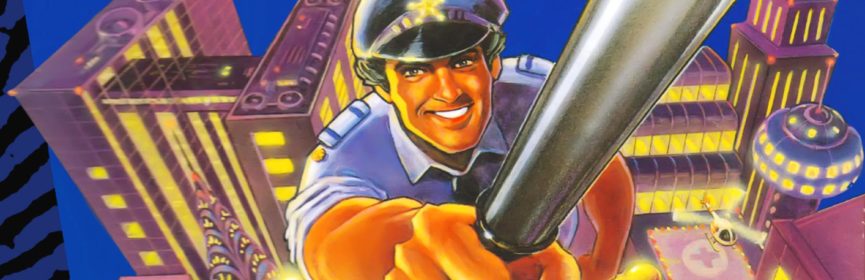
#140 – Space Shuttle Project
You decide if things are cleared for takeoff.

Bright blue skies!
To Beat: Reach the ending
Played: 11/8/19 – 11/11/19
Difficulty: 3/10
My Difficulty: 3/10
My Video: Space Shuttle Project Longplay
I get a lot of excitement out of playing NES games where I don’t really know what to expect, and much of the time I’m delighted with what I end up playing. I was very intrigued by this game just by name alone because it doesn’t really give you any indication of exactly what kind of game it is. Is it a space adventure, a simulation game, or something completely different? Space Shuttle Project turns out to be a little bit of everything and it is one of the more unique NES games I have played so far.
Space Shuttle Project is an NES game exclusive to North America. It was developed by Imagineering and published by Absolute Entertainment. The game was released in November 1991.
The best way to summarize Space Shuttle Project is that it is a mini-game compilation. You play the role of a recently promoted Shuttle Commander. Your job is to support six high priority missions vital to the space program. You are responsible for everything from pre-flight checks to space missions to shuttle launches. To secure your job for the sake of your country, you must successfully complete all six missions. Of course, you also win the game if you do all those things.
Beginning the game throws you into your first challenge right away. You are required to pass the security check. You are given a 4-digit code as well as the name of a shuttle. Next you enter your name up to 6 characters. Use the D-pad to choose a character, A to select, and B to backspace, then select End to lock your name in. Now the code display is cleared and it is replaced by rotating digits. Hopefully you remembered your code or wrote it down. For each digit, wait until the corresponding number in your 4-digit code appears, then press A quickly to lock it in place. You repeat this for all four digits and the shuttle name. If your code matches exactly, then you pass, otherwise you have to try again. You get a few tries before you are locked out completely, losing the game before you even start.

Open valves and doors and accompany your crew.
Each mission is broken up into four stages and the first of these is the launch preparation. This is a side scrolling platformer section where you run around to set up the shuttle for launch. You begin at the bottom of the long elevator shaft. Use Left and Right to walk on the platforms and press Up or Down when on the elevator to move it. First activate the Oxygen pump at the very top. The lever for the pump is flashing so you know which one it is. Press A when in front of the pump to activate it. Now you have to start the Hydrogen pump below it, however activating oxygen now sets a moving obstruction in front of the elevator’s path. Wait for an opening and try not to bump into the blue piece or you will get briefly stun locked. The hydrogen pump activates another blocker. Now you will need to escort each crew member from the bottom of the elevator shaft up to the shuttle door, back and forth for every person. A message on screen will alert you to when you have brought the last crew member so that you can board the shuttle yourself. You are on the clock the entire time and if you don’t get everything done you lose a life and have to start over. The timing for the launch preparation is fairly tight so you need to move quickly while avoiding getting bumped on the elevator as best you can.
The second stage of the mission is shuttle lift off. You are first presented with a long list of items you will be doing. Don’t be intimidated by this, you don’t need to memorize this list! The shuttle launch begins automatically and then you support the different individual steps of the launch via various indicators that play out like tiny mini-games. In this stage you see a side view of your shuttle, and at the top of the screen is the control panel which shows the different indicators. Many of these indicator mini-games are simple timing events. There is a meter shown with a vertical bar that moves left to right. Press A when the bar is in the white band. Some operations like thrusting or braking use the thrust indicator. You control the bottom arrow and you follow the top arrow with Left and Right as it moves back and forth. These are all you need for the first mission. Extra steps and different indicators appear in later missions. During lift off you set your navigation via the tracking indicator. There is a gray sine wave with a tiny white dot overlaying it. As the dot slowly passes from left to right, you use Up and Down to keep the dot on top of the sine wave as close as possible. Valve adjustment is done via the test indicator. There is a set of six lights that glow in sequence and you have to repeat that order to pass using Left, Right, and A to turn on each light. Completing this indicator gives you an extra life as a bonus. Vernier adjustment is done by moving an arrow above and below a bar through a gap that passes back and forth. The gap moves quickly but eventually does a slow pass which is when you make your move. The gimbal indicator game is played by bouncing a vertical bar back and forth between two zones on a meter. When the bar touches the left zone you press B, and when it reaches the zone on the right you press A.

Support the shuttle launch through mini-games.
The third stage is the actual mission that is different every time. The first of these missions is a satellite launch. Your job is to carry a satellite by hand from the space shuttle up to its orbital path at the top of the area. You have limited oxygen which acts as your mission timer. You control your astronaut’s thrust with the D-pad. Since you are in zero gravity, you will keep drifting along until you thrust in the opposite direction to slow down and change course. There are other satellites floating past that you must avoid, as colliding with them costs you a life. Once you get to the top and place the satellite, it needs a little time to open up its panels. The best way to avoid a collision during this action is by placing the satellite while moving in the direction of orbit. Along the way, there are round energy panels that sometimes appear in orbit with the moving satellites. You can touch these safely for an extra life. You might also see an oxygen tank that refreshes your oxygen levels.
The second mission has you building the space station. You have to carry panels from the space shuttle to where they are needed on the space station itself. This stage scrolls from left to right and has the same movement controls as the previous mission. As you scan the space station you will see background panels that appear darkened. These are the missing ones that you have to align with carefully to automatically put the new panel in place. Then you must move carefully back to the shuttle so that you can re-enter it from the hatch on the top to retrieve a new panel. The shuttle restores your oxygen level. You can also restore oxygen from permanent tanks that are on the background. Just fly over them to restore oxygen. You need to apply four panels total to complete this mission. This mission is reprised in both Mission 4 and Mission 6. The difference is you need to fly farther to place the panels and you have to set more of them in subsequent missions.
For the third mission, you are fixing a satellite already in orbit. Here the space shuttle is in the lower left corner while asteroids are circling Earth. Among the asteroids is the satellite. Approach the satellite carefully, grab it, and take it back to the space shuttle. You enter from the top of the shuttle like in Mission 2 but here it is flipped so you approach from below this time. Inside the space shuttle you automatically do the repairs, so now you need to go back through the asteroids to place the satellite back into orbit. Once that’s done, re-enter the shuttle to complete the mission.

I guess you have super strength in space.
In the fifth mission, you are rescuing a stranded cosmonaut. This is similar to the first mission where you need to go up the screen, though this time it is much further. You will need to add some oxygen via floating tanks found on your path. Once you get to the top, go up and around the Russian spacecraft to retrieve the cosmonaut, then proceed carefully back down to the space shuttle.
Finally, the fourth and final stage in every mission is the re-entry back to Earth. This plays out the same way as the shuttle launch in the second stage, only there is a different order to the mini-games required to land safely. There are also a couple of new indicators unique to re-entry. For setting movements like roll and pitch, you use the maneuver indicator. This is the same as the normal timing mini-game only with pressing a D-pad direction instead of A. The other new one is the alignment indicator. You will see an outline of your shuttle and a second outline will separate from it. You use the D-pad to guide the two outlines back into alignment, then press A to lock them in.
I’ve casually mentioned this already, but this game has lives, in the gaming sense. Every time you make a mistake on a mini-game, fail to prepare the shuttle for launch, or crash into something in your space suit, you lose a life. The penalty varies depending on the stage and mission. Messing up a timing mini-game proceeds normally. Crashing in your space suit sends you back to the shuttle. Failing the pre-check means you repeat the entire process. I think these penalties make sense given the situation. You begin the game with five lives and remaining lives carry over from any stage or mission. You can only have up to nine lives even if you go over. If you run out of lives, you must restart the entire mission all the way back to pre-check. You can reset your lives by starting a mission using the password. Your password is the same format of the 4-digit code and space shuttle name as entered in the opening mini-game. It’s pretty clever to recycle a game mechanic as password entry.
This was my first time playing through Space Shuttle Project. When testing out my cart I only cleared the first stage of the first mission. That meant I was aware of code entry and the shuttle setup, but nothing beyond that. This game is not incredibly common but not too hard to find. Loose cart copies are selling for around $15. I got my first copy from a seller back on NintendoAge with three other games for $30 total, if memory serves. A friend of mine traded with me for a condition upgrade, which I gladly appreciated.

Welcome home, crew!
This game was not too difficult for me to beat. In a way the first mission was the most difficult one because you don’t quite know what to expect over all stages. The shuttle pre-check stage is a little tricky especially in the later missions. At best, I finish with about 10 seconds to spare so there’s not much wiggle room for error. Both the take off and the landing stages were the easiest for me to clear. The mini-games are easy enough, and you play them so much that they become second nature almost right away. The space missions are not as varied as they first appear. You move through obstacles and things in every mission, only the layout changes in the odd numbered missions. After a few missions I had this game down pat, beating it with passwords over a couple of days.
You can probably guess that this game becomes quite repetitive. There are cutscenes and animations that are repeated every stage during launch and re-entry. These scenes are well made and neat to see, but only for the first couple of times through. After that they feel long and drawn out, which is quickly made apparent during a longplay. My recording of the whole game took over an hour and it could have been sped up by several minutes with some quicker or skippable cutscenes. It is a boring video to watch, but it is complete and I played well with only minor mistakes. I did figure out one little trick to save time. During the even numbered missions, after you place a panel, you can intentionally crash so that you restart back at the shuttle. If you are holding anything, you lose it, but for the return trip back to the shuttle, since you aren’t holding anything it becomes a nice time saver. Over the full game I had plenty of extra lives to burn for this.
There’s one bonus tidbit about this game that I want to share. I didn’t know about this before I completed the game and I would have showed it off if I did. It’s really simple. There is a bad ending to the game triggered when you lose all your lives during the opening mini-game. At the end of most missions, you see a newspaper with a headline detailing your successful mission. In the bad ending, since you failed to authenticate at the start, the paper announces your arrest for impersonating the shuttle commander. It’s a nice Easter egg to find that’s right there for the taking.
Space Shuttle Project was a pleasant surprise for me to play. This is a simple game that takes multiple, unexpected forms as you go. The graphics and animations are well drawn and nice to look at. The music is just okay, nothing notable. The controls are spot on once you know what to do. Some of the shuttle mini-games are not immediately intuitive but control correctly when you know how. The gameplay is on the simplistic side and there’s not much meat to each mission, even the ones in space, though those are the most fun. I really enjoyed the first few missions and then the game was a bit of a drag, slogging through the same things over and over. Playing a single mission was quite fun for me, but too much more than that is overkill. It’s too bad the game overstayed its welcome, since this game made me genuinely happy before I got tired of playing it.

#140 – Space Shuttle Project