Take on the NES Library

An 8-bit Extravaganza!

stones

OCT
02
2018
0

#97 – Chip ‘n Dale: Rescue Rangers

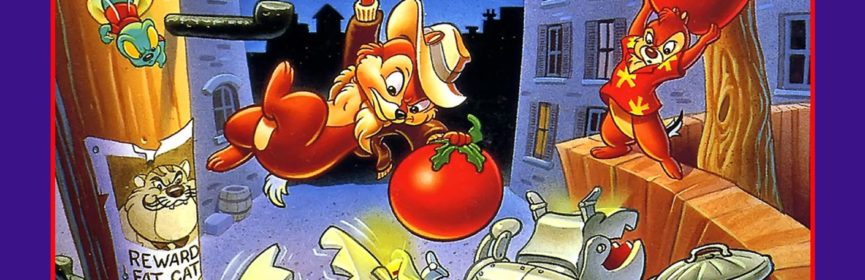
If you ever wanted to throw a friend, here’s a great way to do it!

Ch-Ch-Ch-Chip and Dale!

To Beat: Reach the ending
Played: 8/12/18
Difficulty: 4/10
My Difficulty: 3/10
My Video: Chip ‘n Dale: Rescue Rangers Longplay

We are almost at 100 NES games into this project, yet somehow this will be the fourth Disney Afternoon NES game on the list already. Sure, I handpicked DuckTales to round out my first ten games, but then TaleSpin followed quickly after. DuckTales 2 was beaten just a few months ago. I did not watch much of those cartoons in the Disney Afternoon lineup, but I sure played a ton of Chip ‘n Dale: Rescue Rangers over the years. Time to play it again and document it all!

Chip ‘n Dale: Rescue Rangers was an animated series from Walt Disney Television Animation. It was created by Tad Stones and Alan Zaslove. The series technically started with a preview episode that aired in August 1988. The full series began on the Disney Channel in March 1989 with a 13-episode run in its first season, which included that preview episode. Season 2 ran 47 episodes from September 1989 through May 1990. The first five episodes of the season were initially created as a standalone movie named Rescue Rangers: To the Rescue. The third and final season was an abbreviated five episode run from September 1990 through November 1990. Reruns were aired as part of the Disney Afternoon from 1990 through 1993.

Chip ‘n Dale: Rescue Rangers is one of the few releases to launch near simultaneously in both Japan and the US. Both the Famicom version, named Chip to Dale no Daisakusen, and the NES version were released June 1990. The PAL version would wait until December 1991. There was also a port to the Playchoice-10 arcade machine. Capcom both developed and published this game. Chip ‘n Dale: Rescue Rangers was included as part of the Disney Afternoon Collection compilation released in 2017.

Small cutscenes progress the story.

Chip ‘n Dale: Rescue Rangers is a side-scrolling platformer. The Rescue Rangers work together to find their neighbor Mandy’s missing kitten. Chip and Dale go hot on the trail and fend off a bunch of mysterious robotic enemies. It turns out to be a distraction as their enemy Fat Cat captures Gadget, one of the Rescue Rangers. Now the remaining Rescue Rangers have to work their way through several levels to find and defeat Fat Cat. Simply reach the ending of this story to beat this game.

At the start of the game you decide if you want to play single player or two-player mode. In single player you then get to pick if you want to control either Chip or Dale. Both play the same so just pick the one you like more. In two-player mode, player 1 is Chip and player 2 is Dale. Two-player mode is simultaneous play which I have found is a big draw to this game.

The controls are normal platformer controls. You move around with the D-pad and press A to jump. You can control your fall with the D-pad for good old precision movement. Hold Down to duck low, and if you press A then you will jump down through ledges. The B button is used to pick up and throw objects. Normally you will throw crates but there are other things you can grab. Push into the crate from the side and press B to pick it up. You can move around like normal when holding a crate. Press B to throw the crate sideways the length of the screen. You can hold Up and press B to throw a crate straight above your head, like you have super strength. If you duck while holding a crate you will hide inside of it. You’ll see your character’s eyes peeking out. While hiding like this, enemies can walk right into the crate and take damage, acting like a shield of sorts. If you throw the crate while hiding you will throw it low across the ground. In the two-player mode, you can throw crates at each other, stunning your partner briefly. You can also pick the other player up, carry him through the level, and throw him around. Press Start to pause the game, and press Select to also pause the game and bring up a status screen.

Always carry a crate along.

A little information is on-screen during play, and the rest of it is shown on the status screen. The top of the screen shows your health meter in the corner. You get three hearts of health and damage from an enemy causes you to lose a heart. In this game there is no way to extend the maximum health meter. There is also a C or a D displayed above the health depending on if you are playing as Chip or Dale. The status screen from pressing Select shows your character portrait along with the number of lives, flowers, and stars you have collected.

There are powerups and collectibles you can find. Flowers are the most common item you will see all the time out in the open. Meanwhile, stars are usually found hidden behind a crate. Once you collect either 100 flowers or 20 stars, a 1up star will float into play from the side of the screen. You can occasionally find 1up stars hidden in crates. You can tell the difference as 1up stars flash colors and normal stars do not. Health-restoring acorns can also be found in crates. Normal acorns restore one heart and blinking acorns restore all health. While not a powerup, I want to also mention the metal crates. You can’t throw these, but you can pick them up, drop them, and stack them to build makeshift stairs.

Large treasure boxes may hold special items. You can find full-health acorns inside them sometimes. You can find a powerup with the letter P on it that helps you carry heavy items. There are some things like large apples that you can pick up but they slow your movement and you can’t jump as high. When carrying an apple you can see Chip or Dale visibly sweat because it’s so heavy. With the P powerup you can carry big items the same as normal ones. Boxes may contain a hunk of cheese that lures fellow Rescue Ranger Monterey Jack. He will go after the cheese while knocking a hole in the wall that opens up the next screen. The best powerup is Zipper, another Rescue Ranger. He provides temporary invincibility and knocks out all your enemies for you while it lasts.

Choose your own adventure!

You jump right into the action after the initial story sequence in a new game. The end of this level is when Gadget gets captured. After a message from one of the characters, you get to choose the next level you want to play from the map. Each area is identified by a letter of the alphabet, and you can fly your plane to the one to want. Of course, you have to beat a level before you can pass it on the map to the next one.

At the end of each level before the map screen, you get to play a bonus game. This is a single-screen platforming segment with a few crates that have items inside. You want to find stars and 1up stars here if you can, but the bonus game is over so quickly that you have to be intentional on where you want to look. In two-player mode this is especially devious as you can stun the other player with thrown crates, losing precious bonus time in the process.

The levels themselves are mostly straightforward platforming. There are locations where everything is large in contrast to your small size. You can run around library books or jump over steaming pots in the kitchen. Some stages have interactive elements. For instance, you can turn off streams of water in the way by jumping on top of and turning the tap. You can also hit switches with crates to turn things on and off. The path of the level may take you in any direction, but you always stay on track and the screen doesn’t scroll to let you backtrack.

Turn the tap to shut off the upper valve also.

Most stages end in a boss battle. Instead of the bosses dropping throwable items, you get a single red ball used to attack. This ball acts like the crates but it is permanent. Throw it into each boss five times to defeat it. The ball always rebounds off the wall and flies backwards before dropping to the ground after its next collision with one of the sides. This is so you can’t lose the ball behind some of the larger bosses in the game.

You start the game with three lives. You can play when the status screen shows zero lives remaining, so you always have one more life than it appears. The same thing happens with continues. You can continue up to three times from the start of the stage where you died. Before your last continue, the Game Over screen will display “Continue 0.” I think it’s nice to have what feels like an extra continue just in case you need it!

Chip ‘n Dale: Rescue Rangers was a game I’ve owned since I was a kid and I have played through the game countless times. We did not own this new, but it sold well enough that there were a lot of second-hand copies floating around. I don’t recall how I got my first copy but I have had a few other copies I bought within game lots on eBay. As a popular, yet common game, it always sells for around $10-$15.

This huge boss is probably some kid’s toy robot.

I have played a lot of this game, but I hadn’t played it recently. I liked the idea of trying to beat the game without dying, but this time I just wanted to beat the game well enough to move on to the next one on my list. I died four or five times in my run and I didn’t get too far in before I died the first time. It’s not a great outcome, but I’m satisfied with it. I made sure to play all the stages. Poor Area E gets ignored by just about everyone since there’s really no reason to play it due to its location on the map. I wanted to give it part of the spotlight during my playthrough because it’s a good level like the others.

Chip ‘n Dale: Rescue Rangers is a great NES game suitable for any collection. It has colorful and detailed graphics, peppy music, responsive controls, and fun levels. The enemies and traps are interesting with some creative behavior and interactivity, and the boss battles are well made. The levels are in some unusual but clever settings and they really suit the game well. My only gripes are that the game feels a bit too short and the game difficulty is mostly easy. A few of the levels can be skipped over entirely making for an even quicker game if that’s what you want. These are minor complaints. This is an excellent game made even better by supporting two players. Games like this tend to make me crave more of it, but lucky for me there’s an NES sequel coming up someday. I haven’t yet played Chip ‘n Dale: Rescue Rangers 2, nor do I know much about it at all, so I am very much looking forward to playing it!

#97 – Chip ‘n Dale: Rescue Rangers

 
SEP
07
2018
0

#93 – Indiana Jones and the Temple of Doom

More like the Temple of Pain, Suffering, and Doom.

The top title text is usually cut off on old TVs

To Beat: Reach the ending
Played: 7/5/18 – 7/12/18
Difficulty: 9/10
My Difficulty: 9/10
My Video: Indiana Jones and the Temple of Doom Longplay

I’m here to talk about Indiana Jones and the Temple of Doom on NES, but what I really want to talk about is La-Mulana. I’ve long thought the game La-Mulana is secretly the best Indiana Jones game, or at least the best interpretation of that concept. In La-Mulana, you play as the archaeologist Lemeza as you seek to follow your father’s footsteps in exploring and discovering the secrets of the ruins of La-Mulana. It’s a Metroidvania game with a huge emphasis on solving complex, intricate puzzles spelled out through cryptic textual monuments. You really need a pencil and notebook as you gather clues and piece them together throughout the journey, while also collecting various artifacts, battling huge bosses, and avoiding constant death traps. This is not a game for everyone, but I fell hard for it and it is one of my favorite games, both the original freeware version styled like an MSX game, and the newer remake available on Steam and elsewhere. Actual Indiana Jones games seem to take a safer stance in terms of gameplay. There are several Indiana Jones games on the NES that are standard platformers. Indiana Jones and the Temple of Doom, on the other hand, is less of a platformer and a lot closer to my La-Mulana-like ideal than I originally thought.

Indiana Jones is a well-loved film franchise. There have been four major films to date: Raiders of the Lost Ark in 1981, Temple of Doom in 1984, The Last Crusade in 1989, and Kingdom of the Crystal Skull in 2008. A fifth movie is slated for production beginning in early 2019 with a tentative release date in 2021. A TV series, The Young Indiana Jones Chronicles, ran from 1992-1993, and that series was followed by four made-for-TV movies between 1994 and 1996. There have been plenty of books, comics, video games, toys, and attractions revolving around Indiana Jones.

There are two video games based on Temple of Doom. The first was a 1985 arcade game that was later ported to various home computers. The NES game, Indiana Jones and the Temple of Doom, was released in 1988. It was developed by Atari Games and published by Tengen. In December 1988, Temple of Doom was licensed by Mindscape, so that’s the version I played for the project. Both the unlicensed Tengen version and the licensed Mindscape version are identical games. This version was also ported to a few home computers.

Whip it, whip it good!

I have seen all of the Indiana Jones movies, but it’s been a few years and I don’t remember much of anything about Temple of Doom. From what I’ve read, the story and gameplay both follow the movie. You play as Indiana Jones who, along with his companions Willie and Short Round, reach the village of Mayapore. The Sankara Stones have been stolen and the children of the village have been captured by evil people from the Pankot Palace, led by the high priest Mola Ram and his Thuggee guards. The children have been forced to mine for the missing Sankara Stones, so Indy sweeps in to save the children and recover the stones. The game consists of twelve levels, or waves, that you need to beat to complete the game.

Indiana Jones and the Temple of Doom is an action game from what I’ll call a near top-down perspective. You use the D-pad to move in all directions. Indy is armed with his trusty whip that you wield with the A button. You can whip in all eight directions by holding the direction and pressing A. The B button is for jumping. A for jumping was a standard convention by now, but nope, it’s B. If you just press B, you will jump downward. If you want to jump in a different direction, hold the D-pad in that direction and then press B. The Start button pauses the game and brings up a status screen. Use the Select button to switch weapons. You hold Select and press either Up, Down, Left, or Right to switch between the four weapons in the game.

You will spend a lot of time in this game saving children. They appear within holes along the cave walls. Simple walk or jump up to them to save them. You will earn some points and they often will leave weapons behind that you collect. Usually, they drop either a gun or a sword. These are limited use weapons that have secondary functions. In the first room of Wave 1, you can use the sword right away. There are small tunnels boarded off by wooden planks. If you slash them with the sword, they will reveal TNT to collect. These are your base weapons in the game that you switch between with Select. Left is for the gun, Right for the sword, Up for TNT, and Down to go back to your whip.

I’m coming to save you! (For equipment and points)

There is limited information on-screen during play. There is a countdown timer at the top of the screen that counts down from 99. The timer speed varies depending on the level. If it goes down to 0, Mola Ram appears, which causes you to lose a life and you have to start the wave over. Below the timer is an icon for the current weapon equipped if it’s something other than the whip. When you switch weapons, you briefly see the ammo count next to Indy. The Status screen when pausing the game gives you a lot more information. You are shown your current score and lives remaining. Below that are all your weapons and ammo accumulated. You also see any special items you’ve collected. Next are the number of children remaining in the wave and how many map pieces are remaining in the game.

There are other items to collect from the children. Some children have map pieces that you hold onto until a later event in the game. An arrow may be left behind. You can pick this up for points, but it’s main purpose is to point the way toward a warp room. Small jewels restore your level timer. Hats are extra lives, and they play a familiar tune when you earn a new life. The key opens the locked door to the next wave.

Most waves in the game follow a similar pattern. Each wave has two rooms. One is a cave room, and the other is a mine cart room. You can switch freely between the two rooms within a wave. The cave rooms have open doors that lead to the mine cart room, and the mine cart tracks may end in tunnels that lead back to the cave room. Each room has a locked door leading to the next wave. To open the locked door, you first obtain the key from the opposite room. The key in the cave room opens the locked door in the mine cart room, and vice versa. Each room has its own key so it is up to you how you want to approach clearing each wave.

Come along for a ride.

The movement mechanics allow for some complex scenarios that the game takes full advantage of. The rooms start getting really large within just a few waves. They also loop around in all directions, which makes them seem even bigger than they really are. Sticking to the main paths will not get you very far, especially in the mine cart rooms. You are going to have to leap from ledge to ledge to explore every nook and cranny of the rooms. Jump while holding Up to jump on the same ledge you are standing on. Otherwise, you fall through all solid objects until you reach a walkable area. The mine cart rooms have a bunch of disconnected conveyor belts so you need to jump to get around those for sure. You also must contend with lava rivers all over these rooms too. Falling onto a lava tile is instant death, so you have to be smart and not just jump all willy-nilly through the rooms.

The mine carts add some additional movement options within those rooms. First, you must jump onto the mine cart to climb in. Then you get to ride around! Carts move from left to right and you can slow them down by pressing Left and speed them up by holding Right. Press Up to lean the cart to the left and Down to lean the cart to the right. Sometimes lava or something is obstructing part of the path and you can lean one way to get through. Be careful as other mine carts appear periodically and they can get in your way, causing you to crash and die if you collide. Tracks sometimes merge which also facilitates collisions. Getting the mine carts to appear in the first place can also be a hassle. Usually you need to scroll the screen horizontally to get one to appear from the left side. In later waves, enemies are in the carts and you need to whip them or defeat them some other way before entering.

The enemies in this game as a huge nuisance. They don’t typically kill you, rather they stun you. This pushes you somewhat and often forces you to fall to the ledge below. Those falls can drop you to your death or leave you vulnerable in other ways. The most common enemy is the Thuggee guard. You can kill them with other weapons or stun them with the whip. You can knock them into the lava for an easy kill. Once a guard is whipped, he becomes an attacker and will kill you outright with a hit. There are bats, rats, snakes, and spiders that move erratically and stun you. Retractable spikes and lava pools kill you. Some guards drop boulders in the mine cart rooms that kill you if they drop on you, but the rocks also provide the benefit of temporarily stopping the movement of conveyor belts.

Whipping guards into lava seems excessive.

Indy has his set of weapons to help out. Furthermore, all of them have secondary uses for moving around the levels. The whip is your primary weapon for stunning guards and killing minor enemies. You will find hooks on the walls that you can latch onto with your whip to swing over gaps. The gun does not actually fire bullets, but instead does instant damage to the first object within its line of sight. There are skulls on the wall that you can shoot with the gun to reveal hooks for swinging with your whip. Swords kill guards and enemies, while they are also used to open up blocked caves containing TNT. The TNT can be thrown in eight directions and leaves a blast that kills enemies. This explosion removes spikes and certain lava tiles that obstruct walkable paths. I found myself switching weapons all the time for each need as it appears.

Another use of the TNT is to reveal hidden rooms. In waves 1, 4, and 6, some children will hold arrows that point in the direction of a hidden room. When you think you’ve found the spot, bomb it to hopefully reveal the door. This takes you to a warp room, which is its own unique stage. Pass through any door in the warp room to advance to a future wave. Doors farther out in the warp room advance you further along in the game. As a bonus, you earn all the map pieces in a wave where you don’t rescue any children, including the waves you skip via warp. Waves without a warp room also have hidden doors revealing either a large cache of normal items or a special item.

The first eight waves all follow the two-room structure and get difficult fast. Wave 9, however, is where the game takes a turn into a devious direction. This wave contains only one room called the Chamber of Kali. Your goal is to reach the Statue of Kali and the three Sankara Stones at the top of the room. You have to forge a path across the lava river to get there. There are several locations where lava monsters appear randomly out of the lava. Hitting a monster with either the gun or TNT turns the monster to permanent stone and you can walk across. The idea is to find the area with the most lava monster activity so that eventually you will clear a path across. You are at the mercy of randomness as you wait for the monsters to line up properly. Once you get to the other side, retrieve the stones and then locate the exit door to Wave 10.

Building your own lava bridge is excruciating.

This is where the map pieces you have been collecting come into play. Before starting Wave 10, you are presented with a crude map of one of the rooms in the wave. There are 25 pieces of the map in all so you may see a partial map excluding sections at random representing map pieces you did not collect. The map shows skulls, doors, children, and an X indicating the exit door for the wave. This is the only time you see the map, so commit what you need to memory or make notes before proceeding.

Wave 10 consists of six large rooms with several doors connected to other rooms. Your task is to use the map to determine which room contains the exit and where the exit is positioned within the room. The exit door itself is hidden and must be revealed by TNT. Each room has four possible locations for the exit door, so there are 24 possible exits. When you find the exit door, you will not be allowed to exit the wave unless you are holding the three Sankara Stones. Unfortunately, if you die in Wave 10, you drop all the stones you are holding. Each room has three large skulls in it and these are where the stones are placed should you drop them. It would really behoove you to get all three stones back in your possession before moving to a different room. God help you if you drop stones in two or even three different rooms at once. All the while, you have to deal with lava pits, lava monsters, conveyor belts, swarming enemies, and all that good stuff. Without a doubt, this is one of the nastiest challenges I’ve experienced in this project to date.

If somehow you survive Wave 10, there are still two more waves to finish. These are more straightforward challenges, but you still need to hold all three stones to exit the wave and you must collect them from skulls if you die in the wave. These scenes are meant to follow the movie as you destroy the rope bridge and keep Mola Ram from escaping. The good thing is that you have unlimited continues throughout your entire journey. The bad thing is that once you get past Wave 9, you go back to Wave 9 when you continue. Still, it’s better than starting from scratch.

This just gets ridiculous.

This was my first time playing Indiana Jones and the Temple of Doom. I do remember that this game seemed awfully challenging when I tested out my carts, and I have heard that this is one of the most difficult games on the NES. This is an inexpensive game, but it’s not one I see a whole lot, either in licensed or unlicensed form. I think I owned the Tengen unlicensed version before I owned the licensed Mindscape version. Both versions cart only are worth around $8-$10.

I had what I consider an unusual path to completing this game. I struggled the first couple of times I tried. Wave 1 is really small, but after that, the rooms seem to increase in size drastically up through either Wave 5 or 6. There are several doors connecting each room together and I couldn’t keep track of where I was. I had a couple attempts where I gave up around the middle of the game, but it felt like I was on the brink of getting the hang of this game. One morning I got up early and tried again, and I finally reached Wave 9 without warping before I had to stop. I was able to leave the NES on all day and chipped away at attempting the end of the game, and then before bed I was able to beat the game. I didn’t expect to finish it, so I wasn’t recording, and I wasn’t exactly thrilled with the prospect of playing through the entire game again. So it goes. I was able to block out a few hours during the evening on another night to set up the recording and play through the whole game again. Sadly, this game is a little buggy. It crashed on me somewhere around Wave 7. I was able to jump straight to Wave 9 with the continue code but all my item counts were screwed up. I started over and then it crashed on me again in Wave 10. This time I was able to continue from Wave 9 with everything normal. I ended up going to bed and came back early in the morning before work to finish the game on video. I was running low on time but I managed to beat the game again with all the proper documentation.

There are a couple of optional special items that make this journey a lot easier. These are called out in the manual directly. There is a hidden door in Wave 7 that hides the special key, and another hidden door in Wave 8 that hides a secret idol. Both these items have their locations randomized at the start of their respective waves. The special key unlocks any locked door in the game but you can only use it once. There is a locked door in Wave 9 that can only be opened with the special key. It takes you to an island partway across the lava river in that wave, saving you a lot of time. The secret idol is much more useful. If you have it, the secret idol will appear within Wave 10 on top of the hidden door to Wave 11. It takes much of the guesswork out of where the exit is hidden. The secret idol item is permanent too. In my opinion, the secret idol might as well be mandatory to finish the game. The map, even a full map, is far too sparse and lacks enough detail to be useful. With enough plays, I suppose you could learn how to connect the map data to the location you need to search, but believe me, I’d rather not. If I have to find something hidden, I’d rather bomb around the two rooms of Wave 8 than the six rooms of Wave 10, especially since I can keep continuing on Wave 8 for as long as I need to.

Identifying the hidden exit is a huge relief.

Lastly, I want to discuss the difficulty rating. A fellow who goes by Electric Frankfurter helped compile a list of the Top 30 most difficult NES games. My two 10/10’s so far, Ikari Warriors and Q*bert, are both featured on the list, and so is Indiana Jones and the Temple of Doom. Make no mistake, this game is hard, ridiculously hard, with what is asked of you to complete the final stretch of the game along with unlimited enemies that are all over you all the time. It falls short of 10/10 for me because of the infinite continues. I have many of the 10/10 games already in mind, and I’m really going to have to take a deep look at the ones that have infinite continues to see if they are truly deserving of the hardest of the hard. The fact is that if you can reach Wave 9 with a good number of items (and hopefully the secret idol), you can just keep hammering away with the exact same item loadout until you beat it. Total play time is another factor I consider. I beat the game twice within a week and I don’t think I spent any more than 10 hours total. That’s not quite 10/10 for me either. I don’t do fractional scores, but I would say the game is more challenging than most of its peers in the 9/10 area.

I am more impressed with the idea of this game than how it actually turned out. There are some clever concepts here with collecting pieces of a map, locating secret items, and using multiple weapons that double as tools. Randomization adds some replay value to the mix. The rest of the game is kind of a mess. The rooms are huge, complex, and tough to successfully navigate under constant enemy threat. Whip swinging has poor hit detection, both on hooking with the whip and landing on the other side of the swing. The jump mechanics are confusing and many jumps to below ledges don’t make physical sense. Locating hidden doors are all trial and error that require limited resources to reveal. The controls for switching weapons don’t always trigger correctly, which always happens when I am in a rush. The graphics are okay and the music is poor, aside from the Indiana Jones theme. There is bad programming that can occasionally lead to crashes. The game is playable, but for the most part it is more frustrating than fun. If you are looking for a new challenge, this game certainly has it. Now if you’ll excuse me, I think I need to go play some La-Mulana.

#93 – Indiana Jones and the Temple of Doom