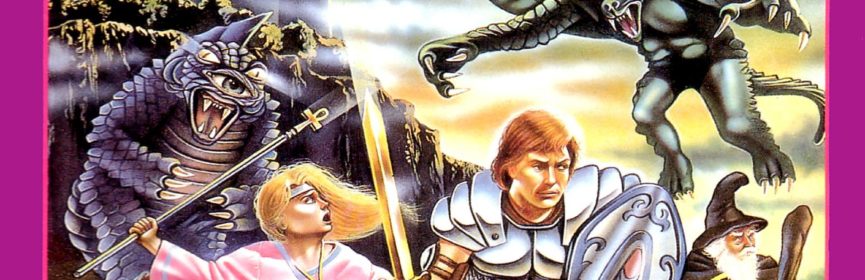
#171 – Ultima: Exodus
The Ultima journey on NES begins here!

The long journey awaits!
To Beat: Reach the ending
Played: 11/27/20 – 4/7/21
Difficulty: 9/10
My Difficulty: 9/10
My Video: Ultima: Exodus Longplay Part 1 Part 2 Part 3 Part 4 Part 5
So needless to say, this is a big one for me. If you were following my journey through this game on my Twitch channel, you certainly saw all of the blood, sweat, and tears I went through to beat this game. The Ultima series has been a total blind spot in my gaming knowledge. Dragon Warrior was the gateway game for me to get interested in RPGs, but Ultima is an older series with more vintage sensibilities, particularly the earlier entries on home computers. I’ve never been a Dungeons and Dragons guy either, so these kinds of games, while historically important, don’t sit with my interests. But I knew all along of the three NES Ultima games and, perhaps surprisingly, I was looking forward to getting to know this series better. It ended up being way more than I bargained for.
The Ultima series of games is the brainchild of Richard Garriott, who first got into computers through a programming class in his high school. He and a friend convinced the school to let them do a 3-year self-study program, giving him access to the school’s Teletype machine where he eventually wrote 28 fantasy computer games while a student. After high school he worked at a computer store and got to see an Apple II, and he immediately latched onto it and made a new graphical computer game he called Alakabeth. The store owner convinced him to sell copies of his game inside the store. At first, he only sold 5 copies of the game, but one of them made its way to a company called California Pacific who quickly sent Garriott plane tickets, and he signed a contract with the company to sell his game through them. Alakabeth sold 30,000 copies and Garriott received $5 per copy, making him rather wealthy very quickly. From there he started to develop the Ultima series.
The main Ultima series consists of 9 numbered games, neatly broken up story-wise into 3 trilogies. Ultima I came out in 1981 and Ultima IX was released in 1999. The series originally started on the Apple II but quickly found ports to other home computers, and naturally to more modern platforms for the later releases. There were 3 NES Ultima games: Ultima III: Exodus, Ultima IV: Quest of the Avatar, and Ultima V: Warriors of Destiny, only with the numerals removed. Ultima: Exodus was first released on Apple II in 1983, and then was ported to various other computers throughout the 1980s. The NES version was first a Famicom release in October 1987, published by Pony Canyon. The US release waited until February 1989, published by FCI. The original game was developed by Richard Garriott under his new publisher group Origin Systems, while the Famicom/NES port was done by Newtopia Planning. During research I also saw the group Softhans listed as a developer, but the relationship between the two developers is unclear. Perhaps both groups are the same group, I don’t know.

Build many characters to find the ones right for you!
This was my first time playing through Ultima: Exodus and my first Ultima game ever. This game must have sold well back at release because I had a copy of this one in my childhood collection probably from a yard sale. I remember popping the game in once or twice and completely rolling off of it right away. No way I was getting anywhere in this game as a kid without the manual. I have had quite a few copies of this one while collecting, pretty much all of them in good shape, and all have been resold already. I even have the box and manual. This has typically been a $5-$10 cart, and now that NES game prices have been on the rise again, currently it is sitting at a crisp $12 price.
I’m deviating a little bit from my normal review format for this one. I feel the best way to write up my review of this game is to hit the main points and features in the same order that I experienced them on my own. Ultima: Exodus was significantly more challenging than I expected and my route to the ending was very, very long, clocking in at over 50 hours. You’ll come to see a lot of that length was my own doing; I could beat this game much faster in another playthrough if I desired, now that I know what to do and how this game works. But a lot of the long duration had to do with the complicated systems at play and how that works with the world itself. Another thing: this review is going to contain spoilers of all kinds. I’m leaving few stones unturned here, if any. If you have not played this game before and have any interest in trying it out for yourself, then this review is not for you. Otherwise, we are about to take another very long journey together, and there’s a spot in the party just for you.
Ultima: Exodus takes place in the land of Sosaria. Under the rule of Lord British, there have been major attacks in this land before. In the first Ultima game, a great warrior defeated the magician named Mondain. In Ultima II, the villain Minax was thwarted by yet another hero. After some more years of peace, there is a small island that is experiencing volcanic activity. There is evil on that island that is known as Exodus, and indeed both Mondain and Minax have cast a spell on that island. This time Lord British summons four heroes to band together to take on the threat and restore peace once again.
Before you start the game proper, you’ll need to build a party of four. After you create your save file, go to the Create menu, then select Create again. You can choose to use either pre-built characters or ones you can create from scratch. I went the scratch route to get the builds I wanted, and before I booted up the game for the first time, I researched exactly what character builds I thought would help me the most. For each character, you’ll have to pick both a race and a job. There are five races in the game: Human, Elf, Dwarf, Bobit, and Fuzzy, and eleven professions: Fighter, Cleric, Wizard, Thief, Paladin, Barbarian, Lark, Illusionist, Druid, Alchemist, and Ranger. You can mix and match as you like. For each character, you can choose their race and profession, a four character name, and distribution of stat points to either Strength, Dexterity, Intelligence, and Wisdom. You can assign 50 points total and up to 25 per stat to start. You can create up to 20 characters per save file but you can only use four on the field during play. If you don’t want to go through the hassle of creating characters, you can select from ready-made ones. Just name them and add them to your party.

Behold! This rare cutscene
The manual describes which races and professions have which benefits. Races determine how many ability points you can assign at max to Strength, Dexterity, Intelligence, and Wisdom. Professions determine what kind of weapons and armor you can use, as well as what kind of spells you can cast, how much MP you have to cast them, and general dexterity ratings. My thinking in building a party was to have one character be able to max out one of each of the four stats, so everything was covered. We’ll get into this more a bit later, but there are two magic systems in this game. Intelligence is related to Magic Power, and Wisdom is connected to Will Power. Creating a Fuzzy Wizard and a Bobit Cleric let me have max MP for each magic system plus access to every spell in the game. The Dwarf Fighter gives me max strength and access to any weapon or sword, so that seemed like a good fit. I thought the best Dexterity class was Wizard, but I already had a Wizard, so I decided to create an Elf Druid so I could have access to some of both Magic Power and Will Power spells. (I learned recently the manual has a typo and that the Thief class holds the best Dexterity, which logically makes sense.) With that, this was my party: JP the Elf Druid, Smash the Dwarf Fighter, Willa the Bobit Cleric, and Wiz the Fuzzy Wizard.
The game begins with a small scene of Lord British sending you forth, and from there you immediately go to the overworld map. You start off next to both a castle and a town. There may be enemies visible on the map as well. If you don’t press anything for a bit, a pop up box will display some stats. The pop up looks pretty cluttered at first. There are three lines of stats for each of the four characters. The first line is the character’s name followed by four letters. Each letter represents, in order, health status, sex, race, and profession. For instance, my lead character JP is GMED, which means good health, male, Elf, and Druid. The next line is hit points and magic points, denoted by ‘H’ and ‘M’ respectively. The third line is food denoted by ‘F’, and an ‘L’ for experience level.
I decided to check out the town first, known as Royal Town. Of course, in any RPG there are plenty of people to speak with. Many towns have similar amenities. Royal Town features a pub, armory, weapon shop, and a grocery store. The pub just has people to talk to and you can buy a drink for a few gold pieces. After purchasing a few drinks, the bartender will give you a more helpful hint. At the armory and weapon shop, you can buy armor and weapons for your characters. You’ll need to equip them through the Status command, not incredibly intuitive. You’ll be visiting the grocery store a lot. As you explore you will slowly consume food, and when you run out you start losing HP instead. Each character holds their own gold and food, but with the Food command in the menu you’ll split all the food evenly across the entire party.
Next, I explored the Castle, which has some more special locations. Lord British sits in the throne room. He can raise your level when you have enough experience. There is an Inn here, which is where you save your game. There is also a hospital in the castle. Here you can cure both poison and colds for a small fee, as well as resurrect your character for a higher fee. You also have the option to give blood which is interesting. You exchange 100 HP for 30 gold. Since gold can be tough to come by, this might be useful, if you have spare HP to give. You only have 150 maximum HP to start, and it’s important to say here in advance that your healing options are very limited. There’s no place you can go to sleep to restore all your party’s HP like in other game; the inn is for saving only.

Townspeople speak wisdom; you need food to survive.
Before we go much deeper, let’s talk about the menu. Press A while on the field or in a town to bring up the menu. Use the D-pad to navigate the menu, press A to confirm, and press B to go back. There’s a second page to the menu that you can see by pressing Select. Let’s go over the options. You can talk to people with the Talk command. Cast spells with the Magic command. Many commands like Magic will prompt you for a character first. If they can cast both kinds of spells you’ll select which set next, then choose the spell. Fight lets you pick a fight with any monster or person you want, though you really want to restrict that to just monsters. Status brings up the screen with your stats, experience, and money, and you can also choose a character here to equip both weapons and armor. Tools gives you access to certain items you buy in shops. Give and Get let you give an item to someone or take an item respectively. Climb is reserved for the dungeons. The Food command splits all the food evenly across your party. Gold lets you swap gold between characters, either 10, 100, or 1000 gold pieces at a time. Horse lets you get on and off your horses, which you do not start the game with. Finally, Order lets you change the turn order of your four-person team. There are also special commands that can be earned as you play.
With all this in mind, it’s time to start fighting. Find an enemy on the overworld and either choose the Fight command or let them fight you on their own as they approach, it doesn’t matter. The view switches over to the top-down battle screen. Combat is grid-based as you’ll see both you and the enemy take initial alignments. One at a time your characters will blink signifying their turn. You can either move the character one square with the D-pad or perform one of the commands. You can Fight an adjacent enemy, use Magic, or one of your Tools. To fight, after you choose the command you use the D-pad to determine which way to attack. You’ll do a melee attack if you are right next to the enemy, or fire a ranged attack if you have the proper weapon for that. Some weapons like the dagger can be thrown just once, but then you are without a weapon and can only fight bare-handed. If you press B at any time, you’ll forfeit that character’s turn and just stand still. There’s no way to undo any menuing in battle, even part way. Sometimes taking no action is the proper strategy, but it’s a shame you can’t change your mind and move the character once you’ve committed to attacking or a spell. There’s also no option to run from battle, and enemies always start pretty far away so that it takes a few turns to approach the enemy if you have no ranged weapons. Once you command all characters then each enemy will have a turn in the same fashion.
For the start of the game, I approached it much like I would any RPG. I got some fights under my belt and gained some experience. There are some spells that help immensely. All spells from either the magic or will power systems are available from the start, provided you have enough MP to cast them. With my two casters at 25 max MP, I get access to six spells each. Two of those spells target certain sets of early game enemies, and best of all they cost 0 MP to use. Undead and Repel both have a high frequency of failure, but when it hits it wipes out most or all of the enemies. Enemies drop a chest on the overworld that you can open for gold. Much of the time those chests are also booby trapped either dealing damage to you or giving you a cold or poison, in addition to the money inside. My cleric had an Open spell that can disarm the chest for you. It took me a bit before figuring that out. In the meantime, after a particularly rough battle, I opened the chest only for it to be a trap chest that ended up wiping out my entire party. Only the lead character gets revived.
Needless to say, this is where things went completely downhill for me. To revive a character, you either need powerful magic or a chunk of gold. The hospital can resurrect a character for 500 gold, which works roughly half the time. If it doesn’t work, then your character turns to ash. To fix that, you have to find a temple where you can be revived for an additional 900 gold. Not only that, but any equipment you had also gets nuked if you turn to ash. I tried to go that route and realized it was too steep of a cost to bother. What I ended up doing was deleting those characters and starting over. Each new character gets 100 gold in their pocket for free. You can exploit this by creating new characters, giving their gold to a permanent character, resetting the game, deleting the broke characters, and repeating this over and over again for as much money as you want. I thought about it but ultimately decided to go about it more honestly.

This is an incredibly tough encounter for the early game.
Along the way here, I inadvertently made the most critical error of the entire game. My lead character JP got enough experience to level up, so I visited the king and got him to Level 5. The only thing leveling up does for you is increase your max HP by 100 per level. It doesn’t affect your stats in any way like I had hoped. You also cannot level up beyond Level 5 initially. But there’s another more sinister side effect here: the enemies level up with you. Once someone reaches Level 3, more difficult enemy groups appear, and even harder groups appear at Level 5. These enemies are immune to the Undead and Repel spells and have significantly more HP. I did not realize what I did for a very long time and once I understood what had happened, I didn’t feel like starting the game over. One enemy group in particular, Demons, gave me serious trouble because they can attack any character at long range, and my party makeup only allowed for one character wielding a long range weapon. I could maybe survive with everyone alive at Level 5 with max HP, but it was hardly worth it. Stronger enemies give more experience but the same amount of gold, and at this point, experience wasn’t doing me any good.
I eventually got everyone to Level 5 but stalled out from there. I hit up a few more towns that I found around the map. Some of them have guild shops where you can buy items. You can buy a set of 5 torches for lighting up the dungeons. Magic Keys open doors you find out and about. The gem lets you view the map for a one-time use, can be pretty handy. The Sands freeze enemies in battle for several turns, letting you get the upper hand. The tent restores 100 HP per party member when used. Aside from the keys, you can perform all these same actions with spells. You can find stables and purchase horses for your team. On horseback you can take steps faster than your enemies helping you avoid conflict, though I did not find them until much later in my playthrough. Also, some of the hospitals let you pay 200 gold to completely restore the health of a party member, something that I also didn’t realize until almost the end of the game. I mostly performed healing through the simple Heal spell over and over. One good thing is that on the overworld you restore 1 MP per character per step, which helps immensely over the course of the game.
The information in the towns didn’t really yield anything directly helpful to me, so I was in a rut for a while. I got out of it by acquiring a ship! At some point in the adventure, enemies in ships hug the coastline. If you approach the boat, then you’ll have to fight Pirates, but if you win the ship becomes yours to travel as you please. You can move the boat in any open water including rivers. The wind can slow you down or boost you considerably, depending on the direction it is blowing. When not paying attention to the wind, it feels like erratic movement. Taking to the water, I realized that the map was a lot smaller than I first thought. I entered a few new towns and tinkered a little with some of the dungeons I found. The dungeons felt too difficult and you don’t regen MP as quickly when walking inside, so I was discouraged from that. Eventually, I stumbled willingly into this whirlpool I occasionally saw, and from there things finally started to improve for me.
The whirlpool transported me to the land of Ambrosia, a completely different world map than where I started. To the south I could see the same whirlpool I rode in on, but I had no ship to get back there. I explored around the best I could. I didn’t mention this yet but the overworld maps and towns have line of sight functionality where you cannot see the other side of solid or dense tiles. Trees in particular block your view to where you are practically walking in the dark even though you can pass through. So there were lots of hidden paths that took some exploring to figure out. The southwest corner of the map also had enemy encounters that you couldn’t see until you are right next to them, which caused me issues when demons showed up. I eventually found my way along the western edge of the map where I found the Shrine of Strength. I spoke to the man there who asked for 100 gold as an offering. Figuring that this was my chance I just threw a bunch of gold at him not really knowing what I was doing. Once I opened the menu I figured it out. Every 100 gold I spent there increased my Strength stat by 1 point for the character that spent the money. Now each character has a maximum stat value and the game will let you overspend gold without any increase, but fortunately I didn’t suffer from that at all.

Discover the shrines where you power up your characters.
So finally, I had my plan. I would search out the other shrines. I would max out Wisdom first for my Cleric to get the best healing spells. Next, I would max out Intelligence for my Wizard to get the best battle magic. Then I would max out Strength for everyone and finally Dexterity for my Druid. This would take a very long time grinding, particularly when trying to battle only the weak enemies since gold chests hold the same amount of money no matter which enemies you defeat. All that is fine and good, but now I need to figure out how to get out of here. That southwestern path with the enemies leads to a ship that you must take over and sail over to the whirlpool. You’ll have to battle the Pirates to win the ship, which was straightforward enough. You also must avoid the man-o-war enemy that patrols the water. Getting into a battle with them on the ship is almost certain death, but if you can get out you go back to Sosaria and can continue on from there.
The next step after a very long period of grinding gold and boosting stats was to start tackling the dungeons full on. The dungeons in this game all have similar characteristics. First of all, they are in first-person perspective. They are pitch black, requiring either a torch or some magic spell to light the way. Torches and spells will fade, and sometimes torches get snuffed out through wind, so plan accordingly. Enemy encounters are random and here you cannot see what enemies you are fighting before the battle. Each dungeon in the game is eight levels deep and you traverse the floors with ladders using the Climb command. You can find treasure boxes on the ground in the dungeons. There are also fountains in the dungeons. All look alike but can have different functions. Some cure poison while others cause poison. Some fountains deal damage to you, and others restore your health to the max. You can also step on traps that damage you or encounter gremlins that steal food from you. Dungeons also have doors. Some of them are visible and others just look like normal walls, but you can walk freely through both. This makes dungeon exploration very tedious and it’s easy to miss things. One good thing is that with either the gem item or the appropriate magic, you can view a map of the current dungeon floor. I did not know this until I started writing this review, and wow that would have been incredibly handy to know.
One of the main purposes of searching the dungeons is to locate the four marks. They are the Mark of Kings, Mark of Fire, Mark of Force, and Mark of Snake. Each one unlocks something in the game. The Mark of Kings lets you level up beyond Level 5 up to Level 25. The Mark of Fire lets you walk safely on fire tiles. The Mark of Force lets you pass through these blue barrier tiles safely. The Mark of Snake is for moving a giant snake out of the way. I forgot to mention that there’s an island on the map guarded by a giant snake that you might see relatively early in the adventure.
There is a bit of a trick I figured out to finding these marks in the dungeons. Through repeated attempts of making dungeon dives I realized most of the dungeon floors themselves are irrelevant. Sure, you might find money chests in there, but for the most part nothing else. The good stuff is always in the bottom floor of the dungeon. Once I got all the spells enabled, this became a lot easier. The Cleric has the Rise and Sink spells, and the Wizard has the Descend and Ascend spells that allow you to warp up and down floors without needing a ladder. At the bottom floor, you can also use the Cleric’s Move spell or the Wizard’s Trans spell to teleport to a random location on the same floor, which is handy when parts of the floor are only accessible by certain ladders. Of course, having full magic is helpful for the bottom floors where the strongest monsters live, regardless of your current experience level. Anyway, there are six dungeons in the game and it’s a race to the bottom in each one to see what you can find down there. It’s a good idea to get the map so that you have some idea of where to look for things when you make it to the bottom. Some of the marks can also be found on higher floors, but this is much more uncommon and mostly down to luck if you don’t already know where to find them. I originally found the Mark of Kings in the 2nd floor of a dungeon, sparing me a deeper trip for that mark.

First person dungeons are tough without proper maps.
Another mystery I solved on my own has to do with the phases of the moon. There are these gates that appear off and on around the map. You can step in them freely and they teleport you around the map. There are some places only reachable through these gates. Now I had seen the gates and stepped through them when I saw them, but it took me until deep into the game before I figured out how they work. Near the wind indicator, there are two moons that change phase after so many steps. Each phase of the moon represents a location on the map. The first moon means which gate is open, and the second moon indicates where the gate leads. By taking gates and waiting for them to open up, I matched up all the entrances and exits. The second moon changes at twice the speed of the first, meaning that every gate can take you to one of two locations depending on when you enter.
Something else I figured out on my own very late was the mystery city of Dawn. I had received a hint somewhere saying “Dawn appears when two new moons.” You would think during a few months of playing that I would have seen it somewhere. Well, it turns out Dawn is hidden in the woods where you can’t see, and it indeed only appears when both moons are new moons. I had a hunch to check out the forest south of the castle and I nearly stumbled into it right as it appeared. This town has all the amenities you would want. In particular, the weapon shop contains unique weapons that can only be purchased here. Dawn is accessible from the very beginning if you know where to look, and it’s close to the starting location.
As you may know, I am a father of two kids with a full time job and I have all the responsibilities that come with that. I also have a very strong desire of figuring things out on my own in these games, and naturally those two things clash. I am really proud of what I was able to figure out on my own, even if I did many, many things the hard way. After over four months and 50 hours of playing the game, it was time to move on, and so I took every direct hint imaginable to get me to the end of this game. It was not a completely spoiler free playthrough, but at least I have my sanity and my time back. I have no qualms and no regrets about that.
The first thing I knew I was missing was the Mark of Snake. I was pretty sure I had explored the bottom of all the dungeons but I missed this mark altogether. Friends in Twitch chat helped lead me right to the mark I had missed, so that was covered. Now I could use the Silver Horn I found to move the snake and head right into Exodus, the end of the game. But once I got inside and got into my first battle there, I could do no damage at all to the enemies. There was something else I was missing, actually two things, the Mystic Sword and Mystic Armor. There are two items, the Silver Pick and the Gold Pick, that you use to dig up the Sword and Armor on the overworld. I had found the Silver Pick in one of the dungeons but was missing the Gold Pick. To get that, you have to steal it from the Guild in Dawn. Just reach over the counter with the Get command to grab it. Now guards will appear in town and you really want to get out of town right away without engaging them in battle. There are two tiles on very small overworld islands where you use the picks to dig up the Mystic equipment. I am not sure how you are supposed to figure all that out with just the in-game hints. You can keep digging up swords and armor so that everyone can get one, and they are equippable by every character. The final things I needed were the four cards. I can’t remember if I figured this out on my own or not, most likely I needed a gentle hint in the right direction. You have to visit each of the shrines in Ambrosia and use the Pray command (that you have to discover separately in-game) to get a card. There is a Time Lord in the bottom of one of the dungeons who tells you the order of the four cards which is needed later.

Giant enemies like this startled me the first time!
Finally, we have reached the end of the game. It’s time to take on Exodus! The final castle is a winding maze of corridors with strong dragon enemies all over the place. It is possible to pass around some of them, but you’ll need to fight through many of them. Thankfully with the Mystic equipment you can damage them now. Upon reaching the final corridor, I ran into an unexpected encounter with the floor, yes, the floor. These are invisible enemies which pose a different kind of challenge. The idea is you try and walk around and if you can’t move then you know its right in front of you and you can bash away. You’ll need to fight a minimum of two encounters against these floor tiles. At the very top, it looks like nothing’s there. You must use the Pray command here to awaken Exodus. You will now place the four cards in the proper order to disable Exodus, but we aren’t quite done yet. The castle begins to collapse and you need to escape. This scene was legit frightening as rocks and debris begin appearing on the path and the whole screen is shaking. It is very possible to get blocked off completely in which case everyone dies and you have to start over. I ended up going out a completely different way than how I entered, which I was told was VERY ill-advised. I even took a dead end or two by mistake, but somehow I got out of the castle intact and I beat the game. Whew, what a ride! The finale there took me completely by surprise and it was very intense. It is now one of my very favorite NES memories and such a neat way to end this long adventure.
I have just a few loose ends to tie up before I wrap this very long review. I mentioned earlier that this game is considered a remake of the original version as many things were tweaked, changed, or added. Some of the more notable additions include the following: the game can only be saved at the inn, the cold status effect was added, the give blood option was added to some hospitals, simple gambling casinos are available in some towns, the ship is allowed to slowly move against the wind, the gold and silver pick quests for the Mystic equipment were added, and the ending escape sequence was added. Much of the dialog and hints were changed from the original version as well. There’s one more thing that I completely missed that is new in this version. In Ambrosia you can pluck these flowers and exchange them with Sherry in the Royal City for Compass Hearts. You can use a Compass Heart to return directly to the castle from anywhere, including Ambrosia, the dungeons, or even in battle. You can do this sequence for as many Compass Hearts as you want, but each character can only hold one at a time. I suppose I either missed this flower entirely or just didn’t know you could grab it.
I also want to call attention to the speedrun of this game. It takes advantage of manipulating the randomness in the game to skip over the majority of the content. Here’s how it works. The game has to be played a specific way with specific movements to set up the random number generator to give favorable results. There is a particular moon gate that can drop you off on the inside of the island where Exodus is located. Normally you need the ship and the quest items to move the snake and reach the castle, but with the proper manipulations, the enemy ship will spawn within the waters between Exodus and the snake. You can then fight for the ship and sail on into the castle without removing the snake. Even better, once you reach all the way inside to Exodus in this way, the game assumes that you have already collected the cards so you don’t have to bother rounding them up either. Pretty nifty way to beat the game in under 30 minutes. The World Record is currently 24:27 by Yogidamonk and I recommend watching it for the meticulous setup required to win so quickly.
Ultima: Exodus was one of the most unexpectedly evil games in the NES library. I have a pretty good handle on what games are going to pose a significant challenge. While I don’t think Ultima: Exodus is going to show up on hardest game lists anywhere, its difficulty in hidden mechanics and plot elements made for a rough time. The graphics are simple but effective. The music is surprisingly catchy. Considering I had to hear it for so long and didn’t get bored of it, aside from the battle theme’s short loop, that is a testament to its strength. The controls I had some issues with, particularly not having a back button for some combat decisions. Sailing is cumbersome too as the wind really staggers your navigation, which is annoying in grid-based movement. The gameplay is perfectly fine, but some design decisions really allowed me to dig a massive hole for myself. Not having some RPG amenities that I’m used to, like easy healing options, compounded the problem. This is a solid game for sure. If you can work around the issues I mentioned or just know how to play the game better, there’s plenty of fun here. I’ll be happy to avoid any more 50+ hour games for quite some time now.

#171 – Ultima: Exodus