Take on the NES Library

An 8-bit Extravaganza!

beam

MAR
22
2021
0

#164 – Days of Thunder

Here we go ‘round the race driving track so early in the morning.

One of the few songs in the game is here!

To Beat: Finish 8 Races
To Complete: Win the Championship
What I Did: Completed the game
Played: 8/16/20 – 9/27/20
Difficulty: 9/10
My Difficulty: 9/10
My Video: Days of Thunder Longplay

I can’t say if this is true of all NES racing games, but the ones I have played and beaten so far have been awfully hard.  Bill Elliott’s NASCAR Challenge was surprisingly puzzle-like in configuring the car properly for top speed, and it also had a low threshold for failure that made the game very challenging.  Nigel Mansell’s World Championship Racing had more arcade style racing but required near perfection to post top times and win races.  That game also had randomness in the pit stops that often made good finishes next to impossible.  Days of Thunder has a pretty strong claim for being the hardest of these three games and was very close to earning a surprise 10/10 difficulty rating.  Read on to discover why this game is so hard and I had to do to clear it.

Days of Thunder was a Summer 1990 racing film.  It stars Tom Cruise, was directed by Tony Scott, and produced by both Don Simpson and Jerry Bruckheimer.  Production on the film seemed troubled with many reported arguments between the director and producers on how certain scenes were shot.  As a result, the film went way over budget, coming it at around $55 million.  Despite all the issue involved, the movie ended up a financial success, grossing over $150 million worldwide, plus tens of millions more in rentals.  The film was received by mixed reviews critically.

Days of Thunder was adapted into a couple of video games.  The initial version was a PC release in 1990, developed by Argonaut Software and published by Mindscape.  This version was ported to many other computers, as well as the NES.  The NES version of Days of Thunder was released in October 1990.  This port was also published by Mindscape but was developed by Beam Software.  PAL versions were released in April 1991.  A Game Boy version also followed in 1992.  The 2nd Days of Thunder game was a PS3 and Xbox 360 release in 2011 for the 20th anniversary of the film.  This game had very few critical reviews, but of those it had it was received poorly.

You can pull right up to the front of the place.

The story of this game follows in line fairly well with the source material.  You play the role of Cole Trickle, a rookie driver who has never driven in stock car racing before.  Even still, he has his eyes on winning and winning big.  To win the championship, he will need to win many races including beating his rivals Rowdy Burns and Russ Wheeler, both characters from the film.  This game features an eight-race series with a leaderboard and you will need to perform very well if you expect to win.

The racing controls are very straightforward.  All races in this game are run on circular tracks driving counter-clockwise around the track.  You use the A button to accelerate and the B button to brake.  After accelerating you can let go of the A button and maintain speed without pressing anything.  Tap the B button to brake.  Once you initiate the brake, you will continue to slow down until you press A again.  Naturally, you will use Left and Right to turn.  The Select button pauses the game.  

While racing in this game takes place from behind the car, you still see different indicators about the car along the edges of the screen.  The top left shows your fuel gauge, nice and big.  The top right side shows which lap you are on, as well as either timings for qualifying or your position in the current race.  The two round meters are your speedometer and tachometer respectively.  The speedometer indicates how fast you are going, while the tachometer shows how many RPMs your engine is running.  You may notice during driving that your acceleration and braking most directly affect your tachometer.  The lower right shows a top down image of your car, with color coded damage and wear indicators.  You can see the condition of your tires, engine, and fuel tank.  Green is good, yellow means some wear, purple means significant wear, and red is extreme wear.  Condition is affected both by normal driving over time, as well as collisions with other drivers or the sides of the tracks.  Your driving performance is reduced once components begin to wear.

Before competing in each race, you must run qualifying laps first.  The first thing you’ll see is a top down overview of the racetrack along with a text scrawl at the bottom of the screen.  Move past this screen and you go directly into the action.  Each course requires you to drive four qualifying laps first.  The bottom text as the laps begin show you the target time you are trying to beat in any one lap of the four.  On the right side you will see your current lap timer as well as your best completed lap, which starts off at 0.  It turns out the lap you want to focus on the most is the second lap because the first lap begins with you not at top speed, and by the third lap you will start having tire wear which reduces your performance just enough to make a difference.  Your best lap determines where you begin the race.  Beat the target time to start in pole position, tie the target time to start second, and then you lose a place for every tenth of a second slower than that.  At worst, you’ll start the race in eighth place.

Just you and the track. Go fast!

Now that qualifying is finished, it’s time to race.  You will first see the same top down view as before, but also you see your starting position.  If you pay attention to the text on this screen, it will tell you how many laps the race is, which is very important to know.  Press Start to immediately begin the race.  Now the real fun begins as you try to handle the turns, weave around other drivers, and avoid collisions to keep your car in tip-top shape.  You earn points for completing each race that are reflected on the overall leaderboard.  The scores from 1st through 8th place are 175, 170, 165, 160, 155, 150, 146, and 142.  No matter how many cars are in the race, it seems you cannot do worse than 8th place if you finish the race.  If you are unable to finish the race, you get no points, which is disastrous.  There is also a 5 point bonus for leading any individual lap, as well as another 5 point bonus to the driver who led the most laps in the race.  The leaderboard is cumulative over all races.

Racing is tough, and sometimes you don’t drive all that well and finish poorly.  Eventually, your team and sponsors have had enough of bad driving and demand that you run additional time trials to prove your mettle.  If this happens, after a race you will receive a telegram expressing disappointment along with a goal time they want you to meet.  This part functions the same as qualifying, only the goal time is an average of your laps, not just the best lap.  If you average ahead of the goal time, they allow you to continue racing, but if you fail, it is Game Over and you must restart from the beginning.  This sequence can happen up to three times in the game with stricter goal times each time.  Poor enough racing to trigger this for a fourth time is automatic Game Over as well, though I never saw this scenario.

A unique, and frustrating feature of this game are what happens in the pit stops.  Pit lane appears on the left side just before the lap finishes.  You must slow down and drive left into pit lane.  Go too fast and you will drive right through, wasting time and putting you at risk if you are in a dire situation with the car.  In the pits, you can refuel, replace your tires, and repair your engine, but you must do so manually.  Upon entering, fresh tires and jacks are in position, as well as your crew members.  There are three roving crew members that handle tires, one dedicated refueler, and one dedicated engine mechanic.  One at a time you control the pit crew members, putting them into place and performing actions.  Press the B button to cycle between the pit crew members.  You control the flashing person directly with the D-pad.  Press the A button to perform a context-specific action.

Pit stop management can be super tedious.

Juggling all the pit crew members around to perform the actions you need while under the clock can absolutely make or break your race, so you need to have a plan and execute quickly.  Replacing the tires is the most complicated, time consuming, and necessary procedure.  First off, you need a person in front of the jack, then press A to lift up that side of the car.  Next, switch to another roving member, put them in front of the old tire, and press A to start replacing it.  You will do the same thing with the other tire while this is taking place.  The tire replacement happens completely without any further interaction, and the pit crew member automatically backs away when finished.  To complete this, you need the center person to unjack the car and set it back down.  Now if you need to replace the right side tires, which you most likely will do, you need to run those same members one at a time around the car to the opposite side and perform the same procedure as above.  The positioning in front of the jack and tires is very precise and they won’t do the work unless they are just in the right spot.  Crew members can also get stuck on the sides of the car while running around, adding to the frustration.  Refueling is more simple, just move the refueler to the right and press A to start fueling.  However, the car must be lowered on that side.  Similarly, move the mechanic to the left to start fixing the engine, however in this case the car must be raised on the right side to perform the repairs.  You will often want to do everything in the pits, and there is a flow to it once you do it enough.  You have to do it fast as the race keeps happening and you lose position the longer you spend in the pits.  The most effective pit stops with all repairs take between 18-22 seconds, often it ends up longer than that due to the controls.

Something special happens at the end of the game that lines up well with the events of the movie.  Before the final race, you receive a telegram that says Rowdy, the leaderboard champion, has suffered some serious injuries and cannot compete in the final race.  You have been asked to drive his car in his stead, presumably to allow him to remain sponsored or something like that.  For this final race, you will be driving his Mello Yello car.  This helps a lot because he won’t receive any points for the race, allowing you to come from behind and become the champion if you are also able to fend off Russ.  This also means for the duration of the game you only need to worry about maintaining second place overall.

Feels good to pull out in front!

Beating this game is one of those nebulous situations.  Just completing all the races is difficult enough, with the threat of getting kicked out for driving too poorly looming all the time.  But with a little practice, you can finish all the races and get an ending screen.  It turns out it is the same ending screen you get if you win the championship.  Does that make it a bad ending or a normal ending?  I suppose that is up for debate, though it is clear in my mind.  Considering it is a racing game, and that most of the other racers I’ve played on the NES require winning the title, that’s what I settled on here as well.  It doesn’t feel right to simply finish without being the best, plus there is a congratulations sequence for getting first place, an actual good ending.  Making this difficult is that this game has no continues or passwords whatsoever.  It is only 8 races, but there is little room for error over a full season.

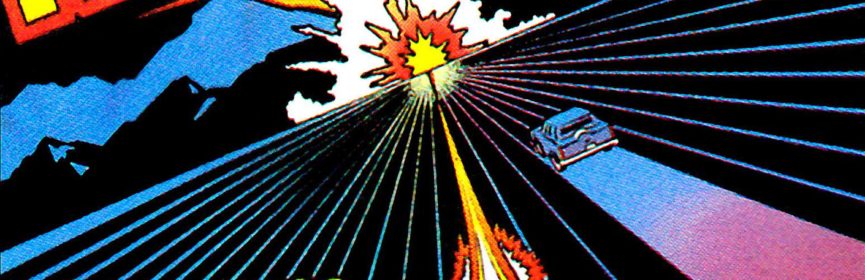
This was my first time playing Days of Thunder.  I know I sound like a broken record at this point, but I don’t care for racing games at all, and also I never saw this movie.  This is one of those cheap, filler NES games that is not super common but easy to come across eventually in a game lot, for instance.  The one thing I did remember about my time from testing my cart was that the track animation as you are driving looks really nice.  That was my only memory of this game.

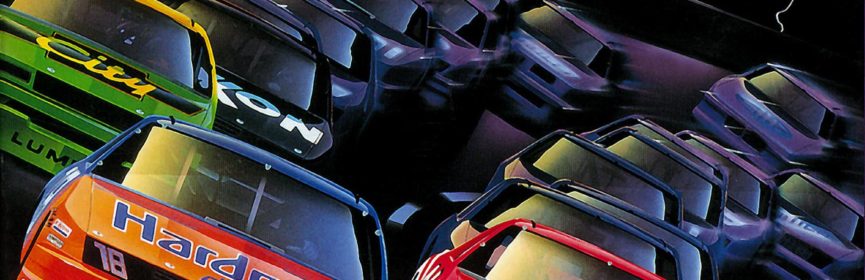
This game works against the player in several ways.  The driving mechanics seem straightforward enough.  You don’t have to hold A the entire time and slowing down in the curves is a matter of tapping B to slow down a bit and tapping A to maintain speed.  If you do it correctly, by holding left throughout the turn and starting low, you should move slightly toward the outside and finish the curve near the edge without touching the outside wall.  This is the standard technique that you will do over and over.  Navigating around the cars while doing this isn’t too bad, until you get to Rowdy in 1st and Russ in 2nd.  Their AI is different than all the other drivers.  Russ in particular is really a jerk as he always moves to get in front of you.  Rowdy tries to do the same but always holds the line in the curves, giving you a little more room to get around him.  There isn’t much room to squeak by them, so you need to get in close and sort of slingshot around them without touching them.  Any kind of bumping will add extra wear to your tires, and what’s worse is that if your fuel tank or engine gets degraded at all, there’s really nothing you can do to advance until you pit.  Pitting pretty much always loses you position even if you are on top of your game.  And that’s another thing, planning out when you should pit is also important.  Usually you will need to pit twice per race and you need to space them out as much as possible so as to keep in good running shape while also properly managing fuel usage.  Running out of fuel is a lost race and an automatic reset if you are set on winning the title.

It can feel hopeless attempting to pass your rivals.

My trajectory through this game to completion was about what you might expect.  I didn’t get very far for the first couple nights, struggling through pit stops and ending with poor results.  You can get decently far into the game even when you drive badly; the third time trial is really tough without proper seasoning but it takes several races to trigger that.  Within a few days I was able to finish 3rd in a lot of the races, enough to get through the game 2nd overall due to Rowdy dropping out.  This is where I stalled out for a long time.  I was always losing ground in the turns but couldn’t get the hang of taking them properly.  I spent one entire night grinding the first track just to see what kind of edge I could find, ultimately finding nothing.  After 10 hours total and over half of that with no progress, I decided to research proper strategies, and the answer was pretty simple.  I needed to start braking before the turn, not into the turn.  You don’t need to brake that much, just a little bit slower going into the turn and I took the whole thing at a higher speed than I was before.  Before I could do turns with the tachometer pointed between 3 and 4, now I could have it pointed at the 5 and still handle the turns perfectly.  This was the edge I needed.  Now I can get right behind the lead car just before the turn starts, and then whip around the outside and get in front.  On my winning attempt, I was able to win both of the first two races, setting the pace.  I didn’t do nearly as well from then on, even a 5th place finish in there, but by the end I edged out Russ by only five points on the board.  It was a hard fought victory for sure.

In early to mid-2020, the Video Game History Foundation acquired development materials from the late Chris Oberth, such as old computers and floppy disks.  Among these items was the source code for a completely different NES version of Days of Thunder that had never saw that light of day.  Thanks to the tireless efforts of these video game preservationists, the source code was compiled, and they managed to create a working build of this long lost title.  You can watch a gameplay video right here, the source code has been made public, and you can find a downloadable ROM floating around the Internet.  This version of the game features qualifying laps in the first-person perspective, with races taking place in a side view.  The pit stop mechanics are also different but do carry over the “do it yourself” feel from the released version.  I am so glad that things like this are still being found today.

While it’s no surprise that I was less than thrilled about playing this game, I can definitely respect the work that went into making it.  The graphics in this game are well done.  The way the track redraws as you approach curves really gives the game a sense of depth, done in a different way than other racers.  The music, like many racing games, is all sound effects during the races, but the smaller tunes in between parts sound good.  The game controls well during the actual racing and the driving feels right.  The controls during the pit stops are both finicky and challenging, not in a good way.  This is what sets this game apart, but also what leads to frustration and guaranteed time loss no matter how efficient you are.  That part could have been improved for certain.  Having no password or retry system really pushes the difficulty near the max.  As far as movie adaptations goes, this one is just fine.  I think it has some good qualities as a racing game.  I am happy this one is in my rearview mirror.

#164 – Days of Thunder

 
JAN
15
2021
1

#162 – The Last Ninja

After this game, I can see why there would be no more Ninjas.

Prepare to be stared at the whole time.

To Beat: Reach the ending
Played: 7/9/20 – 7/12/20
Difficulty: 5/10
My Difficulty: 5/10
My Video: The Last Ninja Longplay

Ninjas are well known in popular culture.  They are traditionally known as assassins from feudal Japan, known for moving quickly, quietly, and discretely, with deadly force.  It is no surprise then that Ninjas would be the main characters in video games quite often.  The Ninja Gaiden series, for instance, is a very popular game series with sword slashing and climbing through fast-paced platformer stages.  The Last Ninja, on the other hand, features a ninja that is pretty much the polar opposite of Ryu from Ninja Gaiden.  It might seem like this would make for a bad game, but different doesn’t necessarily mean bad.  Let’s take at look at what makes this game tick.

The Last Ninja is a series of three games originally for the Commodore 64 and other computer platforms.  The games were all developed by System 3, beginning with The Last Ninja in 1987.  The game was released to critical acclaim and sold well enough to give the developers the go ahead for sequels.  The Last Ninja 2 was released in 1988 and was far and away the biggest success of the series, selling 5.5 million copies of just the Commodore 64 version alone.  The Last Ninja 3 came out in 1991, also selling millions of copies and was a critical success much like the first two entries.  Curiously, despite all of its success, this was the end of the series.  The NES version of The Last Ninja is actually a port of The Last Ninja 2.  The NES version released in February 1991, developed by Beam Software and published by Jaleco.  This is a North American exclusive game for the NES only.

The Last Ninja has a pretty lengthy story written up in the manual.  You play the role of the Ninja named Armakuni.  In the first game, he battles and defeats the shogun Kunitoki and collects sacred scrolls.  After that, Armakuni seeks to reinstate a new order of Ninja warriors.  One night there was a meeting of his inner circle, when all of a sudden he is whisked away through time to 20th century New York.  Armakuni doesn’t understand how he got there, but he knows that Kunitoki is here as well, so he goes off toward another battle against his archenemy.  There are six stages in this adventure.  Clear them and defeat Kunitoki to win the game.

The first puzzle sets the stage for the rest of the game.

This game is an action-adventure game taking place in an isometric perspective.  This is a “screen-by-screen” kind of game, where the view is locked in place and you exit either off the side of the screen or through doors to a new screen.  Contrary to other Ninja games, this has very slow movement and pacing all throughout. Levels are more or less open and often you can backtrack several screens to use new items as needed.  You use the D-pad directions to move, though the cardinal directions on the controller result in diagonal directions on screen.  For example, Up on the D-pad moves your character up and left.  If you rotate the controller in your hand 45 degrees counter-clockwise, you get the rest of the directions to line up.  I had trouble with this as it was the opposite orientation for Q*bert, and even a few years later I couldn’t wrap my head around it right away.  While moving, if you press A you will do a forward jump.  This is a fixed distance jump and you are locked into the movement after leaving the ground.

Some screens contain weapons and other items on the ground.  To pick them up, you’ll need to stand close to them and press B to bend down and grab them.  The positioning is very precise and not as intuitive as it should be, usually requiring some guesswork and wiggling about to find the right spot.  The things you collect are classified as either weapons or items.  To swap weapons, hold Select and press B.  To switch items, hold Select and press A.  To use a selected item, press B, though you must be standing in the correct, particular spot to actually use it.  The default action of the B button is a standing kick.  Press A to punch, or if you have a weapon selected, press A to attack with that weapon.

There are enemies that patrol many of the screens.  Sometimes they charge at you, while other times they walk along a set path.  Some can throw objects at you from across the screen.  You can fight them with your weapons or punches and kicks.  Your power meter is the swirly blue icon at the lower left of the screen, with two layers of health shown.  There can only be one enemy on screen and their power meter is to the left of yours.  When you deplete your enemy’s power, they crumple to the ground in a heap, but they will slowly regenerate their health before getting back up again.  You can take the opportunity to leave the room or do whatever, but if allowed to get back up you will have to fight them again.  The second time you knock them out, they stay down for good.

Piles of bodies left behind.

There are six distinct stages in the game, each one its own self-contained area.  The stages are Central Park, the Street, the Sewers, the Office, the Mansion, and the Final Battle.  The variety in the stages mostly has to do with the locale and the puzzles within.  Some levels are pretty straightforward, and others are more open ended and you will have to do exploring while trying not to get turned around too much.  The goal in each stage boils down to finding keys, finding items, or solving puzzles that let you make progress.  It can be tough the first time through to know what to do or how to clear the way ahead.  This is made more difficult because of the positioning issues I’ve mentioned earlier.  Sometimes you will miss out on the correct solution just because you were a couple of pixels off, which is very frustrating.  One more thing to know is that your items carry over from one stage to the next, occasionally in a way that can get you stuck badly if you don’t have the right thing.

At the start of the game you have five lives to work with, plus the one you start off with.  You lose a life when your energy is depleted, which can happen anywhere between slowly and instantly depending on the trap or enemy attack at hand.  In some of the levels you can pick up a hamburger for an extra life.  This game has a password system where you get a password after completing each stage.  The passwords here are 15 characters long consisting of 0-9 and the letters B, C, D, F, G, and H.  The passwords retain the current level, the items collected, and the lives remaining.  Because the passwords keep your life total, this is a game where it pays to replay levels efficiently to get a better password.

This was my first time playing through The Last Ninja.  I sort of remember seeing this game long before I played it, but I’m not sure how far back that memory goes.  I would consider this a slightly uncommon game as it is one I don’t see much.  I have owned two copies of this game, both bought on eBay.  The first one cost me $8 shipped in 2014, and the other was in a small lot of games I bought to upgrade and resell a few years later.  This game sold for around $10 back in 2014, but now is worth double or more for just a loose cart.

I spend a lot of time on the computer too.

I can see where this might be a difficult game, but I didn’t really have that much trouble with it.  I have timing data now since I’ve been streaming, and I beat this game in a little over 3 hours, spread out over three evenings.  This is the kind of game that could take a lot longer if you miss out on small details or you fail to interact with things properly.  I only had one case in this game where I looked up the solution to a puzzle.  Maybe I jumped the gun a little bit, but I was pretty well stuck for 20-30 minutes in about a four screen stretch and I don’t have much patience for that kind of stuff these days.  There’s a section where you have to get past a panther guarding a door.  You grab a chicken leg, and I assumed you had to distract it with food, but that wasn’t good enough.  You need to dip the leg into a box of poison and then you kill the panther with the tainted food.  The box looked too much like the background and I didn’t recognize that it was part of the solution.  The rest of the game I managed to figure out on my own.

I went back and recorded a full playthrough of the game after beating it on stream, and it took me roughly 18 minutes to beat the game.  In a rare twist, later on I had a much faster playthrough that is lost to time.  I had participated in the Big 20 speedrun race in September 2020, and that inspired Twitch streamer ShesChardcore to create her own version she called the Chardcore 20.  Since then there have been multiple Chardcore 20s, but I participated in the first one and The Last Ninja was included in the list.  My speedrun of the game was not well optimized at all compared to leaderboard times, but I managed a 12 minute clear of the game.  The route is pretty close to the same and most of the time saved is from kicking enemies to stun them before running past.  Imagine a Ninja running away from fights!  Anyway I failed to record that playthrough, but I am satisfied with the 18-minute run I captured.

The box of The Last Ninja has Game of the Year written on it, but I don’t find any evidence of it actually winning Game of the Year.  It was the runner-up for Game of the Year from the Golden Joystick Awards out of the UK in 1988/1989.  Even still, this was a critically acclaimed game that makes sense to reach the NES.  Based on my experience with this one, I would have to imagine that the NES port of the game misses a lot of what made the original game great.  Graphically it looks nice, with plenty of varied environments and some great animation, particularly of our hero.  The music is limited to just a few songs, but they are catchy and enjoyable to hear.  The controls do take some getting used to, particularly in my case with the “swapped” directions.  It’s in the gameplay where this game falters.  The level design is solid, and most of the puzzles are fair.  Lining up either to grab items or interact with the environment provides some of the most frustrating moments in a game in quite some time.  Enemies bearing down on you during that is even worse.  All in all, it really isn’t a bad game, but nowhere near Game of the Year material to me.
 

#162 – The Last Ninja

 
OCT
11
2019
0

#130 – Bad Street Brawler

Here’s another accurately named game.

He’s so bad.

To Beat: Reach the ending
My Goal: Beat the game with the Power Glove
What I Did: Beat the game
Played: 7/2/19 – 7/21/19
Difficulty: 8/10
My Difficulty: 8/10
My Video: Bad Street Brawler Longplay

This is another one of those milestone posts. There aren’t too many of them left, so let’s enjoy them while we can! Not only am I going to cover Bad Street Brawler, but we are also going to talk about the Power Glove. While maybe an odd choice for a compatible title, it does bear the label “Power Glove Gaming Series” on the cart. Sadly, it doesn’t play very well as one, leading me to believe this was just tacked on and not specifically designed to work with the peripheral. Still, I made it a point to play this game with the glove and try to make sense of it for you.

Bad Street Brawler was originally named Bop’n Rumble when it released on the Commodore 64 and MS-DOS in 1987. In Australia, the game was renamed Street Hassle. This game was developed by Beam Software and published by Mindscape. The NES version was renamed to Bad Street Brawler when it released as a Power Glove compatible title in September 1989. This port was also developed by Beam Software but published by Mattel, the manufacturer of the Power Glove accessory.

The Power Glove was an officially licensed peripheral for the NES that was made by Mattel, releasing in October 1989, a month after Bad Street Brawler. The Power Glove was heavily inspired by the Dataglove originally created by Thomas Zimmerman. VGL, Zimmerman and Jaron Lanier’s company, partnered with Abrams/Gentile Entertainment to possibly adapt the glove for video games. They pitched the idea to Mattel, who eventually pitched the idea to Nintendo, making it a reality for the holiday season in 1989. The Power Glove ended up selling well but didn’t work very well with Nintendo’s back catalog of games. There were only two NES games released for it before the glove was discontinued the following year. Still, it remains one of the most recognizable gaming peripherals of all time. You could say it laid the framework for motion controls in more modern gaming, such as the Wii and today’s VR headsets. There is a very good documentary from The Gaming Historian that will give you much more information about the glove’s history.

Imparting words of wisdom as you practice.

The Power Glove is a right-handed controller that you wear on your arm attached by Velcro. A wire from the Power Glove connects to a box that has a second wire going to the NES and the third to a set of three sensors that are positioned around the TV screen. The glove contains two ultrasonic speakers that interface with the three ultrasonic microphones on the sensors by the TV. This triangulates the glove’s position so that it can detect both roll and yaw. Conductive ink in the fingers allows the glove to detect finger bends from all fingers aside from the pinky. All these inputs translate into button presses on the NES. A set of lights on the corner TV sensor translates which directions and buttons are held down. The glove comes with 14 built-in programs that you can set with number buttons on the glove. These programs map movements and gestures to NES button presses. Bad Street Brawler comes with its own program along with some special programs that can be used in other NES games. First you initialize the program on Bad Street Brawler, then you turn the game off and quickly insert a new cartridge while the glove briefly “remembers” the program during power down. The Power Glove also has the same buttons as an NES controller so that you can use the glove as a controller itself or get direct inputs while using the glove. Finally, the Center button on the glove resets the positioning in relation to the sensors during a game. The Power Glove came with a couple of detailed manuals that show how the glove can be used and which programs might work best for some games.

Bad Street Brawler doesn’t have much of a story. You play as Duke Davis, a definitive 1980s Cool Guy. He wears big sunglasses with a yellow vest and green shorts. Basically, the streets are filled with criminals and Duke wants to clean up the streets. He will beat up the bad guys and take their weapons, throwing them away in the dumpster after each stage. In this game there are 15 levels and you must clear them all to beat the game.

Cleaning up the streets of short men and dogs.

The controls in this game are simple enough … with a controller that is. Use the D-pad to move around Left or Right. Press Down to duck and press Up to jump. You have three different attacks at your disposal in each stage called Force Moves. One is triggered with A, the second with B, and the third with both A and B pressed together. You can also press Start to pause the game. Controlling the game with the Power Glove is more cumbersome. Your steady arm movements control Duke’s movements. Move the glove up, down, left, or right to move Duke in that direction. The A button move is performed by rotating your wrist left or right. This action both moves Duke in the turned direction while rapidly pressing A. Bend your thumb to do the B button move. Bend the middle finger to perform the A and B button move. (I bend all my fingers aside from the thumb for this.) If you push the glove forward toward the screen, you do a special move once per stage called the Glove Zap. This automatically defeats one enemy. From watching the lights on the sensor, I learned the Glove Zap is actually performed by pressing both Left and Right together, which makes this move impossible to perform on a standard controller and making it ”exclusive” to the Power Glove.

Each level flows the same way. You begin on the left and need to make your way to the right. Enemies will appear two at a time on screen. You can fight them or you can simply run all the way to the right. Each level has three points where the scrolling stops and you are forced to fight a couple of bad guys before continuing. At the bottom of the screen you see your health bar, the active enemy’s health bar, your score, and lives remaining. The top of the screen displays some buildings that indicate how far along you are in the stage. Every three levels there is a stronger encounter, often with a unique enemy, at the end of the stage. The music changes to signal the event. Upon victory, you are rewarded with an extra scene of Duke celebrating his win or chatting with the local media.

At the beginning of each stage, you are placed on a special screen. You can read some encouraging words from Duke as well as practice your moves against a punching bag. The Force Moves change between levels and each stage has its own set of three moves. This gives the game some variety since you can’t get comfortable with any one move. It is helpful to see what moves you get in a safe space before tackling the level itself.

You leap during some attacks which lets you dodge too.

There are fifteen Force Moves in the game broken up in the manual into three groups. The first group is called the Fast-Footwork Force Moves. The Drop Kick is a standard kick. A Sweep Kick is a low kick that knocks the enemy into the air and stuns him briefly. Trip just knocks a guy down by pulling his legs out from under him. While attacking, you duck down and can avoid some attacks. The Roundhouse Kick is a powerful move with a very long windup that leaves you vulnerable. The High Kick is similar to the Drop Kick, only Duke does a tiny hop during this kick. I like this move a lot because the hop also dodges enemy bullets.

The next set of moves are the Fist-To-Fist Force Moves. Punch is just a standard attack. The Pile Driver lifts an enemy over your head before slamming him literally into the ground, stunning him briefly. The Stooge Hit is analogous to the Roundhouse Kick. It has a significant windup but is pretty strong. The Ear Twist is such a goofy move. You grab the guy by his ears and pull on them. You can hold the move down for a little while and increase the damage. The Arm Spin acts similar to the Ear Twist. You grab an attacker by the arm and spin them around. You can hold the move for more damage, then toss the enemy behind you. It’s a nice move for avoiding combat.

The final set is Fancy Force Moves. In the Aeroplane Spin, you lift an enemy overhead, spin him around a while, and then throw him to the ground. The Body Fling is another attack that doubles as a dodge. You jump into the air and slam on top of an enemy, sending him into the ground with a brief stun. The Gut Knee is an amazing move. You grab the enemy slamming your knee into his gut. This knocks the bad guy into the air, putting you in the best position to grab him again while on the way down to land another Gut Knee. The Head Butt causes the enemy to recoil a bit on attack. Lastly, the Bull Ram does a brief dash forward and you toss the enemy into the air.

The Gut Knee is positively overpowered.

There are a few items in the game. An orange spy often appears after forced encounters. Sometimes he will drop a bomb that hurts you if on screen when it blows up. You need to either move forward quickly or hit the bomb with a low attack to disable it. The spy also can drop a heart with wings. Grab it to restore all your health. Some fallen enemies also drop a weapon. You just collect these for points later. At the end of each stage, you see a cutscene where Duke throws each item into a dumpster and gets points for each one.

You start the game with two extra lives. You can earn more lives every 10,000 points. However, you cap off at five lives and any earned beyond that are forfeited. Every death starts the stage over. You can continue twice with a fresh set of lives from the same stage you died. Your score resets to 0, but you do get a chance to enter your initials on the high score list!

This was my first time beating Bad Street Brawler. I first played the game a few years ago for the Nintendo Age contests and reached the final level, only to fail pretty hard when I got there. This is a relatively common game though I do not know if it sold as well as the Power Glove did the first year. I have had a few copies of the game through buying lots. It will only cost you around $5-$7 if you are looking for one.

If you were paying attention, I sort of gave this away already. Unfortunately, I did not complete this game with the Power Glove. Not even close. I spent about three weeks with this game with the intent of beating it with the Power Glove but the results were too inconsistent. The furthest I reached was Stage 8, which is honestly an achievement in and of itself. Most of my runs ended in Stage 3. The mix of enemies, the available Force Moves, and no healing item until the 2/3 point of the level caused me to crumble up a lot. The first time I cleared Level 3, the game locked up on me and I was forced to reset. Perhaps I should have taken that as a sign to move on, but I kept at it. I had a few runs to Stage 5 and one or two to Stage 6 or 7. There wasn’t even any sign of continual improvement because good attempts were scattered among multiple Stage 3 failures. I do think if I kept at it for a long time, maybe things would have clicked and I would have figured it out. Ultimately, I did not want another Ikari Warriors situation where I spent four months on the same game. Settling on a controller clear for this game sounded just as good. I bought a Power Glove with the intent to use it for both this game and Super Glove Ball, so when I reach that game I will have to make good on clearing it with the glove.

Thank you trench coat man for this helpful healing heart.

This game is still difficult even on controller. Many of the enemies in this game are borderline unfair. A baseball bat wielding punk is a common enemy that normally isn’t hard to deal with. If I let him get close enough to hit me, I normally get whacked a few times before I can counter or escape. Skateboarders telegraph their attacks somewhat, but if you get hit it drops 40% of your health bar in one shot. Good luck if you have to fight two of them at once. Knife-wielding women are hard to approach when they start throwing blades. The worst enemy in the game is the break dancer guy. When he rolls around, he is invincible. You have to get close enough to get him to stand up but stay far enough away to hit him. Then you only get one hit in before his routine loops. Normally I try and jump over him but sometimes it works and sometimes it doesn’t. I will say most stages are pretty easy. You can run past most of the level and get at least one health refill in the stage. Some Force Moves let you dodge attacks and some let you stun lock enemies where you hit them over and over before they can recover. The levels without these helpful moves are much harder to clear.

My winning run of the game was one of those magical, miracle runs. It started off well enough. Stage 12 is one of those tough levels that typically costs me several lives, but I coasted through everything else. I reached the final stage with 3 lives and both continues but then it all went downhill. The last stage is very hard. It starts off with two break dancers, and then the first forced fight is between a break dancer and a knife thrower. Most of the time I didn’t get past that part. Then you have to pass the next third of the level before you can get a health refill. On one life I scrolled away the health pickup and died shortly thereafter. It was starting to look like a failed run. On my last life of my last continue, I finally broke through. I just barely survived the first section with only two health points left, and I got down to one just before I got the health refill. I had a solid final boss fight to put this game in the books.

Avoidance is good strategy but doesn’t always work.

I would go as far to say that playing with the Power Glove worked out better than I expected. After all, I’ve heard plenty of tales over the years that the Power Glove is unplayable garbage and what have you. Some facets of the Glove worked out better than others. The directional movements were pretty much spot on. The first thing to figure out is how to position your arm in the sweet spot. For me, it was about 5-6 feet away from the TV screen in the center of the three sensors. You will have to center the glove a ton with the Center button, but Bad Street Brawler provides enough opportunities to do that without pausing. Twisting my wrist to the right worked out okay, but to twist left far enough I had to lift my elbow which was very uncomfortable. The finger bends were by far the most inconsistent, or at worst not working at all. The instructions say to make a fist a few times to calibrate the glove. Maybe I wasn’t doing it right, but I had wildly varying results that often changed mid-game. Grabbing with my four fingers worked much of the time, but bending my thumb rarely worked. Losing the thumb control cost me one entire move unless I used the B button on the glove. I only got it to work well once or twice.

I know I have not made a case for the Power Glove being feasible as a controller, but perhaps I am still optimistic. The trick seems to be finding the optimal conditions. Unfortunately, the documentation around this feels incomplete. This is my best guess at what you need to do to set it up properly, at least for Bad Street Brawler. Get your arm into that sweet spot I mentioned above: In the center of the sensor zone about 5-6 feet away from the TV screen. Press Start to get to the menu, hold your glove in position, center it, make 2-3 gentle fists, center it again, then start the game. On the intro screen, test out all your moves. Make more fists and re-center as often as needed. Now, I couldn’t get it to work consistently well so this is still not optimal. I would say, at best, I was operating about 80% as efficiently as I would with a controller. The Glove Zap is quite helpful when used strategically, closing that control gap a tiny amount. If I could get the calibration routine right, really homed in my Power Glove dexterity, and keep the glove from going out of whack randomly in the middle of a level, I could definitely see me beating the game this way. But that’s just too many factors that have to line up to make it happen, in any sensible timeframe at least.

I understand why Bad Street Brawler was selected as the first of the Power Glove Gaming Series. It is an inherently simple game. Simply walk left to right and beat up a few bad guys using rotating move sets. It’s not a great game though. The graphics are okay, but the color choices are garish are unappealing. The music is just okay. It’s a little bit catchy at times but the tunes are short loops that may become grating. The controls work well with a standard controller and poorly with the Power Glove. The gameplay, despite trying to vary things, is essentially repeating the same things. Some of the enemies, even the early ones, can cheap shot you unfairly. While it is fun and encouraged to stun lock enemies, getting stun locked yourself is frustrating. Overall, this is a below average game. It has kind of grown on me though and I do like it a little bit.

#130 – Bad Street Brawler

 
MAR
01
2019
0

#111 – Smash TV

Big money! Big prizes! I love it!

No music, but nice detailed title graphics!

To Beat: Reach the ending
Played: 1/2/19 – 1/4/19
Difficulty: 8/10
My Difficulty: 5/10
My Video: Smash TV Longplay

I had Super Smash TV on the SNES growing up. I probably got it from a yard sale or something, but I remember spending a lot of time playing the game. I wasn’t really that good at the game though. Maybe that version is really tough to beat. I didn’t know the NES had a port of the game until I started digging deeper into the library. With as frantic and sprite heavy as the SNES version is, it blows my mind that they even tried to replicate this style of game on the NES, let alone pull it off. Even though I still can’t believe this game exists on the NES, I’m glad it does.

Smash TV is a 1990 arcade game both developed and published by Williams. The game creators are Eugene Jarvis and Mark Turmell. The game was ported to several home consoles under the title Super Smash TV. The home computer versions, as well as the NES version, retained the Smash TV name. The NES version was released in September 1991. It was developed by Beam Software and published by Acclaim Entertainment. The game also had a PAL release in 1991.

Smash TV takes place in 1999. Thankfully, we didn’t get this timeline where TV has become ultra-violent. Game shows have turned into life-or-death competitions with huge prizes at stake for the survivors. Smash TV is the biggest hit show at the time where one or two contestants fend off hundreds of opponents in the arena in hopes of becoming grand champions. You play the role of one of these contestants as you try to survive over four levels.

Defeat enemies from all sides.

This game is a top-down twin-stick shooter game. Hordes of enemies appear from the four doors on each side of the room. Your job is to shoot down all of the threats that appear before you can move on to the next room. Of course, since it’s a game show, you also want to pick up as much cash or prizes as you can carry. Clearing each room opens at least one exit to an adjacent room. There is a map that shows which rooms connect so that you can plan your way to the boss room at the other end of the stage.

The basic controls are simple enough but tricky to use. Use the D-pad to move in all eight directions. The A button fires your weapons in the direction you are moving. The B button lets you focus your firepower in the last direction you shot so that you can shoot and move in different directions at the same time. This is a far cry from the arcade version where you had two joysticks for independent walking and firing at all times. The SNES version with the four face buttons on the controller worked well for a twin-stick setup. Fortunately, there’s a much better way. Smash TV on NES features a two-controller setup. Plug two controllers in and hold one in each hand with the D-pad at the top. The controller 1 D-pad moves the player while the controller 2 D-pad controls shooting. Smash TV has a two-player mode and supports four controllers so that both players can enjoy the two-controller setup. I highly recommend playing this game with the dual-controller option.

Your standard weapon is a pea shooter with unlimited ammo. While sufficient, you will do better with different weapons. Pickups appear on the ground as square icons while you fight. There are three special weapons. First is the scatter gun. This gives you three-way shooting which clears up a lot of space. Next are the missiles. These are powerful, piercing shots that can take out a row of enemies or even some stronger ones in just one hit. The spew weapon looks like a grenade and fires a swarm of short-range projectiles out in front of you. Each of these three weapons has limited ammo. Underneath your score is a green bar that indicates how much ammo you have. Grab a new weapon to change weapons or grab the same one to top off your ammo.

You need to be a real weapons powerhouse.

There are other helpful pickups too. Cash, gold bars, and presents are just for points, so while not necessary for survival, this is kind of your goal and you might as well grab some. The shoes increase your walking speed, but it seems to last just for your current screen and you lose it if you die. A circular ring icon is the shield, which makes you invincible so you can defeat enemies by running into them. This is given to you by default when you begin a new life. The icon with triangles gives you ninja blades. These are five blades that circle around you and wipe out enemies. Individual blades eventually go away after hitting so many targets. This powerup stops you from moving all the way to the edge of the screen, so that’s something to keep in mind. A little person icon gives you an extra life.

There are several types of enemies to deal with. Most of the enemies are standard grunts that always move toward you. Others take more effort to defeat. Orbs bounce around the playfield and shoot lasers. Shrapnel bombs walk the perimeter before exploding into shards that kill you. Tanks absorb a lot of firepower before going down. Wall gunners are very resistant to firepower and repeatedly shoot at you. Huge robot snakes slide around the screen and you have to destroy each piece of it to put it down. Red swarmers are many little red dots that clump together and fly around the screen. There are also stationary mines that kill you if you take a wrong step.

After the first screen of each stage is completed, a map is displayed. This shows the end level boss room as well as any treasure rooms. These rooms provide you with a bunch of cash and prizes from the moment you step inside. The rooms then get filled with enemies and tend to be more difficult than other rooms. These are good places to go if you want a high score.

Each stage ends in a boss battle. The arcade version has huge bosses that weren’t possible on the NES hardware. On the NES, they are smaller in size and seem to be easier fights than on other platforms. The cobra boss takes on a different form than the arcade version so that fight is the most different from the others. No matter what, you have to use a lot of firepower to put them out of their misery.

Mutoid Man is still recognizable here.

You begin each stage with five lives. Extra life pickups appear at random, but they tend to show up often. Due to the nature of the game and all the constant enemies, death is common. This is a problem for a few reasons. There are no continues in the game so you have to start all over if you run out of lives. You are capped at nine lives and can’t pick up any more beyond that. Also, each new stage after the boss puts you back at the default number of lives, so there’s no benefit to stockpiling lives in early levels since they don’t carry over to later stages.

I beat Smash TV once before back in 2014 as part of the NA weekly contest. I got 4th place that week with a score over 12 million points. I don’t remember where I picked this game up. It’s not very common but not too expensive when you do find a copy. Carts cost around $10. An interesting side note on collectibility is that Acclaim at one point manufactured their own carts. This matters because their carts have poorer quality labels where the glue bleeds through the white part of the label and the label fold starts to chip a little bit. My copy of Smash TV looks really good all things considered, but some of my other Acclaim games are not so hot.

While Super Smash TV is challenging enough that I haven’t yet finished it on my own, the NES port of Smash TV is easier. That’s not to say the game is easy at all. I didn’t have a lot of trouble with the game playing it for myself. There’s a bit of luck involved if you happen to run into more extra lives than usual, but skill is king and what will push you through. To that end, using the two-controller setup is essential for succeeding in this game. I tried out the normal control setup for a level or so and managed okay, but that would become a problem in the later levels where the enemies get tougher and the screens take longer. There’s no substitute for having separate movement and shooting controls in all directions.

Twin-stick shooting is so helpful when surrounded.

This game was tough to pin a difficulty on. I’m not so sure my past experience beating the game helped me that much. It was more my skill with this style of game. I don’t hear about people playing and beating this game very much. In the contest I played in 2014, only four people beat the game, and there were a lot of skilled gamers playing then. I don’t think this is an undesirable game that people are avoiding because they don’t think it’s fun to play. My gut tells me that this is an above-average game in difficulty that I happen to be good at. Having no continues bumps it up a notch too.

One thing I noticed playing this time was that my ending score was significantly lower than what I scored back in 2014. I played through all levels taking the top route just because I like consistency. The first stage has only one treasure room that is located on the top route so I just stuck with that path in the other levels too. Based on my 2014 score and forum posts from that week, I am pretty sure the lower routes in the other two stages are more lucrative for scoring. Points in this game are highly correlated with the number of enemies defeated. This leads me to believe that in general the upper routes have fewer enemies and therefore are easier than the lower routes. The ending doesn’t change on score or route or anything like that, and there’s no difficulty setting, so just pick whichever way you want.

There’s one more interesting tidbit about this game. The arcade version and at least the SNES version from my experience feature keys as item pickups. After the third stage boss, there are key rooms that unlock depending on if you hold enough keys. The manual for the NES game briefly mentions both key rooms and keys. However, there are no keys to pick up in the NES version at all. You still get to play the key rooms anyway between the third boss and the final boss which is often considered the fourth and final level of the game. It’s just a small, weird oversight of the NES port.

Smash TV is a really fun action game and the NES port is a great one to play. The gameplay and controls are both excellent. Movement is responsive and enemies get blasted constantly. The graphics are on the simplistic side, but the sheer number of enemies and bullets rendered on screen at the same time is awfully impressive for the NES. There is some sprite flickering which is to be expected, but there is either infrequent or no slowdown. The music is okay but gets repetitive and takes a backseat to the action anyway. The game is also repetitive and lengthy and will wear out your thumbs after some time. Smash TV on NES is an admirable port and worth playing for NES fans, even though I like the SNES version much better.

#111 – Smash TV

 
OCT
12
2018
0

#98 – Defender of the Crown

One must obtain the crown before he can defend it.

The detailed title screen sure looks like a PC conversion.

To Beat: Defeat the Normans to reach the ending
Played: 8/15/18 – 8/19/18
Difficulty: 5/10
My Difficulty: 5/10
My Video: Defender of the Crown Longplay

The beauty of this NES completion project is that I get to experience new games and am able to build an appreciation of them I would not have had naturally. Defender of the Crown at first glance lulled me in as something interesting. I mean, it’s a Konami/Ultra game and they make great games, so it ought to be good. Then I booted it up and saw that it was a strategy game with a goal of map conquest. I turned a complete 180 from my original impression in my head. I put the game on my deferred list. Fast forward to now and things are much different. I have now beaten Gemfire, a game that I originally didn’t want to play but ended up liking quite a bit. Defender of the Crown is also more action based than I first realized which is another way the game appeals to my tastes. I started up the game with feelings of intrigue and excitement, rather than an attitude of indifference. Would I have a good experience after all?

Defender of the Crown is a game for the Commodore Amiga that released in 1986. It was developed by Cinemaware as their first release. It was best known for setting the graphics standard in video games at the time of its release. Later the game was ported to various home computers while taking a hit in the graphics and audio compared to the Amiga version. The NES port of the game was released in July 1989 in the US and in PAL regions in July 1991. Ultra Games published the US version and Palcom published the PAL version. Beam Software appears to be the developer but the evidence I have found isn’t conclusive. It’s possible Konami developed it themselves.

Defender of the Crown is a strategy title that includes some action elements. The game takes place in England in the year 1149, mired in a civil war. The king has died and someone has to take the throne. To the north are the Saxons displayed in blue, and to the south are the Normans in orange. You play the role of one of the Saxon lords. Your task is to take over all three Norman castles, thereby ending the war so that you can be crowned king. The other Saxons are your allies, but they too want the crown and may come after you as well. You will beat the game if you turn the entire map to blue.

Hey, it’s Robin Hood!

There are many different modes to this game so the controls change frequently to follow suit. Most of the time you will control a cursor on the map screen. Use the D-pad to move the arrow and press A to make selections. The map shows all the separate regions of England. There are colored shields with symbols on them that denote which lord owns that territory. Your army is displayed as a man on horseback within the region you currently occupy. At the start of the game you are randomly assigned one of the three Saxon castles. This map fills up most of the screen, but there is a white banner in the upper left corner that acts as your menu. Press A while on the banner to bring up the menu. A dagger appears as the menu cursor.

Before starting a game, you get to choose one of four knights as your main character. They are Wilfred of Ivanhoe, Wolfric the Wild, Cedric of Rotherwood, and Geoffrey Longsword. Use the D-pad or the Select button to switch between profiles, then press A on the one you want. Each knight has ratings in Leadership, Jousting, and Swordplay ranging from Weak to Average to Good to Strong. The manual says Wilfred of Ivanhoe is the best knight to start off with, and this is the one I chose to play.

After choosing your knight, and before each turn, you see your status screen. You get to see your character portrait, as well as the portrait of the fair maiden should you rescue her. At the top is the current date, both month and year. Below that is your monthly income and your current gold. Next are the Leadership, Jousting, and Swordplay ratings. At the bottom the current forces of your army are shown. You see the number of soldiers, knights, and catapults in your army. You also see how many soldiers are staying behind to defend your home castle. You always get the first turn every month. You will see the map activity of the other lord’s turns afterward. While you can see the location of your army, you cannot explicitly see where the enemy armies are positioned on the map.

Study the map, then conquer it.

The main menu in the corner of the map screen contains your main commands. Tournament lets you spend five gold to hold a jousting tournament. Conquest is one of your primary commands. It contains sub commands that allow you to move your army and forces around the map. Go Raiding lets you do a raid for gold against one of the castles. Buy Army lets you spend gold to buy more troops. Use the Read Map option to check the stats on any of the provinces. You can also choose to Pass your turn.

With the Conquest command, you can control your army. The sub commands are Read Map, Move Army, Transfer, and Done. Read Map under the Conquest command is the same option as on the main menu. Move Army lets you move your army between territories, but before you can do that, you first select the Transfer command to move troops between your castle and your army. You begin the game at your home castle with 20 soldiers and none are in your army, and you can’t move your army with no one in it! On the transfer screen, you see Soldiers, Knights, and Catapults in the middle. On the left side is the count of each in your home garrison, and the right side is the count of each in your army. Use the D-pad to move the dagger cursor and press A to select a unit type. You can use either Left or Right to move troops between the army and garrison, and then press A again to de-select the cursor. Choose Done when finished moving troops. This action doesn’t cost a turn.

Now that you have troops in your army, you can use Move Army to move them to a new territory. You can move the army to any adjacent territory you already own without losing your turn. You can also move freely through other Saxon territories and you decide if you want to just pass through or attack them. If you move to either an empty or hostile territory, this will end your turn. It’s a good idea to use Read Map to examine other territories. Pull up a territory to see the name of it, who owns it if applicable, the number of vassals, and the monthly income generated from owning the territory. Moving to an empty territory claims it for yourself, and in addition, the number of vassals in that territory are added to your army. Adding vassals only happens when taking previously unclaimed territories and not when taking a territory from someone else. If you move to a territory owned by someone else, and there’s no army or castle there, you claim it. Otherwise you will do battle with the occupant. More on that later. All claimed territories generate income that you earn in gold at the start of every turn.

Try to hit the center of the shield to knock him off.

You can compete in jousting tournaments either by paying five gold from the menu or participating for free in a tournament arranged by someone else. You can either compete for Fame or for Land. If you have no land to gamble, or if the game doesn’t let you choose, you automatically compete for fame. When jousting for land, you get to pick an enemy territory that you want to claim. Then that ruler will choose one of your territories and the winner of the joust gets both. When jousting for fame, select the name of the lord you want to compete against. The tournament can last for three rounds as long as you keep winning, and you can only compete against a lord once per tournament. One key point here is that jousting for fame will increase your Leadership stat if you are successful. In fact, Leadership is the only rating that can either rise or fall depending on actions you make throughout the game.

The joust consists of two phases: The joust and the morning star battle. The joust portion is the face-off on horseback that you would normally think of. Two riders on horseback take opposing sides. The action takes places from a first-person perspective with the opponent approaching from the other side of the low fence. Use the D-pad to adjust the position of your spear. Movement is erratic and stiff, but what you want to do is try and put the tip of the spear as close to the center of the opponent’s shield as you can. Then you see an animation with the results. One man can be knocked off his horse, or neither. If no one falls you try again up to three times. If you are unsuccessful by the third attempt, you automatically get knocked down. The worst possible outcome is if you accidentally spear and kill the opponent’s house. This is considered most dishonorable, and if you do that you lose most of your stuff. The results of this joust play into the morning star battle.

Morning star your opponent into submission.

The other half of the match is the morning star battle. You are the blue knight on the left and the opponent is the red knight. There are health bars at the bottom for each participant. Winning the joust gives you a larger health bar. Use Left or Right on the D-pad to move your fighter. Press the A button to swing your morning star. This does a high strike. You can do a low strike by holding Down when pressing A. You have a shield that defaults to defending low. Hold B to raise your shield and block high. The idea is to hit where he is not blocking by striking when his morning star is pointed the farthest away from you. The winner of this fight wins the round.

Swordfights occur when you go on a raid, or if another ruler approaches you to save the damsel in distress. This takes place from a side view. You approach the castle and must take out three guards outside. Then you go inside to battle with the captain of the guard. Use the D-pad to inch either Left or Right. Press A to strike with your sword, or you can parry by holding Up and pressing A. You can also escape by moving all the way to the left but that reduces your leadership rating. The best strategy is to hit him with as much space between the two of you as possible, then back up a bit and strike again. It’s possible to get through without damage though I haven’t done it. The outside guards have small health bars, but the captain inside has a long health bar plus the advantage of stairs on his side of the room. If you initiate a raid and win, you steal half the gold from the enemy castle.

Raiding a castle for gold isn’t supposed to be easy.

As the main purpose of this game is map conquest, you need to build up a powerful army by spending cash and buying troops. Use the Buy Army command. All troops purchased here are assigned to your home castle, so to use them in your army you need to be able to move the army home and then transfer them over. There are four types you can buy. Soldiers cost one gold each and are the bread and butter of your army. Knights cost eight gold each. Naturally with the price difference you will have far fewer knights than soldiers. Knights are powerful fighters on the battlefield but are not that useful for defending your home turf. Catapults cost fifteen gold each. You must have at least one catapult if you intend on attacking an opposing castle. You can also buy castles here for twenty gold. This option lets you build a castle on a territory you occupy and provides you ten soldiers to go along with it. A castle on a territory gives you an option to defend yourself and makes things more difficult for enemies to claim it.

Battles take place out on the open field between opposing armies. There’s no action here, rather the battles play out automatically via what amounts to invisible dice rolls behind the scenes. The battle screen displays one soldier per every 25 commanded and one knight per every 10 commanded on each side. The actual numbers are displayed at the bottom. There is a menu at the bottom where you can change your tactics. Use the D-pad to position the cursor and A to make your selection. The command may take some time to take effect depending on your leadership level. The idea to battles is that there are different tactics you can try based on the situation. Hold Your Ground is suitable when you have the size advantage and are a strong leader. Ferocious Attack is a risky move that could help if you are outnumbered. Bombard takes advantage of your catapults. The Outflank tactic can be effective if you are a weak leader with the larger army. You can also Retreat, which saves your men but affects your leadership rating. Battles can play out very fast so you need to make quick decisions for best results during battle.

Punch a hole in the enemy’s defenses.

If you have a catapult, you can perform a catapult siege against your enemy. Simply attack an enemy castle with a catapult in your army. This mode is all about timing. You get six times to attack the enemy castle before engaging them in battle, no matter how many catapults you have. Each time you get to choose your ammo from either a boulder, disease, or Greek fire. Then you get a view of the castle from behind your catapult. Press and hold A to pull the catapult back and let go to fire away. The castle has a low wall in the front. What you want to do is hit the top of the wall with a boulder first to break a hole in the castle. You can expand the hole with multiple boulders by hitting the top of the wall each time. Then you can use either the Greek fire or disease shots to fire into the hole in the wall you made. The fire shot defeats 10% of the home army, while the disease can kill enemy soldiers over time, particularly if you score a hit with it early in the siege. After all attacks are made, then you go automatically into a normal battle.

Should an enemy attack one of your castles, you then play yet another mini-game to defend it. This is a crossbow battle played from a first-person perspective from inside your castle. Enemy soldiers will pop up at predefined points on the wall and fire at you. You move the crossbow at the bottom of the screen with the D-pad. It moves freely left and right, while it will sit at only three vertical levels that you can shift between by pressing Up or Down. Press A to fire arrows. The number of hits you can take and the number of enemy soldiers you have to dispatch depend on how many soldiers are in each army. The higher your leadership rating, the faster you can slide the crossbow around the screen. The enemy’s leadership rating determines how quickly enemy soldiers fire. If you lose your home castle, you lose all your territory and the game is over. This goes the same for enemy castles, so if you successfully take the enemy’s home castle you get all of their territories.

Outnumber your opponent for best results.

Finally, in a pinch, you can call on Robin Hood to help you. On your turn, point the cursor to Sherwood Forest in the center of the map and press A to talk to Robin Hood. He will help you out up to three times during the game. He can help you raid a castle, siege a castle, or help you out in battle. To use him, you must perform one of those three actions right after asking him for help, otherwise you forfeit his assistance. For the normal battles, Robin Hood will swoop in and knock out a chunk of the opposing army.

This was my first time playing Defender of the Crown. I’m glad I got to play it since it was something I had ignored for a long time. A cart copy only costs around $5, but even with that price it’s not one I see as often as I would expect.

The 5/10 difficulty rating I gave Defender of the Crown is misleading. If you haven’t played this game before, you will get destroyed quickly and often. Any time I encountered an enemy on the map, I suffered for it heavily. The fights I did win left me so crippled that I didn’t last much beyond that, and the ones I lost were over almost as fast as I could issue any command. I fared a little better with gold raiding and the joust, however, you can’t win a game with those skills alone. I couldn’t maintain territories long enough to have enough gold to afford even a modest army. The castle defense sections were also tough to get the hang of. Several attempts ended swiftly. I combed through the manual several times for help, and against my normal policy, I also read parts of an FAQ I found online. The FAQ really helped to clarify the tips in the manual and steered my focus, rather than tell me outright the best way to win the game. I was now able to put together a successful strategy for beating the game. My first win was a little drawn out, but I played a few more rounds and started to win pretty easily. My experience with Defender of the Crown went just like AD&D: Heroes of the Lance. The game starts off challenging, but soon gets much easier when you learn to make sense of what to do.

Defending your home turf is the most important ability.

Here was my strategy for beating the game. If you want to figure it out yourself, now is the time to look away. The first thing you need to do is learn the map. Take some time to use the Read Map feature and check out the territories to see which ones are valuable. There is one near the middle of the map that is really good and one of the starting positions will allow you to claim it right away. Instead of building up my army early on, I spent my gold on castles to lock down the best territories. To properly defend the castles, you really need a quick crossbow. This leads to the most important piece of advice. The key ingredient for success is maintaining a high leadership rating. As you could tell from reading here, many positive outcomes all throughout the game are born from having high leadership. If no one started up a tournament after sticking castles on two or three territories, I made sure to hold one to joust for fame and build up my leadership. The sooner you get to Strong leadership, the better. Then you’re in the driver’s seat. Make sure you keep ten soldiers in each castle, especially the ones that border enemies. You can use your army to help distribute soldiers all over your territories, all on one turn. Having a bunch of castles and getting good at defending them with the crossbow is what you want to focus on. You can opt to play the long game here and start rolling out castles on more territories, slowly dominating the map that way. My way was a little faster. Once I had a territory in reach of an enemy’s home castle, I then splurged on a single catapult and the biggest army I could get, splitting my money about evenly between soldiers and knights. Sometimes I went on a gold raid against a home castle for a nice cash infusion. You can also borrow soldiers from castles that aren’t at risk from enemies to add to your army. Do the best you can at a catapult siege, but even if it doesn’t go the best, I vastly outnumbered my opponent anyway and just did Hold Your Ground until victory. Taking a home castle can give you other territories all in one shot. It should be easy to win from here.

I guess you could say I had a love/hate relationship with Defender of the Crown. I was never interested in this game. When it appeared on my list, I was excited to try it. I liked it at first, even though I got hammered. Then I started to dislike the game from all the losing. Once I figured it out, then I had a lot of fun with the game. The graphics are pretty decent. They are a far cry from the original Amiga version, but are more than passable. I don’t remember the music very well, which I suppose means it’s forgettable. I found the controls to be slow and stiff, especially in the jousting and sword fighting. I realize that this is not exactly selling the game to you. What I enjoy about the game is the variety. There are several ways to play this game and you only have to work hard at one or two of them. There are different characters with his own strengths, plus some random starting positions that give you some replayability. It’s a quick game too, which is unusual for a map conquest game. I think it’s the ideal pick-up-and-play game of this style and I can see myself playing it through again, which I would have never said just a few months ago.

#98 – Defender of the Crown

 
AUG
07
2018
0

#87 – RoadBlasters

Do what the title says and blast your way through this action driving game.

Pretty nice tune here.

To Beat: Reach the ending after Level 50
To Complete: Beat the game and play all levels
What I Did: Completed the game without dying
Played: 5/28/18
Difficulty: 6/10
My Difficulty: 3/10
My Video: RoadBlasters Longplay

I’m noticing that a lot of video game names are long and complicated these days. Part of that is because modern games are also longer and more complicated, and they do seem to trend that way all the time. It’s tough to sum up modern games with short names that can also carry the idea of the game itself. The other part is that most of the simpler names are already taken. With early games especially, the ideas are simple enough to sum up in a word. I’m thinking of games like Asteroids or Centipede where you don’t need to go any further in explanation to know what they are about. RoadBlasters has a straightforward name and you know what you are getting into when you play it.

RoadBlasters originated as an arcade title in 1987. It was both developed and published by Atari Games. The arcade version came in both a standard upright cabinet and a large, cockpit-style cabinet. This game was ported to various home computers and game consoles, including the Atari Lynx and the Sega Genesis. The NES port, released in January 1990 in North America, was published by Mindscape. PAL versions were released in Europe sometime in 1990. A lot of what I read said that Atari Games or Tengen developed the NES version, but I believe it was Beam Software as they are mentioned on the title screen for producing the game.

RoadBlasters is a driving game that’s more of a shoot-em-up than a racing game. There’s no story here for a change. You drive an armored car that is outfitted with guns on the front. Simply drive ahead and blast away anything that stands in your way. Your task is to reach the end of each course before running out of fuel. There are 50 courses in RoadBlasters and you beat the game when you reach the end of the final course.

Blow them up! It’s more of a shooter than a driving game.

This game has simple controls. You use the D-pad to drive. Press Up to accelerate and Down to brake. If you let go of both Up and Down, your car will maintain speed as long as you stay on the road. Press Left or Right to steer in the desired direction. Press the A button to fire your main guns. You have unlimited shots! The B button is used to launch any special items you have. The Start button pauses and unpauses the game.

The game screen mostly consists of the open road and your car with the view from behind your vehicle. The bottom part of the screen contains all pertinent information. The left side shows your score multiplier. The small, vertical rectangle to the right of the multiplier is an indicator light that flashes when you are approaching mines. Next to that is your fuel gauge, both your normal fuel and your reserve fuel tank. You also see your current speed as well as your score. The round number is displayed in the upper-right corner of the playfield.

One of the main mechanics to this game is the score multiplier. It begins at one and can go as high as ten. You accrue points rapidly just by driving and the multiplier determines how quickly your score increases. Every way you can earn points is influenced by the multiplier, whether it is from shooting enemies or earning a bonus at the end of each course. You increase the multiplier by one when you shoot down an enemy, but it decreases by one if you miss with a shot. You really need to work on your accuracy and not just spew fire all over the road if you want to have a high multiplier.

Orange cars sometimes leave behind fuel pickups.

Another mechanic is the fuel system. Naturally, you use fuel in this game as you drive and you don’t want to run out before reaching the end of the course. There are a few ways to earn fuel. Sometimes there are fuel globes on the road and all you have to do is drive over them to add fuel. There are green ones that appear on the course that add a tiny amount of fuel, and there are orange ones you get by blasting certain cars that add more fuel than the green ones. Many levels have a checkpoint halfway through that automatically refills your main fuel tank back to the starting amount. You also have a reserve fuel tank. Only when you run out of fuel in the main tank will you automatically draw fuel from the reserve tank. When you complete a course, you get a point bonus that doubles as a reserve fuel refill. The more bonus points you get, the more reserve fuel you get. This is the real reason why you want to keep your multiplier as high as possible. A multiplier of ten at the end of the level fills up your reserve tank all the way.

There are some special items available. Periodically, a support plane will fly above and drop off some special gear containing one of four items. The item name will appear on the bottom of the screen after you collect it. The U.Z. Cannon mounts a turret on the top of your car. There is an ammo meter and the U.Z. Cannon is lost as soon as you run out of ammo. Firing the U.Z. Cannon does not affect your multiplier so you are more at liberty to fire at will. The other items can be used three times each. Round icons at the bottom show how many uses are remaining. The Electro Shield causes your car to flash colors for a while and you can drive through anything on the road unscathed. The Nitro Inject gives your car a huge speed boost. Normal max speed is 212 but you can get up to 298 with it. The Cruise Missile destroys everything on the road. Be careful because it also removes fuel globes on screen. All items are lost when either you use them all up or you crash your car.

Speaking of crashing, that’s another interesting thing about RoadBlasters. In most games, you would normally lose a life or lose a bunch of time when you crash. Here you can crash just about as often as you want and you come right back. The only penalty is a slight loss of fuel since you have to accelerate from a standstill each crash. I wrecked my car plenty of times when playing through RoadBlasters. It’s nice that the game is lenient in this regard.

The U.Z. Cannon is helpful against these off-road turrets.

There are several types of enemies and hazards on the road. The most common enemy is the orange Stinger car. These are taken down with one shot and can hide precious fuel globes. Small motorcycles can also be shot down, but they are a narrower target. Blue Command Cars aren’t damaged by normal fire and are often in your way. You can take them out with Cruise Missiles or the Electro Shield. Rat Jeeps are annoying enemies that only show up on a few courses. They drive in front of you from behind and then slam on the brakes to try and crash into you. You can blow them up but be quick. Gun Turrets sit on the sides of the road and shoot at you. They are difficult to shoot because of their positioning and are best left alone in my experience. Mines are telegraphed by the flashing indicator light but are tough to see on the road even if you know they are coming. Just avoid them. There are also rocks on the road that cause you to crash. Finally, oil slicks cause you to spin out and lose control when you drive over them. They are not deadly on their own if you manage to stay on the road.

The fifty stages in the game are grouped into twelve regions. At the start of the game, you may select from any of the first three regions, skipping some levels if you choose. When you complete a region, you are brought back to the select screen and you can choose a new region. This is really nice for practicing certain sections or getting to the end of the game faster. If you want to play every course in the game, then you must select the next region manually each time you get the opportunity.

You lose a life anytime you run out of fuel and are unable to reach the end of the stage or a checkpoint. You can continue from the start of the current course. After two continues, you have to start all over.

It gets tense when fuel is running low.

I have beaten RoadBlasters many times before. This was one of the earliest NES games my family owned and one of the few that was purchased new. I still have the same cart we bought back then and that’s what I used to play this time. I also beat RoadBlasters a couple of years ago for the NintendoAge NES contests. This is an affordable NES game that only costs around $5.

RoadBlasters isn’t exactly what I’d call an easy game. Some of the levels are very dependent on fuel globes and you need to be almost perfect to get through, even with a full reserve tank. You also have to do the dance of driving without shooting unless it’s necessary to keep the multiplier up so that you can top off your reserve tank for later. My past experience paid off big time, for I had no trouble beating RoadBlasters this time around. I played through every course and didn’t lose a life. My final score was a little over 1,950,000 which was better than I scored during the last NintendoAge contest. There were a few close calls in some of the later levels where I just barely survived, but overall I am very pleased with my run and my video longplay. It takes about an hour and a half to do a full run and it was good to get it done on my first try.

RoadBlasters is a fun action game that plays well on the NES. The controls are simple and work well for this kind of game. You can start out with easy levels or fast forward to some more difficult levels right away. This makes RoadBlasters a good game to play for just a few minutes or for longer stretches. The graphics are good and the roads curve quite a lot without any technical issues or slowdown. The sound is lackluster. All you hear during the game are car noises and sound effects. That can be exhausting for such a long game. The few songs that do play on the title screen and after each course are catchy and provide a nice sound break after the droning of the main action. One knock against RoadBlasters is that it’s a long game that is very repetitive if you take on all fifty courses. There’s also little room for error with only two continues to draw from. I’d say this a good NES game and a fun one to try out, even if you don’t care for racing games.

#87 – RoadBlasters

#87 – RoadBlasters (1,953,567 Points)

 
NOV
22
2016
0
Fisher-Price: Perfect Fit Box Cover

#30 – Fisher-Price: Perfect Fit

Can you make all the pieces fit? I sure hope so!

Fisher-Price: Perfect Fit Title Screen

Could this title screen be any more perfect?

To Beat: Complete any round
To Complete: Win a round on the highest difficulty against the computer
What I Did: Completed the game
Played: 9/16/16
Difficulty: 1/10
My Difficulty: 1/10

As discussed here on this blog before, there were many companies that wanted to get a piece of the NES pie, including popular toy maker Fisher-Price. Developed for kids, Fisher-Price: Perfect Fit was just the game I needed to check off the list as I have been waiting to balance out all that time spent on mastering Ikari Warriors. Contrary to the title, this game isn’t exactly a good fit for the current NES collector or player unless you want to feel that satisfaction of completing any old NES game.

Fisher-Price was founded in 1930 by Herman Fisher, Irving Price, his wife Margaret Evans Price, and Helen Schelle. They originally made wooden toys but eventually switched to plastic in the 1950s which helped the company continue to grow. The Quaker Oats company bought Fisher-Price in 1969 after Herman Fisher retired. Fisher-Price became an independent company once more in 1991 and was bought in 1993 by Mattel.

In addition to their toy lines, there were a number of PC games bearing the company name. Three of these games were ported to the NES: Perfect Fit, I Can Remember, and Firehouse Rescue. The earliest release of these three was Firehouse Rescue but it turned out to be the last of the NES ports so I will be covering that one last. These three games appear to be the only console releases of any Fisher-Price video game. The early Fisher-Price games are all published by GameTek, and Perfect Fit on NES was developed by Beam Software. This was a US exclusive title.

Nice and simple!

Nice and simple!

Perfect Fit is a game meant for young children, so the controls and rules are quite simple. The object of the game is to match up pieces with their places on the puzzle. These pieces can be letters, numbers, toys, and other objects like that. One at a time, these pieces will drop down a chute on the left side of the screen. On the puzzle there will be silhouettes of these objects. You have to move the current piece on top of the matching shadow and press A to put the piece down. Get it right and the next piece will come down, but if you get it wrong you will hear a buzz and you get to try again with no further penalty. Place all the pieces correctly and you win! There are three puzzle boards to solve and you win the game when you complete all three.

There are three difficulty levels. Level One has few pieces to solve so this mode is great for a first time young player. Level Two introduces a flip mechanic. In this mode there are two fields below the chute labelled “Flip Image” with arrows. One field is for flipping the piece horizontally and the other is for vertical flips. If you need to flip the piece to get it to match up, simply place the piece over the appropriate field and press A to flip the piece in the direction indicated by the arrow. This difficulty also introduces a time limit and scoring. In Level Two you get six minutes to finish all the three puzzles and for every second left at the end of the game you are awarded 10 points. Difficulty Level Three is the same as Level Two but with a stricter time limit of three minutes and 20 points awarded for each remaining second at the end.

I put my thing down, flip it and reverse it...

I put my thing down, flip it and reverse it…

This game has a two player mode where players take turns solving their own puzzles and compete for the higher score in the scoring modes. Before starting the game you get to enter your name for display on the level start screen and high score screen. There is also a single player mode versus the computer. The CPU opponent is named Electro. Ultimately this gives no advantage when playing. It’s mildly interesting watching the AI bumble through piece placement. I found while playing that the AI always attempts to place the piece in the correct spot but does not know which way to properly flip the piece, so it will alternate between horizontal flips and vertical flips and test each time to see if the piece actually fits. Despite the slow going it seems to be able to solve all the puzzles in time.

One minor oddity about the scoring system is that the way to get the best scores is through Level Two difficulty. There is a maximum score and points are essentially lost the longer the game goes on. That maximum score is the same for Levels Two and Three but the point loss is twice as fast in Level Three as it is in Level Two. The high score chart is shared between these difficulty levels. I suppose if the game designers really cared about scoring then there would be some kind of point bonus just for playing on the harder level.

His best is not good enough!

His best is not good enough!

This was my first time playing Perfect Fit and there’s a pretty good chance that it will also be my last time playing the game. While playing I completed all difficulty settings both alone and with the CPU player. It was overkill even though the game didn’t take too long. I also played with my daughter in the room to see how interested she would be in the game. She is not quite two years old yet so she’s not really ready for the game yet. She does enjoy holding the controller and pressing buttons for a few minutes, and she also knew what each of the letter and number pieces were. I think the graphics may be a bit too primitive for her to recognize any of the other pieces when I asked her what they were.

There’s really not much else to say about Perfect Fit. It plays well but doesn’t do much to hold your attention. Kids today have much better options for introductory gaming. The only thing perfect about it is that is it a very easy game to clear for the sake of an NES completion project like this one. Perhaps there’s a benefit here for easing a child into using a game controller if he or she is interested in playing NES games. Otherwise there’s really no reason to play Perfect Fit.

I played through Perfect Fit on my NES top loader and not long after that I received my AVS console. Aside from a few exceptions like Zapper and R.O.B. games, going forward I will be playing everything else with my AVS. I also have started capturing footage starting with the next game so there are gameplay videos coming soon. I didn’t make one for Perfect Fit but I don’t think it’s a big loss!

Fisher-Price: Perfect Fit Ending Screen

#30 – Fisher-Price: Perfect Fit

Fisher-Price: Perfect Fit High Scores

#30 – Fisher-Price: Perfect Fit (High Scores)