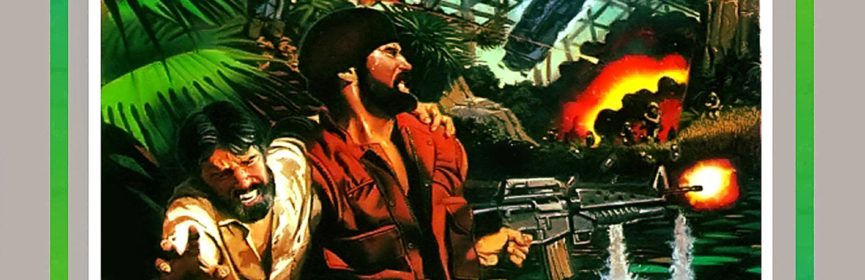
#158 – Day Dreamin’ Davey
A good game? In your dreams!

Not pictured is Davey’s PogChamp face.
To Beat: Reach the ending
Played: 5/24/20 – 5/31/20
Difficulty: 5/10
My Difficulty: 5/10
My Video: Day Dreamin’ Davey Longplay
When I was building my licensed NES collection, I would always get excited when I saw a new game I had never seen before. I browsed eBay lots of NES games looking for deals, so I saw plenty of games all the time. I knew of the really rare games and what to look for, but there were also uncommon games that don’t demand much value but are hard to come by when you are looking to add them to the shelf. Day Dreamin’ Davey is a game that immediately takes me back to that phase of my collecting days. It has an interesting, kind of goofy cover, the kind that really piques my curiosity. In this particular case, the allure of owning it exceeded the quality of the game found inside.
Day Dreamin’ Davey was released on the NES in the US only in June 1992. The game was developed by Sculptured Software and published by HAL Laboratory. I was surprised when I researched that Sculptured Software developed 10 NES games, by my count. This is the first game by this developer that I have played for this project.
In this game you play the role of Davey. He is a boy in school who has trouble focusing and staying awake in class. During class or even when talking to people like the school principal, he will doze off, taking whatever discussion is going on into his daydreams. The game takes place inside of Davey’s dreams as he travels in his mind to various locations. Your goal is to get Davey through his school day by navigating through all his dream scenarios. There are 11 levels to play to beat the game.

First things first, you gotta jump the rocks.
Day Dreamin’ Davey is a top-down action game. You move Davey with the D-pad in four directions throughout the large, free-scrolling stages. Press the Start or Select button to bring up the menu. Here you can see your items in columns sorted by B button items, A button items, and consumable items. Navigate with the D-pad and select any item per column with either the A or B button. Typically, the A button is for your permanent melee weapons like swords, while the B button weapons are limited by the ammo you carry. You can also jump by pressing A and B together. While being able to jump is not intuitive, you can hold down A and press B to jump while repeatedly attacking, making things a bit easier. (The inverse is not true, holding B and pressing A does not jump.) Sometimes you will talk to people in your adventure and you can progress through their words by pressing A.
The first area you’ll come across is the Medieval World. You begin with only a short sword that attacks straight ahead with A. You’ll need to use your jumping skills to jump out of the rock circle you start in and talk to the first white knight you see. You might mistake him for your enemy, and you can actually defeat him if you really want. The goal for this level is to find you a better sword, Excalibur to be exact, and defeat the dark knight Lumper. Explore through the woods maze to complete these objectives.
There are other items you can pick up here. Sometimes enemies drop them and sometimes you find them in dead-end or other nooks and crannies. There are spears that you can throw as a consumable weapon. There are two kinds of potions you can find that look the same but appear in different spots in your inventory. One of these is a healing potion and the other damages you, so beware. An hourglass freezes all the enemies in their tracks, while a magic bag of fairy dust makes Davey invincible for a short time.

Here’s the *checks notes* John Smith building.
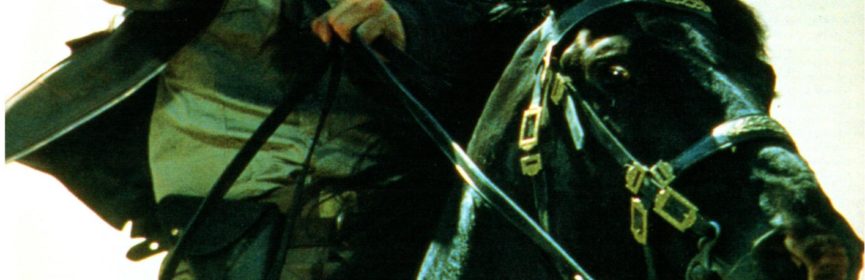
When you complete your goal and wake up from your daydream, you’ll advance the story via cutscenes before slipping into your next daydream which brings you to the Western World. Our hero dons a cowboy hat and carries a whip as you explore an Old West town. There are gunslinger enemies as well as other desert hazards such as rattlesnakes and tumbleweed. This area has several buildings and you can go into some of them for different things. The first goal should be to find the sheriff’s office where he will give you a mission and some cash. There are some stores in the town. The gunsmith shop lets you buy different firearms as well as ammo for them. At the Trading Post, you can exchange items you find for cash as well as purchase random items like deer tails and spirit powder. Some of the items you buy have good effects, while others have negative effects. You can find some items on the ground as well, such as ammo, snake skins, and TNT.
The goal in the Western World is to defeat a specific gunslinger found somewhere in town. You’ll follow the directions from the sheriff to figure this out, plus you’ll need to acquire a gun for the shootout. When you encounter the enemy, the perspective changes to a screen with the bad guy in full view facing you. He will tell you to “draw” and then you have to shoot the gun out of his hand before he blasts you first. It costs you a life if you lose. You can fight this battle in one of two ways. The most straightforward way is to use the controller to aim a targeting reticle at his gun, then press A to fire. In a neat twist, the other way to defeat him is to use the Zapper gun, specific to just this fight. When you first encounter him, you will have pick up the Zapper quickly, then shoot the gun to beat him. Nowhere in the manual or on the box does it tell you that this is a Zapper-compatible game, but it works and that’s how I played this game.
The third area in the game is the Greek Mythology World. Here you don’t start with a weapon but you can punch with either A or B to start. You will need to speak to various Greek gods and goddesses for tips on how to clear this area. You will need to acquire both a bow and arrow and a shield. Along the way you will fend off guards, eagles, and satyrs with whatever you have on hand. Droppable items include apples, some of which heal you while others hurt you, and sundials to freeze time. The goal of this stage is to find and defeat a cyclops. There are several temples to enter as well as gates that connect different sections of the stage together.

Shoot his eye out!
The rest of the stages are in one of the three above themes. The neat thing is that you will go back to the same areas you were before but this time you will have access to different portions of the stages. Some areas expand further out to brand new sub areas. For instance, in the Greek Mythology world you go down into the Underworld and meet with Hades himself. This means that the later levels are longer than the earlier ones, even with the benefit of having been to those stages before.
You start the game with one extra life and there’s no way to earn any more. This is the only game I’m aware of that has a lives system with only one spare life. Losing a life lets you keep any items you’ve acquired, but when you continue after your next death, then you have to start the level all over again. A few of the stages are long enough that it is a pain to have to go back and replay, but having one retry is better than nothing. Thankfully, the game is long enough that there are passwords. The codes are short, five-letter codes made up of all consonants.
This was my first time playing through Day Dreamin’ Davey. I am pretty sure I picked up my copy of this game at my local game store. It would have sold for either $5 or $8. I didn’t keep any records of local purchases, but I believe that to be correct. I do know that I sold a double of this at some point, but I don’t remember where I got the other one either. I would not be surprised if I picked up both locally. In fact, I think there might be another copy at my local store now, though I have not been there in months. They raised their prices a few years back across the board so I suspect they have it listed at either $15 or $20. This is an uncommon game that sells for around $15 cart only.

Zapper this varmint’s gun right out of his hand!
My playthrough of this game was not notable except for one thing. This was the first game I successfully streamed in its entirety! Of course, since it was Zapper-compatible, that meant I recorded in standard definition off my modded top loader and CRT in the other room, but everything went well. It took me four nights of streaming to beat the entire game, taking a little over 5 hours total. I was expecting the game to last longer than that. I went back later and recorded the entire game from start to finish for YouTube, which lasted about 80 minutes. That took two tries over two separate nights because I accidentally started the game over instead of continuing when I was in Stage 8.
Despite the interesting premise and late release date, this is not a good game. The biggest issue with the game is the lack of any polish, like the game feels rushed to completion. Enemies often disappear for no reason, sometimes glitching through solid walls. Sometimes an enemy can get stuck to you and deal crazy damage. It is often hard to tell if you are damaging the enemy because damage flashes are inconsistent and there’s no clear sound effect to show that you are hurting the bad guys. A few places in the game have invisible quicksand where you need to mash A and B to jump out of them lest you die. Having one extra life was a strange decision. Collision detection feels off. It’s a shame because the theme of the game is interesting, so there could have been a good game here. With mediocre graphics and music, the gameplay needed to be strong for this to have been a fun game, and that is definitely missing. It feels to me like they spent their entire development budget on the voice samples found throughout the cutscenes. I would say skip this one unless you are desperate to try something different on the NES.

#158 – Day Dreamin’ Davey