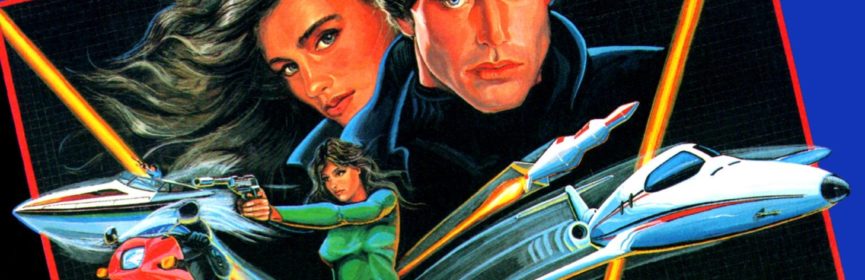
Take on the NES Library

An 8-bit Extravaganza!

Finished

MAR
13
2017
2

#38 – Spy Hunter

Take pursuit of the top score as the bad guys pursue you.

The font is a bit hard to read.

To Beat: Complete the Winter season and the River section
Played: 11/21/16 – 11/23/16
Difficulty: 5/10
My Difficulty: 5/10
Video: Spy Hunter Longplay
Bonus Video: Spy Hunter Glitch

This is another first for Take On The NES Library with the first racing game covered on the site. However, if you know anything about Spy Hunter then you’ll already know that this is a loose claim at best. Since Spy Hunter is less about racing and more about combat, survival, and high scores, we will have to save the first true racer for another day.

Spy Hunter is originally an arcade title released by Bally Midway in 1983. It was supposed to be a James Bond game and it carries that kind of vibe. Spy Hunter was popular enough to spawn a pinball game bearing the same name in 1984. Later the game was ported to a host of home computers and other consoles. The sequel Spy Hunter II was released in 1987 and featured more of a 3D perspective from above and behind the car as opposed to an overhead view. The NES port of Spy Hunter was also released in 1987 and was both developed and published by Sunsoft. In 1991, Sunsoft released a Famicom title called Battle Formula which plays as a racing shooter game similar to Spy Hunter. When they brought the game to the NES, they obtained the Spy Hunter license from Bally Midway and released the game as Super Spy Hunter in 1992.

Spy Hunter experienced periods of dormancy sandwiched between a number of reboots. The next Spy Hunter game was released in 2001 along with a sequel, Spy Hunter 2, in 2003. Around that time a Spy Hunter movie was starting up but it has not yet seen the light of day. There was a movie tie-in game called Spy Hunter: Nowhere to Run that was released in 2006 anyway despite no movie release to go with it. After another long quiet spell, yet another video game reboot of Spy Hunter was developed for handhelds in 2012. There have been rumors that a Spy Hunter film is still in development as recently as 2015, but at this point it seems unlikely this will ever come to fruition.

Just crusin’ along!

Spy Hunter is a top-down racing and shooting game. You control the G-1655 CIA Prototype Interceptor as you are being chased by a bunch of enemy agents who only want to destroy you. Your task is to take out the enemy agents, protect innocent bystander vehicles, and drive as far as you can.

The controls are simple. Use the D-Pad to steer your vehicle left and right. You go faster by holding up and you slow down by pressing Down. Your Interceptor is armed with a machine gun that you can fire with the B button. If you have a special weapon you can use it with A, and the Select key will switch between special weapons if you have more than one. There is no pause feature with the game which is a significant omission as far as I’m concerned.

When you begin the game you are unloaded by the big brown weapons van and you can start driving right away. Your score counter is displayed on the upper-right of the screen and it increases as you drive. You want to stay on the pavement since you don’t get score while you are riding along the edge of the road. If you go faster you accrue points more quickly while at a higher risk of crashing. There are a number of vehicles and hazards that will get in your way from both ahead and behind so you want to maintain a decent speed. You also earn points by defeating the enemy agents. If you happen to bump into or destroy a non-enemy vehicle your score counter blinks and stops increasing for a little while.

Try to avoid shooting the regular cars.

There is also a time counter on the bottom-right that ticks down pretty fast from 999. The timer ties to an interesting mechanic concerning your lives. As long as the timer is running, you can crash your vehicle and you can get right back on the road with no penalty. The timer runs out quickly and it only counts down once at the start of the game, so this juncture is when you want to be more careful. You want to drive well enough to earn at least 10,000 points before the timer runs out. Fail to reach that score and your next crash ends your game immediately. However, if you reach that mark then you get an extra life that is shown where the timer used to be displayed. If you play really well and get to 30,000 points you get another extra life, and you can earn another life at every 30,000 points beyond that.

The enemy vehicles on the road all share the same deep blue color so you can easily distinguish them from the others. There is a skinny enemy called the Tire Slasher. You can easily shoot it with your machine gun when it is in front of you, but if it gets to your side it will deploy spikes out of its tires and try to collide with you, causing you to lose control of your vehicle completely. The second enemy agent is a thick car called a Bullet Proof Bully. Naturally this vehicle is immune to your machine gun, so the way to take it out is to bump it off the road with your Interceptor. This enemy will try and do the same to you, so be careful. The third agent is a long Limousine. This vehicle attacks you via a backseat passenger firing a pistol out the side windows whenever you run along side of it, so you want to avoid approaching it just as you want to avoid the Tire Slasher. There is a fourth enemy which is a white helicopter. This is the only flying vehicle and you can hear it coming long before you see it. The helicopter drops deadly bombs on the road that create a deadly pothole in the ground should you run over it.

The helicopters are relentless!

To help fend off the enemies, you can find three special weapons. At certain times the same brown van that drops you off at the start appears with a symbol on the top. If you get close to the van it drops a ramp so that you can drive up into the back of the van. If you do this, the van will pull over to the side of the road and drop you off with your new weapon. The weapons are indicated by letters in the upper-left corner of the screen. The one denoted by an S is the smoke screen which lets you spew a wide fan of smoke out of the back of your Interceptor. This pretty much causes everything behind you to crash, including innocent drivers which halts your score counter. The M is a homing missile that is used solely to take out the helicopter. You have to drive in a way to keep the helicopter still long enough so that you can hit it, and getting the hang of it takes some time. The O is an oil slick which drops a car-wide stream of oil behind you. The effect is similar to the smoke screen but it is much easier to target a single enemy. These weapons are useful but if you crash you lose them all.

As you drive you will occasionally find forks in the road. You have to be careful to pick a side so that you don’t crash in the median. You will also drive across long bridges. When you come out of the other side the background scenery changes. There are four different areas you drive through and each one corresponds to a season. You can bounce around a bit between the different seasons, but usually you go through Spring, Summer, Fall, and then Winter.

If you get really far into the game you will eventually come across a small branching path to the left with a small building at the end. It’s very easy to miss it when you are going fast, and it is completely optional anyway. Drive into the building and you switch over to a boat and drive on the river. There are two types of enemy boats you will encounter and no friendly vehicles to avoid. Cruise boats fire torpedoes both ahead and behind them, and speed boats drop explosive barrels you need to navigate around. Enemy helicopters can also join the fray. You can stay on the water for as long as you want, or eventually you can find a path back to the boathouse and get back on the road.

The water is more dangerous than the road.

Looking around online, it seems a common rumor about Spy Hunter back in the day was that the game eventually has an ending if you play long enough. I can put that rumor to rest: Spy Hunter is an endless game. With an endless game comes deciding on what constitutes a win. The closest thing Spy Hunter has to levels are the seasons and the river. Winter is always the last unique season you will encounter in the game, so my winning condition is to drive through the Winter scene and also survive one loop of the river.

Spy Hunter is one of my childhood games and one that I spent time with on an occasional basis. Play sessions are pretty short so this was a good choice for a pick up and play game. I never committed to it long enough to ever get really good at the game, so this was my first real shot and beating it and seeing everything the game has to offer.

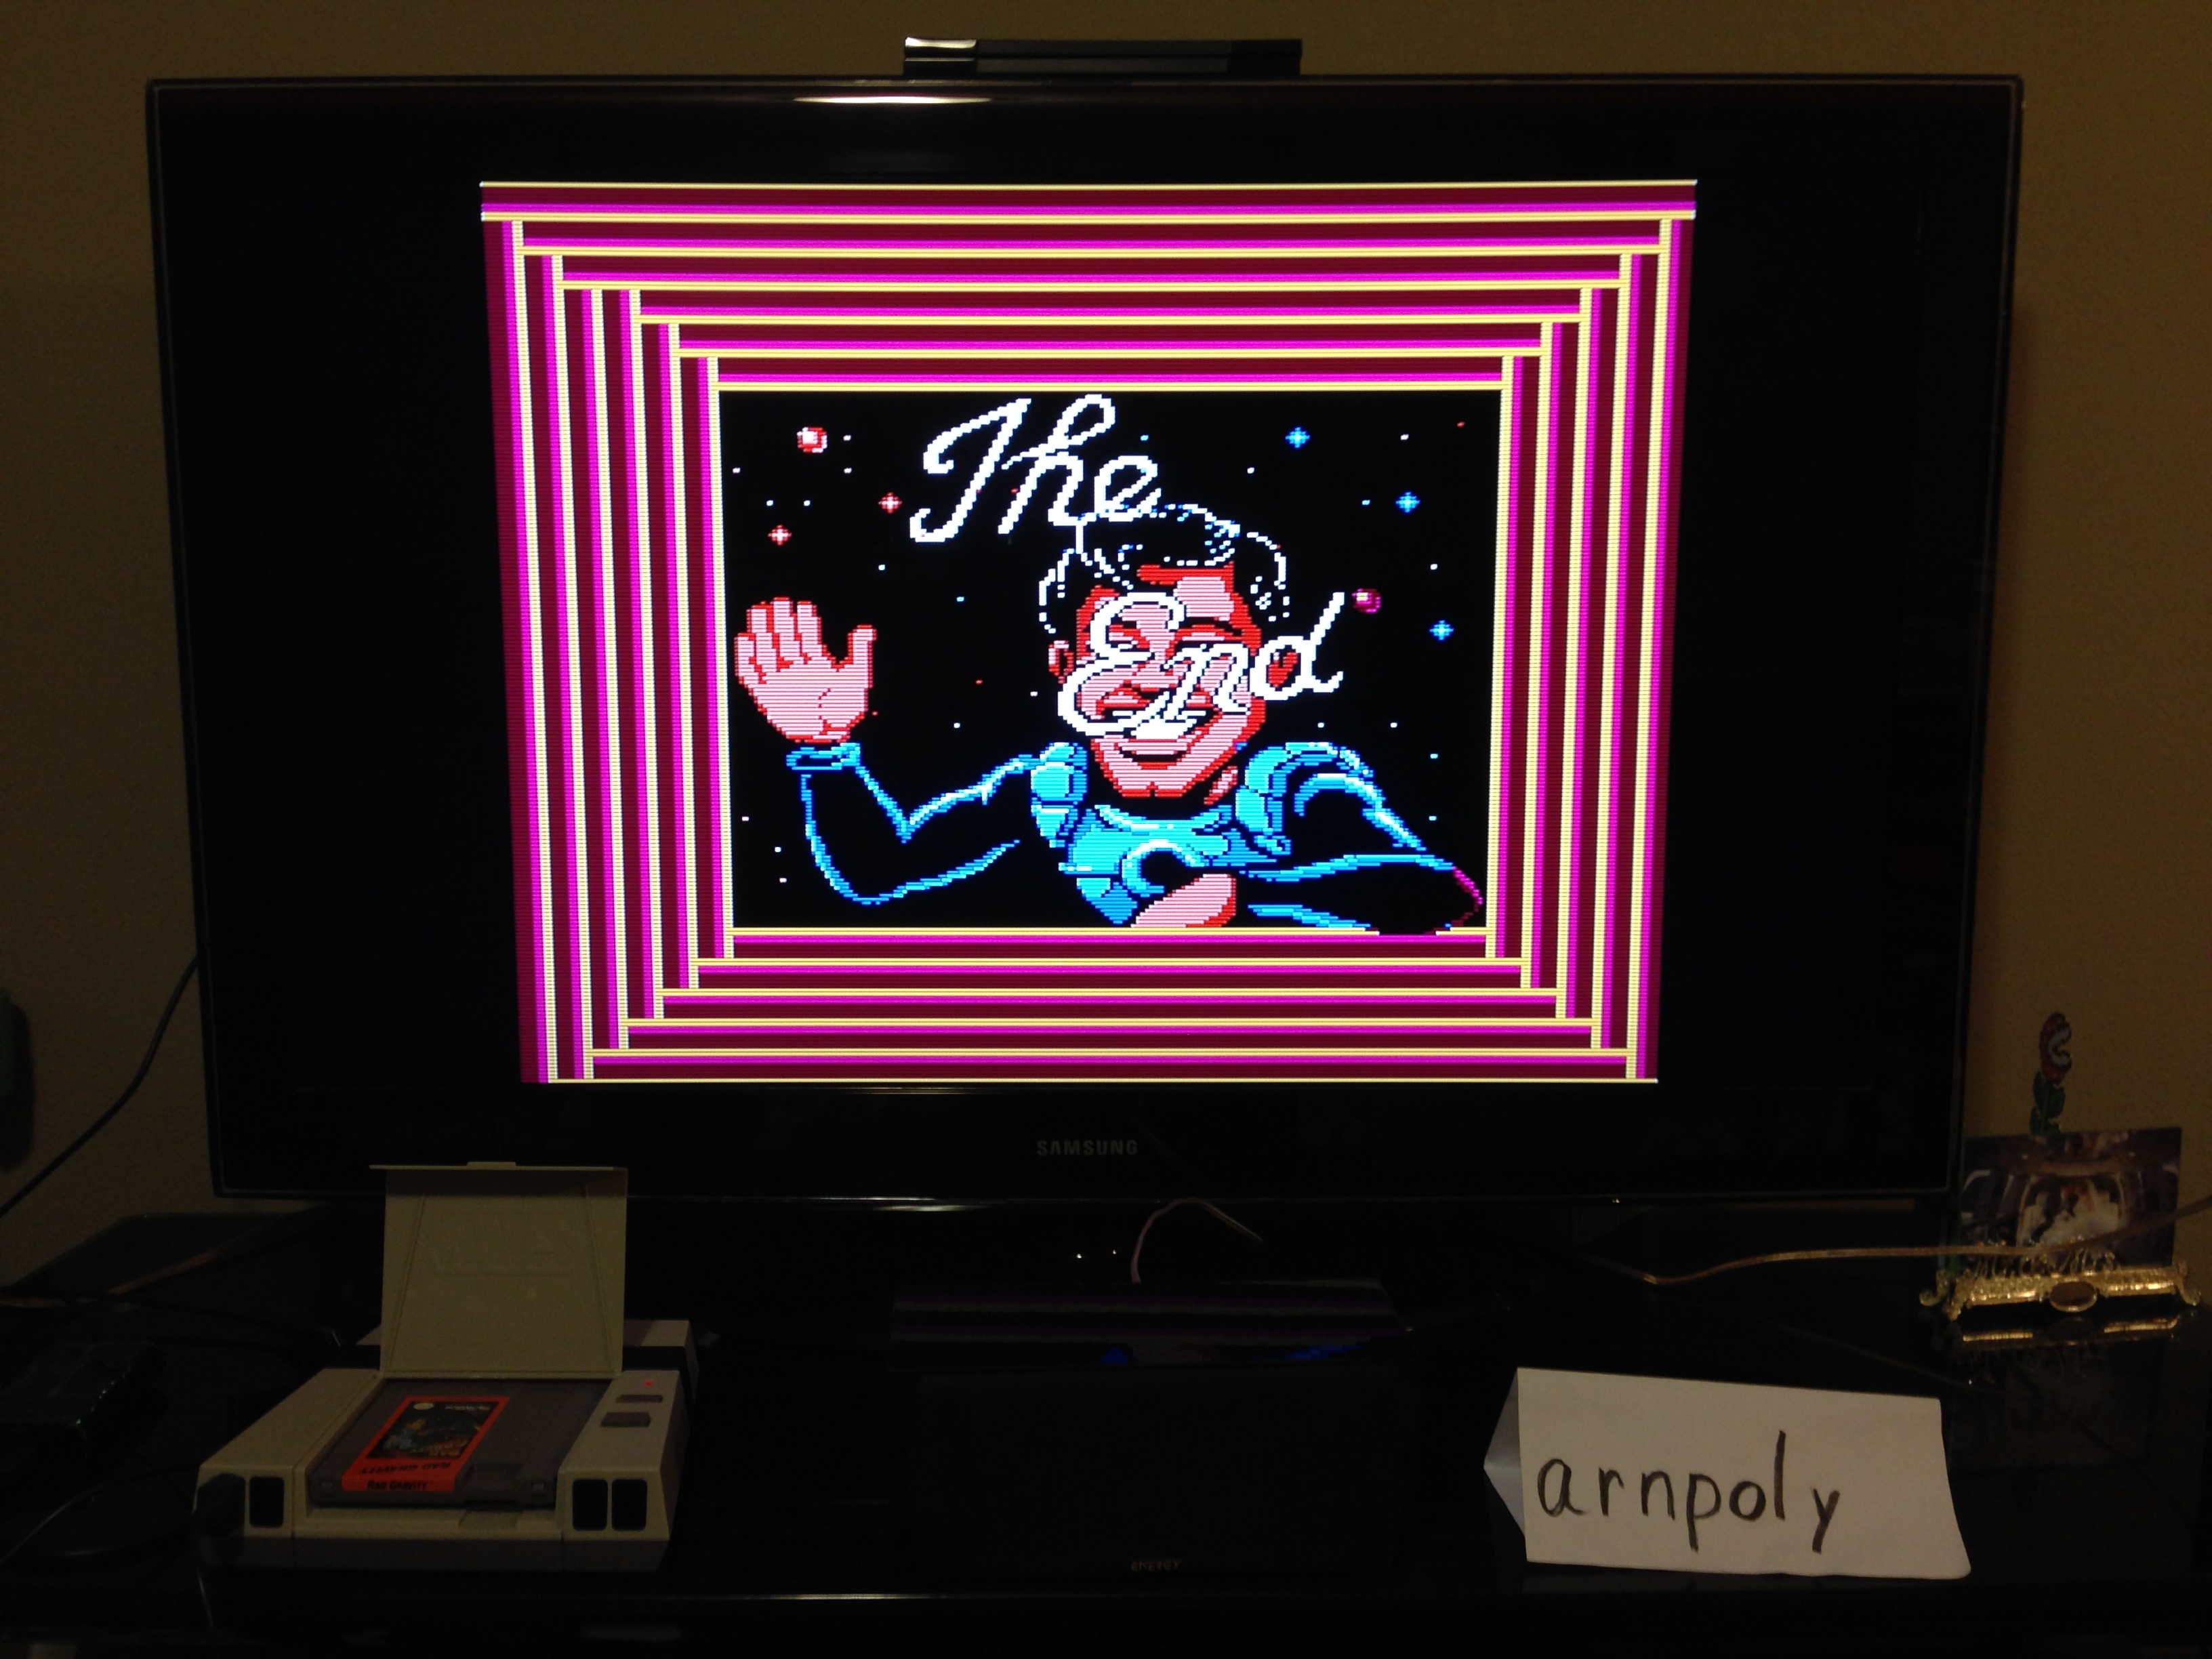
Because Spy Hunter is a pretty short game I ended up recording all my attempts, so I have some hard data on my effort in beating the game. It took me 18 attempts over almost exactly an hour and a half of total playtime. 17 of those attempts took place the first night I played, and the next time I sat down to play I had my winning run on the first try. I took on the river at my first opportunity and ended up getting through it for the first time in my life. The river scene was a childhood gaming nemesis that I was super proud to finally conquer. Going from car to boat or vice versa is the only time the game stops for long enough to capture a proper picture since there is no pause feature. I managed to capture a quick image with my camera even though I hadn’t technically finished the game yet. I was able to drive well enough to pass through Winter and beat the game with a final score of 108,595.

I don’t think many Spy Hunter players have seen this snow!

My 11th attempt was where I got my highest score. I looped through Winter twice and was going pretty well when I decided to go for it and try the River. Unfortunately, I failed out pretty fast. I earned a score of 134,525. I don’t remember what happened after that but I must have been pretty disappointed that I missed my best chance to that point. I stopped recording for a little while and then started back up again a little later. Those last attempts that night were not very good so I smartly cut my losses and went to bed.

During my 4th attempt I unintentionally triggered a glitch that soft-locked my game. I was trying to drive into the weapons van when I bumped into another car at the same time. The game started the sequence of steering the Interceptor into the van without actually putting the car inside. It left my car in a state where it was hovering over the road where I couldn’t move it and no one could touch it. That’s the first time I’ve seen that happen while playing and I had no choice but to reset and start over. I bet the timing of the glitch is really tough to reproduce!

Spy Hunter is a classic game that would be a good fit it any NES collection. There may not be a lot of substance to the game, but it plays well and it is a great game to pop in if you just want to kill a few minutes. I’m just glad to say that after all these years of playing that I have finally seen all there is to see, and it didn’t take me nearly as long as I thought!

#38 – Spy Hunter

 
MAR
06
2017
0

#37 – The Guardian Legend

Two styles of gameplay collide in this legendary adventure!

A static title screen with some nice music!

To Beat: Reach the ending
To Complete: Beat both the main game and the special mode
What I Did: Completed the game
Played: 11/7/16 – 11/19/16
Difficulty: 4/10
My Difficulty: 4/10
Video: The Guardian Legend Special Mode Longplay

In 2012, Mike Matei of Cinemassacre published a now well-known YouTube video listing his top 10 obscure NES gems. The Guardian Legend is the first game I have covered that made his list. Now I won’t tell you exactly where this slotted in on the top 10, but most of the games on that list became instantly more popular overnight, including The Guardian Legend. So the game has a lot of hype surrounding it now, but does it live up to it?

The Guardian Legend was developed by Compile. They are pretty well known for developing shoot-em-up games. The game was first released on the Famicom in February 1988. There it was named Guardic Gaiden and it was published by Irem. The Guardian Legend was released on the NES in April 1989 and published by Broderbund. The game was later released in Europe in 1990 published by Nintendo. The box and label art are unique among all three versions of the game.

Much to my surprise, my research revealed that The Guardian Legend is actually a sequel. There was a trio of games released by Compile on the MSX computer in Japan. The first game was Final Justice which released in 1985 and plays similarly to Galaga. The second is Guardic released in 1986. In this game, each level is a static screen with enemies to shoot. You go to the next stage by flying upward into a scrolling section where you can decide which path and level you want to take next. The third game is Blaster Burn from 1990 which is a vertical scrolling shoot-em-up. The Guardian Legend is the sequel of the middle game Guardic.

There’s a lot going on even in the very beginning.

The Guardian Legend is a shoot-em-up game comprised of vertically scrolling shoot-em-up sections and top-down adventure sections. You play as the Guardian who can transform between a humanoid form and a spaceship form. The goal of the game is to destroy the planet Naju which is filled with monsters and set on a collision course toward Earth. Your mission is to explore the surface of the planet to locate corridors that are buried deep inside the planet. These corridors contain switches that can activate the self-destruct sequence when all of them are set.

The game begins inside the first corridor. Here the Guardian assumes her spaceship form and you play a vertical scrolling shoot-em-up stage. After clearing the stage, the Guardian switches back to her humanoid form and then you explore the surface of the planet from a top-down perspective searching for the next corridor. The game format resembles The Legend of Zelda in that you explore an overworld while looking for dungeons you need to clear.

The controls are pretty much the same in both perspectives. Use the D-Pad to move the Guardian in eight directions. The B button fires the standard weapon. In the shoot-em-up sections you can only fire upward but in the top-down portions you can shoot in any direction. Hold down the B button for a quite generous auto-fire. The A button is used to fire secondary weapons. You can pause the game by pressing Start and you press Select to open up the subscreen.

Information overload!

There is a lot of information available on the subscreen. The top portion of the subscreen contains the same information shown when you are playing and it is comprised of three rows. The top row shows your current score, the number of power chips you currently have, the number of shots for your secondary weapon, and which secondary weapon you have equipped. The middle row contains your health bar. The bottom row shows which area you are located and the X and Y coordinates of where you are located in the overworld. All of that is just the top part of the subscreen!

The left side of the subscreen shows the map. You can see your current location highlighted as well as the location of any reachable corridor. The right side of the subscreen shows which keys you have, the maximum number of chips you can have, your attack and defense power, the power level of the currently selected subweapon, and how many chips it takes to fire the current subweapon. The bottom of the subscreen shows all of the subweapons you have. Use the cursor to select which subweapon you want to equip.

The power chips are very important to your survival. They are the ammunition for your subweapons. Each subweapon uses up a certain number of chips for each time you fire it and you cannot use your subweapons if you run out of chips. The other important mechanic is that the chips also influence the firepower of your normal weapon. When you reach certain chip amounts your weapon will power up, but spending chips and falling below that amount will cause your weapon to downgrade. There is a balancing act between using your other weapons while also maintaining enough chips in reserve to have a more useful normal weapon.

It’s a tiny swarm of overworld enemies.

There are a ton of upgrades and items that you will encounter in the game. The most important items for making progress are the keys. As you explore you will find black circles on the ground next to walls that have some kind of symbol written on them. If you hold the key that matches the symbol, then you can stand on the circle and teleport to the adjacent room. The keys are found in the corridors and they allow access to new areas of the map. Each new area hides more corridors.

You will also gather subweapons. There are twelve unique subweapons and once you have one you can switch to it anytime you want via the subscreen. If you collect the same subweapon again you can upgrade it to a more powerful form. Each subweapon has three distinct power levels. These get really strong later in the game but they cost more chips to deploy. The subweapons have all kinds of different effects and patterns and they are a lot of fun to use. You can get grenades, a laser sword, circular shots, homing shots, and so on. If one of the enemies or bosses is giving you a lot of trouble, it is probably because you are not using the best subweapon for the job. Experiment to see which one is most useful for your situation.

Some items give you other types of permanent upgrades. The Blue Lander is a little creature that will increase your maximum health, and the Red Lander increases the maximum amount of power chips. The gun item increases your attack power, and the shield item increases your defense power. The item that looks like four upward arrows increases the rate of fire for your normal weapon. You can also find an energy tank that fills up your health to your current maximum. It’s worth pointing out here that you can also upgrade your maximum health by reaching certain score thresholds.

Look, a weapon lying on the ground!

Other items are found by defeating enemies. Sometimes when you kill an enemy a little explosion cloud will appear on the ground for a little while leaving behind a power-up block. Shoot the block to reveal the item. You can find a heart that will restore some of your health. The blue orb gives you 20 power chips and a tiny bit of health, and a red orb restores 500 power chips and a little more health than the blue orb. You can also find full energy tanks but they are more uncommon.

There are quite a few ways to find the upgrades and items. On the surface you can find shops where you can exchange power chips for a weapon or upgrade. Some screens contain mini bosses that hold an upgrades. When you walk into one of these screens an alarm will sound and all the screen exits will be blocked off forming an arena for the fight. These can be challenging but the reward is worth it. Some screens contain a powerup freely for the taking although it takes some maneuvering around the map to find them.

There are ten different areas spread out across the map that branch off of the hub area. Each one has its own theme such as a water area and forest area. Each area contains two corridors and they are numbered based on the current area number. Area 1 contains both Corridor 1 and Corridor 11, for example. Corridors 1-10 are required for clearing the game and each one of them is blocked off from entry. There is some kind of puzzle you need to solve to open up the gate. Exploring the area and talking with some Blue Landers will yield the answer for how to open the gate and access the corridor. The remaining Corridors 11-20 are optional but you get upgrades from clearing them that you probably will want.

One of many huge boss sprites!

The corridor stages can pose a challenge. Often they are teeming with enemies and there can be a lot going on at one time. The scrolling speed varies from crawling to crazy fast which can add to the excitement. Each stage ends in a fight with a huge, detailed boss that takes a lot of firepower to defeat. As mentioned before, choosing the right subweapon is critical to taking out the boss successfully.

All throughout the map you will find rooms with Blue Landers that will give you a password to save your progress. The passwords are really complex, consisting of 32 characters of capital and lowercase letters, numbers, and symbols. The passwords do track all of the items you have acquired as well as your score, but the length and complexity is just too much. Thankfully in the smartphone era a simple picture works wonders for capturing it just right.

This was my first time playing through The Guardian Legend but I have quite a few random memories surrounding this game. Growing up it was one of those games I would often browse at the local video store but never rented. I ended up buying my first copy of the game for $5 during my honeymoon. A couple of years later I got big into NES collecting again and The Guardian Legend kept popping up for me. My local game store chain was slow to update their NES pricing and they sold it for $3 when it was at least a $10 game. I bought several copies of the game just to flip. (Yep, I’m one of those “evil” reseller types.) I even picked up a cheap copy on eBay a couple of years ago when I saw it. Then right before I started playing through the game for my blog, my grandmother came across a lot of NES stuff with yet another copy of The Guardian Legend. This one however was a nice condition complete in box copy that I am keeping!

Such colorful death bubbles!

It took me a little under two weeks to finish playing The Guardian Legend with my normal rate of playing. The game definitely has some meat to it with all the areas and corridors, but I managed to make progress at a good rate every time I played. I didn’t get stuck anywhere for too long and even the most difficult corridors only took a few attempts at most.

The Guardian Legend is extremely generous with powerups. The item drop rate isn’t terribly high, but there are so many enemies around to defeat that you will get powerups on constant rotation. The top-down segments, corridors, and even most boss fights provide you enough to keeping going as long as you are reasonably careful and employ smart subweapon usage. For this reason, I don’t think the game is that difficult overall, but there were a few tricky sections that caused me to give it a 4/10 difficulty rating. One of the recurring minibosses became a war of attrition every time I encountered it, and the final boss was pretty mean and took a few tries to beat. This is the kind of game where you consistently make progress, and you can keep attempting the tough parts until you get it right.

I already spoiled this a little bit, but in case you didn’t pick up on it or don’t want to know, now is the time to skip ahead to the next paragraph! Upon beating the game and sitting through the end credits, you are given a very short password “TGL.” You can use the password to play through a special mode of the game that consists only of the Corridor sections. The levels are identical to the regular game but the big change here is how you are awarded the powerups. After completing each corridor, you are taken to a special screen where you earn powerups for meeting specific score requirements. You can get as many as five powerups after each stage even if you score high enough to be awarded more. This mode shifts the focus on scoring as many points as you can. It is also more difficult than the regular game because the rollout of powerups is slower than in the normal mode. It’s a fun way to play through the game again and a fitting reward for beating the game.

The Guardian Legend handles many enemies pretty well.

There is a very good hack of the game called The Guardian Legend Secret Edition. This is a complete overhaul of the game containing a new overworld, new Corridor stages, new Corridor puzzles, and even some new bosses. The difficulty has also been cranked up quite a lot, but that is to be expected with a hack like this. I started playing through Secret Edition once I completed the game and I got about halfway through before I stopped playing. If you like The Guardian Legend then you will really like Secret Edition. I really need to get back to it and finish it for myself!

The Guardian Legend indeed lives up to the hype. This is a really good NES game that I enjoyed playing a lot. The game controls well, the graphics and music are really nice, the myriad of subweapons gives you a lot of variety and power, the boss fights are well made, and most importantly the game is simply fun to play. I certainly got hooked! The only negative in my mind is the long password system, but if that’s the only thing I can find wrong with the game then Compile did a whole lot more right. I recommended that you give this gem a try!

#37 – The Guardian Legend

 
FEB
27
2017
0

#36 – The Adventures of Rad Gravity

A “Rad” adventure that may or may not pull you in.

Rad floats around and points at which option is selected. Neat!

To Beat: Reach the ending
To Complete: Beat the game with all health upgrades and items
What I Did: Beat the game
Played: 10/17/16 – 11/1/16
Difficulty: 8/10
My Difficulty: 8/10

One of my favorite game styles is the open world platformer, more commonly known as a Metroidvania. The Adventures of Rad Gravity does not feel like a Metroid game but it is sort of a similar experience, which took me by surprise when I started to get into the game. While the Metroid series is one of my favorite game series, this particular game is not nearly on the same level though it does have some moments that are really quite interesting. Let’s take a deeper dive so you can better understand what I mean.

The Adventures of Rad Gravity was developed by Interplay and published by Activision. It was released in December 1990 on the NES in the US and it later made its way to Europe and Australia in 1991. The Australian version was distributed by Mattel. The game is an NES exclusive since it was not released in Japan and had no ports to any other system.

The story of Rad Gravity starts with a colonization effort long ago between nine planets. During this effort Compuminds were developed that could communicate instantly between all the colonized worlds. At some point, a wizard named Agathos was transformed by some kind of weird space magic into a huge brain. Because of this, Agathos came into power and decided that he wanted to take over the colony and shut down all the Compuminds, leaving the worlds to fade away and decay. Some time later, one of the Compuminds named Kakos was discovered and turned on. He came up with a plan to restore the rest of the Compuminds and bring back the former colony to glory. Kakos cannot physically explore the planets and must employ Rad Gravity as the best space cadet suited to travel to each world and restore both the Compuminds and the colony.

Rad gets stuck doing the dirty work.

The Adventures of Rad Gravity is a side-scrolling platformer game where you play the role of Rad. You team up with Kakos to explore each of the nine worlds. The game begins in your spaceship where you can select an available planet from your monitor and Kakos will beam you down to the surface. Here you control Rad directly from a side-scrolling view. At the start of the game you only know the location of one planet, but as you explore you will come across the coordinates for other worlds. You will also accumulate different kinds of equipment to help you explore later levels. You can travel to almost any unlocked world at any time. Thus the item and level progression is how the game resembles Metroid.

The controls are simple. When controlling Rad use the D-Pad to move around, press A to jump, and press B to use a weapon or item. The Start button pauses the game and brings up the item selection bar at the top of the screen. Press either Left or Right to select the item you want to equip and then press Start to unpause the game with the item you selected. You can press Up on the D-Pad to enter doors or interact with computer terminals, and you press Down to duck. You can also jump down through certain floors by holding Down while jumping with A.

When inside your spaceship looking at the map, there are colored circles that indicate places you can reach by teleporting. Use the D-Pad to choose a teleport location and press A to go there. If you choose one of the planets you will zoom in on it to see either one or more possible landing spots. There are also stargates on the map that will warp you to a different part of the colony where you can see different planets. I found that the map can be pretty confusing to navigate when the stargates are used, so sometimes I had to bounce around for awhile just to figure out what areas were available to me, but it’s something I eventually got used to.

Enter your coordinates and get going!

There is a menu bar at the top of the screen displayed during the platforming sections. You can see which item is equipped as well as Rad’s health bar. There is also a score counter that is completely frivolous because you only earn points when collecting items. There are no points awarded for defeating enemies which seems pretty unusual for an action game.

Rad collects many items along the way to help in his quest. You begin the game with three very useful items. The Communicator item is your method to travel from a planet back to your spaceship. You can use it at any item to leave a level whether you are done looking around or if you get into a bad spot. When you teleport back to your ship your health is completely restored. That sounds really nice but there really isn’t much of a penalty if you die. Actually you can teleport out during the death animation and you still get full health back, making death a personal choice! The second item is the Translator which allows you to read messages found on computer terminals. The third item is a Laser Sword for close range combat.

The rest of the items are found along the way. The most common upgrade is the health upgrade. The item itself looks similar to a chunk of your health meter. Collect it to add another bar of health to your maximum. There are 15 of them in the game and some of them are well hidden. The teleport beacon is a neat item with some really clever uses for the resourceful player. It comes in two parts. Press B when equipped to throw one on the ground, and press B again to teleport to the exact spot you dropped it. The beacon location is lost whenever you go back to your ship, but you can use to teleport back no matter how far away you go or how many screens away you are. Another item is the Energy Disk that acts like a hoverboard. Deploy it with B and hop onto it and you can float on it while moving left or right. You can move downward with it but you cannot go up. If you jump off then it vanishes. This item does force you to spend a bar of your health to use it so you will only use it in a few cases. There are also three different levels of armor upgrades that lower the health loss when taking damage.

Oh boy oh boy oh boy a health upgrade!!

The rest of the items are weapons. There is a sword upgrade called the Super Sword that gives slightly longer range and more attack power than the base sword. You get a Power Pistol that fires bullets horizontally across the screen. You can upgrade it to the Vertigun that lets you also fire vertically, and you can later find the Maxigun that gives it a power boost. Saurian Crystals act as bombs that you toss in an arc ahead of you, and you can find the Crystal Bombs to power them up even further.

There are ten levels in The Adventures of Rad Gravity. Cyberia looks like a cityscape with a few buildings to explore. Effluvia is the garbage dump of the colony. Sauria is a jungle styled level with some vicious baby dinosaurs. Turvia is flipped completely upside down for a unique experience. Vernia is another city high up in the clouds. The Asteroid Belt contains an abandoned spaceship. Utopia is a planet with two sides and an underground factory. Odar contains an underground maze. Volcania is a burning planet with active volcanoes as you might expect from the name. Telos is the final planet shrouded in mystery!

There are quite a few enemies and traps that stand in Rad’s way. Most of them are your run of the mill enemy types that can be killed with a few attacks. However there are quite a few obstacles that have some kind of unique behavior attached to them. Some enemies you can kill and they explode after a short pause sending shrapnel across the screen. Other enemies cannot be killed but they can be manipulated by how you shoot them. Some enemies can be pushed around if they are blocking a critical path. Sometimes an enemy can push Rad through small spaces that he cannot walk through by himself. There are some enemies that Rad can safely ride on top of. These enemies tend to be put in places where you have to think more about what to do to get past them rather than just engaging in pure combat.

Weaving and bouncing through the asteroid belt can be really taxing.

By the same token, there are certain kinds of mechanics that only appear in a single area in the game. In one level, you have to place a peg inside a hole on top of a gate that opens it. One levels has keys to find. There are blocks you can push that you need to use as stepping stones to clear certain jumps. In the Asteroid Belt you need to navigate between obstacles by firing your gun in the opposite direction to push Rad around as he floats in space. The game does have a variety of things to do in all kinds of environments that make the game interesting.

The Adventures of Rad Gravity does feature a few boss battles mostly in the second half of the game. Similar to the enemies, the bosses tend to have some kind of unique gimmick associated with them where you have to figure out what to do to effectively fight them. These solutions are not always obvious and there was more than one moment where I was left scratching my head.

While not overly long, this is not a game you can finish in a single sitting unless you have already played through it a few times. Fortunately the game has a password system! The only way to trigger the password screen is to actually die in a level without teleporting out of it, which is a little annoying to do. The passwords themselves are 20 characters long and they track all of the items collected and planets unlocked.

Hmmm I wonder how to fight the green blob?

This was my first time playing The Adventures of Rad Gravity. I did not really know about this game until I started my big push for collecting NES. The only way it really stood out at all early on is because of the bright orange label. I ended up buying this cart individually on eBay in 2014 for a little over $7 shipped. While not a terribly expensive game, that cart had the best price I have seen on it so I snagged it right away. The game now sells typically in the $15-$20 range and that price is not too much higher than it was when I bought the game.

I started playing Rad Gravity when my wife was out of town for a couple of days. I was able to put in about 4-5 hours of play time and that got me about halfway through the game. The latter half of the game took longer and I spent two weeks grinding through it. Some of the difficulty stemmed from not knowing which area was the correct one for my current item loadout and some of it came from figuring out how to best clear the areas themselves. I struggled some on the bosses too. I am happy to report that I managed to beat the entire game without looking up anything in a walkthrough. Some of the solutions are obtuse enough that it was no small feat to clear the game on my own. Now this was not a 100% complete run because I missed some health upgrades as well as one of the powered up weapons if I recall correctly. I watched a longplay of the game with all items and some of the ones I missed I probably would not have found on my own. There is only one ending regardless of item completion so reaching the credits is enough to consider the game beaten.

Here’s a tip that helped me get through the game. I found the manual to be particularly helpful for a specific reason. Toward the back of the manual is a section called Top Secret Clues. These hints in and of themselves were only occasionally helpful. The clues are grouped by planet and the order of the planets listed in this section is the same order you can play through the levels. It turns out you do not have to follow this exact order but this way definitely works if you want to take the guess work out of where to go next.

Trying to figure out this stage had me running on fumes.

I have mixed emotions about the game. There are some really neat elements to the game that I have already mentioned, but the whole package doesn’t add up quite right. If I had to describe my experience in a single word, I would choose clumsy. The jumping physics feel really heavy most of the time, meaning you can jump pretty high and then fall down hard. In contrast, the level design is often claustrophobic with long tight horizontal corridors. The jumping combined with the level design can lead to missed jumps and a lot of unnecessary frustration. The sword is not really a great weapon and you are stuck with dealing with close combat and hardly any health at the beginning of the game. The backgrounds can be very unclear on which blocks are solid and which ones are just decoration. The way to make progress is not always obvious making it easy to get fed up with the game, at which point you might drop it altogether or dip into a walkthrough at the slightest hint of getting lost. But I have to say, there were some moments where I figured out something that was so cleverly done that it will stick with me for a long time. It is really hard for me to pick a side here!

The Adventures of Rad Gravity is a really tough game for me to give a strong recommendation. It’s not a great game, it’s not a hidden gem, and it’s not really even an average game. Instead it is a combination of varying highs and lows. I think this is a game that you have to play to know if it’s something you will like. Watching videos or looking at screenshots do not convey well what this game is all about. And frankly reviews don’t do it much justice either. It seems to me that most reviews give up on the game before some of the neat stuff starts. My hope is that this post will highlight the game just enough for you to decide if you want to seek it out on your own and form your own opinion.

#36 – The Adventures of Rad Gravity

 
FEB
10
2017
0

#35 – Hogan’s Alley

Do you have what it takes to shoot cardboard targets?

Take a shot at any mode!

To Beat: Finish Game A Round 30, Game B Round 4, and Game C Round 10
What I Did: Reached Game A Round 41, Game B Round 6, and Game C Round 11
Played: 10/17/16
Difficulty: 3/10
My Difficulty: 3/10

Today we have another Zapper game! It’s not just a Zapper game, but one of the revered “Black Box” NES games as well. The game box features a menacing looking gangster that you just want to blast away! Hogan’s Alley is an early game with some surprising history behind it for a game based on target shooting.

Hogan’s Alley was created in 1984 as a standalone arcade cabinet. The game featured a light gun peripheral attached to the machine that players use to shoot at targets. Hogan’s Alley was ported to the Famicom later in June 1984 and was the third light gun game on the system behind Wild Gunman and Duck Hunt. All three of those games were launch titles when the NES was first released in October 1985. Hogan’s Alley was eventually re-released on Wii U Virtual Console in Europe in October 2015 and in North America a few months later in January 2016.

The name Hogan’s Alley originated from an American comic strip of the same name way back in 1895. Hogan’s Alley is portrayed in the comic as a run-down neighborhood full of odd people. In the 1920s, the FBI opened a rifle training ground at the Special Police School and named it Hogan’s Alley. The school was shut down during World War II. In 1987, a couple of years after the release of the video game, Hogan’s Alley was established in Quantico, Virginia and it is used for tactical training by the FBI and other government organizations. This facility was designed to look and feel like a real small town with a huge fake crime problem. The FBI themselves claim that they chose the name Hogan’s Alley because the rough neighborhood in the original comic strip resembles the style of their training area. I’m just speculating, but possibly the old facility was named after the comic strip and they just carried the name over to the current facility. It is also pretty likely that this was the same reason why Nintendo chose Hogan’s Alley as the name for the video game.

Visual recognition is just as important as trigger speed.

Hogan’s Alley is a light-gun target game that requires the NES Zapper. There are three game modes selectable from the title screen. Game A is called Hogan’s Alley and looks like it takes place inside of a shooting gallery. In each round, three panels will scroll into view sideways so that you cannot see the face of the panels. Once all three come into view they will turn and face you. The object is to shoot each of the gangsters and avoid shooting the innocent bystanders. There are six different people that can appear. Three of them are gun-wielding gangsters that you should shoot, and the others are a lady, a professor, and a police officer that you must leave alone. You only get a short amount of time to fire before the panels flip back to the side. Afterward, the next round begins with three new panels. Each successive round changes the amount of time that the panels face you and this timer gets shorter the longer you play. If you fail to shoot a gangster or fire at an innocent bystander, this you get a miss. The game is over when you accumulate ten misses.

Game B is also called Hogan’s Alley but this time it takes place in what I can only assume is the location Hogan’s Alley. Here you face buildings in the alleyway and the panels emerge from the scenery one or two at a time. The objective is the same. Shoot the bad guys and leave the good people alone. After five panels are revealed, the view will scroll forward to reveal new scenery as well as five more panels. Each round has five different sections of five panels each before looping back to the beginning. Just like in Game A, each successive round has a shorter timeframe for active panels, you accumulate misses when you make a mistake, and the game ends after ten misses.

Keep out! You mean keep the bad guys out!

Game C is called Trick Shot and this game is different from the other two. Cans will emerge from the right side of the screen moving to the left while falling. Shoot the cans to bounce them upward in the air a bit. The goal is to prevent the cans from falling down off the bottom of the screen. On the left side of the screen are three ledges. You want to navigate the cans onto one of those ledges to earn points. The top ledge gives you 300 points, the middle ledge gives you 800 points, and the bottom ledge gives you 5000 points. The lower you go, you get more points at a higher risk of losing the can off the bottom of the screen. The cans will also ricochet off the sides of the ledges keeping them in play longer. There is a tiny safety platform toward the middle of the screen that the cans can land on as well but you only get 100 points for that. Each round has five cans. You get a miss if a can falls off the bottom of the screen and ten misses means the end of the game.

Hogan’s Alley does not have an ending in any of the game modes, so this one has an unclear winning condition. There are a range of potential choices. The easiest condition would be to break the high score of 12,000 in one or all of the modes, but that is a rather low bar to achieve in any mode. The most difficult one would be to loop the round counter. The game can go up to Round 99 before looping back to Round 0. I don’t think this is good either since the difficulty flattens out long before getting that high.

The winning condition I chose has to do with the periodic victory messages that Hogan’s Alley displays on screen. After winning so many rounds, the game will play a little melody and display the phrase “SHARPSHOOTER!” on screen. Play even further and you’ll eventually get the message “SUPER SHARPSHOOTER!” to appear. This is the best possible message you can get and you can see it over and over as long as you keep playing. Obtaining the “SUPER SHARPSHOOTER!” message is what I consider to be mastery of the game for that particular mode. To get this message, you have to complete Round 30 in Game A, Round 4 in Game B, or Round 10 in Game C. I wanted to achieve that in all modes.

Shooting an actual can has to be much more difficult.

My family never owned Hogan’s Alley growing up but I do remember playing it at some point during my childhood. My grandfather likes to hunt and he got into playing several Zapper games at one point, so that is probably where I remember playing it casually. I remember enjoying Trick Shot but that’s the only mode I remember playing.

It didn’t take me very long to beat Hogan’s Alley. I had a much easier time here than when I beat Operation Wolf so that experience probably helped. It did take me two attempts to clear Games A and B and I beat Game C on the first try. I ended up playing until I ended naturally. I reached Round 41 in Game A and Round 6 in Game B before failing out. Unfortunately I wasn’t able to capture the picture properly when I ended Game C and all I got was the high score. I didn’t take notes either and I’ve already forgotten exactly what I did from several months ago. I did capture an image of the end of Round 10, so I can say I made it to Round 11 for sure.

Hogan’s Alley is a fun Zapper game that doesn’t really offer much once you’ve mastered each mode. It was definitely neat for a launch game and having the novelty of shooting the bad guys (or cans) on the TV. Today, it’s a pretty good game as an introduction to using the Zapper, and that’s about it. I guess it could be fun if you want to chase high scores or compete against someone else. At best it is an average game, but there’s nothing wrong with that in my book.

#35 – Hogan’s Alley (Game A)

#35 – Hogan’s Alley (Game B)

#35 – Hogan’s Alley (Game C)

 
JAN
25
2017
0
Gyruss Box Cover

#34 – Gyruss

Go ahead … give it a spin!

Yay starfield!

To Beat: Reach the ending
To Complete: Complete 2 Loops (maybe 3?)
My Goal: Beat 2 loops
What I Did: Reached about halfway through Loop 2
Played: 10/16/16 – 10/17/16
Difficulty: 7/10
My Difficulty: 4/10
Video: Gyruss Longplay

One way I have seen people try and describe a game is by forming it in terms of one or more other games that have shared elements. For instance, the term Metroidvania is widely used to describe a game that contains elements of both Metroid and Castlevania. Even though these comparisons may not always be the best, I think I can sum up Gyruss in this way. A cross between Galaga and Tempest, Gyruss is a fun shoot-em-up that is unlike anything else on the NES.

Gyruss originally is a 1983 arcade game developed by Konami. It was designed by Yoshiki Okamoto. He worked on only two games for Konami, Gyruss and Time Pilot. The arcade version was also published by Konami in Japan and Centuri in the US. Gyruss was later ported to five other home platforms by Parker Brothers. The NES version is not an arcade port, but a complete remake of the game by Konami. It was first released in Japan on the Famicom Disk System in November 1988 and in North America on the NES in February 1989, published by Ultra Games.

This is probably a good time to explain the relationship between Konami and Ultra Games. Nintendo decided to implement strict licensing agreements with companies that wanted to release games on the NES, and one of their policies was that companies were allowed to produce no more than five titles on the system per year. These policies were not in effect on the Famicom and some companies such as Konami were releasing many more titles. To get around the restriction, Konami created a separate publishing label named Ultra Games that received its own allotment of five games per year. So when you see Ultra Games on a cart you know the game is really developed and published by Konami. Nintendo certainly did a lot of hand waving here to let Konami release extra games, but I won’t complain since for the most part it works to our benefit!

Quite the generic story!

As I mentioned earlier, Gyruss borrows elements from both Galaga and Tempest. The game play is similar to Galaga in that each level has a few waves of enemies that enter in and all of them must be eliminated to proceed to the next stage. However the style is a tunnel shooter very reminiscent of the arcade hit Tempest. Your spaceship can orbit in a fixed circular path around the screen and enemies sit in the center of the screen moving outward toward your ship.

To beat the game, you must clear all 39 levels. You do this by planet hopping every four levels starting from Neptune going all the way to Mercury, and finally finishing off at the Sun. You can logically break down the level structure in groups of four. The game begins as you approach Neptune with the text “3 Warps to Neptune.” This level is the basic level type where four waves of enemies fly into the stage and you must defeat all of the enemies to warp to the next level. The second level “2 Warps to Neptune” has the same four enemy waves but with four enemy bases stationed in the middle of the screen. These take a lot of firepower to destroy so this type of level takes a little longer. The third level is “1 Warp to Neptune” which mirrors the first stage and includes a boss battle at the end. After reaching Neptune, the fourth level is a Chance Stage which plays out just like the Challenging Stages in Galaga. Here you get different enemy formations than the previous levels but the enemies cannot hurt you and your only goal is to defeat as many of them as you can for a point bonus at the end of the stage. This set of four stages repeats with the approach to each planet. There is no Chance Stage after the final boss so that sets the level count at 39.

When you begin the game you have the option of selecting either Control A or Control B. These determine how your control the movement of your ship. Control A boils down to pushing the D-pad in the direction you want to move regardless of where you are on the screen. So if you want to move to the left, you press left and you will travel the shortest path to the left side of the screen. If you keeping holding left you eventually will lock your ship in the farthest left position which can be handy at times. You can use up, down, left, and right to move to whichever side of the screen you want. Control B only utilizes left and right on the D-pad. Press left to move clockwise and press right to move counter-clockwise. Up and down do not do anything in this control mode. I have always used Control A and in my opinion I find it way more intuitive and useful than Control B. I think the only benefit to Control B is that you get continuous movement all around the screen by only having to hold down one direction on the D-pad.

Knowing where the enemies spawn helps you clear stages quickly.

You have two different types of attacks in Gyruss. The standard unlimited bullets are fired with the B button. You have a limited-use phaser attack by pressing A button. The phaser is a concentrated blast of fire at one position on the screen that plows through just about anything in its path. When you fire a phaser the screen pauses briefly for you to charge up and fire off the shot which is a nice touch to demonstrate the power of this attack.

There are a few powerups to help along the way. During the standard levels, a formation of three enemies in a row will appear on screen. The two outer enemies are cross shaped and the middle one is generally a powerup. The blue cross item upgrades your standard shot to a double shot. The orange cross item adds an extra phaser shot to your reserves. There is a round item with an orange center that gives you points. The round item with a blue center automatically destroys all enemies on screen aside from the enemy bases in the “2 Warps” levels. There is also a 1-up item that gives you an extra life. You also earn an extra life at 50,000 points and for every 100,000 points after that. You can have a maximum of seven lives and seven phaser shots in reserve.

The Chance Stages all have five formations of eight enemies for forty enemies in total. A few of the enemies in these formations will be a different color than the rest. These enemies bestow a powerup when destroyed so these bonus levels are good for upgrading if you get lucky enough with the item drops. You also get 100 points at the end of the level for each enemy you destroy. If you get all 40 enemies you get a 20,000 point bonus instead. Performing well at these stages goes a long way toward earning lives at a fast enough pace to keep going in the game.

That hairy blob enemy is really annoying.

The approach to each planet typically contains a unique enemy type or two in addition to the standard set of enemies across all levels. As an example, the approach to Neptune has indestructible asteroids that fly in a straight path at you. These special enemies can complicate clearing levels because they also must be dealt with before you can finish the stage. Several of them are shielded or have complicated movements, and that means they tend to linger around for awhile until you can defeat them. Others you simply have to wait out until they go away. You will have to learn what to do for each enemy to make progress in the game.

As mentioned previously Gyruss has a boss battle before warping to each planet. About half of these bosses are the same type consisting of a core surrounded by pods. These pods open up to shoot at you and that’s the only time they are vulnerable. The boss is defeated when all of the pods are destroyed. The remaining bosses are unique from one another and they are the ones I enjoy fighting the most.

Gyruss is a pretty difficult game on its own merits, but it is made more challenging due to the lack of continues. If you run out of lives you have to start over at Level 1. It is also frustrating that the stock of lives has a hard cap at seven. Granted, if you are maxed out on lives you are likely playing well enough to make a deep run, but it would be nice to have a larger buffer. I have had runs come crashing to a halt even with a full complement of lives. Gyruss has a lot of stages but they typically go fast so it isn’t that costly timewise to put in several attempts in a row to try and get the hang of it. I thought about going higher with the difficulty assessment, but perhaps fittingly I decided to give it a 7/10.

This boss has waving arms that are difficult to avoid.

Gyruss is one of the games I had in my childhood collection and I had played it enough to beat it many years ago. I had also beaten the game a few months earlier as part of the NintendoAge contest. Combining both of those experiences left Gyruss relatively fresh in my mind.

My first run of the game was one of those where I lost all of my lives in one spot. The boss at Jupiter I find to be very troublesome. Sometimes I can defeat him pretty quickly, and other times I simply can’t do anything to him and burn through all my lives. This time he wiped me out completely. Starting over, I managed to beat that boss and the entire rest of the game without much trouble.

Gyruss starts over after the final boss with increased difficulty. The enemies shoot more often and some of them move more quickly. The real problem for me is that one of the recurring boss attacks becomes significantly more deadly. I wanted to clear the second loop but I was not successful. I understand that some of the Konami games that loop like this actually have three distinct difficulties, and considering that Gyruss is basically a Konami game it figures that it could follow that pattern. Unfortunately I have not found any evidence of how many difficulty loops are in Gyruss, and I was not able to clear the second loop to find out for myself. I believe that completing all the levels once and getting the ending is sufficient for completion.

Hello, recurring boss of death!

I had recorded my winning run on video, but when I went back to watch it later I found out that the recording had a glitch in it near the beginning. It bothered me enough that I played through the whole game again to get a better capture. This time it worked and I managed to set a personal best in progression on that second loop. I was doing great until I had a complete meltdown on one of the bosses. It’s so bad that it almost looks like I was trying to fail out on purpose! I might end up going back to beat both loops one day just for my own personal benefit, but for now I’m satisfied.

Gyruss has a secret bonus! During the Chance Stage, if you manage to defeat the same number of enemies as the current level, you are awarded with 30,000 points. For instance, the first Change Stage is Level 4, so if you destroy 4/40 enemies then you get the bonus. This is more lucrative than the point bonus for shooting all of the enemies, and in some cases it is easier to pull off too. In my run I tried for the bonus every time as well as trying to hit as many of the powerup-giving enemies as I could. I only missed the bonus one time during the first loop. I abandoned that strategy during the second loop because I was more interested in the powerups.

I think Gyruss is a really fun game to play. I have always enjoyed Galaga so I already like the play style, but with the gameplay perspective, additional enemy types, powerups, and bosses, it makes it a more complete experience with significantly more depth. The graphics are very nice and the music is catchy as well. The game performs well with only the occasional slowdown, and when it does go slow it’s actually welcome. Finally, Gyruss is still a cheap cart to buy if you’re into cart collecting. If anything about the game sounds the least bit appealing to you, I think that Gyruss would be worth your time.

#34 – Gyruss

 
JAN
04
2017
0
Super Mario Bros. 2 Box Cover

#33 – Super Mario Bros. 2

Jump into the Mario game of your dreams!

You can already tell the game play will be a bit different!

To Beat: Reach the ending
Played: 10/9/16 – 10/10/16
Difficulty: 6/10
My Difficulty: 2/10
Video: Super Mario Bros. 2 Longplay

I was pleasantly surprised to see Super Mario Bros. 2 at a mere 33 games into this project. This is also the first sequel covered on the blog! Despite significantly changing the style from the original game, this one is a classic NES game and a must play for anyone who may have passed on it back in the day.

Normally I would refer to the Super Mario Bros. post to recap the history of this game and series, but I went pretty skimpy on the words in that original entry and so it’s time to make up for it here. Nearly everyone knows about Mario and many people in all walks of life remember the groundbreaking NES platformer Super Mario Bros from 1985. Mario originally debuted in the arcade smash hit Donkey Kong in 1981, though he was known at the time as Jumpman. He joined with his brother Luigi in Mario Bros in 1983, but it was Super Mario Bros that really put Mario in the limelight. The iconic plumber has more or less been the mascot for Nintendo ever since. Mario is the star of around 20 platformer style games but has also been the poster child for the Mario Party series, the Mario Kart series, several sports games, and more. Include the spinoffs games from all the supporting characters and there are dozens and dozens more games based around the universe of the one and only Mario.

Nintendo designers Shigeru Miyamoto and Takashi Tezuka quickly set out to create a sequel to Super Mario Bros, but this is not the sequel that we know of in the US. Super Mario Bros. 2 for the Famicom Disk System was released in 1986 and expands on the concepts of the original game. Luigi is a playable character here with a higher jump but slippier momentum on the ground. The game is perhaps best known for its high level of difficulty compare to its predecessor. Nintendo deemed it too difficult for American audiences and decided not to release it in the US. They instead decided to take one of their other games, Yume Kojo: Doki Doki Panic, and update it into a game with Mario characters. This became our Super Mario Bros 2.

No goombas here!

The series in both Japan and the US would converge again with Super Mario Bros. 3 which was identical between the regions. Nintendo would eventually embrace both Super Mario Bros. 2 games in all regions. The original Super Mario Bros. 2 on FDS was eventually released on the Super Nintendo as part of Super Mario All Stars. Here it was named Super Mario Bros: The Lost Levels. The American release of Super Mario Bros. 2 was released on the Famicom in 1992 and renamed as Super Mario USA. Super Mario Bros. 2 also made it to handhelds in 2001 as the Game Boy Advance launch title Super Mario Advance with a few more enhancements.

Now let’s talk about the NES title! Super Mario Bros. 2 is a side-scrolling platformer game. Mario comes across a land named Subcon in his dreams that he eventually discovers is real. He brings along Luigi, Toad, and Princess Toadstool and they set out to save Subcon from the evil frog Wart.

At the start of each level you may choose from any one of the four playable characters. Once a character is chosen you must use that character until either the level is cleared or you lose all your lives. Each character has different traits and abilities that come in handy depending on the situation. Mario is the straight average character. Luigi jumps the highest with a slow, loopy flutter jump but he is a bit weaker than Mario. Toad is both the strongest and the fastest –especially when carrying an item — but he has the weakest jump. The Princess is the weakest character but she has the very useful ability to float in midair for a few seconds during a jump.

The princess’ float ability is very useful!

The game has standard platformer controls. Use Left and Right on the D-Pad to walk. Press Up and Down and climb ladders or vines. You can also press Up to enter doors and press Down to duck. The A button is for jumping and the B button is for running when held down. The B button also lets you pick up an item or an enemy. You can carry it around for awhile and later throw it with the B button. There is also a special move called the Power Squat Jump. Press and hold down to duck and after ducking for long enough you will start to flash. Jump while flashing to perform a very high jump.

In this game you cannot defeat enemies by simply jumping on them. In fact most enemies can be ridden safely with no damage to either you or them. When riding on an enemy you can pick it up and toss it into another enemy to defeat both of them. You will find grass on the ground all over the place in this game. You can stand on top of the grass and pluck it out of the ground to reveal an item. Most of the time this will be a vegetable that you can throw into enemies, and these come in ripe and unripe varieties. Other times it will be a useful item. You can find turtle shells that slide along the ground when thrown killing enemies just as in the original Super Mario Bros. Bombs will detonate after a few seconds so you need to get rid of them quickly, but they are useful for destroying crumbled blocks to open up passages. Occasionally you will find a Bob-Omb enemy that explodes almost instantly. You can also find 1up mushrooms that give you an extra life. If you happen to pull four ripe vegetables in a level, the fifth one will be replaced with a stopwatch that freezes all the enemies in place for a little while.

The most important item you find from a plant is a magic potion. Throw it into the ground to create a door leading to Sub-space. This is a shadowy, mirrored version of the current screen where the scrolling is locked into place. Here is where you will sometimes find a large mushroom that expands your life meter when you pick it up. You start each level with two points of health and there are two mushrooms in nearly every level that help increase your maximum health to four. These mushrooms are always in the same location when you play so you will need to enter Sub-space near where the mushroom is hidden to be able to grab it. Also in Sub-space any plants you pull up will reveal coins which I will explain what they are used for a little later. You can collect coins in Sub-space only twice per stage. Sub-space ends on its own after a short while unless you go back through the door, returning you back to the normal level to continue your journey.

Some places have both a mushroom and a lot of coins.

There are other useful items that are out in the open. Cherries can be found floating all over the levels. Collect five of them to spawn an invincibility Starman which rises up from the bottom of the screen. For every five enemies you defeat, a small heart will appear that restores one point of health. POW blocks shake the entire screen when thrown on the ground defeating every enemy touching the ground. Mushroom blocks can be thrown over and over again. You can use them to defeat enemies or stack them on top of each other to reach otherwise inaccessible areas. There are also keys that will unlock a nearby door, but beware of Phanto chasing you around whenever you carry the key.

At the end of each level, you must grab a crystal ball to open the mouth of a giant bird head. Usually the crystal ball is carried by the recurring mini-boss Birdo, but in some cases you find it alone. Proceed through the open bird mouth to clear the stage. It’s definitely weird the first time! Here you get to play a bonus chance slot machine game to earn extra lives. Each coin you collect in Sub-space gives you a chance at the slot machine. If you match three of the same icon you get an extra life. Cherries show up here and they award a little differently. If you get a cherry in the first slot you get one life, if you get cherries in the first two slots you get two lives, and if you get all three cherries you get five lives. It is possible to skillfully stop the slots in order to get the best prizes, and if you play well during the game you will have dozens of opportunities to try.

The last level in each world contains a boss battle at the end. There are five bosses in total. Mouser is a large rodent that tosses bombs at you. Tryclyde is a three-headed fire breathing snake. Fryguy is a floating plumb of fire. Clawgrip is a crab that throws rocks. The final boss Wart is a giant frog that shoots deadly bubbles at you. You won’t attack these bosses directly but fight them with the means given to you inside the boss chambers. The fights can be difficult but I find them to be interesting to play.

Fight fire with … mushroom blocks?

There are 20 levels in Super Mario Bros. 2 over 7 different worlds. Each world has an overall graphical theme but the levels themselves often deviate into other caves and areas. There are three levels within each of the first six worlds, and World 7 only has two stages to round out the 20 levels. You start the game with three lives and you are only allowed to continue twice if you run out of lives. The game is pretty long with no passwords or saving, though there are four hidden warp points that will bump you ahead in the game if you are able to find them. The lack of lives and continues does make the game pretty challenging overall, though this is mitigated by collecting coins and getting either skilled or lucky at the slot machine.

Super Mario Bros. 2 is one of the earliest NES games I had growing up, so I have spent a lot of time playing it through the years. I have a relatively good memory of the game overall aside from many of the mushroom locations, but I am good enough at the game that I can get by without them. I knew this one would be pretty easy for me to clear once I sat down to play it.

To spice things up for my run of the game I used a random number generator on the side while playing to help select the character for each level of the game. It made things a little harder as some of the levels are best suited for one particular character. I ended up getting the Princess the most often though each character got a few stages of play. It was not a great run of the game for me as I feel I died far too often, but I managed to spread those deaths out enough that it wasn’t too repetitive. I captured footage of my playthrough and decided to edit out a bit of the backtracking after some deaths for my upload to YouTube. It really wasn’t necessary and maybe only saved a couple of minutes overall on the video.

Toad is not the best suited for tiny jumps like this.

I had a couple of interesting things happen during my run worth pointing out. During the Fryguy boss fight, we both defeated each other at the same time. I got the exit door to spawn during the death animation which was kind of cool. I had to do the battle over again though. I also triggered a glitch that I wasn’t aware of. In the second to last level, I managed to throw a mushroom block inside of a ladder. When that happens the mushroom overwrites the ladder tile but the color palette for that location stays intact, so the mushroom is the same color of the ladder until it is picked back up. I almost got it stuck in a spot where I couldn’t get through. That would have meant replaying the game from the start but I avoided that. A little further ahead I got another mushroom block stuck into the top of the ladder where I could pick it back up. I got it all captured on video!

Super Mario Bros. 2 provided a lot of new characters that persisted in future Mario games, such as Birdo, Shyguys, and Bob-Ombs. It also gave new life and personality to Luigi, Toad, and the Princess. Each of those characters has starred in their own game as well as had major supporting roles in other mainstream Mario titles and spin-offs. This game really left a lasting impression. I don’t think that it is publicly regarded as well as it should be and if true that’s a shame. Super Mario Bros. 2 is not just a good Mario game but a good game period and it’s one that should not be missed.

Super Mario Bros. 2 Ending Screen

#33 – Super Mario Bros 2.

 
DEC
14
2016
0
Alien 3 Box Cover

#32 – Alien 3

Is it a run-and-gun game or a maze game? Well, how about both!

The title fades in a piece at a time which I thought was neat!

To Beat: Reach the ending
To Complete: Beat the game on Hard difficulty
What I Did: Completed the game
Played: 9/25/16 – 10/2/16
Difficulty: 7/10
My Difficulty: 8/10
Video: Alien 3 Longplay

Hot on the heels of Bram Stoker’s Dracula comes another licensed NES game based on a movie. Both games are late, obscure NES releases that even share the same developer. I thought that Bram Stoker’s Dracula was pretty fun, so let’s see if the same holds true with Alien 3.

The film Alien is a 1979 science fiction movie about a crew who comes across an old alien spacecraft. One of the crew members becomes the host to one of the aliens who then attempts to kill every living thing on their spaceship, and the crew is forced to come up with a way to get rid of the alien to ensure their own survival. (Hopefully this is a sufficient explanation since yet again I have not seen the movie.) The film was both a box office and critical success and is widely regarded today among the best movies ever made. Later there would be three movie sequels, a prequel movie, and a spin-off series Alien vs. Predator. Currently there is another prequel movie in the works and possibly more in the future.

This popular series made its way into several video games based on most of the movies. Alien 3 was the base of three distinct games. The SNES game was released in 1993 and it is run-and-gun platformer with a mission-based style. The Game Boy game is a top-down survival adventure style game. The Master System version is a run-and-gun platformer with maze-like levels. This version was also released on the Genesis, Game Gear, Commodore 64, and Amiga. The NES version of Alien 3 has the same format as the Master System version but it has a unique set of levels. Because of the different stages it can be considered a fourth unique adaptation of Alien 3. The NES version was developed by Probe Software and published by LJN. Acclaim manufactured the carts and may also have had a role in its publishing. It was released in March 1993 almost a year after the film and also has a PAL version that was released in Europe and Australia.

Let’s get down to business.

In Alien 3 your goal is to guide Ripley through the prison on Fiorina 161. The aliens have taken the prisoners captive and along the way you must seek out and free each of these prisoners as well as escape safely to the next area. There are many aliens that will stand in your way including the guardian alien boss battles. There are eight levels total in the game as well as four boss levels. Clear all the levels and you win the game!

Before starting the game there are some options available on the title screen. You can turn both the music and sound effects either on or off. There is also a Configure menu with more options. Here you can set the difficulty level to either Easy, Normal, or Hard. You can also play any of the songs and sound effects, as well as set the number of lives from one to nine. The defaults are Normal difficulty and three lives.

The game has pretty nice graphics. The backgrounds and sprites are clear for the most part and there is a fair amount of color considering the mostly drab setting of a prison. However, what stands out the most in this game is the music. The soundtrack to Alien 3 was written by Jeroen Tel and the sound to me is both atmospheric and tense. It’s worth listening to outside of the game for sure.

The controls are straightforward. Use the D-Pad to walk around. You can use Up and Down to climb ladders, and Up is also used to open and close doors. The A button jumps and the B button fires your weapon. Weapons can be aimed diagonally upward as well as straight up for a total of five different firing directions. Press Select to change weapons and press Start to pause.

You begin the game with a full assortment of four weapons. The base weapon is the pulse rifle that is weak but has a high rate of fire. It is an effective weapon but burns through ammo very quickly. The flamethrower is an excellent close range weapon with a large swath of flame to engulf nearby aliens. The grenade launcher is a powerful weapon at long range with a lower rate of fire as a trade off. The hand grenades can be tossed and bounced on the ground and they pack a pretty good punch if you can get the timing right. All of the weapons prove useful especially when utilized in the correct situation.

Applying a flamethrower to the face is often useful.

There are a number of pickups as well that will help you out. There are ammo refills for each of the four weapons. First aid kits will restore your health just as you would expect. There is also a radar item that will active the tiny radar in the corner of the status bar. The radar generates a little blip in the direction of a nearby prisoner.

There are only a few enemies that show up in the game. The most prominent enemy is the adult alien though they do have a variety of patterns and moves to mix things up. Some move fast and some move slow. Sometimes they spit acid at you. Other times they latch on to the ceiling and drop down right in front of you if you get too close. The other enemy type is the face-hugger. These are small aliens that burst out of pods and latch onto your face if they touch you. If this happens you need to shake Left and Right on the D-pad to get them off. I never let them latch on to me in all the times I played but that is how the manual describes it. You can also destroy their pods before they come out and defeat them that way which is much easier.

The game is an action game on the surface but it really plays like a maze game. Each level is an arrangement of corridors, shafts, and dead ends. You need to search out all of the paths in order to locate the prisoners and find out which sections are best left ignored. Each stage has a set number of prisoners that you must untie and free, and then once all the prisoners are saved you will need to locate the exit in order to escape.

Don’t worry … I’ll save you!

The aliens in the game are not nearly as scary as the time limit. On the one hand you need to take the time to explore everything in order to find both the prisoners and the proper route through the facility. On the other hand, you need to rush through everything to make it to the end in time. There’s nothing more frustrating than seeing the last stretch of the stage just as you run out of time knowing you will need to repeat the level all over again. The one nice thing the game does for you here is that if you missed any prisoners the game pans through the level revealing the location of each missing inmate. However you also get to see that prisoner get murdered right before your eyes as a little mental punishment.

After every two stages there is a Guardian level where you square off against one of the boss creatures. The levels themselves are small battle arenas so the focus is purely on combat. There is still a relatively strict time limit in place so you need to work quickly. You might think the Guardians would actively hunt you down, but instead they have a set pattern that they patrol constantly. The key here is to find where the save spots are and fire away until you defeat the boss. I found these fights to be much easier than the normal levels.

I mentioned earlier that there were three difficulty levels. I only played the game on Hard difficulty and tinkered a bit with the lower settings. As far as I could see, the only difference is that the time limit is lower on the harder settings. I think everything else is the same though I haven’t played enough to see if there are other changes.

It can get a little hairy when time winds down.

This was my first time playing through Alien 3. I remember acquiring this game in an eBay game lot in the summer of 2013. I think it was in the first batch of games I bought whenever I decided that I would pursue NES collecting for good. I would say it’s an uncommon game so that was a good pickup for me at the time. I know I had a double of the game that I sold off at some point as well.

Alien 3 is the type of game where you need to play it over and over again just to make a little bit of progress each time. I finished the game in a week over close to a dozen attempts. I insist on beating the game on the hardest difficulty right off the bat, but in this case I could have benefited from learning the levels on Easy and then putting it all together for a run on Hard. I think there is at least some benefit to learning the levels under a tighter timeframe that probably helped me out a little bit. A week is a good amount of time to spend on a game anyway!

I was able to capture my winning run on video. It was a really solid run with only a few minor mistakes and stumbles, but that is only because I had to hone in my strategy through repetition. It was very close to being a deathless run as well. It was close enough that I decided to leave that death in there as a reminder of how mean this game can be sometimes. Other than that one big mistake it was a nice run for my first time clearing the game.

This was not the best location for a boss battle.

I decided to rate Alien 3 with a 7 on difficulty just because it is a game you have to learn over time. There are no continues so you can’t really grind through the game apart from starting from scratch each time, though you can set up to nine lives for the most opportunities to practice the later stages per attempt. Actually, I was all set to give it an 8 in difficulty but I realize that I only made it harder on myself so that I could clear it on Hard.

Alien 3 is a competent and playable game, but it has a few issues that make the game not as much fun as it could be. The most notable issue is that the screen scrolling only kicks in when you get really close to the edge of the screen. You can hardly see what is in front of you and it is very annoying. I actually wonder if that was done intentionally to introduce the element of surprise when an alien shows up in your face. Either way it is not a fun gameplay element to have so little visibility. The other somewhat related thing is that I don’t find the aliens to be that much of a threat in the first place. I found that unless you play very carelessly you are more likely to run out of time than to run out of health, at least on Hard difficulty. I was more concerned with running recklessly through the stage to outrun the clock and just take damage in places to get through quicker. There are other more minor issues as well. The jumping is kind of loopy and slow, and the screen scrolling stutters sometimes. The boss battles are pretty lame. There are also a lot of dead ends and loops in the stages that are frustrating to pass through.

Alien 3 is a competent and playable game, but it is these issues that really hold the game back from being a better game. I can see that there is a good game there that just can’t shine through like I would want. Mediocre games such as Alien 3 are really not that bad for me in terms of my project, but I would not give them a strong recommendation either. Alien 3 is fine but there are better games out there that are more worth your time. If anything it is worth checking out just for the music!

#32 – Alien 3

 
DEC
02
2016
0
Archon Box Cover

#31 – Archon

Let’s kick the board game format up a notch with Archon.

Dueling dragons!

Dueling dragons!

To Beat: Win a match
To Complete: Win as both the Light team and Dark team
What I Did: Completed the game
Played: 9/21/16 – 9/23/16
Difficulty: 3/10
My Difficulty: 3/10
Video: Archon Longplay

Today is a big day for Take On The NES Library! I am finally incorporating game play videos for some games going forward, and we are kicking off this momentous occasion by talking about the first strategy game covered on this site.

Archon: The Light and the Dark was originally released in 1983 for Atari 8-bit computers. It was developed by Free Fall Associates and published by Electronic Arts. The game is notable both for being among the first titles published by EA and a huge hit for Free Fall Associates. The game was so popular that EA wanted a sequel quickly, so the developers released Archon II: Adept the following year in 1984. The original Archon was ported to many home computer systems and was a success on pretty much every one. The NES would receive a port of this game all the way in December 1989 published by Activision and Bullet-Proof Software.

Archon can be adequately summarized as an action chess game. There are two sides, light and dark, composed of fantasy creatures that duke it out for control of a 9×9 grid. Each side takes turns moving a creature from one space to another. If a character is placed on a square occupied by a member of the opposite team, the gameplay switches to the combat arena. Here you take direct control of your creature as you attempt to defeat the opponent by thumping or shooting them enough to deplete their life bar. Defeated creatures are removed from the board and the winner occupies the square. There are also five power spots on the board: One in the middle of each of the four edges of the board and one in the center. You can win by either destroying all of the enemy creatures on the other team or by occupying all five power spots at the same time.

One strategy is to try and hold the power points.

One strategy is to try and hold the power points.

The game board consists of light squares, dark squares, and shifting squares called Lumina squares. Light squares and dark squares always stay the same, but the Lumina squares change color throughout the game after every other turn. There are five different shades of Lumina square: light, light blue, blue, dark blue, and dark. All the Lumina squares start off blue and shift toward dark, then reverse and shift toward light. This cycle repeats through the course of the game. The color of these squares is important because light characters are stronger on lighter squares and dark characters are stronger on darker squares. It is to your advantage to engage in combat on those squares when they match your color.

There are several types of creatures in the game and they can be separated into two groups. There are ground creatures and flying creatures. Ground creatures cannot move through squares occupied by other characters and must have a direct walking path to the desired square. Flying creatures can go over units and land on any square within flying range. Each character has a range of squares they are allowed to travel during a move ranging from three squares to five. If a ground character can walk four squares, then it gets a combination of four horizontal or vertical steps and that’s all for that turn. If a flying character can move four squares, then it gets up to four squares of horizontal movement and up to four squares of vertical movement. As a result, flying creatures can cover significantly more ground per turn than ground creatures.

Ground characters on each side match up against each other on the board for the most part. The leaders are the light Wizard and dark Sorceress. They are the only characters capable of spell casting which I will get to in a little bit, and they also move via teleporting which evidently is exactly the same as flying but with a different animation. The light Knights and dark Goblins are the pawns of this game with short range attacks and weak stamina. The light Unicorns and dark Basilisks are quick and reasonably strong. The light Archers and dark Manticores are a tad on the weaker side but have long range attacks. The light Golems and dark Trolls are very slow but very strong.

The starting lineup!

The starting lineup!

The remaining matchups demonstrate the differences between the two teams. The light Valkyrie is a bit stronger than the similar Archer. On the other side, the dark Banshee has a scream attack that drains the enemy health when in close range, and it is the only attack in the game that allows the character to move while the attack is in action. The light Djinni is the best light attacker though only a little better than the Valkyrie. Opposite it, the dark Shapeshifter turns into whichever enemy opposes it in combat, matching its stats exactly. The light Phoenix can explode dealing massive damage when touching an opponent while doubling as a defensive move that nulls any attack during the move’s duration. The dark Dragon has both the strongest long-range attack in the game as well as the most health.

Combat is pretty straightforward. The arena contains the two combatants and a seemingly random arrangement of objects. You can move in eight directions and attack with the A button. When you or an opponent fires off an attack, there is a delay before the next attack is allowed. This recharge time varies per character. A noise will sound whenever the next attack is ready to go. The tone is a higher pitch for the light character and a lower pitch for the dark character so you can easily distinguish the two. The objects in the arena are stationary but shift state frequently enough that there’s no real way to determine how those spaces will behave. Sometimes attacks will go right through them and sometimes they get blocked. Character movement through these obstacles may or may not be permitted or it might be allowed at a slow, plodding pace. It adds enough randomness to the battles so that combat is tense and exciting.

Both the Wizard and Sorceress have access to the same complement of spells. Each spell may only be used once per game, and the spell may not target a character stationed on one of the power spots. If the Wizard or Sorceress is defeated then no spells may be cast by that side. Another interesting wrinkle is that using a spell drains a bit of health from the spellcaster. To use a spell, press A when selecting the caster and a spell dialog will appear at the bottom of the screen. You may cycle through the spells with Up and Down and cast the spell by pressing A. You can also select the Cancel option if you don’t want to use a spell.

Attack from afar with an elemental if you want!

Attack from afar with an elemental if you want!

There are seven spells in Archon. The Teleport spell moves any character on your team to any square not already occupied by another team member. You can move a character onto an opponent to engage them in battle directly. The Heal spell restores the health of any one of your characters. The Shift Time spell reverses the flow of the Lumina squares. The Exchange spell swaps any two creatures on the board no matter which team they belong. The Summon Elemental spell calls a temporary elemental to attack any opponent on the board. It could be an earth, air, water, or fire elemental that is chosen at random and each has different characteristics in combat. Either win or lose, the elemental is removed from play after the battle is over. The Revive spell brings a defeated creature back into play. The revived character must be placed on a square adjacent to the spellcaster. The Imprison spell can be cast on any creature locking them to the board. The affected creature is not able to move on the board until the Lumina squares match the team color, though opponents may engage an imprisoned creature in battle at any time.

One more interesting thing to mention is that there is the possibility of a tie game. If there are few characters remaining on each side and no combat or spellcasting occurs in a set number of turns, the game will be called a draw. This was implemented to encourage combat. The other more straightforward stalemate happens when the last two characters on the board kill each other at the same time.

Combat is a balance of staying out of danger while finding an open line of fire when you can.

Combat is a balance of staying out of danger while finding an open line of fire when you can.

This was my first time playing Archon but I had great success for a beginner. I started playing as the Light team and I got beat down pretty quickly. I was losing characters left and right as I got used to the combat and characters. About halfway through the match the game clicked with me and I started mounting a comeback, but despite that it started to look like it was too little to late. The best character I had remaining was my Wizard and I decide to go for broke and try to take out the Sorceress. She had not moved the entire game and her square is always dark, but despite the disadvantage I managed to win that fight. After that I picked off all the remaining enemies for a win by brute force.

Since it didn’t take me very long to win the game and the dark team plays differently from the light team, I wanted to get a win from the other side. This was the run I recorded for YouTube. It did not start out particularly well but I ended up winning in half the moves required for my first victory. I also won the match by occupying all five of the power spots instead of defeating all the enemies.

Archon is a fun, short game that might be worth a look if you are interested in chess or light strategy games. The graphics and music are adequate and don’t get in the way of the action at all, but the gameplay is solid and that’s what’s important in a game like this. I didn’t even mention yet that the game has a 2-player mode that is sure to be a lot of fun once both players get a few matches under their belt. For myself, I enjoyed playing the game but unless I get another player involved I don’t see myself playing very much more Archon in the future.

Archon Ending Screen

#31 – Archon

 
NOV
22
2016
0
Fisher-Price: Perfect Fit Box Cover

#30 – Fisher-Price: Perfect Fit

Can you make all the pieces fit? I sure hope so!

Fisher-Price: Perfect Fit Title Screen

Could this title screen be any more perfect?

To Beat: Complete any round
To Complete: Win a round on the highest difficulty against the computer
What I Did: Completed the game
Played: 9/16/16
Difficulty: 1/10
My Difficulty: 1/10

As discussed here on this blog before, there were many companies that wanted to get a piece of the NES pie, including popular toy maker Fisher-Price. Developed for kids, Fisher-Price: Perfect Fit was just the game I needed to check off the list as I have been waiting to balance out all that time spent on mastering Ikari Warriors. Contrary to the title, this game isn’t exactly a good fit for the current NES collector or player unless you want to feel that satisfaction of completing any old NES game.

Fisher-Price was founded in 1930 by Herman Fisher, Irving Price, his wife Margaret Evans Price, and Helen Schelle. They originally made wooden toys but eventually switched to plastic in the 1950s which helped the company continue to grow. The Quaker Oats company bought Fisher-Price in 1969 after Herman Fisher retired. Fisher-Price became an independent company once more in 1991 and was bought in 1993 by Mattel.

In addition to their toy lines, there were a number of PC games bearing the company name. Three of these games were ported to the NES: Perfect Fit, I Can Remember, and Firehouse Rescue. The earliest release of these three was Firehouse Rescue but it turned out to be the last of the NES ports so I will be covering that one last. These three games appear to be the only console releases of any Fisher-Price video game. The early Fisher-Price games are all published by GameTek, and Perfect Fit on NES was developed by Beam Software. This was a US exclusive title.

Nice and simple!

Nice and simple!

Perfect Fit is a game meant for young children, so the controls and rules are quite simple. The object of the game is to match up pieces with their places on the puzzle. These pieces can be letters, numbers, toys, and other objects like that. One at a time, these pieces will drop down a chute on the left side of the screen. On the puzzle there will be silhouettes of these objects. You have to move the current piece on top of the matching shadow and press A to put the piece down. Get it right and the next piece will come down, but if you get it wrong you will hear a buzz and you get to try again with no further penalty. Place all the pieces correctly and you win! There are three puzzle boards to solve and you win the game when you complete all three.

There are three difficulty levels. Level One has few pieces to solve so this mode is great for a first time young player. Level Two introduces a flip mechanic. In this mode there are two fields below the chute labelled “Flip Image” with arrows. One field is for flipping the piece horizontally and the other is for vertical flips. If you need to flip the piece to get it to match up, simply place the piece over the appropriate field and press A to flip the piece in the direction indicated by the arrow. This difficulty also introduces a time limit and scoring. In Level Two you get six minutes to finish all the three puzzles and for every second left at the end of the game you are awarded 10 points. Difficulty Level Three is the same as Level Two but with a stricter time limit of three minutes and 20 points awarded for each remaining second at the end.

I put my thing down, flip it and reverse it...

I put my thing down, flip it and reverse it…

This game has a two player mode where players take turns solving their own puzzles and compete for the higher score in the scoring modes. Before starting the game you get to enter your name for display on the level start screen and high score screen. There is also a single player mode versus the computer. The CPU opponent is named Electro. Ultimately this gives no advantage when playing. It’s mildly interesting watching the AI bumble through piece placement. I found while playing that the AI always attempts to place the piece in the correct spot but does not know which way to properly flip the piece, so it will alternate between horizontal flips and vertical flips and test each time to see if the piece actually fits. Despite the slow going it seems to be able to solve all the puzzles in time.

One minor oddity about the scoring system is that the way to get the best scores is through Level Two difficulty. There is a maximum score and points are essentially lost the longer the game goes on. That maximum score is the same for Levels Two and Three but the point loss is twice as fast in Level Three as it is in Level Two. The high score chart is shared between these difficulty levels. I suppose if the game designers really cared about scoring then there would be some kind of point bonus just for playing on the harder level.

His best is not good enough!

His best is not good enough!

This was my first time playing Perfect Fit and there’s a pretty good chance that it will also be my last time playing the game. While playing I completed all difficulty settings both alone and with the CPU player. It was overkill even though the game didn’t take too long. I also played with my daughter in the room to see how interested she would be in the game. She is not quite two years old yet so she’s not really ready for the game yet. She does enjoy holding the controller and pressing buttons for a few minutes, and she also knew what each of the letter and number pieces were. I think the graphics may be a bit too primitive for her to recognize any of the other pieces when I asked her what they were.

There’s really not much else to say about Perfect Fit. It plays well but doesn’t do much to hold your attention. Kids today have much better options for introductory gaming. The only thing perfect about it is that is it a very easy game to clear for the sake of an NES completion project like this one. Perhaps there’s a benefit here for easing a child into using a game controller if he or she is interested in playing NES games. Otherwise there’s really no reason to play Perfect Fit.

I played through Perfect Fit on my NES top loader and not long after that I received my AVS console. Aside from a few exceptions like Zapper and R.O.B. games, going forward I will be playing everything else with my AVS. I also have started capturing footage starting with the next game so there are gameplay videos coming soon. I didn’t make one for Perfect Fit but I don’t think it’s a big loss!

Fisher-Price: Perfect Fit Ending Screen

#30 – Fisher-Price: Perfect Fit

Fisher-Price: Perfect Fit High Scores

#30 – Fisher-Price: Perfect Fit (High Scores)

 
NOV
08
2016
0
The Simpsons: Bart vs. the Space Mutants Box Cover

#29 – The Simpsons: Bart vs. the Space Mutants

All the shorts-eating you could ever hope for!

The Simpsons: Bart vs. the Space Mutants Title Screen

This looks really nice on the NES. I’m impressed!

To Beat: Reach the Ending
Played: 9/5/16 – 9/14/16
Difficulty: 8/10
My Difficulty: 7/10

I think it’s safe to say that The Simpsons has been the most successful US cartoon of all time. Such success leads to branching out all over the place and particularly into video games. There are many Simpsons games and today I will be writing about the first one!

The Simpsons show was created by Matt Groening and debuted on FOX on December 17th, 1989. The family was actually created two years prior appearing in animated shorts for The Tracey Ullman Show before appearing in their own half-hour show, and the series has lived on ever since. As of this writing, The Simpsons is in its 28th season spanning just over 600 total episodes. It is the longest running American sitcom and is near the top of many other lists of long running television programs. I have watched several episodes of the show but not regularly since I was a teenager.

There are over 20 Simpsons video games spanning the NES all the way to Xbox 360, PS3, and mobile. Bart vs. the Space Mutants was released in February 1991 and it is the first game with The Simpsons license followed just one month later by the arcade game simply titled The Simpsons. The most recent game is Tapped Out on iOS and Android which is still receiving gameplay updates today. The NES had four titles in total: Bart vs. the Space Mutants, Bart vs. the World, Bartman Meets Radioactive Man, and Krusty’s Fun House. Bart vs. the Space Mutants also appeared on the Sega Genesis, Game Gear, and various PCs. The NES version was developed by Imagineering and published by Acclaim. It was also released in Europe in late 1991.

The humor you know and love can be found here!

The humor you know and love can be found here!

Bart vs. the Space Mutants is a sidescrolling platformer. Aliens are attempting to take over the world and Bart Simpson eavesdrops in on their diabolical plan. They need to collect specific items in order to build an ultimate weapon, and so Bart sets out to remove those items before the aliens get them first. The story plays out exactly like this in the gameplay. Each level begins with the aliens discussing what object they need to collect, and then you set out to collect a specific number of that item to help clear the level.

The graphics have a cartoon look to them that is pulled off well on the NES. All the characters are recognizable and there are many objects that only appear once in the game so there is a lot of variety. The main issue with the graphics is that it can be tough to distinguish which background elements you can interact with in some areas. The music isn’t that bad either. The rendition of The Simpsons theme is done quite well, and there are some voice samples included too. However much of the soundtrack isn’t all that memorable.

The controls in this game are more involved than your typical platformer. The D-Pad moves Bart and the A button jumps. Bart can do a super jump by pressing both A and B at the same time and the feel for this is important as this move is used often. The run button is also A, so Bart jumps first and then he runs once A is held down. The run button is not obvious but it does come in handy. The B button is used for specific weapons. The game also has an inventory system. You can cycle through the inventory by pressing Select, and if you hold Down and hit Select the items will scroll in reverse order. Press Start to use the selected item. The Pause option shows up as part of the inventory so you will need to select the Pause option and press Start to pause the game.

Show yourself alien scum!

Show yourself alien scum!

One of the default items is the X-Ray Specs. The aliens disguise themselves as ordinary humans walking the streets, so the X-Ray Specs can reveal if a person of interest is either a normal person or one of the aliens. When you use the Specs the entire screen color changes to sepia tone and the alien heads are revealed if a person is indeed an alien. If it’s an alien Bart can jump on his head to defeat him. However if it is not an alien then Bart takes damage for trying to hurt an innocent bystander. When an alien is bopped a trinket is left behind that represents the proof of their existence. That’s how it’s described in the manual! Collect enough of these proof tokens in a level and one of Bart’s family members will help out in the boss battle at the end of the level. Progress is tracked by spelling out the letters of the name of the family member. For instance, the first level spells out MAGGIE and so six proofs need to be collected, one for each letter in her name. It is not required to do this but it can be helpful.

The other default items are coins. Bart can find these behind objects in the levels by jumping around. Do this in the right places and bouncing coins pop out. These can be spent just like money in certain places in the game. They also grant Bart extra lives if you collect enough. When you earn 15 coins you automatically earn an extra life, but it only costs 10 coins to buy one. I assume this was done so that you will never have fewer than 5 coins at any time unless you intentionally spend them.

There are some other items that appear but are not part of your inventory. Krusty the clown emblems give Bart an extra life and they are most helpful. Jebediah Springfield bestows the power of invincibility if you are able to locate his severed statue head powerup.

This mall definitely would have shoes your size.

This mall definitely would have shoes your size.

The status screen at the bottom has all the necessary information for playing the game. It shows which family member is featured in the stage along with how many letters are currently spelled out. Next to this are tiny Bart heads that show how many hits are remaining. For each life, Bart can take two hits from enemies. If he has been hit once already then one head will display and the next hit will cause a loss of life. Next to that in the status screen is the current inventory item, the score, remaining lives, the level timer, and the number of remaining goal items required to complete the level. If you reach the end of the stage without meeting the goal requirement, then the boss will not appear and you will need to backtrack to find more items. Finally on the far right the current weapon ammo is displayed.

Here are each of the five levels in the game:

Level 1 is the streets of Springfield. Bart must collect (or destroy) purple colored objects. These take all kinds of different forms and there are a number of ways to deal with them. The most common way is to collect the spray paint weapon and change the color of purple items to red, rendering them completely useless to the aliens. Other purple things need to be hidden or removed in specific ways. The first level of the game has a puzzle feel to it that is kind of a novelty for its time. This is also the main level where you purchase items to help with the purple cleanup. For instance, you can buy a wrench and use it on a fire hydrant to spray a stream of water that washes off fresh purple paint from a nearby awning. The level is challenging because there are only a few excess purple items that can be bypassed. Maggie is in this level and she will help by rolling bowling balls that Bart can use to damage the boss.

This is where the difficult platforming is put front and center.

This is where the difficult platforming is put front and center.

Level 2 is the Springfield shopping mall and the goal items are hats. There are stray hats all over the level but you can also lift them off a person’s head if they are wearing one. This is where the game ditches the puzzle elements of the first stage and switches to a more straightforward platforming challenge. There are lots of enemies that walk and fly around and you just need to get by them since there are no weapons in this stage. There are also areas of wet concrete that kill Bart if he sinks in them. These sections have tricky jumps that are pretty unforgiving. Marge is in this level and she will help deflect some of the boss projectiles for you.

Level 3 is Krustyland and Bart must get rid of balloons. There are some carnival mini games that Bart can play as well as one puzzle challenge for free balloons if you can figure it out in time. Bart can find slingshots here. They only damage a couple of enemies but they are most helpful in popping floating balloons that are too high to reach. There are some neat setpieces here and some tough platforming as well. Lisa can occasionally stun the boss to give Bart a breather during the fight.

Level 4 is the Springfield Museum of Natural History and Bart is collecting the exit signs. You only need to deal with six exit signs, so the level is more about surviving the obstacles than any other level in the game. Bart can get a dart gun here that can hurt some enemies as well as blow away the exit signs that are otherwise unreachable. This stage has the toughest platforming with sections that must be navigated perfectly. In some areas it is really difficult to tell what is a platform and what is just background detail, and also some of the platforms are not as big as they appear. I found it very frustrating. At the end of the stage, Homer will drop wet towels that block projectiles and cause the boss to slip up a bit.

These platforms are way smaller than they appear.

These platforms are way smaller than they appear.

The final level is the Springfield Power Plant and Bart must find all of the nuclear power rods. This is a large maze with multiple floors to explore. Bart can take the elevator as well as emergency stairways and he must take every path to explore every nook and cranny of the place. There are doorways here that are blocked off unless you have the keycode to open the door. There are 16 rods to find but Bart can only hold four of them at once. You have to go into the basement and drop them off at the reactor to collect more. All of the family members are here and they assist Bart in their own way. Lisa knows the door codes and she will share one if you talk to her. Marge will take your collected rods to the reactor for you sparing you a trip to the basement. Homer will scare off all the enemies from the screen if you give him a box of donuts that you find throughout the maze. Maggie wanders around but she does help you out in a specific way.

In Bart vs. the Space Mutants, you begin with 3 lives and can collect up to 9 total. There are no continues and no passwords, so the game must be cleared in one try. The challenge here comes in several ways. The first stage requires the most thought initially but it is the easiest level once you know how to do it. The three middle stages have some tough platforming and several instant kill spots. Sometimes you will have to spend all your lives getting the feel for overcoming an obstacle and then you have to start all over again. The final level doesn’t have a map of any kind, so if you miss a rod or two you are up against the clock if you get lost. The penalty for failure is steep and the game is lengthy enough that it takes several long attempts to get good enough to beat the game. I think 8/10 difficulty is a fair assessment.

Lisa wants to help out from as far away as possible.

Lisa wants to help out from as far away as possible.

I have played and beaten Bart vs. the Space Mutants but not since I was a kid. I owned all three of the “Bart” NES games in my childhood collection and I beat all three back then, but I didn’t retain a whole lot of knowledge from prior play. I remembered all of the puzzles in the first stage but that was about all I could recall.

I foolishly thought that my old knowledge would be good enough to clear the game quickly. I beat the first level with relative ease on my first playthrough, but the rest of the game featured the same kind of incremental progress I experience when playing new games. I think it took me around a dozen tries to finish this game. The latter part of the museum level took a lot of practice, and the final maze really got to me. I am generally good with maze levels and mapping things out in my head, but I got down to the last two rods and got completely stuck until I got Game Over. It’s frustrating getting so close to the end like that. Luckily the next run was the winning run and I had plenty of lives left over for a comfortable win.

The Simpsons is such an iconic television series and by extension I think there is a lot of nostalgia for Bart vs. the Space Mutants. The development team managed to put in a lot of Simpsons references in the game and the Simpsons theme sounds nice on the NES. From my playing experience, the game is rough around the edges and not all that fun to play at times, but the first level at least is genuinely clever and holds up nicely today. It’s a mediocre game with a few redeeming qualities.

The Simpsons: Bart Vs. The Space Mutants Ending Screen

#29 – The Simpsons: Bart Vs. The Space Mutants