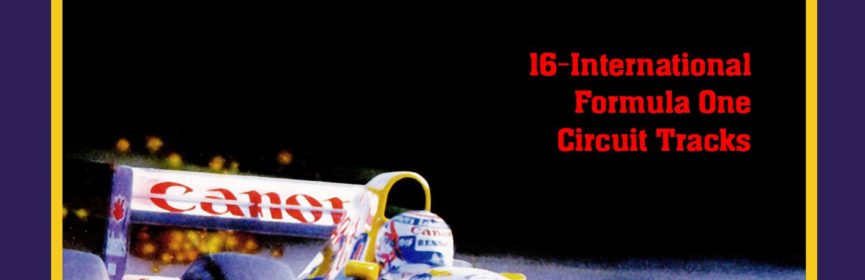
#159 – Nigel Mansell’s World Championship Racing
Let Nigel guide you through this racing season.

World Championship Challenge may be a better name.
To Beat: Win the Championship
Played: 6/1/20 – 6/13/20
Difficulty: 8/10
My Difficulty: 8/10
My Video: Nigel Mansell’s World Championship Racing Longplay
In a perfect world, I would be able to crank out these reviews roughly in line with when I beat the game. It turns out I enjoy playing the games more than writing about them, so naturally I’ve fallen behind. For this game, it may work to my benefit to be behind. This is the second racing game I have beaten for this project, but between beating the game and writing this review I have already beaten a third racing game. My struggles with all three games have indicated that I am not good at racing games. Because of that, in part, I also do not like them very much. I don’t have to like the game to recognize that this is a solid racing game.
Nigel Mansell had a 15-year career in Formula One racing, active from 1980 through 1995. His early career started out slow but when he joined the Williams racing team in 1985 he became a real contender for the World Championship. He finished second overall in both 1986 and 1987 and placed Top 10 for the next several years. After a brief foray with the Ferrari team in 1989 and 1990, he went back to Williams in 1991. That year he placed second for the third time in his career. Finally, in 1992, he had his best year and won the World Championship. Due to some disagreements with his team, he switched over to the CART series for the 1993 season, where he won that as well. That made him both Formula One and CART champions at the same time, the only racer to ever accomplish this feat. He returned to Formula One for 1994 and 1995, retiring for good after the 1995 season.
Nigel Mansell’s World Championship Racing was first released on the Amiga in 1992. It was developed and published by Gremlin Graphics. The company changed names to Gremlin Interactive Limited in 1994 and was acquired by Infogrames in 1999 before closing down in 2003. The game was widely ported to other home computers and game consoles mostly in 1993, including the NES, SNES, Game Boy, and Sega Genesis. The NES version was released in October 1993, developed by Gremlin Graphics and published by Gametek. The game was also released in Europe in 1993, slightly retitled to Nigel Mansell’s World Championship and published by Gremlin.

Ready. Set. Go!
Nigel Mansell’s World Championship Racing is a Formula One simulation game. You have the option to run single races, but the meat of the game is the full season mode. This is a 16-race season. Depending on your placement at the end of each race, you are awarded points that are cumulative throughout the season. To beat the game, you must complete the season as the points leader.
At the title screen, where the game is named Nigel Mansell’s World Championship Challenge for some reason, press Start to advance to name entry. The game tells you on screen the controls for entering your name, which is nice! You can enter your name up to 13 characters, then there’s a forced space, and then the final 3 characters for your country. One thing to note here is that the character entry is extremely touchy. You can scroll through characters quickly but you have to tap briefly to advance one at a time. After entering your name, you go to the main menu. Here you can choose to run a single race or the full season mode, as well as a training mode called “Improve with Mansell.” You can also toggle the music on and off.
The driving is very straightforward. The game takes place from behind the wheel. Use the D-pad Left and Right to steer the car. For manual transmission, press Up or Down to shift gears. There are six gears in this engine. Press and hold A to accelerate, and press B to hit the brakes. The bottom of the screen shows all the information you need. On the bottom left, you see the current lap timer as well as how far ahead or how far behind you are in time from first place. The middle contains the track map as well as your current position ranking and current lap. The bottom right shows your speedometer and gear setting, as well as a meter denoting the quality of your tires.

Set up your car for peak performance.
The setup of your car is important to how well it will perform during the race. You can set the transmission, tires, and the angle of the wing on the back of the car. First up is manual vs automatic transmission. Manual transmission translates to faster driving because you can more optimally shift gears, but it requires more skill to pull off. The tire choice determines how they wear out and the amount of grip they have. Hard tires wear slower, but they have less grip making it harder to turn. Wet tires are very useful during rainy weather conditions. With a wet track, the wet tires wear out same as the hard tires and handle turns well. In dry conditions, the wet tires wear out the fastest and handle the poorest. For the wings, the angle determines the acceleration and handling of the car. A low angle of 10% gives the car the best acceleration but poorest cornering. The angle of 30% is the opposite: The acceleration is degraded but the cornering is the best. You can also choose in the middle at 20%.
The single race option is good for trying out the game. You begin with the Track Select screen. Each track is represented by the flag of the country it is located, and when you hover over the flag you can see the map of the track below. Choose a track to go to course information. You’ll see the name of the course and the map, as well as the distance, fastest lap, weather conditions, and number of laps. After this screen, you’ll have a submenu. Setup lets you configure your car for the race. Now you can either qualify for the race or jump straight into the race. When qualifying, you run a single lap of the course, and the ranking of times from fastest to slowest among the 12 total racers determines everyone’s starting position for the race. If you go directly to the race without qualifying, you always begin at the very end of the starting lineup. After the race, you’ll see how you placed, followed by the full leaderboard of all 12 racers.

May the pits be ever in your favor.
The Improve with Mansell mode functions similarly to setting up a single race. First you go to track selection, then the circuit information screen. Next you go straight to the setup screen for customizing your car. Now you are ready to drive. You will run the full number of laps with Nigel’s floating head in the upper right the entire time, with no other drivers on the track. There is a race line arrow that shows you generally how you should align yourself throughout this race. Nigel will give you tips as you drive, from basic stuff like staying on the track and staying in the racing line, to important information like watching your tires so you remember to make a pit stop. When you finish the laps, you go back to the main menu. The purpose of this mode is not to go fast, but to drive accurately. While it is helpful to learn the basics, you will need to learn how to handle the courses at or near top speed to win races.
The main mode in the game is the full season mode. Since this is a long mode, there are passwords, which are 14 characters long consisting up all consonants, digits, and the period. The entry screen also has the same finicky character selection as name entry, making passwords frustrating to input. Upon either continuing a game or starting a new one, the rest of the mode functions the same as a standard race. You get course information, you can configure your car, and you can optionally run a qualifying lap before starting the race. You will run all 16 races one at a time until a champion is crowned.
This was my first time playing Nigel Mansell’s Championship Racing. This is an uncommon, late release, however I’ve been able to find this one locally several times. My local store had it at one point for pretty cheap, either $5 or $10, and that’s where I got mine. I know I bought some locally and at least one more on eBay in a lot. Loose carts of the game sell for $15 or so. I think my local store sells it for $20 now.

The wide cars can be difficult to pass.
It’s a small sample size so far, but I have learned that racing games such as this one demand a high level of skill to compete against the computer. Furthermore, this game is biased against you in some unexpected ways. Take qualifying as an example. It is common to make a mistake or two in qualifying and end up in last place by many seconds. To make this worse, you have to navigate around other cars during your lap. Qualifying is supposed to be just you and the track, nothing else. When you bump into a car from behind, your car always drops a gear, which is frustrating when driving manual. That also drives home the importance of figuring out how to qualify on top in as many races as possible. Other racers are large on the screen, easy to bump into, and usually tricky to pass. Probably the biggest hurdle in the game is that the other racers never take a pit stop, where you will always have to take one in the middle of the race. Moreover, the pit stops take anywhere from 5 to 9 seconds, and it is random. At least you can take as much time as you want to choose your new tires. This is not an easy game to beat.
Figuring out the car setup was very important. I went with manual transmission all the way. I learned that even though the soft tires wear more quickly, you can still run every race with only one required pit stop. The better handling of the soft tires was the clear winner. Of course, use the wet tires if it is raining, obvious best choice there. For the angle I eventually settled on 20 degrees. Early on in the playthrough I varied a lot, winning some races with hard tires and 10 degrees, and others with soft tires and 30 degrees.
The best way to win races is to get yourself into first place as early as possible. With no one in front of me, it was much easier to build up a good lead. Usually this means qualifying in first place, but sometimes I settled for lower than that, especially on difficult tracks. Many times I qualified lower but worked my way to first before pitting. You really want to build up a much of a lead as possible since you will lose time during your mandatory pit stop. You do need to get lucky to get a short pit time since it is random. It’s very frustrating to get several seconds ahead, then be behind and unable to catch up because you got stuck with a 9 second pit stop. But that’s the way it goes.

Sweet victory!
My strategy on racing games with a leaderboard is that I always want to be in first place at every point in the season. In this playthrough, I mostly accomplished that. I struggled learning the first track and settled for a second place finish after trying over and over. Then I won the next two races and earned an 8-point lead. I maintained the lead the rest of the way. This was the point in the game that I noticed that the other top racers tend to share the leaderboard points. There is no clear rival in this game, and any racer can win one race and end up fifth or sixth the next race. The placements tend to be random. Sometimes this meant I could place lower than I wanted and still feel comfortable proceeding because I only lost a point or two on the leaderboard between me and second place overall. Over the 16 races my lead varied quite a lot. I got down to a 4-point lead, then later built up a 20-point lead, and finally finished 5 points ahead.
There’s one final point I want to make. My longplay video for this game is just stitched together with the final attempts at each race before moving on. I spent nearly 11 hours of attempts to come up with the 2.5 hour longplay. Very few times did I place well enough in consecutive attempts. I absolutely abused the password system, and I expect that most people that play through this game will do the same. There’s no sense in accepting bad results when you can just input the previous password and try again. I set up the video to make it look like I did the whole game single segment, but I assure you that I did not.
Nigel Mansell’s World Champion Racing is a pretty good racer. This is a good looking game. The cars are well detailed, the scrolling is smooth, and there are some neat effects such as hills when driving and the accurate rear view mirrors from inside your car. The tunes that play in the menus and leaderboards are pleasing to the ears. It doesn’t bother me that there are only car noises and sound effects during gameplay. The controls during driving work great, and they are annoying and tedious when inputting names and passwords. The racing itself is well done with good track variety. The races don’t overstay their welcome at 4-6 laps each. The game is a little long, but not too bad. The game does things that are unfair, but it is structured in a way where you can mitigate that. I still don’t enjoy racing games, but I can’t deny that this one is quality.

#159 – Nigel Mansell’s World Championship Racing